Advertisement
Available languages
Available languages
Table of Contents
- 1 Important Safety Information
- 2 Parts and Hardware
- 3 Specification and Dimension
- 4 Installation and Assembly
- 5 Installation for 3 Sided Viewing
- 6 Methods of Operation
- 7 Touch Panel Operation
- 8 Control Panel Operation
- 9 Remote Control Operation
- 10 Temperature Limiting Control
- 11 Remote Control Battery Information
- 12 Care and Maintenance
- 13 Troubleshooting
- 14 Ważne Instrukcje Bezpieczeństwa
- 15 Podłączenie Do Zasilania
- 16 Czyszczenie I Konserwacja
- Download this manual
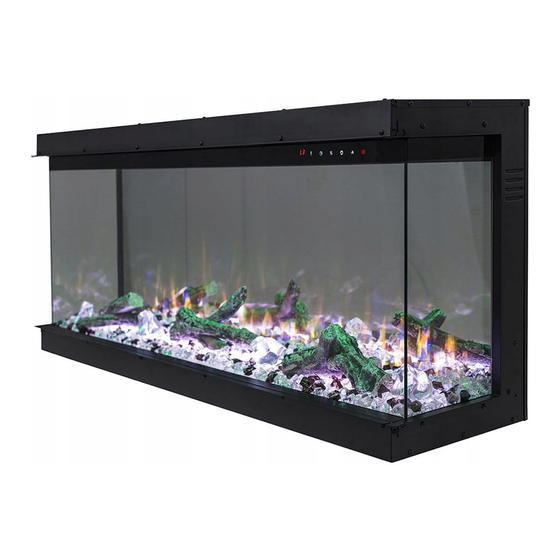
ELECTRIC INSERT FIREPLACE HEATER
Model Numbers:
AV-INS60SUP
Three sides Viewing Electric Fire
Read and understand this entire owner's manual, including all safety
information, before plugging in or using this product. Failure to do so could
WARNING
result in fire, electric shock, or serious personal injury.
Keep this owner's manual for future reference. If you sell or give this
CAUTION
product away, make sure this manual accompanies thisproduct.
OWNERS MANUAL
AV-INS50SUP
AV-INS40SUP
33"/40"/50"/60" /65"
AC 220-240V 50Hz 1400-1600W
AV-INS33SUP
AV-INS65SUP
Polski s. 30
1
Advertisement
Table of Contents

Related Manuals for AFLAMO AV-INS50SUP


Summary of Contents for AFLAMO AV-INS50SUP
- Page 1 ELECTRIC INSERT FIREPLACE HEATER OWNERS MANUAL Model Numbers: AV-INS33SUP AV-INS50SUP AV-INS40SUP AV-INS65SUP AV-INS60SUP Polski s. 30 33"/40"/50"/60" /65" Three sides Viewing Electric Fire AC 220-240V 50Hz 1400-1600W Read and understand this entire owner’s manual, including all safety information, before plugging in or using this product. Failure to do so could WARNING result in fire, electric shock, or serious personal injury.
-
Page 2: Important Safety Information
CAUTION: In order to avoid a hazard due to inadvertent resetting of the thermal cut-out, this appliance must not be supplied through an external switching device, such as a timer, or connected to a circuit that is regularly switched on and off by the utility. www.aflamo.com... -
Page 3: Parts And Hardware
Preparation This product includes a GLASS panel! Always use extreme caution when handling glass. Failure to do so could result in personal injury or property damage. Remove all parts and hardware from the carton and place them on a clean, soft, dry surface. Parts and assembly steps are grouped for free-standing or wall-hanging use. -
Page 4: Installation And Assembly
PRODUCT DIMENSIONS Model Number 50" 13" 21.2" 48.8" 12.5" 3.5" 48.6" 15" 7.7" AV-INS50SUP 127cm 33.2cm 54cm 124cm 31.7cm 123.5cm 38.1cm 19.5cm 60" 13" 21.2" 58.8" 12.5" 3.5" 58.6" 15" 7.7" AV-INS60SUP 152.4cm 33.2cm 54cm 149.4cm 31.7cm 148.9cm 38.1cm 19.5cm "... -
Page 5: Installation For 3 Sided Viewing
Installation for 3 Sided Viewing 1. The fireplace is fixed with fending bars and panels on the left and right side. www.aflamo.com... - Page 6 2. Take off the fending bars and panels if you want to view the fire from three sides. 3. Fix back the fending bars after the panels are removed. www.aflamo.com...
- Page 7 4. Remove the screws from the fireplace as shown in the picture below. 5. Fix the brackets with the screws in the previous step. www.aflamo.com...
- Page 8 6. Make an opening for the fireplace according to requested measurement. 7. Insert the fireplace into the wall opening. Drive the mounting screws into the brackets and the wall studs. Plug in and check if the fireplace works properly. If so, move on to next step. www.a amo.com...
- Page 9 8. Cover the glass panel with protective plastic bag and install plywood or drywall. 9. Decorate the plywood or drywall with glazed tile, wallpaper, etc. www.aflamo.com...
- Page 10 1. To view the fireplace from front and right side, you need to take off the fending panel on the right side and keep the left side close to a wall. 2. Remove the 7 screws on the right side. Take off the fending bar and panel. www.aflamo.com...
- Page 11 3. Fix back the fending bar after the panel is removed. 4. Remove the screws from the fireplace as shown in the picture below. www.aflamo.com...
- Page 12 5. Fix the brackets with the screws in the previous step. 6. Make an opening for the fireplace according to requested measurement. www.aflamo.com...
- Page 13 7. Insert the fireplace into the wall opening. Drive the mounting screws into the brackets and the wall studs. Plug in and check if the fireplace works properly. If so, move on to next step. 8. Cover the glass panel with protective plastic bag and install plywood or drywall. www.aflamo.com...
- Page 14 9. Decorate the plywood or drywall with glazed tile, wallpaper, etc. www.aflamo.com...
- Page 15 1. To view the fireplace from front and left side, you need to take off the fending panel on the left side and keep the right side close to a wall. 2. Remove the 7 screws on the right side. Take off the fending bar and panel. www.aflamo.com...
- Page 16 3. Fix back the fending bar after the panel is removed. 4. Remove the screws from the fireplace as shown in the picture below. www.aflamo.com...
- Page 17 5. Fix the brackets with the screws in the previous step. 6. Make an opening for the fireplace according to requested measurement. www.aflamo.com...
- Page 18 Plug in and check if the fireplace works properly. If so, move on to next step. 8. Cover the glass panel with protective plastic bag before install plywood or drywall. 9. Decorate the plywood or drywall with glazed tile, wallpaper, etc. www.aflamo.com...
- Page 19 Decorative Crystal & Log Embers Installation 1.Use a screwdriver to take off the 4 screws.(as shown in diagram) 2.Have two people take out the glass panel and move it to a clean soft place to avoid scratching. www.aflamo.com...
- Page 20 4. Put the drift wood logs on the surface of all crystals and put the 4 pieces big crystals between the Gap of each log sets. Figure 2. 5. After placing the all decorative media, insert the glass panel back and fasten screws. www.aflamo.com...
-
Page 21: Methods Of Operation
This electric fireplace can be operated by the TOUCH PANEL, located on the upper right side of the fireplace (see below picture), or by the battery-powered REMOTE CONTROL. Before operating, please review the IMPORTANT SAFETY INFORMATION on Pages 2 and 3, and heed all warnings. Touch Panel www.aflamo.com... -
Page 22: Touch Panel Operation
Touch Panel Operation Control Panel Operation BUTTON FUNCTION ACTION & INDICATION ON: Enables control panel functions and Press once. Indicator light turns on. Power remote control. Turns on flame effect. turns on. All functions enabled. OFF: Disables control panel functions and Press again. -
Page 23: Remote Control Operation
Low heat is turned on. NOTE: To prevent overheating, the heater Press again. The Display shows “H2” and blows cool air for 10 seconds before the High heat is turned on. HEATER heater turns on, and after it turns off. Cycle from H0-H1-H2 www.aflamo.com... - Page 24 2. Press again: until desired setting is NOTE: Press & Hold the button for 5 seconds, the temperature setting will switch from ℃ to ℉. reached. Digital display shows setting Same way from ℉ to ℃。 circles as below: TEMP www.aflamo.com...
- Page 25 To improve operation, aim the remote control at the front of the fireplace. DO NOT NOTICE press the buttons too quickly. Give the unit time to respond to each command. 1 Set current day and time 2 Set ON/OFF time and temperature on a weekly cycle note: note: Open window warning www.aflamo.com...
-
Page 26: Temperature Limiting Control
5. If the problem continues, have your outlet and wiring inspected by a professional. Remote Control Battery Information ∧ This remote control uses two AAA batteries. NEVER dispose of batteries in fire. Failure to observe this precaution may result in an explosion. Dispose of batteries at your local hazardous material processing center. www.aflamo.com... -
Page 27: Care And Maintenance
Electrical components are integrated in the fireplace and are not serviceable by the consumer. Storage: Store fireplace in a clean dry place when not inuse. WARNING! NO SERVICING of the internal or electrical parts should be performed by the consumer. DO NOT service the unit yourself. www.aflamo.com... -
Page 28: Troubleshooting
1. Fireplace is not plugged in to 1. Check plug. 6. Fireplace will not an electrical outlet. 2. Call a qualified service techni- come on when 2. Control failure. cian. switch is flipped to 3. Breaker tripped. 3. Reset breaker. www.aflamo.com... - Page 29 Please remember to always have the unit disconnected prior to any work, always lay glass as well as the unit on a towel or other material not to damageparts/frame. This entire process should not take longer than 20-30 minutes. www.aflamo.com...
- Page 30 KOMINEK ELEKTRYCZNY INSTRUKCJA OBSŁUGI AV-INS50SUP AV-INS Modele: AV-INS60SUP AV-INS 0SUP AV-INS65SUP 33"/40"/50"/60"/65" AC 220-240V 50Hz 1400-1600W Przed podłączeniem lub skorzystaniem z urządzenia, przeczytaj ze zrozumieniem całą instrukcję użytkownika, z uwzględnieniem wszystkich OSTRZE- informacji dotyczących bezpieczeństwa. Niezastosowanie się do tego ŻENIE wymogu może skutkować...
-
Page 31: Ważne Instrukcje Bezpieczeństwa
Należy zadbać o to, aby dzieci nie bawiły się urządzeniem. UWAGA: Aby uniknąć ryzyka spowodowanego niezamierzonym zresetowaniem termicznych wyłączników przeciążeniowych, kominka nie wolno podłączać do zewnętrznego urządzenia przełączającego, jak programator lub obwodu z układem cyklicznego załączania i wyłączania. www.aflamo.com... - Page 32 Przygotowanie Produkt ten wyposażony jest w szklany panel! Zawsze podczas przenoszenia szkła należy zachować szczególną ostrożność. Niezastosowanie się do tego zalecenia może skutkować obrażeniami ciała lub uszkodzeniem mienia. Wyjmij wszystkie podzespoły i elementy montażowe z kartonu i ułóż je na czystym, miękkim i suchym podłożu.
- Page 33 Model 50" 13" 21.2" 48.8" 12.5" 3.5" 48.6" 15" 7.7" AV-INS50SUP 127cm 33.2cm 54cm 124cm 31.7cm 123.5cm 38.1cm 19.5cm 60" 13" 21.2" 58.8" 12.5" 3.5" 58.6" 15" 7.7" AV-INS60SUP 152.4cm 33.2cm 54cm 149.4cm 31.7cm 148.9cm 38.1cm 19.5cm " " 22"...
- Page 34 Instalacja do prezentacji 3 stron 1. Kominek jest mocowany za pomocą ramek i paneli z lewej i prawej strony. www.aflamo.com...
- Page 35 2. Zdejmij ramki i panele, jeśli chcesz oglądać ogień z trzech stron. 3. Przymocuj ponownie ramki, po zdjęciu paneli. www.aflamo.com...
- Page 36 4. Usuń śruby z kominka, jak pokazano na rysunku poniżej. 5. Przymocuj wsporniki za pomocą śrub z poprzedniego kroku. www.aflamo.com...
- Page 37 6. Zrób otwór na kominek zgodnie z żądanymi wymiarami. 7. Włóż kominek do otworu w ścianie. Wkręć śruby montażowe w uchwyty i kołki rozporowe. Podłącz i sprawdź, czy kominek działa prawidłowo. Jeśli tak, przejdź do następnego kroku. www.aflamo.com...
- Page 38 8. Przykryj szklany front folią ochronną i przymocuj sklejkę lub płytę gipsowo-kartonową. 9. Udekoruj sklejkę lub płytę gipsowo-kartonową glazurowaną płytką, tapetą itp. www.aflamo.com...
- Page 39 Instalacja do prezentacji z przodu i z prawej strony 1. Aby obejrzeć kominek z przodu i z prawej strony, należy zdjąć panel z prawej strony i trzymać lewą stronę blisko ściany. 2. Usuń 7 śrub po prawej stronie. Zdejmij ramkę i panel. www.aflamo.com...
- Page 40 3. Przymocuj ponownie ramkę, po zdjęciu panelu. 4. Usuń śruby z kominka, jak pokazano na rysunku poniżej. www.aflamo.com...
- Page 41 5. Przymocuj wsporniki za pomocą śrub z poprzedniego kroku. 6. Zrób otwór na kominek zgodnie z żądanymi wymiarami. www.aflamo.com...
- Page 42 7. Włóż kominek do otworu w ścianie. Wkręć śruby montażowe w uchwyty i kołki rozporowe. Podłącz i sprawdź, czy kominek działa prawidłowo. Jeśli tak, przejdź do następnego kroku. 8. Przykryj szklany front folią ochronną i przymocuj sklejkę lub płytę gipsowo-kartonową. www.aflamo.com...
- Page 43 9. Udekoruj sklejkę lub płytę gipsowo-kartonową glazurowaną płytką, tapetą itp. www.aflamo.com...
- Page 44 Instalacja do prezentacji z przodu i z lewej strony 1. Aby obejrzeć kominek z przodu i z lewej strony, należy zdjąć panel z lewej strony i trzymać prawą stronę blisko ściany. 2. Usuń 7 śrub po lewej stronie. Zdejmij ramkę i panel. www.aflamo.com...
- Page 45 3. Przymocuj ponownie ramkę, po zdjęciu panelu. 4. Usuń śruby z kominka, jak pokazano na rysunku poniżej. www.aflamo.com...
- Page 46 5. Przymocuj wsporniki za pomocą śrub z poprzedniego kroku. 6. Zrób otwór na kominek zgodnie z żądanymi wymiarami. www.aflamo.com...
- Page 47 7. Włóż kominek do otworu w ścianie. Wkręć śruby montażowe w uchwyty i kołki rozporowe. Podłącz i sprawdź, czy kominek działa prawidłowo. Jeśli tak, przejdź do następnego kroku. 8. Przykryj szklany front folią ochronną i przymocuj sklejkę lub płytę gipsowo-kartonową. 9. Udekoruj sklejkę lub płytę gipsowo-kartonową glazurowaną płytką, tapetą itp. www.aflamo.com...
- Page 48 Instalacja ozdobnych kryształków i polan 1. Za pomocą śrubokręta zdejmij 4 śruby (jak pokazano na schemacie) 2. Niech dwie osoby wyciągną szklany panel i przesuną go w czyste, miękkie miejsce, aby uniknąć zarysowania. www.aflamo.com...
- Page 49 Rysunek 1. Rysunek 1. Rysunek 2. 4. Umieść kłody drewna na powierzchni wszystkich kryształów i umieść 4 kawałki dużych kryształów między szczeliną każdego zestawu kłód. Rysunek 2. 5. Po umieszczeniu wszystkich dekoracji wsuń szklany panel z powrotem i dokręć śruby. www.aflamo.com...
-
Page 50: Podłączenie Do Zasilania
(patrz rysunek poniżej) lub korzystając z PILOTA ZDALNEGO STEROWANIA, zasilanego bateriami. Przed przystąpieniem do obsługi, zapoznaj się z WAŻNYMI INSTRUKCJAMI BEZPIECZEŃSTWA na stronach 2 i 3 i zastosuj się do nich. Panel dotykowy www.aflamo.com... - Page 51 WŁ.: Naciśnij raz: i pilota. Załącza efekt płomienia. WYŁ.: Naciśnij ponownie: Naciśnij raz: . Zmiana efektu płomienia i polan. koloru płomienia i polan. UWAGA: Efekt koloru pozostaje aktywny Naciśnij ponownie aż do uzyskania do momentu naciśnięcia przycisku zasilania. Efekt koloru płomienia musi być załączony w celu uruchomienia nagrzewnicy.
- Page 52 PRZYCISK FUNKCJA DZIAŁANIE i SYGNALIZACJA Aktywuje funkcje panelu sterowania Naciśnij raz: Kontrolka zaświeci się. Załączenie i pilota. Załącza efekt płomienia. zasilania. Wszystkie funkcje aktywne. Naciśnij ponownie: Efekt płomienia POWER wyłączony. Wszystkie funkcje nieaktywne. pilota. Wyłącza efekt płomienia. Przycisk PŁOMIENIA: regulacja jasności Naciśnij raz: Zmiana jasności efektu płomienia.
- Page 53 Temperatura zmieni się na 18 ℃ 2. Naciśnij ponownie: aż do uzyskania UWAGA:Naciśnij i Przytrzymaj przycisk przez żądanego ustawienia. Wyświetlacz 5 sekund, skala zmieni się z ℃ na ℉. Tak samo wskazuje nastawę z tabeli: z ℉ na ℃。 TEMP www.aflamo.com...
- Page 54 Jest to normalne zjawisko i nie powinno się powtórzyć, chyba że nagrzewnica nie będzie używana przez dłuższy czas. Aby usprawnić działanie, skieruj pilota na przód kominka. NIE naciskaj przycisków UWAGA za szybko. Odczekaj chwilę aż urządzenie zareaguje na poszczególne komendy. www.aflamo.com...
- Page 55 AAA ( • W tym pilocie zastosowano NIGDY nie należy wrzucać baterii do ognia. Postępowanie niezgodne z tym wymogiem może grozić wybuchem. Zużyte baterie należy wrzucać do specjalnie oznakowanych pojemników lub przekazać do Punktu Selektywnej Zbiórki Odpadów Komunalnych. www.aflamo.com...
-
Page 56: Czyszczenie I Konserwacja
• Silniki wentylatorów zostały fabrycznie nasmarowane i nie wymagają późniejszego smarowania. • Elementy elektryczne są zintegrowane w urządzeniu i nie są mogą być samodzielnie naprawiane. Przechowywanie: • Nieużywane urządzenie należy przechowywać w czystym, suchym miejscu. OSTRZEŻENIE! Wewnętrzne elementy elektryczne NIE SĄ PRZEZNACZONE do samo- dzielnej naprawy przez użytkownika. www.aflamo.com... - Page 57 1. Kominek nie został podłączony 1. Sprawdź wtyczkę. do gniazdka elektrycznego. 6. Kominek nie urucha- 2. Skontaktuj się z autoryzowanym mia się pomimo serwisem. 2. Usterka sterowania. przełączenia włącznika 3. Wyzwolenie bezpiecznika. 3. Ponownie załącz wyłącznik w pozycję ON. automatyczny. www.aflamo.com...
- Page 58 Należy pamiętać o odłączeniu urządzenia od zasilania przed przystąpieniem do jakichkolwiek prac. Szybę jak i całe urządzenie należy zawsze kłaść na ręczniku lub innym materiale, który nie spowoduje uszkodzenia elementów/ramy. Cała ta procedura nie powinna zająć więcej niż 20-30 minut. www.aflamo.com...
Need help?
Do you have a question about the AV-INS50SUP and is the answer not in the manual?
Questions and answers