Table of Contents
Advertisement
Quick Links
Hitachi Advanced Server
DS240 Service Guide
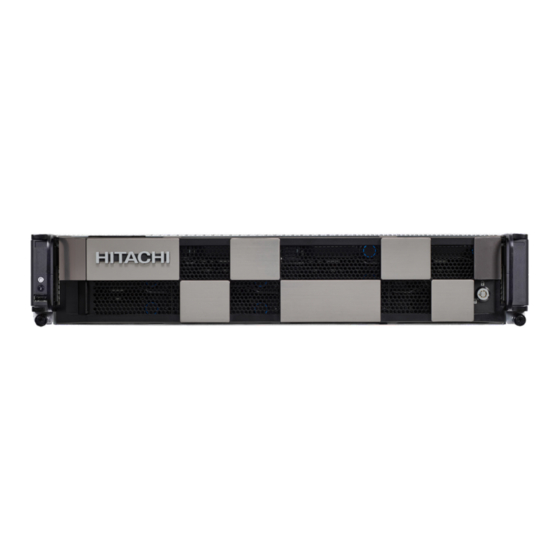
This guide provides the system overview and specifications for Hitachi Advanced Server DS240,
including hardware descriptions, installation instructions, BIOS setup utility descriptions.
configuration guidelines for connectors and jumpers, and basic troubleshooting instructions.
FE-97HAS007-00
May 2018
Advertisement
Table of Contents

Related Manuals for Hitachi DS240


Summary of Contents for Hitachi DS240
- Page 1 Hitachi Advanced Server DS240 Service Guide This guide provides the system overview and specifications for Hitachi Advanced Server DS240, including hardware descriptions, installation instructions, BIOS setup utility descriptions. configuration guidelines for connectors and jumpers, and basic troubleshooting instructions. FE-97HAS007-00 May 2018...
- Page 2 Licensee may not make any other copies of the Materials. "Materials" mean text, data, photographs, graphics, audio, video and documents. Hitachi reserves the right to make changes to this Material at any time without notice and assumes no responsibility for its use. The Materials contain the most current information available at the time of publication.
-
Page 3: Table Of Contents
ABLE OF ONTENTS ABLE OF ONTENTS About the System Introduction ............1-1 System Features. - Page 4 ABLE OF ONTENTS Hard Disk Drive Assembly ..........2-2 Removing an HDD Tray Assembly .
- Page 5 ABLE OF ONTENTS Repeater Module........... . . 2-28 Removing a Repeater Module.
- Page 6 ABLE OF ONTENTS BIOS BIOS Setup Utility ........... . . 4-1 Operation .
- Page 7 ABLE OF ONTENTS Keystroke Mapping ......... . . 4-25 Limitations .
- Page 8 ABLE OF ONTENTS Platform Event ........... 5-4 Platform Event Filter .
- Page 9 ABLE OF ONTENTS Troubleshooting Troubleshooting ............7-1 Server Boot Issue Topics .
- Page 10 ONVENTIONS Conventions Several different typographic conventions are used throughout this manual. Refer to the following examples for common usage. Bold type face denotes menu items, buttons and application names. Italic type face denotes references to other sections, and the names of the folders, menus, programs, and files.
- Page 11 RECAUTIONARY EASURES Precautionary Measures Read all caution and safety statements in this document before performing any of the instructions. To reduce the risk of bodily injury, electrical shock, fire, and equipment dam- age, read and observe all warnings and precautions in this chapter before installing or maintaining your system.
- Page 12 RECAUTIONARY EASURES Table 1: Warning and Cautions (Continued) The enclosure is designed to carry only the weight of the system sled. Do not use this equipment as a workspace. Do not place additional load onto any equipment in this system. Indicates two people are required to safely handle the system.
- Page 13 RECAUTIONARY EASURES Equipment Handling Practices Reduce the risk of personal injury or equipment damage: Conform to local occupational health and safety requirements when moving and lifting equipment. Use mechanical assistance or other suitable assistance when moving and lifting equipment.
- Page 14 RECAUTIONARY EASURES Rack Mount Warnings The following installation guidelines are required by UL for maintaining safety compliance when installing your system into a rack. The equipment rack must be anchored to an unmovable support to prevent it from tip- ping when your system or piece of equipment is extended from it. The equipment rack must be installed according to the rack manufacturer's instructions.
- Page 15 RECAUTIONARY EASURES Electrostatic Discharge (ESD) CAUTION! CAN DAMAGE DRIVES BOARDS AND OTHER PARTS E RECOMMEND THAT YOU PERFORM ALL PROCEDURES AT AN WORKSTATION F ONE IS NOT AVAILABLE PROVIDE SOME PROTECTION BY WEARING AN ANTI STATIC WRIST STRAP ATTACHED TO CHASSIS GROUND ANY UNPAINTED METAL SURFACE ON YOUR SERVER WHEN HANDLING PARTS...
- Page 16 RECAUTIONARY EASURES ified in this manual. Use of other products / components will void the UL listing and other regulatory approvals of the product and will most likely result in non-compliance with product regulations in the region(s) in which the product is sold. System power on/off: To remove power from system, you must remove the system from rack.
- Page 17 RECAUTIONARY EASURES The system is designed to operate in a typical office environment. Choose a site that is: Clean and free of airborne particles (other than normal room dust). Well ventilated and away from sources of heat including direct sunlight. ...
- Page 18 RECAUTIONARY EASURES Structure of this guide Chapter 1: About the System “This section introduces the system, its different configuration(s) and the main features.” Chapter 2: Installing the Hardware “This section provides guidance information to properly service components in the system.”...
- Page 19 About the System Chapter 1 This section introduces the system, its different configuration(s) and the main features.
-
Page 20: Introduction
BOUT THE YSTEM NTRODUCTION 1.1 Introduction This document provides an overview of the hardware features of the chassis, troubleshooting information, and instructions on how to add and replace components of the server. For the latest version of this manual, see support.HitachiVantara.com. - Page 21 BOUT THE YSTEM YSTEM EATURES Specifications Table 1.1: System Specifications PECIFICATIONS ESCRIPTION Form factor 2U rack mount 444mm x 87.5 mm x 866 mm Chassis dimensions (W x H x D) 17.5" x 3.4" x 34.1" Mainboard form factor 400mm x 559.8mm / 15.75" x 22.04" (Wx L), full-width Processor type: Intel®...
- Page 22 BOUT THE YSTEM YSTEM EATURES Table 1.1: System Specifications (Continued) PECIFICATIONS ESCRIPTION Riser Slot1 (x24): Gen3, PCIe x 8, CPU1 (Full Height Half Length Card*) Gen3, PCIe x16, CPU0 (Full Height Half Length Card) Riser Slot2 (x16): Gen3, PCIe x16, CPU1 (reserved for SAS mezzanine card type B installation) Riser Slot3 (x32): Gen3, PCIe x16, CPU2 (MD2 Low-profile Card) Gen3, PCIe x16, CPU2 (MD2 Low-profile Card)
- Page 23 BOUT THE YSTEM YSTEM EATURES Table 1.1: System Specifications (Continued) PECIFICATIONS ESCRIPTION (16) 2.5” hot-plug SATA/SAS HDD/SSD or NVMe SSD for system: NVMe SSD 0~15 while four CPUs installed SATA SSD/HDD 0~11 only SAS/SATA SSD/HDD 0~15 while SAS HBA/RAID card installed Storage (2) PCIe x1 / SATA M.2 2280/22110 slot Note:...
-
Page 24: Thermal Limitation List
BOUT THE YSTEM YSTEM EATURES Table 1.1: System Specifications (Continued) PECIFICATIONS ESCRIPTION Operating temperature: 5°C to 35°C (41°F to 95°F) Non-operating temperature: -40°C to 65°C (-40°F to 149°F) Operating environment Operating relative humidity: 50% to 85%RH Non-operating relative humidity: 20% to 90%RH Thermal Limitation List... -
Page 25: Package Contents
BOUT YOUR YSTEM ACKAGE ONTENTS 1.2 Package Contents (1) Hitachi Advanced Server DS240 system (4) processor heat sinks (2) power supply units (2) power cords (optional) Note: For exact shipping contents, contact your Hitachi sales representative. -
Page 26: A Tour Of The System
BOUT THE YSTEM OUR OF THE YSTEM 1.3 A Tour of the System System Overview The system is available in 16 x 2.5” SATA/SAS HDD/SSD or NVMe SSD models. The following illustrations describe the major components of these variants. 2.5” Storage Drive System ❻... -
Page 27: System Front View
BOUT THE YSTEM YSTEM RONT Table 2: System Component Overview (Continued) ESCRIPTION Two server handles used for pulling the system out of the rack CAUTION! Server handle ANDLES ARE DESIGNED FOR THE EXTENSION OF THE SYSTEM FROM THE RACK ANDLES ARE NOT DESIGNED TO CARRY THE WEIGHT OF THE SYSTEM O NOT USE THE HANDLES TO MOVE OR LIFT THE SYSTEM Features power button with LED, ID button with LED and USB port. - Page 28 BOUT THE YSTEM YSTEM RONT Table 3: System Front View (Continued) EATURE ESCRIPTION Thumb screw Secure the system to the rack frame Asset Tag Record serial number or other important information Power sub-system Main power supply unit (PSU). See Power Sub-System on page 1-11. *SAS HDD/SSD will be available while SAS HBA / RAID card installed ** SATA/SAS HDD/SSD will be available while SAS HBA / RAID card installed Table 4: Intel®...
-
Page 29: Storage Drive Tray Overview
BOUT THE YSTEM YSTEM RONT 2.5” Storage Drive Tray Overview Release Button Handle Active LED Status / Fault LED Figure 1-3. 2.5” Storage Drive Tray Overview The following LED behavior table represents LED conditions. Table 5: 2.5” Storage Drive Tray LED Status Behavior OLOR ONDITION ESCRIPTION... -
Page 30: Front Control Panel And Leds
BOUT THE YSTEM RONT ONTROL ANEL AND Front Control Panel and LEDs ❶ ❷ ❸ Figure 1-4. Front Control Panel Table 6: Front Control Panel EATURE ESCRIPTION Button: Press more than four seconds to power off the system LED: Power button with LED ... -
Page 31: Back View
BOUT THE YSTEM WARNING! Mainboard combinations other than the system are not supported. A system has two modular Power Supply Units (PSU). Both PSUs are directly connected to the Power Distribution Boards (PDBs), the HDD backplane, and middle plane allowing each PSU to individually provide power for mainboard. -
Page 32: General Sku
BOUT THE YSTEM AINBOARD General SKU Air Duct DIMM Slot Socket Mainboard Repeater Module 1-13... -
Page 33: Gpu Sku
I/O P BOUT THE YSTEM ORTS GPU SKU GPU0 GPU1 Mid-Brace Air Duct GPU0 Power slot GPU1 Power slot Back I/O Ports ❶ ❷ ❸ ❹ ❺ ❻ ❼❽❾ Figure 1-7. Back I/O Ports Table 8: Back I/O Ports EATURE ESCRIPTION MicroSD slot Backup BMC System Event Log (SEL) -
Page 34: Cooling Sub-System
BOUT THE YSTEM OOLING YSTEM Table 8: Back I/O Ports (Continued) EATURE ESCRIPTION Power LED (Blue): On / Off: S0/S5 System Power On / Off Power / Status LED Status LED (Amber): Blinking / Off: Critical Event / SEL Cleared Off: No indicator ID LED Blue Blinking: ID indicator... -
Page 35: Enabling The Intel® Vmd Technology
® VMD BOUT THE YSTEM NABLING THE NTEL TECHNOLOGY Enabling the Intel® VMD technology Note: You can use Intel® VROC HII to create the RAID volume. These volumes can be created at any point before or after your system is successfully running your Windows® installation, but may not be used as the boot volume. - Page 36 ® VMD BOUT THE YSTEM NABLING THE NTEL TECHNOLOGY Table 10: Intel® VMD PCIe Root Port BIOS Setup Option Table (Continued) CPU S VMD P OCKET TACK TORAGE RIVE CPU Socket 2 PStack0 CPU Socket 3 PStack1 Press the up or down arrow key to select CPU socket 0 ~ 3. E/nable/disable the Intel®...
-
Page 37: Spanning Raid Data Volumes Across Vmd Domains
RAID BOUT THE YSTEM PANNING DATA VOLUMES ACROSS DOMAINS Spanning RAID data volumes across VMD domains To enable the spanning RAID data volumes across VMD domains feature, you might need to select “Enable RAID spanned over VMD Controllers ” in “Intel(R) Virtual RAID on CPU” (VROC) under the “Advanced”... - Page 38 RAID BOUT THE YSTEM PANNING DATA VOLUMES ACROSS DOMAINS 4. Navigate to and select “Create RAID Volume” 5. To enable the RAID to be spanned over multiple controllers, highlight the [ ], and press <Enter>. This will open a small menu box with two values, blank and X. Blank indicates a setting that is disabled.
-
Page 39: Enabling Platform Trusted Technology (Ptt)
(PTT) BOUT THE YSTEM NABLING LATFORM RUSTED ECHNOLOGY 6. Navigate to and select Create Volume, then press <Enter>. 7. The following message will be displayed: “You have selected NVMe drives that are connected to multiple VMD controllers. Please note that if you continue and create a RAID volume with drives from multiple VMD controllers that RAID volume will not be bootable in a Windows OS environment. -
Page 40: Tpm Configuration Settings
BOUT THE YSTEM CONFIGURATION SETTINGS Press the down arrow key until “Server ME Configuration” is selected. Press down the arrow key to select PTT Support. Then you can enable/disable the PTT feature for your system. TPM configuration settings To set up the TPM configuration, you might need to select “Trusted Computing” in “Advanced”... - Page 41 BOUT THE YSTEM CONFIGURATION SETTINGS Table 12: Configuration on Trusted Computing Screen Description ETUP PTIONS ESCRIPTION OMMENTS TPM 2.0 Device Found Information only. Displays cur- Vendor rent TPM Status. Firmware Version Information only. Displays cur- Active PCR banks rent active PCR banks. Available PCR Information only.
-
Page 42: Installing The Hardware
Installing the Hardware Chapter 2 This section provides guidance information to properly service components in the system. -
Page 43: Safety Measures
NSTALLING THE ARDWARE AFETY EASURES 2.1 Safety Measures WARNING! Always ask for assistance to move or lift the system. WARNING! Only perform troubleshooting as authorized by the product documentation, or as directed by a service and support team. Repairs not authorized by warranty may void the warranty and damage the system. -
Page 44: Hard Disk Drive Assembly
NSTALLING THE ARDWARE RIVE SSEMBLY 2.2 Hard Disk Drive Assembly CAUTION! Do not operate the system without all hard drive trays inserted into the chassis. All hard drive bays must be occupied by either a hard drive or an empty hard drive tray. Hard drives may be removed while the system is operational but should be immediately replaced by another hard drive or an empty hard drive tray. -
Page 45: Installing An Hdd Assembly
HDD A NSTALLING THE ARDWARE NSTALLING AN SSEMBLY Installing an HDD Assembly WARNING! Do not force the tray handle closed. If resistance is encountered, check the hard drive is properly inserted and the hard drives on either side are properly inserted. To prevent damage while servicing, do not hold the HDD module by the ejector handle. -
Page 46: Installing A 2.5" Hdd Into An Hdd Tray
2.5” HDD HDD T NSTALLING THE ARDWARE NSTALLING A INTO AN 3. Remove the HDD module from the tray. Figure 2-4. Removing a 2.5” Storage Device from a Tray Installing a 2.5” HDD into an HDD Tray 1. Align the connectors on the HDD module in the tray. The connectors must face the back of the tray. - Page 47 2.5” HDD HDD T NSTALLING THE ARDWARE NSTALLING A INTO AN 2. Install the HDD into the tray. Make sure the guide pins on the tray and the screw holes on the HDD align. Adjust the HDD as necessary. Guide Pin Guide Pin Guide Pin Guide Pin...
-
Page 48: Power Supply Unit
NSTALLING THE ARDWARE OWER UPPLY 2.3 Power Supply Unit Removing a Power Supply Unit CAUTION! PSU. F ISCONNECT THE POWER SUPPLY UNIT FROM THE POWER SOURCE BEFORE REMOVING AILURE TO DO SO COULD RESULT IN DAMAGE TO THE EQUIPMENT OR PERSONAL INJURY 1. - Page 49 NSTALLING THE ARDWARE NSTALLING A OWER UPPLY 2. Slide the PSU into the chassis until the release latch is secure and the component is locked in place. Figure 2-9. Inserting the PSU 3. Push the PSU handle down. Figure 2-10. Closing the PSU Handle...
-
Page 50: Fan Module Assembly
NSTALLING THE ARDWARE ODULE SSEMBLY 2.4 Fan Module Assembly Removing a Fan Module 1. Extend the system from the rack to allow access to the fan cover. 2. Locate the fan cover on the top of the chassis. 3. Lift up the locking latch to unlock the fan cover. Open the fan cover. Fan Cover Assembly Locking Latch... -
Page 51: Installing A Fan Module
NSTALLING THE ARDWARE NSTALLING A ODULE 4. Push out the release button on the fan module to release the locking latch. Grasp the fan module and pull up to remove. Figure 2-12. Unlocking and Removing the Fan Module 5. Replace the fan module. Installing a Fan Module 1. - Page 52 NSTALLING THE ARDWARE NSTALLING A ODULE 4. Close the locking latch on the fan module. Press it down until the release button locks in place. Figure 2-13. Installing and Locking the Fan Module 5. Lower the fan cover and press down on it until it locks in place. Fan Cover Assembly Front of...
-
Page 53: Mainboard Sled
NSTALLING THE ARDWARE AINBOARD 2.5 Mainboard Sled Mainboard Sled Overview The system is available in two SKUs: GPU SKU or General SKU. The following illustrations describe the major components of these two variants. Air Duct Repeater Module GPU Power Connector General SKU Air Duct+ Mid-Brace... - Page 54 NSTALLING THE ARDWARE EMOVING A AINBOARD 1. Press and hold the release button. Figure 2-16. Releasing Mainboard Sled Latch 2. Hold the latch handle and extend to the open position. 3. Pull the sled partially from the system. 4. Place a hand underneath the sled to support the weight. 5.
-
Page 55: Installing A Mainboard Sled
NSTALLING THE ARDWARE NSTALLING A AINBOARD Installing a Mainboard Sled 1. Align the mainboard sled with the chassis. 2. Slide the sled into the system until sled is flush with the system back and the side lever is locked in place. Figure 2-18. -
Page 56: Pcie Expansion Cards
NSTALLING THE ARDWARE XPANSION ARDS 2.6 PCIe Expansion Cards CAUTION! NSURE ALL POWER IS DISCONNECTED FROM THE SYSTEM BEFORE PROCEEDING PCIe Slots View OCP slot Riser Riser Riser Riser slot4 slot3 slot2 slot1 Riser slot4 (x24) Riser slot3 (x32) Riser slot1 (x24) (FHFL x16:GPU) (HFHL x16+x16) (FHFL x16:GPU) - Page 57 NSTALLING THE ARDWARE EMOVING A ISER SSEMBLY Note: Release the latch plungers on the mid-brace to open position while the GPU cards are installed to PCIe Riser Assembly. Figure 2-20. Releasing the latch plungers To remove a riser assembly for the installation of a PCIe card, follow these guidelines: 1.
- Page 58 NSTALLING THE ARDWARE EMOVING A ISER SSEMBLY 6. Grasp the riser assembly and lift it up carefully. Access Opening Guide Slot Captive Guide Screw Slot Captive Screw Latch Plunger Latch Plunger Handle Secured Open Figure 2-21. Grasp the Riser Assembly 7.
-
Page 59: Installing A Pcie Riser Assembly
NSTALLING THE ARDWARE NSTALLING A ISER SSEMBLY Installing a PCIe Riser Assembly 1. Remove the mainboard sled. See Removing a Mainboard Sled on page 2-11. 2. Align the guide pin on the riser assembly with the guide slot on the back chassis. 3. -
Page 60: Removing A Pcie Card
NSTALLING THE ARDWARE NSTALLING A ISER SSEMBLY 6. Press the latch plunger on the mid-brace to the secured position to lock the GPU card’s mount bracket. Latch Plunger Latch Plunger Latch Plunger Secured Open Figure 2-23. Release the latch plunger 7. -
Page 61: Installing A Pcie Card
NSTALLING THE ARDWARE NSTALLING A ISER SSEMBLY 3. Remove the PCIe card from the riser assembly. Figure 2-24. Removing a PCIe Card 4. Replace the PCIe card. Installing a PCIe Card Note: Check the PCIe Card size before installing to ensure compatibility. Install the mount bracket to the GPU card as shown: 1. - Page 62 NSTALLING THE ARDWARE NSTALLING A ISER SSEMBLY 4. Rotate the latch to secure the PCIe card to the riser assembly. Figure 2-25. Installing a PCIe Card 5. Install the PCIe riser assembly in the system. See Installing a PCIe Riser Assembly on page 2-17.
-
Page 63: Sas Mezzanine Card Assembly
SAS M NSTALLING THE ARDWARE EZZANINE SSEMBLY 2.7 SAS Mezzanine Card Assembly For further information about OCP Mezzanine Cards, see OCP Mezzanine Card on page 2-26 . Note: You must first remove a PCIe expansion card assembly before replacing a mezzanine card. -
Page 64: Removing A Sas Mezzanine Card
SAS M NSTALLING THE ARDWARE EMOVING A EZZANINE 3. Locate the SAS mezzanine card assembly in the back of the chassis. 4. Align the guide hole on the SAS mezzanine card assembly with the two guide pins on the mainboard. 5. - Page 65 SAS M NSTALLING THE ARDWARE EMOVING A EZZANINE 4. Remove the five screws from the bracket. Keep the five screws for further use. ❶ ❶ ❶ Riser Card SAS Mezzanine Card ❶ ❶ ❷ SAS Mezzanine Card Bracket Figure 2-28. Remove Five Screws from the Bracket 5.
-
Page 66: Installing A Sas Mezzanine Card
SAS M NSTALLING THE ARDWARE NSTALLING A EZZANINE 6. Replace the SAS mezzanine card. Installing a SAS Mezzanine Card 1. Remove the mainboard sled. See Removing a Mainboard Sled on page 2-11. 2. Remove the riser assembly. See Removing a PCIe Riser Assembly on page 2-14. 3. - Page 67 SAS M NSTALLING THE ARDWARE NSTALLING A EZZANINE 8. Secure with the provided screws. Figure 2-31. Installing a SAS Mezzanine Card 9. Install the PCIe riser assembly. See Installing a PCIe Riser Assembly on page 2-17. 10. Install the mainboard sled. See Installing a Mainboard Sled on page 2-13. 2-25...
-
Page 68: Ocp Mezzanine Card
OCP M NSTALLING THE ARDWARE EZZANINE 2.8 OCP Mezzanine Card CAUTION! NSURE ALL POWER IS DISCONNECTED FROM THE SYSTEM BEFORE PROCEEDING Installing an OCP Mezzanine Card 1. Remove the mainboard sled. See Removing a Mainboard Sled on page 2-11. 2. Remove the riser assembly. See Removing a PCIe Riser Assembly on page 2-14. 3. - Page 69 OCP M NSTALLING THE ARDWARE EMOVING AN EZZANINE 3. Remove the riser assembly. See Removing a PCIe Riser Assembly on page 2-14. 4. Remove the bracket from the OCP mezzanine card. 5. Lossen the screws securing the OCP mezzanine card. 6.
-
Page 70: Repeater Module
NSTALLING THE ARDWARE EPEATER ODULE 2.9 Repeater Module Removing a Repeater Module CAUTION! NSURE ALL POWER IS DISCONNECTED FROM THE SYSTEM BEFORE PROCEEDING 1. Remove the mainboad sled. See Removing a Mainboard Sled on page 2-11. 2. Locate the repeater module. 3. - Page 71 NSTALLING THE ARDWARE NSTALLING A EPEATER ODULE 3. Carefully lower the repeater module into the chassis. 4. Press the latch plungers to the secured position. Fasten the thumb screw. Make sure the repeater module is locked in place. Figure 2-35. Installing the Repeater Module 5.
-
Page 72: Air Ducts
NSTALLING THE ARDWARE UCTS 2.10 Air Ducts Removing an Air Duct (GPU SKU) CAUTION! NSURE ALL POWER IS DISCONNECTED FROM THE SYSTEM BEFORE PROCEEDING 1. Remove the mainboad sled. See Removing a Mainboard Sled on page 2-11. 2. Remove the PCIe riser assembly. See Removing a PCIe Riser Assembly on page 2-14. 3. -
Page 73: Removing An Air Duct (General Sku)
SKU) NSTALLING THE ARDWARE EMOVING AN ENERAL 4. Press the latch plungers to secured position. Make sure the mid-brace and air duct are locked in place. Latch Plunger Latch Plunger Mid-Brace Latch Plunger Secured Open Figure 2-37. Installing the Air Duct (GPU SKU) 5. -
Page 74: Installing An Air Duct (General Sku)
SKU) NSTALLING THE ARDWARE NSTALLING AN ENERAL 3. Remove the air duct from the chassis. Figure 2-38. Removing the Air Duct (General SKU) Installing an Air Duct (General SKU) 1. Remove the mainboad sled. See Removing a Mainboard Sled on page 2-11. 2. - Page 75 SKU) NSTALLING THE ARDWARE NSTALLING AN ENERAL 3. Carefully lower the air duct in the chassis. Make sure the air duct is secured in place. Figure 2-39. Installing the Air Duct (General SKU) 4. Intall the mainboard sled. See Installing a Mainboard Sled on page 2-13. 2-33...
-
Page 76: Processor
NSTALLING THE ARDWARE ROCESSOR 2.11 Processor All the instructions and images in this section are for illustration purposes only and may not reflect the actual product. CAUTION! NSURE ALL POWER IS DISCONNECTED FROM THE SYSTEM BEFORE PROCEEDING Before attempting to service any component, make sure you are properly grounded and wear ESD gloves to avoid damaging the components. -
Page 77: Processor Component Identification
NSTALLING THE ARDWARE ROCESSOR OMPONENT DENTIFICATION Processor Component Identification The following images help to identify the components described in the following steps. Figure 2-41. Component Identification ESCRIPTION Heat sink Thermal interface material (TIM) Processor bracket Processor 2-35... -
Page 78: Installing A Processor
NSTALLING THE ARDWARE NSTALLING A ROCESSOR Installing a Processor CAUTION! O NOT REMOVE THE HEAT SINK UNLESS YOU INTEND TO INSTALL OR REPLACE A PROCESSOR HE HEAT SINK IS NECESSARY TO MAINTAIN THE DESIGNED THERMAL CONDITIONS WARNING! The heat sink may be hot to touch after the system is powered down. Allow the heat sink to cool before removing it. - Page 79 NSTALLING THE ARDWARE NSTALLING A ROCESSOR 8. Inspect all sides of the bracket to make sure the bracket is level with the carrier. There should not be a gap between the bracket and the carrier. See the following illustrations for further detail. Correct Installation Incorrect...
- Page 80 NSTALLING THE ARDWARE NSTALLING A ROCESSOR CPU 1/2 CPU1/2 CPU1/2 CPU1 CPU2 Figure 2-45. Heat Sink 1/2 Location The following procedure is intended to be a general guideline for heat sink installa- tion and not specific to a single processor slot. 9.
- Page 81 NSTALLING THE ARDWARE NSTALLING A ROCESSOR 10. Turn the heat sink over and locate the corner chamfer. This is the corner that must be aligned over the PIN1 indicator on the bracket assembly. 11. Align the following: Corner chamfer on the heat sink and the PIN1 indicator on the bracket assembly. ...
- Page 82 NSTALLING THE ARDWARE NSTALLING A ROCESSOR 12. Once the heat sink and the bracket are aligned, place the heat sink over the bracket and push down until the retention clips are engaged over the heat sink. An audible click indicates a correct installation. Note: Make sure the PIN1 indicator on the heat sink is aligned with the PIN1 indicator on the bracket before removing the assembly.
- Page 83 NSTALLING THE ARDWARE NSTALLING A ROCESSOR 14. Locate the socket on the mainboard and remove the processor cover if necessary. WARNING! The pins in the processor socket can be bent if force is applied. When installing the processor on the socket, make sure the processor assembly is properly aligned before applying pressure to secure it to the socket.
-
Page 84: Removing A Processor
NSTALLING THE ARDWARE EMOVING A ROCESSOR Removing a Processor To remove the processor: 1. Disconnect the power source and pull the system out of the rack frame. 2. Remove the top cover. 3. In a sequential order, loosen the captive screws on the heat sink. 4. - Page 85 NSTALLING THE ARDWARE EMOVING A ROCESSOR 6. Turn the processor assembly over to expose the processor. Place the heat sink on a clean work surface. Figure 2-53. Processor Location on an Assembly 7. Locate the TIM release slot positioned on the opposite side of the PIN1 indicator. Insert a flat blade screwdriver into the release slot marked on the processor bracket.
- Page 86 NSTALLING THE ARDWARE EMOVING A ROCESSOR 9. Grasp the processor from the edges and remove it from the bracket. Figure 2-55. Removing the Processor 10. Gently push the retaining clips out to unlock the processor bracket from the heat sink. 11.
-
Page 87: Memory Modules
NSTALLING THE ARDWARE EMORY ODULES 2.12 Memory Modules General Guidelines All servers have specific rules for population of memory on the mainboard. Refer to the following individual server rules for information on how to populate the particular server required. Memory Population Support DIMMs are organized into physical slots on DDR4 memory channels that belong to proces- sor sockets. -
Page 88: Removing A Memory Module
NSTALLING THE ARDWARE EMOVING A EMORY ODULE Table 1: DDR4 Registered Maximum Frequency Support (per channel) (MT/ ); V (V); S (SPC) DIMM P PEED OLTAGE HANNEL (DPC) ANKS HANNEL DIMM DIMM (GB) APACITY LOTS HANNEL 1DPC (DIMM0 2DPC (DIMM0, DIMM1 INSTALLED INSTALLED IDTH... -
Page 89: Installing A Memory Module
NSTALLING THE ARDWARE NSTALLING A EMORY ODULE 6. Hold the DIMM module by the ends and remove it from the system. Place the DIMM module in an antistatic packaging. Figure 2-58. Removing a Memory Module Installing a Memory Module CAUTION! ANDLE THE MEMORY MODULE BY THE EDGES AT ALL TIMES 1. - Page 90 NSTALLING THE ARDWARE NSTALLING A EMORY ODULE 5. Install the air duct. See Air Ducts on page 2-30. 6. Install the PCIe riser assembly. See Installing a PCIe Riser Assembly on page 2-17. 7. Install the mainboard sled. See Installing a Mainboard Sled on page 2-13. 2-48...
-
Page 91: Lithium Battery
NSTALLING ARDWARE ITHIUM ATTERY 2.13 Lithium Battery Removing a Lithium Battery 1. Locate the lithium battery. Lithium battery Figure 2-60. Removing a Lithium Battery 2. Remove the lithium battery from the battery seat. Figure 2-61. Removing a Lithium Battery 2-49... -
Page 92: Installing A Lithium Battery
NSTALLING ARDWARE NSTALLING A ITHIUM ATTERY Installing a Lithium Battery 1. Align the lithium battery in the seat. Make sure the polarity matches the defined markings in the seat. 2. Push the lithium battery into the seat. Figure 2-62. Installing a Lithium Battery 2-50... -
Page 93: Bezel
NSTALLING ARDWARE EZEL 2.14 Bezel Removing a Bezel 1. Use the key to unlock the bezel. Figure 2-63. Unlocking the Bezel 2. Push the lever to the left side to unlock the left side of the bezel from the chassis. Figure 2-64. - Page 94 NSTALLING ARDWARE EMOVING A EZEL 3. Pull the right side of the bezel outward until it has cleared the chassis. Do not con- tinue to rotate the bezel to prevent the guide hooks on the left side of the bezel from breaking on the mounting ear.
-
Page 95: Installing A Bezel
NSTALLING ARDWARE NSTALLING A EZEL Installing a Bezel 1. Angle the bezel with the chassis and align the guide hooks on the bezel with the holes on the mount ear. 2. Once aligned, continue to slide the bezel into the mount ear. Figure 2-67. - Page 96 NSTALLING ARDWARE NSTALLING A EZEL 4. Align the right side of the bezel with the chassis and rotate it in. If correctly aligned, the bezel is flush with the USB cap. Figure 2-69. Installing the Bezel in Place 5. Locate the bezel lever and move it towards the right side to lock this end of the bezel to the chassis.
-
Page 97: Rail Kit Assembly
Rail Kit Assembly Chapter 3... - Page 98 SSEMBLY SSEMBLY 3.1 Rail Kit Assembly Make sure you have a stable, clean working environment. Dust and dirt can get into com- puter components and cause a malfunction. Many of the screws on the server are different sizes; use containers to keep screws and small components separated. Adequate lighting and proper tools can prevent you from accidentally damaging internal components.
- Page 99 SSEMBLY SSEMBLY Rack Installation Overview Review thoroughly the documentation that is included with the rack cabinet for safety and cabling instructions. Before installing the rails in the rack cabinet, review the following guidelines: Plan the rail installation starting at the bottom of the rack cabinet. ...
- Page 100 SSEMBLY SSEMBLY 2. Install the inner rail onto the chassis. 3. Secure the screws on the end of inner rails for safety concern. Figure 3-2. Installing the Inner Rail onto the Chassis 4. Press the latch and align the outer rail with the rack cabinet. 5.
- Page 101 SSEMBLY SSEMBLY 7. Align the chassis with the outer rail. 8. Slide in the chassis until it is completely flush with the outer rail. Figure 3-4. Installing a Chassis in the Rack 9. Turn the thumb screws to secure the chassis to the cabinet. Figure 3-5.
- Page 102 SSEMBLY SSEMBLY Removing the Rails CAUTION! HE SYSTEM MUST NOT BE REMOVED FROM ITS SETUP IN THE RACK FOR MORE THAN TEN MINUTES TO MAINTAIN PROPER SYSTEM COOLING Prerequisite: Prerequisite: Power down the system. Disconnect all cables and peripherals from the system. 1.
- Page 103 SSEMBLY SSEMBLY 2. Pull out the chassis until it comes to a complete stop. WARNING! The server is heavy. Removing it from the cabinet requires two individuals. 3. Press the release latch, see the following figure, to continue sliding the chassis out. Once the locking latch is released the server will slide out of the rails.
- Page 104 SSEMBLY SSEMBLY 6. Remove the screws securing the inner rail. 7. Slide and remove the inner rail from the chassis. Figure 3-9. Removing the Inner Rail from the Chassis...
- Page 105 BIOS Chapter 4 This section provides information regarding the BIOS architecture, BIOS update utility, server management, checkpoints, and error handling found in the system.
-
Page 106: Bios Setup Utility
The Keyboard Command Bar is located at the bottom right of the screen and con- mand Bar tinuously displays help for keyboard special keys and navigation keys. Entering BIOS Setup BIOS Setup is started by pressing <DEL> or <F2> during boot time when the Hitachi logo is displayed. -
Page 107: Keyboard Commands
BIOS EYBOARD OMMANDS When Quiet Boot is disabled, the message “press <DEL> or <F2> to enter setup” will be displayed on the diagnostics screen. Keyboard Commands The bottom right portion of the Setup screen provides a list of commands that are used to navigate through the Setup utility. - Page 108 BIOS EYBOARD OMMANDS Table 2: Keyboard Commands (Continued) PTION ESCRIPTION The minus key on the keypad is used to change the value of the cur- Change Value rent item to the previous value. This key scrolls through the values in the associated pick list without displaying the full list.
-
Page 109: Menu Selection Bar
BIOS ELECTION Menu Selection Bar The Menu Selection Bar is located at the top of the BIOS Setup Utility screen. It displays the major menu selections available to the user. By using the left and right arrow keys, the user can select the menus listed here. Server Platform Setup Utility Screens The sections below describe the screens available for the configuration of a server plat- form. -
Page 110: Advanced Screen
BIOS DVANCED CREEN Table 3: Main Screen Description DESCRIPTION ETUP PTIONS OMMENTS Information only. Displays the BIOS Vendor BIOS Vendor. Information only. Displays the Core Version AMI BIOS Core version. Information only. Displays the Compliancy BIOS compliancy. Information only. Displays the Project Version Project version. -
Page 111: Platform Configuration Screen
BIOS LATFORM ONFIGURATION CREEN To access this screen from the Main screen, press the right arrow until the Advanced screen is chosen. Figure 4-2. Advanced Screen Table 4: Advanced Screen Description DESCRIPTION ETUP PTIONS OMMENTS Trusted Computing Trusted Computing Settings Super IO Configuration System Super IO Chip Parameters. -
Page 112: Socket Configuration Screen
BIOS OCKET ONFIGURATION CREEN To access this screen from the Main screen, press the right arrow until the Platform Config- uration screen is chosen. Figure 4-3. Platform Configuration Screen Table 5: Platform Configuration Screen Description DESCRIPTION ETUP PTIONS OMMENTS Displays and provides option to change the PCH Configuration PCH Settings Miscellaneous Configuration... -
Page 113: Server Management Screen
BIOS ERVER ANAGEMENT CREEN To access this screen from the Main screen, press the right arrow until the Socket Configu- ration screen is chosen. Figure 4-4. Socket Configuration Screen Table 6: Socket Configuration Screen Description DESCRIPTION ETUP PTIONS OMMENTS [Custom] [Energy- Configure your own power and performance Pwr and Perf Profile... - Page 114 BIOS ERVER ANAGEMENT CREEN To access this screen from the Main screen, select Server Mgmt Options. Figure 4-5. Server Management Screen Table 7: Server Management Screen Description DESCRIPTION ETUP PTIONS OMMENTS BMC Self Test Information only. Displays the Status BMC Self Test Status. BMC firmware Information only.
-
Page 115: Security Screen
BIOS ECURITY CREEN Table 7: Server Management Screen Description (Continued) DESCRIPTION ETUP PTIONS OMMENTS Configure how the system [Do Nothing] should respond if the OS Boot [Reset] OS Wtd Timer It will be grayout if “OS Watch- Watchdog Timer expires. Not Policy dog Timer”... -
Page 116: Boot Options Screen
BIOS PTIONS CREEN Table 8: Security Screen Description (Continued) DESCRIPTION ETUP PTIONS OMMENTS User Password Set User Password Secure Boot Customizable Secure Boot menu settings Boot Options Screen The Boot Options screen displays any bootable media encountered during POST, and allows the user to configure the desired boot device. -
Page 117: Exit Screen
BIOS CREEN Table 9: Boot Options Screen Description (Continued) DESCRIPTION ETUP PTIONS OMMENTS [<Device String 1>] [<Device String 2>] Boot Option #1 Sets the system boot order … [Disabled] [<Device String 1>] [<Device String 2>] Boot Option #2 Sets the system boot order …... - Page 118 BIOS CREEN the user saved earlier, instead of being restored to the factory defaults. BIOS only supports six USB boot devices. Figure 4-8. Exit Screen Table 10: Exit Screen Description DESCRIPTION ETUP PTIONS OMMENTS Exit system setup without saving any Discard Changes and Exit changes.
-
Page 119: Loading Bios Defaults
BIOS BIOS D OADING EFAULTS Loading BIOS Defaults Different mechanisms exist for resetting the system configuration to the default values. When a request to reset the system configuration is detected, the BIOS loads the default system configuration values during the next POST. The request to reset the system to the defaults can be sent in the following ways: A request to reset the system configuration can be generated by pressing <F9>... - Page 120 BIOS BIOS D OADING EFAULTS c. Move CMOS clear DIP back to off. d. Power on the system. e. Check BIOS defaults are loaded. Note: Complementary Metal-Oxide-Semiconductor (CMOS) is a technology for constructing integrated circuits. CMOS technology is used in microprocessors, microcontrollers, static RAM, and other digital logic circuits.
-
Page 121: Bios Update Utility
BIOS BIOS U PDATE TILITY 4.2 BIOS Update Utility The flash ROM contains system initialization routines, the BIOS Setup Utility, and runtime support routines. The exact layout is subject to change, as determined by BIOS. The flash ROM also contains initialization code in compressed form for onboard peripherals, like SCSI, NIC and video controllers. -
Page 122: Bios Revision
BIOS CMOS LEAR Note: After importing the BIOS settings, you must do system full reset (DC cycle) to enable the new BIOS settings. Note: AMI Setup Control Environment (AMISCE) is a command line tool which provides an easy way to update NVRAM variables, extract variables directly from the BIOS, change settings using either a text editor or a setup program and update the BIOS. -
Page 123: Clear Password
BIOS LEAR ASSWORD Clear Password To clear the password by jumper, use the following steps: 1. Power down the system. 2. Locate the switch SW3 on the mainboard. 3. Adjust the PASSWD CLEAR DIP from off to on. DIP Jumper Settings BIT1: (Reserved) BIT1: CMOS CLEAR Off (Open): Normal (Default) -
Page 124: Out-Of-Band (Offline) Update (Via Yafuflash Tool)
BIOS IRMWARE PDATE NSTRUCTIONS Note: Out-of-band (OOB) means the FW update is performed remotely, User executes the FW update which the FW image and command will be delivered to BMC through the network interface. BMC receives the command and image to perform the firmware update. -
Page 125: Out-Of-Band (Offline) Update (Via Bmc Webui)
BIOS IRMWARE PDATE NSTRUCTIONS Enter command “ubios_ip.bat <BMC IP> XXX.bin” Out-of-band (Offline) update (via BMC WebUI) Make sure the the server is powered off and keep the AC power source connected. Connect one end of network cable to the Server BMC NIC port and the other end ... -
Page 126: In-Band (Online) Update (Via Afuflash Tool)
BIOS IRMWARE PDATE NSTRUCTIONS Browse BIOS XXX.BIN file to upload and Click the Preserve BIOS NVRAM/ME Region and Press “Flash selected section” option. After a period of time, you will find the BIOS firmware upgrade complete with 100% done. In-band (Online) update (via AFUFLASH tool) EFI-Shell environment Follow the steps shown as below to update both BIOS and ME FW:... - Page 127 BIOS IRMWARE PDATE NSTRUCTIONS Move to the USB file system for example FS0: and CD the BIOS release package folder. Execute nsh file “BIOS_efi64.nsh” to update BIOS. Execute nsh file “ME_efi64.nsh” to update ME FW. After the firmware update is complete, perform a DC cycle, the new BIOS/ME FW ...
- Page 128 BIOS IRMWARE PDATE NSTRUCTIONS Then, enter setup, and press <F9> to load the default and save before any test run. x64 Windows environment Follow the steps below to update both the BIOS and ME FW: Power on the system and boot into the Windows OS. ...
- Page 129 BIOS IRMWARE PDATE NSTRUCTIONS Unzip the release package to the same folder in the HDD. Open Terminal in the release package folder, or change to the folder with release package located. Execute batch file “BIOS_lnx64.sh” to update BIOS. ...
-
Page 130: Server Management
BIOS ERVER ANAGEMENT 4.3 Server Management The BIOS supports many standard-based server management features and several propri- etary features. The Intelligent Platform Management Interface (IPMI) is an industry stan- dard and defines standardized, abstracted interfaces to platform management hardware. The BIOS implements many proprietary features that are allowed by the IPMI specification, but these features are outside the scope of the IPMI specification. -
Page 131: Limitations
BIOS ONSOLE EDIRECTION Table 4.1: Keystroke Mappings (Continued) ANSI E SCAPE EQUENCE INDOWS LATFORM ESIGN <ESC>8 <ESC>9 <ESC>0 <ESC>! <ESC>@ Home <ESC>[H <ESC>h <ESC>[K <ESC>k <ESC>+ <ESC>- Page Up <ESC>? Page Down <ESC>/ Reset <ESC>R<ESC>r<ESC>R Standalone <Esc> Key for Headless Operation The Microsoft Headless Design Guidelines describes a specific implementation for the <Esc>... -
Page 132: Network Bios Support
BIOS BIOS S ETWORK UPPORT Network BIOS Support PXE Boot The PXE implementation on this platform is compliant with UEFI Specification 2.5, Section 21 Network Protocols - SNP, PXE and BIS. To utilize this, the user must load EFI Simple Net- work Protocol driver and the UNDI driver specific for the network interface card being used. -
Page 133: Checkpoints
BIOS HECKPOINTS TCP reliability and HTTP load balancing. Moreover, unlike PXE only can get NBP from DHCP server, HTTP boot has the ability to get NBP from remote HTTP server as long as right URL. Figure 4-9. HTTP BOOT Device in BIOS Setup Menu Checkpoints A checkpoint is either a byte or word value output to Debug port. -
Page 134: Standard Checkpoint
BIOS HECKPOINTS Standard Checkpoint The Standard checkpoints are the largest set of checkpoints during the BIOS pre-boot pro- cess. The following tables describe the type of checkpoints that may occur during the POST portion of the BIOS: Table 4.2: Checkpoint Range Description TATUS ESCRIPTION ANGE... - Page 135 BIOS HECKPOINTS Table 4.3: SEC Phase (Continued) TATUS ESCRIPTION 0x0F Microcode not loaded PEI Phase Table 4.4: PEI Phase TATUS ESCRIPTION Progress Codes 0x10 PEI Core is started 0x11 Pre-memory CPU initialization is started 0x12 Pre-memory CPU initialization (CPU module specific) 0x13 Pre-memory CPU initialization (CPU module specific) 0x14...
- Page 136 BIOS HECKPOINTS Table 4.4: PEI Phase (Continued) TATUS ESCRIPTION 0x3A Post-Memory North Bridge initialization (North Bridge module specific) 0x3B Post-Memory South Bridge initialization is started 0x3C Post-Memory South Bridge initialization (South Bridge module specific) 0x3D Post-Memory South Bridge initialization (South Bridge module specific) 0x3E Post-Memory South Bridge initialization (South Bridge module specific) 0x3F –...
- Page 137 BIOS HECKPOINTS DXE Phase Table 4.5: DXE Phase TATUS ESCRIPTION 0x60 DXE Core is started 0x61 NVRAM initialization 0x62 Installation of the South Bridge Runtime Services 0x63 CPU DXE initialization is started 0x64 CPU DXE initialization (CPU module specific) 0x65 CPU DXE initialization (CPU module specific) 0x66 CPU DXE initialization (CPU module specific)
- Page 138 BIOS HECKPOINTS Table 4.5: DXE Phase (Continued) TATUS ESCRIPTION 0x97 Console Output devices connect 0x98 Console input devices connect 0x99 Super IO Initialization 0x9A USB initialization is started 0x9B USB Reset 0x9C USB Detect 0x9D USB Enable 0x9E – 0x9F Reserved for future AMI codes 0xA0 IDE initialization is started...
-
Page 139: Acpi/Asl Checkpoints
BIOS HECKPOINTS Table 4.5: DXE Phase (Continued) TATUS ESCRIPTION 0xD1 North Bridge initialization error 0xD2 South Bridge initialization error 0xD3 Some of the Architectural Protocols are not available 0xD4 PCI resource allocation error. Out of Resources 0xD5 No Space for Legacy Option ROM 0xD6 No Console Output Devices are found 0xD7... - Page 140 BIOS HECKPOINTS Table 5: Extra Checkpoint Ranges (Continued) TATUS ESCRIPTION 0x1D – 0x2A Pre-memory initialization codes 0x3F – 0x4E PEI post memory initialization codes 0x80 – 0x8F DXE initialization codes 0xC0 – 0xCF BDS initialization codes 4-35...
-
Page 141: Bmc
Chapter 5 This section provides information and key features of BMC (Baseboard Management Controller). -
Page 142: Server Management Software
ERVER ANAGEMENT OFTWARE 5.1 Server Management Software Server System Overview In a server system, BMC is an independent system of the host server system. This indepen- dent system has its own processor and memory; the host system can be managed by the BMC system even if the host hardware or OS hangs or is unable to function. -
Page 143: Front Panel User Interface
RONT ANEL NTERFACE Front Panel User Interface The BMC provides control panel interface functionality including indicators (Power/Status and Identify LEDs) and buttons (Power/ID). Power Button The Power button allows to control the system status. Reset Button The Reset button allows to reset the system. ID Button The control panel Chassis Identify button toggles the state of the Chassis ID LED. -
Page 144: Session And User
LAN I NTERFACE Get and Set system boot options Get Field Replaceable Unit (FRU) information Get System Event Log (SEL) entries Get Sensor Data Records (SDR) Set Platform Event Filtering (PEF) Set LAN configurations Session and User This BMC supports ten (10) user accounts. -
Page 145: Nmi
ERIAL The system supports NMI assertion, there are three possible NMI assertion sources, Chassis Control command, PEF action, and Watchdog timer pre-interrupt. It is not available at BIOS POST period. Serial Over LAN BMC supports 1 IPMI (Spec v2.0) specific SOL session. BMC supports redirect data from UART interface. -
Page 146: Firmware Update
IRMWARE PDATE PEF Startup Delay and Last Processed Event tracking is not supported. PEF table lookup isn’t correlated to log SEL to SEL Repository. Serial Alerting is no support. Firmware Update The BMC will allow users to upgrade firmware image on following entities: ... -
Page 147: Bmc Firmware Update
BMC F IRMWARE PDATE 5.2 BMC Firmware Update This section provides guidelines on BMC firmware update process in Linux and Windows systems. Note: In-band means user performs firmware update on the system which has installed Windows/Linux operating system. Using the in-band update, the firmware pack- age is readable in the platform system interface so that the user can execute update script to perform firmware update. -
Page 148: Out-Of-Band (Offline) Update (Via Bmc Webui)
BMC F IRMWARE PDATE Out-of-band (Offline) update (via BMC WebUI) Unzip the BMC firmware package to USB flash drive and rename the folder name to XXXX (XXXX that mean BMC version). Login BMC WEBUI via http protocol, enter 192.168.0.120 in IE (Internet Explorer)/ ... -
Page 149: In-Band (Online) Update (Via Yafuflash Tool)
BMC F IRMWARE PDATE string to update BMCfrimware. Click “Start firmware update” process the firmware update. In-band (Online) update (via YAFUFLASH tool) Get the BMC firmware package named s7dv0350.zip. Unzip package s7dv0350.zip to \tmp\s7dv0350 in Linux (or C:\s7dv0350 for Win- ... - Page 150 BMC F IRMWARE PDATE Windows: Launch a cmd.exe console and change directory into the folder of C:\s7dv0350. run "win.bat" ...
-
Page 151: Smash
SMASH 5.3 SMASH SMASH is a tool that allows you to use Secure Shell (SSH) to log in to the embedded Linux of BMC from a remote terminal and gather information as well as give you control over things like power resets, power off. The basic structure is shown as below: Figure 5-1. -
Page 152: System Level Commands
SMASH Input command in Linux: ssh sysadmin@<Server IP> Figure 5-2. SMASH Activity Diagram Here are the system level and BMC level commands. System Level Commands The system level commands provide you the information and power state control. Table 5.2: Targets and Actions UPPORTED ACTIONS ELATED ARGETS... - Page 153 SMASH start /system Power-off system stop /system Power-reset system reset /system Display all system voltage show /system /voltage Display all system fan show /system /fan Display all system temperature show /system /temp Display all system power supply show /system /power Display power supply unit fan direction show /system /power /system...
- Page 154 ROPERTY ALID ALUE CCESS ESCRIPTION Dynamically to display system MAC address (only available for platform after Grantley) LOM/OCP (System MAC Address) Mezzanine/Hitachi Mezzanine/PCIe PowerIsOFF powerIsOFF indicates the system power is off ChassisStatus powerIsON PowerIsON indicates the system power is on.
- Page 155 SMASH Table 5.4: /system/voltage ROPERTY ALID ALUE CCESS ESCRIPTION indicates the status not available/unknown (typically because system power is OFF) indicates the monitored parameters within normal operating ranges Sensor name list of vlotage nonCritical nonCritical critical indicates the hardware outside normal operating range critical indicates the hardware exceeding specified...
- Page 156 SMASH Table 5.6: /system/temp ROPERTY ALID ALUE CCESS ESCRIPTION indicates the status not available/unknown (typically because system power is OFF) indicates the monitored parameters within normal operating ranges Sensor name list of temperature nonCritical nonCritical critical indicates the hardware outside normal operating range critical indicates the hardware exceeding specified...
-
Page 157: Bmc Information
SMASH Q&A: Q1: My system supports two power supply slots and only one power supply unit con- nected. What is the other power supply status? A1: The other power supply status is " AllDeasserted ". Q2: My system supports two power supply slots and two power supply units connected. But only one power cord plugged. - Page 158 SMASH Table 5.9: /sp ROPERTY ALID ALUE CCESS ESCRIPTION BMCVersion Display BMC firmware revision BMCGUID Display BMC GUID ServerIdentify Configuring server identify LED blinking Display the NIC physical address used by server BMCMAC management agent 5-17...
-
Page 159: Web Graphical User Interface (Gui)
(GUI) RAPHICAL NTERFACE 5.4 Web Graphical User Interface (GUI) Using the Web GUI The BMC firmware features an embedded web server enabling users to connect to the BMC using a Web browser (e.g. Microsoft Internet Explorer). The Web GUI shows system information, system events, system status of managed servers, and other system-related information. - Page 160 OGIN The OEM Proprietary, Administrator and Operator privilege levels are authorized to login to the Web interface. The User and No Access privilege levels do not allow access through the BMC web GUI. Figure 5-5. Login Web Page I Forgot My Password: If you forget your password, you can generate a new one with this link.
-
Page 161: Quick Button And Logged-In User
UICK UTTON AND OGGED Power Control, Maintenance and Sign out. Quick Button and Logged-in User are located at the upper right of the main web page. Menu Bar Quick Buttons and Logged-in User Figure 5-6. Main Web Page Quick Button and Logged-in User Four Quick Buttons User Information Figure 5-7. -
Page 162: Four Quick Buttons
UICK UTTON AND OGGED admin: Click the icon to view the User profile and Sign Out. Signout: Click the icon to log out of the Web GUI. Logged-in user and its privilege level There are four kinds of privileges. User: Only valid commands are allowed. ... - Page 163 UICK UTTON AND OGGED Warning: Click the icon to view any BMC notification messages. Click the Help icon on the the web pages for assistance. Table 7: Main Web Page ESCRIPTION Displays the device, network, sensor monitoring and event logs infor- Dashboard mation.
- Page 164 UICK UTTON AND OGGED Note: Command privilege level table defined in IPMI 2.0 Specification Appendix G – Command Assignments. According to IPMI 2.0 Specification, Chassis Identify command is allowed for Operator privilege. Because this command didn’t change BMC configuration, just to trigger Identify LED used to display where Server is. So it is expected behavior.
-
Page 165: Connectors And Jumpers
Connectors and Jumpers Chapter 6 This section provides position and configuration guidance for the connectors and jumpers. -
Page 166: Mainboard
ONNECTORS AND UMPERS ONNECTORS AND UMPERS 6.1 Connectors and Jumpers Mainboard Connectors See the following figure for information on mainboard connectors. Slimline slot 12 (PCIe x8) AirMax slot 13 (PCIe x16) SAS_HD_A Slimline slot 14 (PCIe x8) Slimline slot 15 (PCIe x8) AirMax slot 16 (PCIe x16) SAS_HD_B Slimline slot 17 (PCIe x8) -
Page 167: Jumpers
ONNECTORS AND UMPERS AINBOARD Jumpers See the following figure for information on mainboard jumpers. DIP Jumper Settings BIT1: (Reserved) BIT1: CMOS CLEAR Off (Open): Normal (Default) On (Short): RTC Reset BIT2: PASSWD CLEAR BIT2: ME FW UPDATE Off (Open): Normal (Default) Off (Open): Normal (Default) On (Short): Password Clear On (Short): ME Force Update... - Page 168 ONNECTORS AND UMPERS AINBOARD...
-
Page 169: Troubleshooting
Troubleshooting Chapter 7 This section provides guidance for troubleshooting errors and hardware failure notifications. -
Page 170: Server Boot Issue Topics
ROUBLESHOOTING ROUBLESHOOTING 7.1 Troubleshooting This section provides information for monitoring and identifing of system faults. Server Boot Issue Topics System does not Boot after initial installation: Power Cord Not Plugged In Processor Issues Memory Issues Power Supply, Chassis and Fan Issues ... - Page 171 Check fan speed in WEBUI & event log to find out if there are any defective fans. If a failure happens, contact your Hitachi sales representative for assistance. Cable Issues Ensure that all cable connections, both internal and external, are attached correctly and securely.
-
Page 172: System Does Not Boot After Configuration Changes
ROUBLESHOOTING ERVER SSUE OPICS If the problem occurs even after removing the nonessential components, the problem has to be with the server board, power supply, memory, or processor. Defective Components Defective components, especially processor and memory, can cause system boot issues. Swap the memory modules with known good memory. -
Page 173: Installation Problems
ROUBLESHOOTING ERVER SSUE OPICS 3. Adjust CMOS clear DIP from Off to On for a few seconds. DIP Jumper Settings BIT1: (Reserved) BIT1: CMOS CLEAR Off (Open): Normal (Default) On (Short): RTC Reset BIT2: PASSWD CLEAR BIT2: ME FW UPDATE Off (Open): Normal (Default) Off (Open): Normal (Default) On (Short): Password Clear... - Page 174 Hitachi Vantara Corporate Headquarters Regional Contact Information 2845 Lafayette Street Americas: +1 866 374 5822 or info@hitachivantara.com Santa Clara, CA 95050-2639 USA Europe, Middle East and Africa: +44 (0) 1753 618000 or info.emea@hitachivantara.com www.HitachiVantara.com Asia Pacific: +852 3189 7900 or info.marketing.apac@hitachivantara.com...
Need help?
Do you have a question about the DS240 and is the answer not in the manual?
Questions and answers