
Related Manuals for Crestron PC-200


Summary of Contents for Crestron PC-200
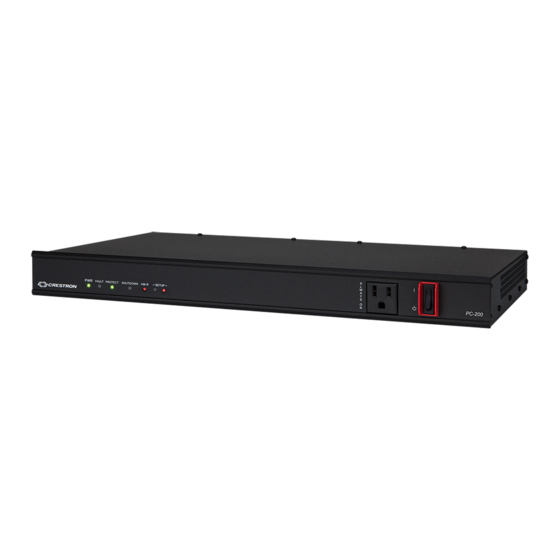
- Page 1 PC-200/PC-300 Energy Monitoring Power Conditioner & Controller Supplemental Guide Crestron Electronics, Inc.
- Page 2 Crestron Electronics, Inc. in the United States and/or other countries. Other trademarks, registered trademarks, and trade names may be used in this document to refer to either the entities claiming the marks and names or their products. Crestron disclaims any proprietary interest in the marks and names of others. Crestron is not responsible for errors in typography or photography.
-
Page 3: Table Of Contents
Contents Introduction ........................... 1 Configuration via Web Interface ..................... 2 Access the Configuration Interface ....................... 2 Create a New Account ..........................3 Navigate the Configuration Interface ....................5 Device Status ............................5 Device Settings ............................ 7 System Status ............................ 11 System Settings .......................... -
Page 5: Introduction
The eight outlets on the rear of the PC-200 may be controlled and monitored via a web browser interface. The eight outlets on the rear of the PC-300 may be individually controlled and monitored via the built-in LCD display or a web browser interface. -
Page 6: Configuration Via Web Interface
∙ Use Crestron Toolbox™ software to access firmware updates and to modify the Ethernet settings and the IP table. Crestron Toolbox may also be used to connect the power conditioner to a control system, allowing the power conditioner to be controlled with a Crestron Studio®... -
Page 7: Create A New Account
After the account is created, the Login page is displayed each time the configuration utility is accessed. Enter the account username and password to log in to the utility. Supplemental Guide – DOC. 7874E PC-200/PC-300: Power Conditioner & Controller • 3... - Page 8 Do not lose the username or password for the configuration interface account. If the username or password is lost, the power conditioner must be restored to factory settings to restore access. 4 • PC-200/PC-300: Power Conditioner & Controller Supplemental Guide – DOC. 7874E...
-
Page 9: Navigate The Configuration Interface
Use the Device Status page to view status information about the power conditioner. These settings are configured using the Device Settings page. For more information, refer to page 7. Supplemental Guide – DOC. 7874E PC-200/PC-300: Power Conditioner & Controller • 5... - Page 10 Secondary DNS: The secondary DNS address used to resolve the power • conditioner domain to an IP address if the primary DNS fails Firmware Version: The firmware version running on the power conditioner • 6 • PC-200/PC-300: Power Conditioner & Controller Supplemental Guide – DOC. 7874E...
-
Page 11: Device Settings
Click Reboot to reboot the power conditioner. • NOTE: Some device settings, including IP addresses, DNS options, IP table, and login information, require the power conditioner to be rebooted before they take effect. Supplemental Guide – DOC. 7874E PC-200/PC-300: Power Conditioner & Controller • 7... - Page 12 Subnet Mask: Enter a subnet mask address for the power conditioner. The • default address is "255.255.255.0". Default Gateway: Enter a default gateway address for the gateway router. The • default address is "0.0.0.0". 8 • PC-200/PC-300: Power Conditioner & Controller Supplemental Guide – DOC. 7874E...
- Page 13 Use the settings provided in the DNS Options section to edit the power conditioner domain name and DNS addresses. NOTE: The power conditioner hostname and domain name may be configured only by using the Text Console tool in Crestron Toolbox. Device Settings - DNS Options Hostname: The power conditioner hostname •...
- Page 14 Hostname or IP Address fields. Online: Reports whether the control system connected via IP is online • CipID: Enter a CIP (Crestron Internet Protocol ID for the control system in • hexadecimal format. Valid values range from 0x03 to 0xFE.
-
Page 15: System Status
Over Voltage: Reports whether the voltage level on the ac input has gone over • the set limit Over Current: Reports whether the current level on the ac outputs has gone over • the set limit Supplemental Guide – DOC. 7874E PC-200/PC-300: Power Conditioner & Controller • 11... - Page 16 Temperature Over Range: Reports whether the power conditioner temperature • has gone over the set limit Input Voltage: Displays the current input voltage level • Temperature: Displays the device temperature in Fahrenheit or Celsius. • 12 • PC-200/PC-300: Power Conditioner & Controller Supplemental Guide – DOC. 7874E...
-
Page 17: System Settings
System Settings Click System Settings in the navigation menu to display the System Settings page. The System Settings page for a PC-300 is shown below. System Settings Page (PC-300) Supplemental Guide – DOC. 7874E PC-200/PC-300: Power Conditioner & Controller • 13... - Page 18 A filled check box indicates that wiring fault protection is enabled. NOTE: A warning message is displayed after wiring fault detection is disabled to alert the user of the risks. Accept the warning message to continue. 14 • PC-200/PC-300: Power Conditioner & Controller Supplemental Guide – DOC. 7874E...
- Page 19 NOTE: For the PC-300, each of the eight rear outlets may be assigned to ping a different device hostname or IP address. For the PC-200, rear outlets 1–6 may be assigned to ping a different device hostname or IP address.
- Page 20 MyCrestron portal: Opens the MyCrestron portal to complete the device • registration process. For instructions on connecting to MyCrestron, refer to "Appendix B: Register the Device with MyCrestron" on page 44. 16 • PC-200/PC-300: Power Conditioner & Controller Supplemental Guide – DOC. 7874E...
-
Page 21: Outlets
The Outlets page differs between the PC-200 and PC-300. These differences are described in the following sections. Outlets (PC-200) The PC-200 Outlets page allows for grouped rear outlet control and monitoring per outlet bank. For an illustration showing the PC-200 outlet banks, refer to the PC-200/PC-300 DO Guide (Doc. 7837). - Page 22 Click Cycle all outlets to cycle the power for all outlet banks: • The PC-200 powers off outlet banks for the duration set for the Power cycle delay setting in the System Settings page. Refer to page 14 or more information.
- Page 23 • Click On to power on the outlet bank. Click Cycle to cycle power to the outlet bank. The PC-200 powers off the outlet bank for the duration set for the Power cycle delay setting in the System Settings page. Refer to page 14 for more information.
- Page 24 The PC-300 powers off outlets for the duration set for the Power cycle delay setting in the System Settings page. Refer to page 14 for more information. The PC-200 powers on outlets after the duration set for the associated Startup Delay (s) setting for each outlet.
-
Page 25: Event Logs
Last Modified: The date and time that the event log entry was last modified • NOTE: Event logs may be further customized by using the SIMPL Debugger tool in Crestron Toolbox. For more information, refer to the Crestron Toolbox help file. Supplemental Guide – DOC. 7874E PC-200/PC-300: Power Conditioner & Controller • 21... -
Page 26: Tls Settings
Filesize: The size of the security certificate file in bytes • Last Modified: The date and time that the security certificate was last modified • 22 • PC-200/PC-300: Power Conditioner & Controller Supplemental Guide – DOC. 7874E... -
Page 27: Configuration Via Lcd Display (Pc-300)
For increased security, creating a new passcode is strongly recommended. Navigate to Setup > System > Passcode to create a new passcode. For more information, refer to page 36. Supplemental Guide – DOC. 7874E PC-200/PC-300: Power Conditioner & Controller • 23... -
Page 28: Network
The Network screen provides selections to configure general network settings and DNS server settings. This screen also provides a selection for viewing the network status. Press BACK to return to the Setup screen. 24 • PC-200/PC-300: Power Conditioner & Controller Supplemental Guide – DOC. 7874E... -
Page 29: Network Status
The following basic network information is provided: Link: Reports whether the PC-300 is connected to a network • IP Address: The PC-300 IP address • Press BACK to return to the Network Status screen. Supplemental Guide – DOC. 7874E PC-200/PC-300: Power Conditioner & Controller • 25... -
Page 30: Dhcp/Network Config
If DHCP is enabled, IP does not function until a reply has been received from the server. The power conditioner broadcasts requests for an IP address periodically. If DHCP is selected after being turned off, the Network Config screen is displayed. 26 • PC-200/PC-300: Power Conditioner & Controller Supplemental Guide – DOC. 7874E... - Page 31 Press BACK to cancel and to return to the Network Config screen. • Subnet Mask Select Subnet Mask from the Network Config screen to display the Subnet Mask screen. Supplemental Guide – DOC. 7874E PC-200/PC-300: Power Conditioner & Controller • 27...
- Page 32 Press the center button on the navigation pad to save the new gateway IP • address and to return to the Network Config screen. Press BACK to cancel and to return to the Network Config screen. • 28 • PC-200/PC-300: Power Conditioner & Controller Supplemental Guide – DOC. 7874E...
-
Page 33: Dns 1
Use the DNS 2 screen to enter a secondary DNS address for the touch screen. The DNS 2 screen and controls are similar to the DNS 1 screen. Supplemental Guide – DOC. 7874E PC-200/PC-300: Power Conditioner & Controller • 29... -
Page 34: System
LCD display outlet control. Temperature High Limit Select Temp. Limit from the Control screen to display the Temperature High Limit screen. Temperature High Limit Screen 30 • PC-200/PC-300: Power Conditioner & Controller Supplemental Guide – DOC. 7874E... - Page 35 Press the center button on the navigation pad to save the new voltage cutoff • and to return to the Control screen. Press BACK to cancel and to return to the Control screen. • Supplemental Guide – DOC. 7874E PC-200/PC-300: Power Conditioner & Controller • 31...
- Page 36 Use the Sampling Interval screen to set the sampling interval between event log recordings. NOTE: The Data logging option must be selected on the Control screen to record event logs at the set interval. 32 • PC-200/PC-300: Power Conditioner & Controller Supplemental Guide – DOC. 7874E...
- Page 37 NOTE: The ping monitor becomes temporarily inactive when the associated outlet is switched off manually. Supplemental Guide – DOC. 7874E PC-200/PC-300: Power Conditioner & Controller • 33...
- Page 38 Press BACK to cancel and to return to the Ping Settings screen. • Ping Target Select an outlet from the Ping Settings screen to display the Ping Target screen for the outlet. 34 • PC-200/PC-300: Power Conditioner & Controller Supplemental Guide – DOC. 7874E...
- Page 39 Outlets selection to the LCD display main menu. A check box is shown next to the Top menu outlet ctl selection if this option is enabled. For more information on outlet control via the LCD display, refer to page 38. Supplemental Guide – DOC. 7874E PC-200/PC-300: Power Conditioner & Controller • 35...
-
Page 40: Passcode
Press BACK to return to the PassCode screen. • Reset System Select Reset from the System screen to display the Reset System screen. Reset System Screen 36 • PC-200/PC-300: Power Conditioner & Controller Supplemental Guide – DOC. 7874E... -
Page 41: Restore Defaults
• About Select About from the System screen to display the About screen. About Screen The About screen displays the current device firmware version and the panel version. Supplemental Guide – DOC. 7874E PC-200/PC-300: Power Conditioner & Controller • 37... -
Page 42: Outlets
Select All Off to power all outlets off at once. If all outlets are powered off, • select All On to power all outlets on at once. Press BACK to return to the Outlets screen. • 38 • PC-200/PC-300: Power Conditioner & Controller Supplemental Guide – DOC. 7874E... -
Page 43: Start Up Delay
Press the center button on the navigation pad to enter the new start up delay • time. Press BACK to cancel and to return to the System screen. • Supplemental Guide – DOC. 7874E PC-200/PC-300: Power Conditioner & Controller • 39... -
Page 44: Monitoring Via The Lcd Display (Pc-300)
Use the Monitor screen to monitor device faults, outlet data, and system sensor readings. The LCD display may also be turned on or off by selecting Display On/Off. 40 • PC-200/PC-300: Power Conditioner & Controller Supplemental Guide – DOC. 7874E... -
Page 45: Faults
Select Clear Faults to reset any fault sensors that have been tripped. An Are You Sure? screen is displayed. Select Yes to reset the fault sensors or Cancel to cancel. Press BACK to return to the Monitor screen. Supplemental Guide – DOC. 7874E PC-200/PC-300: Power Conditioner & Controller • 41... -
Page 46: Outlets (Monitoring)
Total current: Displays the combined current level of all outlets in amperes • Temperature: Displays the device temperature in the chosen temperature unit • Press BACK to return to the Monitor screen. 42 • PC-200/PC-300: Power Conditioner & Controller Supplemental Guide – DOC. 7874E... -
Page 47: Appendix A: Restore The Device To Factory Defaults
Defaults If power conditioner must be restored to its factory default settings, the front panel buttons may be used to initiate the restore. The front panel button sequences for restoring the PC-200 and PC-300 are provided below. CAUTION: After a factory reset, all device, system, and outlet settings are also reset. -
Page 48: Appendix B: Register The Device With Mycrestron
Appendix B: Register the Device with MyCrestron The PC-200 and PC-300 may be used as remote power solutions via the MyCrestron Dynamic DNS service. Once the power conditioner has been registered with a MyCrestron account, the power conditioner may be controlled and monitored from a mobile device directly through the MyCrestron portal. - Page 49 Once the power conditioner is registered, select it from the Device List page to view device settings and to toggle and cycle outlet power. The device settings page for a PC-300 is shown on the following page as an example. Supplemental Guide – DOC. 7874E PC-200/PC-300: Power Conditioner & Controller • 45...
- Page 50 • Click the larger cycling button near the top left of the page to cycle the power • for all controlled outlets. 46 • PC-200/PC-300: Power Conditioner & Controller Supplemental Guide – DOC. 7874E...
-
Page 51: Appendix C: Device Limits Operational Notes
Once a temperature over range condition occurs, the temperature must drop two • degrees Celsius below the temperature cutoff setting before power is restored to the controlled outlets. Supplemental Guide – DOC. 7874E PC-200/PC-300: Power Conditioner & Controller • 47... - Page 52 Crestron Electronics, Inc. Supplemental Guide – DOC. 7874E 15 Volvo Drive, Rockleigh, NJ 07647 (2045741) Tel: 888.CRESTRON 10.18 Fax: 201.767.7576 Specifications subject to www.crestron.com change without notice.
Need help?
Do you have a question about the PC-200 and is the answer not in the manual?
Questions and answers