Advertisement
Quick Links
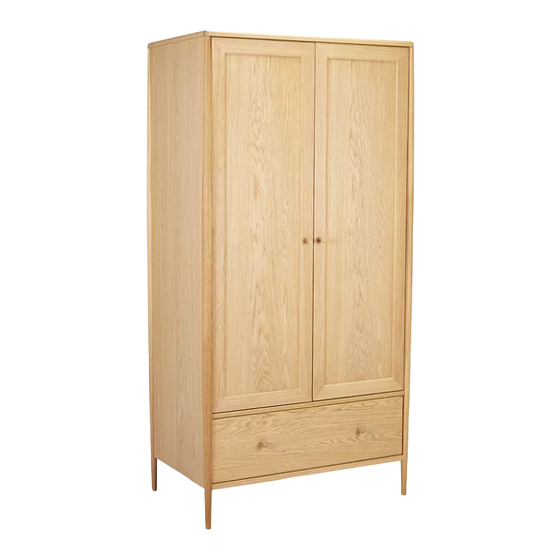
John Lewis
for
Shalstone 2 Door Wardrobe
Stock numbers 80311511
Thank you for purchasing this Shalstone 2 Door Wardrobe. Please read the instructions carefully before use
to ensure safe and satisfactory operation of this product
WARNING. In order to prevent overturning this product must be used with the wall attachment device
provided
Necessary Tools
This item is HEAVY
Pre-assembly preparation
Please ensure instructions are read in full before attempting to assemble this product.
Please check the pack contents before attempting to assemle this product. A full checklist of components is
given in this leaflet. If any components are missing, please contact the retailer from whom you bought this
product.
HEAVY
TAKE CARE
This product is
it should be assembled as near as possible to the point of use.
,
WHEN LIFTING
to avoid personal injury and (or) damage to the product.
1 HOUR
2 PEOPLE
This product is product takes approximately
assemble with
TO
.
SMALL ITEMS
KEPT AWAY FROM YOUNG
The fıttings pack contains
which should be
CHILDREN.
Page 1of 12
Advertisement

Subscribe to Our Youtube Channel
Related Manuals for John Lewis ercol Shalstone 80311511


Summary of Contents for John Lewis ercol Shalstone 80311511
- Page 1 John Lewis Shalstone 2 Door Wardrobe Stock numbers 80311511 Thank you for purchasing this Shalstone 2 Door Wardrobe. Please read the instructions carefully before use to ensure safe and satisfactory operation of this product WARNING. In order to prevent overturning this product must be used with the wall attachment device...
- Page 2 Fittings and parts checklist Top Panel x 1 Cam Heads x 10 pcs Base Panel x 1 Cam Rods x 10 pcs Back Panel x 1 Wooden Dowels x 16 pcs L/H Side Panel x 1 Hinge x 2 pcs R/H Side Panel x 1 Soft Closing Hinge x 4 pcs Drawer x 1...
- Page 3 Step 1 RH x LH panels to be assembled before moving to step 2. Screw 5x cam rods ( B ) into the holes. Insert the 2x wooden dowels ( C ) in to the holes on the side panel by using a soft hammer as shown. Repeat same step for the other panel.
- Page 4 Step 3 Put 8x cam heads ( A ) into the holes as shown. Insert the 4x wooden dowels ( C ) into the holes by using a soft hammer as shown. Step 4 Attach the wooden rail support (L) to the top panel ( 1 ) by using 1x screw ( F ) as shown. Note that the screw must be screwed from the top surface of the panel where there is a countersink on the hole .
- Page 5 Step 6 With the aid of an assistant, locate the atached base and back panel ( 2 ) ( 3 ) and bottom rail ( 8 ) on to the LH side panel ( 4 ) using cams and dowels provided. Tighten the 5x cam heads ( 1 ). Step 7 With the aid of an assistant, locate the R/H side panel ( 5 ), on to the carcass using cams and dowels provided.
- Page 6 Step 8 Slide the wooden hanging rail ( 7 ) through the hole of wooden rail support ( K ) on the top panel ( 1 ) as shown. Step 9 Attach top panel ( 1 ) to the carcass as shown. Tighten 6x Allen head screws ( I ) by using Allen key provided ( K ).
- Page 7 Step 10 Put into place the back panel ( 11 ). Attach the vertical back rail ( 12 ). Join 2x back panels ( 11 ) with vertical back rail ( 12 ) locate in recess at rear of cabinet as shown. Note that it would be better to put a styrofoam or a cardboard piece under the robe to protect its front surface from sharp objects.
- Page 8 Step 11 With uneven floors you may need to align the wardrobe. Please check the alignment of the wardrobe before screwing the back panels and vertical rail. Screw the back panels by using 6x screws ( H ), screw vertical back rail by using 1x screw ( J ) from the back and 1x screw ( F ) from the top panel as shown. MEASURE &...
- Page 9 Step 12 Lay the doors onto a smooth flat surface so the holes are facing upwards. Screw 4x soft closing hinges (E) to top and bottom, 2x hinges (D) to the middle of the doors using 12x screws ( G ) as shown. See Clip top BLUMOTION instructions for soft closing hinge details.
- Page 10 Step 14 Please place the drawer into the unit as shown below. Step 15 Assembly is complete. Page 10 of 12...
-
Page 11: Wall Fixing
Wall fixing - - ‘Only fixing device and screws for fixing to product supplied. if in doubt seek professional advice. No wall screw or nylon wall plug’. Cavity wall Wood Brick or Masonry Special toggle wall plugas are If fixing to wood make sure Use an appropriate wall plug needed. -
Page 12: Safety Instructions
Care and Maintenance Wood Furniture Wood displays different grain patterns depending on which way it is cut - for example, the 'medullary ray' which can appear on oak furniture is a mark of good quality timber - these are just characteristics of the natural beauty of wood.
Need help?
Do you have a question about the ercol Shalstone 80311511 and is the answer not in the manual?
Questions and answers