Table of Contents
Advertisement
Advertisement
Table of Contents

Related Manuals for Fermax MEET NEO 7


Summary of Contents for Fermax MEET NEO 7
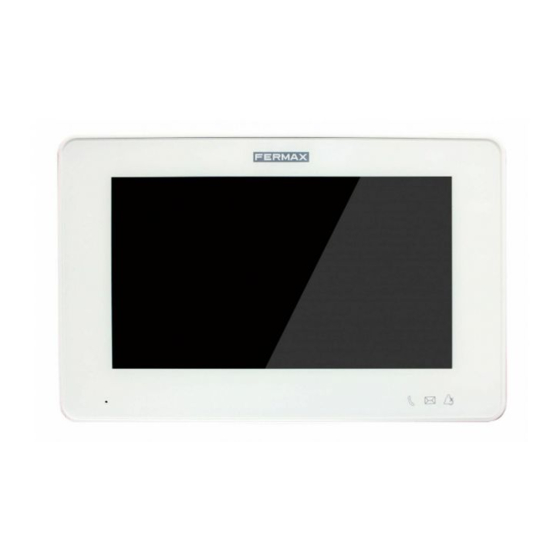
- Page 1 REF. 14501 NEO MONITOR USER MANUAL...
- Page 2 Technical publication for information purposes edited by FERMAX ELECTRÓNICA S.A.U. FERMAX ELECTRÓNICA applies a continuous improvement policy, therefore it reserves the right to modify the contents of this document, as well as the product features hereof at any time and without prior notice. Any modification will be reflected in subsequent editions of this document.
-
Page 3: Table Of Contents
INDEX 1 DESCRIPTION ............................4 2 CALL RECEPTION ........................... 5 Calling from a panel........................5 Call from the door of the apartment/home (doorbell) ..............7 Calls from another home/apartment .................... 7 Call from a concierge ........................7 3 MAKING CALLS ............................. 8 Call concierge .......................... -
Page 4: Description
1 DESCRIPTION The following document is the User Manual for the NEO 7” monitor. Ref. 14501 and firmware V03.00. Alarm Mode Date and time Network status Missed calls Do not disturb Received messages The layout and quantity of icons in the main menu depends on the installer configuration. -
Page 5: Call Reception
2 CALL RECEPTION Calling from a panel NEO monitors can receive calls from both the outdoor panels of the block corresponding to the apartment, as well as from any general entrance of the condominium. During the call it is possible to open the access door, as well as any other additional doors that may have been installed (gate, garage, etc.) up to a maximum of 4. - Page 6 Pick up/accept call You can establish hands-free communication with the caller. The monitor interface will display an icon for volume control. Disconnect microphone Volume indicator Volume settings Exit Display of additional cameras If additional cameras are installed, an icon with few dots will appear on the control panel.
-
Page 7: Call From The Door Of The Apartment/Home (Doorbell)
Call from the door of the apartment/home (doorbell) It is possible to receive calls via a button installed next to the door of the home/apartment itself. This call will sound different from other calls (ding-dong). Calls from another home/apartment It is possible to receive a call from the monitor of another home/apartment in the condominium/building, or even from any other building in the development. -
Page 8: Making Calls
3 MAKING CALLS Call concierge It is possible to call any available concierge in the building or even the condominium as well. To do this, touch the icon . A list of all available concierges will appear on the screen after a short SEARCH period of time, while the system is detecting them. -
Page 9: Call Another Residence (Extercom)
Call another residence (EXTERCOM) It is possible to make a call to the monitor of another apartment in the building, or even of any other building in the condominium. Depending on the characteristics of the installation, this functionality may be deactivated. A "FUNCTION NOT ACTIVATED"... -
Page 10: Call Another Monitor In The Same Apartment (Intercom)
Call another monitor in the same apartment (INTERCOM) It is possible to make a call to another monitor installed in the same apartment. Touch the icon to call to another monitor in the same apartment. A list of all available monitors will appear on the screen. -
Page 11: Connection With An Access Panel
Connection with an access panel It is possible to connect with any access panel in the same block, without having called it previously. Depending on the characteristics of the installation, this functionality may be deactivated. A "FUNCTION NOT ACTIVATED" message will be displayed. To connect to a panel, touch the icon . - Page 12 If there are additional doors to open (other than the main door), tapping this icon will display more options at the bottom of the screen. Click on the one corresponding to the door to be opened. MAIN ADDITIONAL DOOR DOORS Pick up/accept call You can establish hands-free communication with the caller.
-
Page 13: Sos Call
NOTE: In the event that a concierge, monitor or panel that is in use is called, an indicator message will appear on the screen. The call duration is limited to 120 seconds. Tap the icon if you want to finish it earlier SOS call It is possible to send a distress call, which will be received both in the concierges and in the Management Post (if it exists) with identification of its origin. -
Page 14: Additional Functions
4 ADDITIONAL FUNCTIONS In addition to the video door phone and intercom functions, the MEET monitor has a number of additional functions, which are listed below. Alarm Function Your NEO monitor is a complete alarm centre which, if any of the detectors it controls are triggered, will generate an alarm signal both on the monitor itself (an acoustic signal and the activation of a device) and in the Concierge Guard Unit device and MEET Management Software in the condominium. - Page 15 OUT MODE In addition to previous alarms, it will also be triggered when it receives an alarm signal from an intrusion detector in the home defined in the OUT MODE. This is the usual mode of operation when no one is home. Touch the icon to arm the alarm system.
- Page 16 Select HOME MODE When in mode, touch the icon A dialling pad will appear. Enter the ALARM PIN number and touch the confirmation icon. You can also enter the DURESS PIN, which will cause the alarm to be deactivated but will in turn send a duress warning to the concierges.
- Page 17 Remaining time The change will be made automatically after 100 seconds to prevent the alarm from being triggered if you need to pass through the protected area. The remaining exit time is displayed. Once the time has elapsed, the monitor will return to the standby screen, displaying an indicator icon in the upper left corner Select SLEEP MODE OR OUT (from HOME MODE) While in mode...
-
Page 18: Lift Control
NOTES: You may have entered the protected zone before accessing the monitor to disarm the alarm. You have a few seconds to perform the disarming process before the alarm is triggered. The default ALARM PIN is 1-2-3-4 and the DURESS PIN is 4-3-2-1. It can be changed to others of your choice as explained in the "ALARM PIN"... -
Page 19: Actuator Control
Actuator Control Remote activation of up to 8 devices from the monitor screen is possible, depending on the installation and system configuration. Touch the icon to access the actuator panel. Devices that have been installed and configured for remote activation will be listed. Touch the line of the device you want to activate. -
Page 20: Call Management
Call Management Each time a call is received, the information about the call is recorded, including date and time received, whether the call was answered, origin of the call and a capture (photo) of the time of the call, if the call was made from an outdoor panel. Touch the icon to access the record of these calls. -
Page 21: Message Management
Message Management The manager or administrator of your community can send text messages to the monitors, individually, in groups or to all the monitors at once. These messages are recorded on the receiving monitor(s), along with information about the date and time received. -
Page 22: Viewing Community Cameras
NOTE: Depending on the characteristics of the installation, this functionality may be deactivated. A “FUNCITON NOT ACTIVATED” message will be display. Viewing Community Cameras If your development has authorised community cameras (in garages, common areas, etc.), you can select and view them at any time from your own monitor. It is also possible to view the video image captured by the different access panels in the development. - Page 23 The display time is limited to 30 seconds. You can use the controls on the side panel if you want to talk or open the door to the person in front of the panel, if applicable. Tap on the icon if you want to view any community camera in the development.
- Page 24 NOTE: In some countries the private viewing of community cameras may be regulated. The ability to use these cameras for display on monitors depends on the installation and configuration of the system. This functionality can be disabled through the advanced configuration of the equipment. -24-...
-
Page 25: Settings
5 SETTINGS It is possible to customize the NEO monitor to suit your personal taste and to set the basic parameters through this section. You can access the SETTINGS menu by touching the icon from the main screen. A new menu will appear, with these options available: -25-... -
Page 26: Ring Tone Settings
Ring tone Settings The NEO monitors have different ring tones you can associate with the different types of calls: PANEL/BLOCK, CONCIERGE and OTHERS. Touch the icon to access the different ring tones. Select the ring tone to be associated with each type of call. After confirmation, the chosen ring tone will be heard. -
Page 27: Date And Time Settings
Date and Time Settings NEO monitors can connect to the internet to synchronise their internal clock with the time offered by a time server. This requires the building installation to have an internet connection. Otherwise, it will be necessary to make this adjustment manually. You still need to indicate the time zone you want to use and adjust the DST parameter when necessary. -
Page 28: Do Not Disturb Function
Do Not Disturb Function You can silence the ring tone of your NEO monitor so that you are not disturbed for a certain period of time. Incoming calls will turn on the screen but will not sound the ring tone. Touch the icon to activate the Do Not Disturb option and set the required time between 1, 2, 4, 8 or 12 hours, or to deactivate it before the programmed time has elapsed. -
Page 29: Change Of Passwords
Change of passwords It is possible to change the ALARM PIN and DISTRESS PIN codes that are used when changing one of the modes of the alarm centre built into the NEO monitor. There is also possible to change the MEET ME password. Tap the icon to access the PASSWORDS screen: ALARM PIN AND DISTRESS PIN CHANGE... - Page 30 It is possible to change the MEET ME password, to say the password used to register the MEET ME FERMAX APP for smartphone call divert . This is useful in the case that is it required to ban any previous MEET ME user.
-
Page 31: Information Screen
The NEW PASSWORD will be shown in the CURRENT PASSWORD field from now on. Keep the CURRENT PASSWORD carefully because it will be required for a new PASSWORD change. Contact FERMAX Technical Support or acquire a new licence (Ref. 1496) if you lose the CURRENT PASSWORD. Information Screen...
Need help?
Do you have a question about the MEET NEO 7 and is the answer not in the manual?
Questions and answers
Screen has gone blank, is there a trouble shooting guide?