Table of Contents
Advertisement
Use & Care Guide
Manual de Uso y Cuidado
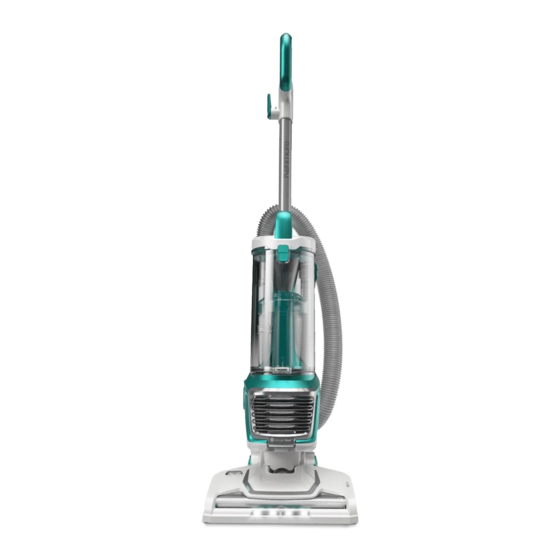
Bagless Upright Vacuum
Cleaner
Aspiradora vertical sin bolsa
Model/Modelo: DU2012
Vacuum Cleaner Help Line:
1-877-531-7321
8:00am-5:00pm EST, M-F
www.kenmore.com
Kenmore and the Kenmore logo are registered
trademarks of KCD IP, LLC and/or Transform SR
Brands LLC and are used under license.
Advertisement
Table of Contents

Subscribe to Our Youtube Channel
Related Manuals for Kenmore DU2012


Summary of Contents for Kenmore DU2012
- Page 1 Bagless Upright Vacuum Cleaner Aspiradora vertical sin bolsa Model/Modelo: DU2012 Vacuum Cleaner Help Line: 1-877-531-7321 8:00am-5:00pm EST, M-F www.kenmore.com Kenmore and the Kenmore logo are registered trademarks of KCD IP, LLC and/or Transform SR Brands LLC and are used under license.
-
Page 2: Table Of Contents
Troubleshooting ......................23-24 BEFORE USING YOUR NEW VACUUM CLEANER Read this Use & Care Guide. It will help you assemble and operate your new Kenmore vacuum cleaner in the safest and most effective way. For more information about vacuum cleaner care and operation, call the Vacuum Cleaner Help Line at 1-877-531-7321. -
Page 3: Important Safety Instructions
IMPORTANT SAFETY INSTRUCTIONS Read all instructions in this guide before assembling or using your vacuum cleaner. WARNING! Your safety is important to us. To reduce the risk of fire, electrical shock, injury to persons or damage when using your vacuum cleaner, follow basic safety precautions including the following: •... - Page 4 IMPORTANT SAFETY INSTRUCTIONS WARNING! This product contains a chemical know to the state of California to cause cancer and birth defects or other reproductive harm. SAVE THESE INSTRUCTIONS Proper assembly and safe use of your vacuum cleaner are your responsibilities. Your vacuum cleaner is intended for Household use.
-
Page 5: Kenmore Vacuum Cleaner Warranty
WITH PROOF OF SALE a defective product will be replaced free of charge. The Kenmore brand is used under license. Direct all claims for warranty service to: Cleva North America, Inc., 1-877-531-7321 This warranty does not cover filters or belts, which are expendable parts that can wear out from normal use within the warranty period. -
Page 6: Parts And Features
PARTS AND FEATURES It is important to know your vacuum cleaner’s parts and features to assure its proper and safe use. Review these before using your vacuum cleaner. REPLACEMENT PARTS Item Part No. Foam Filter 561055105 Felt Filter 561055106 HEPA Media Exhaust Filter 561055118 Belt KC28SEDCZ000... -
Page 7: Assembly Instructions
ASSEMBLY INSTRUCTIONS Before assembling the vacuum cleaner, check the PACKING LIST (page 2). Use this list to verify that you have received all the components of your new Kenmore Bagless Upright Vacuum Cleaner. 1. Insert the handle into the main body and 3. - Page 8 ASSEMBLY INSTRUCTIONS 4. Insert the combination tool onto the 6. Lock power cord plug onto the power accessory storage post located on the cord. back of the main body. Power Cord Plug Power Cord 5. Make sure the upper and lower cord WARNING hooks are in the proper position as Electrical Shock and Personal Injury...
-
Page 9: Operating Instructions
OPERATING INSTRUCTIONS CAUTION Moving parts! To reduce the risk of personal injury, DO NOT touch the brushroll when vacuum is on. Contacting the brushroll while it is rotating can cut, bruise or cause other injuries. Always turn off before servicing. Use caution when operating near children or pets. - Page 10 POWER CORD - RELEASE & USE 4. Plug the power cord plug into an outlet 7. To restore power cord after use, turn the located near the floor. upper cord hook to the upright position. Then wrap cord loosely around cord hooks.
- Page 11 OPERATION MODES 3. Press the switch to the “II” position for ABOVE FLOOR MODE cleaning carpets or rugs. 1. Place the vacuum cleaner in the upright NOTE: locked position. The brushroll rotates when the vacuum cleaner is in the “II” position. 2.
- Page 12 OPERATION MODES CAUTION CAUTION When using attachments, be careful not DO NOT pull the vacuum cleaner to over extend the flexible hose when around the room by the hose. Property reaching. Trying to reach beyond the damage or personal injury could result. hose stretch capability could cause the vacuum cleaner to tip over.
- Page 13 ATTACHMENTS Use the upholstery tool for cleaning fabric CAUTION surfaces such as fabric sofa and bedsheets. See ATTACHMENT USE TABLE (page 13) Use attachments when the vacuum cleaner is upright. ATTACHMENT USE TABLE CLEANING AREA = Applicable Between ATTACHMENT Furniture* Drapes* Stairs Baseboards...
-
Page 14: Performance/Safety Features
PERFORMANCE/SAFETY FEATURES To correct problem: Turn off and unplug THERMAL PROTECTOR the vacuum cleaner, remove obstruction, This vacuum cleaner has a thermal then turn on the vacuum cleaner. protector which automatically trips to protect the vacuum cleaner suction motor. NOTE: Once the brushroll motor shuts If a clog prevents the normal flow of air to down, clear jam from the brushroll before... -
Page 15: Vacuum Maintenance And Care
VACUUM MAINTENANCE AND CARE Always follow all safety precautions when performing maintenance to the vacuum cleaner. WARNING Electrical Shock and Personal Injury Hazard Disconnect electrical supply before servicing or cleaning the vacuum cleaner. Failure to do so could result in electrical shock or personal injury from vacuum cleaner suddenly starting. - Page 16 EMPTYING DUST CUP 3. Position dust cup area of vacuum over WARNING a waste receptacle. Press down on the dust release button to open dust cup lid Always unplug power cord from and allow contents to drop into waste electrical outlet before performing any service on vacuum cleaner.
- Page 17 PRE-FILTER CLEANING The pre-filter is located inside the dust cup. Clean the pre-filter as needed to optimize suction power. If suction remains weak after tapping the pre-filter clean, it will be necessary to wash it to clean off accumulated dust or hair. It is also recommended to wash the pre-filter every three months.
- Page 18 FOAM AND FELT FILTERS CLEANING It is recommended to clean the foam and 3. Wash with cold water only, DO NOT felt filters with cold water every three use detergent or soap. Squeeze by hand months. and allow to air dry. Allow all filters to dry 24 hours before putting back into NOTE: vacuum cleaner.
- Page 19 HEPA MEDIA EXHAUST FILTER CLEANING It is recommended to clean the HEPA 3. Wash with cold water only, DO NOT media exhaust filter with cold water every use detergent or soap. Allow to air dry. year. Allow parts to dry 24 hours before putting back into vacuum cleaner.
- Page 20 BELT CHANGING 4. Remove the worn or broken belt. WARNING 5. Use scissors to remove any entangled Always unplug power cord from hair around the brushroll. Clean any electrical outlet before performing debris from the motorized nozzle. maintenance to the vacuum cleaner. 6.
- Page 21 BELT CHANGING 8. Reinstall the lower plate by aligning tabs 9. Press the lower plate onto nozzle until on front edge of lower plate with slots in a click is heard and secure by rotating the nozzle, inserting the tabs into place, the lower plate latches clockwise to the and then rotating the lower plate to LOCK position.
- Page 22 REMOVING CLOGS CHECKING FLEXIBLE HOSE FOR CLOGS CHECKING CONNECTION HOSE FOR CLOGS If there is noticeable abnormal noise when using the vacuum or the suction power 1. Press the release tab on hose cuff, and suddenly drops, it is necessary to check pull the connection hose away from the the flexible hose for clogs.
-
Page 23: Troubleshooting
TROUBLESHOOTING Review this table to find do-it-yourself solutions for minor performance problems. Any service needed, other than maintenance described in this Use & Care Guide, should be performed by a qualified service agent. WARNING Disconnect electrical supply before performing maintenance to the vacuum cleaner. Failure to do so could result in electrical shock or personal injury. - Page 24 TROUBLESHOOTING Adjust the suction control to increase suction. Suction control is in open position. Follow instructions on page 14. HEPA media exhaust filter is Replace the exhaust filter. To purchase parts, damaged and needs to be call 1-844-202-9924. replaced. Dust escapes Position dust cup correctly and snap firmly in from the vacuum.
Need help?
Do you have a question about the DU2012 and is the answer not in the manual?
Questions and answers