Advertisement
Quick Links
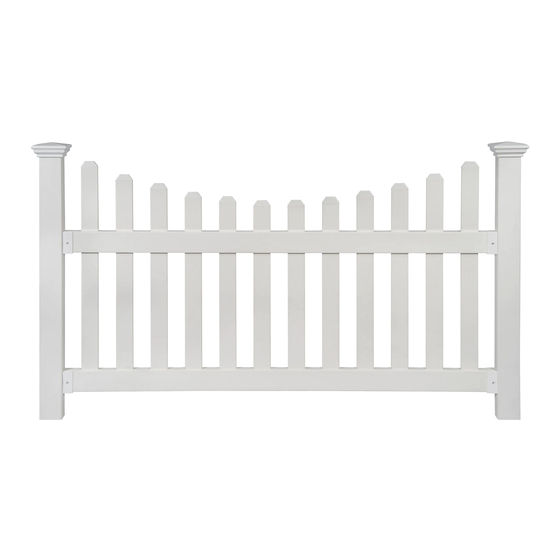
All American Finishing Post sold separately
45 MIN
6935 Reames Rd. Ste. K. Charlotte, NC 28216
@
support@zippity-outdoor.com
704-892-5222 / 877-234-6196
zippity-outdoor.com
38 5/8 in
21 3/4 in
23 in
ALL AMERICAN
PICKET FENCE
approximate assembly time
ASSEMBLY
INSTRUCTIONS
75 1/2 in
6 in
2 in
Ground
70 3/8 in
72 in
www.zippity-outdoor.com
2 3/4 in
42 in
18 1/8 in
4 in
1
Advertisement

Related Manuals for Zippity ALL AMERICAN


Summary of Contents for Zippity ALL AMERICAN
- Page 1 21 3/4 in 4 in 2 in Ground 23 in 70 3/8 in 72 in All American Finishing Post sold separately ALL AMERICAN PICKET FENCE 45 MIN approximate assembly time 6935 Reames Rd. Ste. K. Charlotte, NC 28216 support@zippity-outdoor.com 704-892-5222 / 877-234-6196 zippity-outdoor.com...
-
Page 2: General Information
Although great care has been taken to ensure proper packaging and handling of this product, occasionally problems occur. If you discover any missing, damaged or defective parts, please contact our customer service department. EMAIL: support@zippity-outdoor.com PHONE: 704-892-5222/877-234-6196 Customer service agents are available to take calls weekdays from 8am-5pm EST. - Page 3 If you encounter rock or unstable ground, you can dig a hole and concrete the pipe into place much the same way you would a traditionally installed fence. This can be done either during the pipe installation or even after the fence is complete. 6935 Reames Rd. Ste. K. Charlotte, NC 28216 support@zippity-outdoor.com 704-892-5222 / 877-234-6196 zippity-outdoor.com www.zippity-outdoor.com...
- Page 4 STEP 1: LAY OUT MATERIALS ALL AMERICAN PICKET FENCE COMPONENTS Post Cap (1) 1⁄8“ Hardened Steel Drill Bit (1) Post (1) - 2” x 3 ½“ x 44 5⁄8” Rail Brackets (4) 1” Self-Augering Hex Head Steel Screws (2) (to secure post to pipe) Anchor Pipe (1) - 44 7⁄8”...
- Page 5 Check level in both directions Identify location of your second pipe anchor STEP 2.3 and drive into the ground. The distance from plastic bushing to the next pipe should be 70¼” (Or center to center of pipe at 72”) 70 1/4in. 72 in. www.zippity-outdoor.com...
- Page 6 Using a wood block (or something to protect the top of the vinyl extrusion), STEP 3.2 pound the post so that the bottom 2” to 4” is below the ground. Repeat for second post. www.zippity-outdoor.com...
- Page 7 Look down the top of the post to determine location of pipe STEP 3.5 on vinyl post and secure with the second 1” self-augering hex head steel screw as illustrated. Check pipe location inside of post to determine placement of screw. www.zippity-outdoor.com...
- Page 8 Note: Adjust this post by sliding left or right to t the rail length. Use a level on the top of the bottom rail to STEP 4.3 determine height of opposing bracket and mark for installation. www.zippity-outdoor.com...
- Page 9 Use (2) ¾” self-augering stainless steel screws to secure each bracket. Once the top and bottom rails are secured, STEP 4.7 fasten the second post, following the same steps as outlined in step 3. www.zippity-outdoor.com...
- Page 10 FIRST Then proceed to install only one or two pipe anchors at a time, until you fully understand the fundamentals. This will help you to avoid repetitive mistakes. Post tops can be trimmed down as necessary. www.zippity-outdoor.com...
- Page 11 If your yard has a severe slope or elevation change greater than approximately 5” to 6” over one panel of fence, you will not be able to install this fence. Your post will not be long enough to accomodate. www.zippity-outdoor.com...
- Page 12 (not included) for steel and avoid having to pre-drill. Using a 1⁄8” drill bit (Part B) for steel, pre-drill the TIPS 2 vinyl post and internal steel pipe. TIPS 3 Install bracket to vinyl post and pipe. www.zippity-outdoor.com...