Advertisement
Quick Links
Advertisement

Related Manuals for Inepro PayMatic P2000


Summary of Contents for Inepro PayMatic P2000
- Page 1 PayMatic P2000 Installation Manual | PayMatic P2000 © 2019 Inepro B.V. All rights reserved...
- Page 2 We want to help you get the best result from your PayMatic P2000. This manual contains information on how to do that; please read it carefully. Due to continuous product improvements this manual is subject to changes without notice.
- Page 3 PayMatic P2000 All rights reserved. No parts of this work may be reproduced in any form or by any means - graphic, electronic, or mechanical, including photocopying, recording, taping, or information storage and retrieval systems - without the written permission of the publisher.
- Page 4 Table of Contents Introduction Open / disassemble the PayMatic Installation Notes...
- Page 5 WEEE Dir ective ( Waste of Electr ical and Electr onic Equipment) Inepro considers it important to properly take the climate into account. We therefore produce as many climate-friendly products. Your new dev ice contains materials w hich can be recy cled and then reused.
- Page 6 Introduction Part...
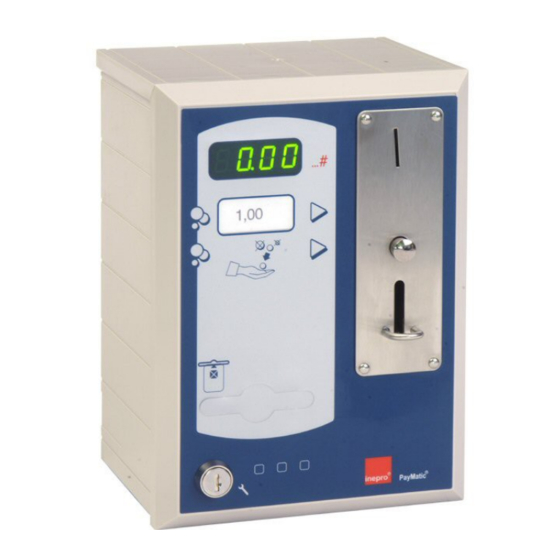
- Page 7 Introduction Introduction The PayMatic P2000 is the simplest unit of the series coin machines and is meant to be connected to any device with a timer system which goes out automatically if necessary. Upon introduction of a coin, this PayMatic emits only a normally open or a normally closed signal to activate the device connected to the coin machine.
- Page 8 Open / disassemble the PayMatic Part...
- Page 9 Open / disassemble the PayMatic Open / disassemble the PayMatic 2. Open the bottom lid. If the coin box is mounted on a pillar: Open and remov e the padlock 1. Lay the Pay Matic, if possible, at the back of the pillar. on its back.
- Page 10 4 screws (M4 x 40mm) when fixing the housing to the wall. For construction follow steps 1-6 in reverse. Do not forget to replace the included locking bolts (Stap 3)!! PayMatic P2000...
- Page 11 Installation Part...
- Page 12 Nevertheless, with independence of these two variable factors, the activation time of the microswitch is always from 20 ms to 200 ms. The device has to be connected by authorised and prepared personnel only! PayMatic P2000...
- Page 13 Notes Part...
- Page 14 Notes This area is meant for the reader's notes: PayMatic P2000...
- Page 15 Notes...
Need help?
Do you have a question about the PayMatic P2000 and is the answer not in the manual?
Questions and answers