
Subscribe to Our Youtube Channel
Related Manuals for Inepro Back Office Suite


Summary of Contents for Inepro Back Office Suite
- Page 1 Inepro Back Office Suite Technical Manual | Inepro Back Office Suite © 2020 Inepro B.V. All rights reserved...
- Page 3 Back Office solution. We want to help you get the best result from your Inepro Back Office Suite. This manual contains information on how to do that; please read it carefully. Due to continuous product improvements this manual is subject to changes without notice.
- Page 4 Inepro Back Office Suite All rights reserved. No parts of this work may be reproduced in any form or by any means - graphic, electronic, or mechanical, including photocopying, recording, taping, or information storage and retrieval systems - without the written permission of the publisher.
-
Page 5: Table Of Contents
..................................77 Card / Account Settings ..................................78 Departments ..................................79 Device Groups ..................................81 Card Layout(s) ..................................82 (Deprecated) Subscription Layout(s) ..................................87 Cost Centres ..................................88 Product Tare ..................................90 Card / Account Groups ..................................91 Version 0.0.11 http://www.inepro.com... - Page 6 ..................................111 ..................................113 4 Configure System Settings AbsencePRO ..................................114 DocuPRO ..................................115 PayCon Server ..................................118 Inepro Back Office Manager ..................................120 License Server ..................................120 AccessPRO ..................................121 ..................................122 5 Create Discounts & Permissions ..................................130 6 Enable Reload Functions ..................................
- Page 7 ..................................223 ..................................223 8 DocuPRO User name doesn't match login ..................................223 PayCon can not find print jobs ..................................224 'Credit too low' ..................................224 Error "Spool file not found" ..................................225 ..................................225 9 AccessPRO Version 0.0.11 http://www.inepro.com...
- Page 8 ..................................225 Glossery ..................................228 1 Field Names Appendices ..................................232 1 Appendix A - Discount Order List Discount Order List ..................................232 ..................................235 2 Appendix B - Flowchart Flowchart ..................................235 End User Licence Agreement http://www.inepro.com Version 0.0.11...
-
Page 9: Introduction
Introduction Part... - Page 10 Inepro has tried to cover every aspect of the Inepro Back Office Suite - All Modules in this manual. This first part of this manual will address the installation and setup of the Inepro Back Office Suite software on the system.
-
Page 11: Overview Ibos
Overview IBOS Overview IBOS... -
Page 13: Hardware Installation
Hardware Installation Part... - Page 14 Connect the serial cable to the computer and/or plug the network cable into a available network socket. Connect the power cable to an available power outlet. The Administrative terminal can be connected via the network instead of using the serial cable. Inepro Back Office Suite...
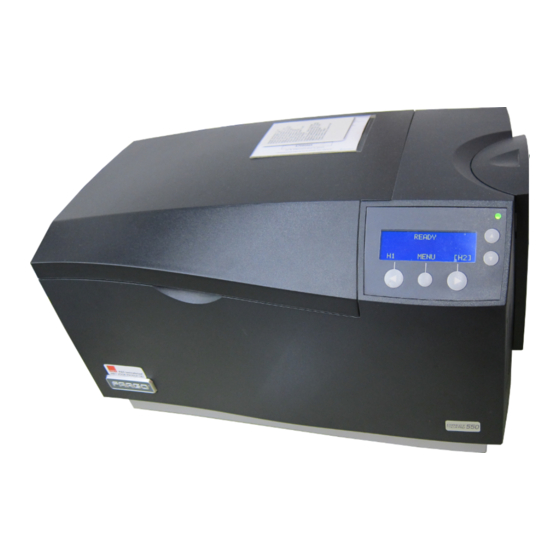
- Page 15 Card Printer Preparation Before the card printer can be used in the system an Inepro Administrative terminal must be connected. Make sure that a power outlet is available at the location of the card printer. On site Connect the device to a power outlet, connect the serial cable to the Administrative Terminal and the USB cable to the workstation.
- Page 16 Make sure that a network and power outlet are available at the location of the license box. On site Connect the Inepro License box to a power outlet and their network cable(s) to a network outlet. Inepro Back Office Suite...
- Page 17 Before a printer copier or multifunctional can be used in the system an Inepro terminal must be connected. Installing a terminal at a printer, copier or multifunctional is a task that can only be executed by an Inepro Certified Engineer, ask the vendor for such an engineer when adding or removing such machines to or from the system.
- Page 18 Before a vending machine can be used in the system an Inepro terminal must be installed. Installing a terminal in a vending machine is a task that can only be executed by an Inepro Certified Engineer, ask the vendor for such an engineer when adding or removing vending machines to or from the system.
- Page 19 Preparation Installing and configuring a PosPRO cash register or till for first time use is a task that can only be executed by an Inepro Certified Engineer, ask the vendor for such an engineer when adding or removing such machines to or from the system.
-
Page 21: Software Installation
Software installation Part... - Page 22 § A valid license box connected to the network. § A server with Microsoft SQL server running - setup with the Inepro specifications (SQL login credentials must be enabled (mixed Mode) among other settings) or the database. § A valid Inepro license key file.
- Page 23 Language Screen Select your language, in this language the software will be installed, and if this is the first time you install the database the database fields will also be in this language, click 'OK'. 3. Welcome Screen This will inform you of the software version, click 'Next'.
- Page 24 Software installation License Agreement Read the license, select 'I accept the agreement' and click 'Next'. 5. Select Destination Location Select the folder where to install the Inepro Back Office Suite, click 'Next'. Inepro Back Office Suite...
- Page 25 6. Select Components Select the components that must be installed, note that most services often only need to be installed one 1 server, just like the database and license server must normally only be installed in one location in the system. So carefully analyse what is needed at this location before the components are chosen.
- Page 26 Use Inepro LPD service, will use Inepro's own LPD service instead of using the Windows LPD service. This will be used in those cases where the Windows LPD service cannot provide the required functionality. Please refer to documentation or a Inepro Certified Engineer if this is required.
- Page 27 8. Database Database, fill out the location of the SQL server, the database (catalog) and the credentials (inepro's default credentials will be used by default, when other credentials must be used, these must also be created in the SQL database for the IBOS...
- Page 28 Software installation 9. Select Start Menu Folder Select the Start Menu folder. Inepro Back Office Suite...
- Page 29 10. Select Additional Tasks Unless the database is installed on this machine, the database wizard should not be run.
- Page 30 Software installation 11. Ready to Install The Ready to install screen will give you an overview of the installation choices. Inepro Back Office Suite...
- Page 31 12. Preparing to install 13. Preparing to install; files still open. 14. Installing - Closing applications 15. Installing If there are still Inepro files open, a warning will be issued, if so click 'Next'.
- Page 32 The setup is finished, if the database was created / upgraded, and a license box was installed with a valid license, the Inepro Back Office Manager should start. If not uncheck the 'Launch Inepro Back Office Manager' box and make sure this issues are attended to first. Inepro Back Office Suite...
-
Page 33: Wizard
Wizard Wizard When the Inepro Back Office Manager is started for the first time, a wizard is started to assist in setting and defining the basic elements of the IBOS system. The possibilities of the dialog screens are treated in this section. - Page 34 When no authentication data is entered everybody can start the Back Office Manager and has access to all functionalities offered by this version of the Inepro Back Office Suite. Access by employees can be limited or granted If the step will be skipped at this point, press [Next].
- Page 35 Wizard When a PayCon is connected to the serial port of the computer running Back Office Manager or to the network, a large number of card management features are provided. Should there be a PayCon connected, check the [Administrative PayCon] check box and select either the serial port it uses or it's IP-address. When a serial port is used the 'Use COM port' box should be checked.
- Page 36 Software installation The Inepro Back Office Suite comes with a number of pre-defined Products and Paper Prices. These can be added, deleted or modified now or in a later session via the menu. Keep in mind that this is a good moment to set the prices of the basic products.
- Page 37 Wizard Product Templates are templates of Products or Paper Prices for a specific device. Thanks to these Product Templates the same configuration can be assigned to a large number of devices. It is possible to add, delete, or modify these templates. Read more about Product Templates in the chapter: Product Templates on page: Printer Pools are groups of printer queues.
-
Page 39: Steps
Steps Part... -
Page 40: Determine System Model
DocuPRO is the module that manages and registers print, scan and copy traffic and/or sells those products. Inepro Back Office Manager The Inepro Back Office Manager is the Graphical User Interface of the Inepro Back Office Suite. AccessPRO AccessPRO is the module that manages and registers access ports and zones controlling and registering the flow of people going in and out of the site building. -
Page 41: Stored Value Server Environment
Determine System Model When to use the Stored Value Server Environment When a IBOS system is set up as a 'Stored Value Server Environment' all relevant balance and account information is stored on the server. This means the user only needs a way to point to this account information. This can be done with a wide variety of possibilities: PIN-codes, cards (ID-only) …... -
Page 42: Determine Network Configuration
In the stand-alone configuration all modules are installed on 1 machine: All modules connect to the IBOS database for information synchronization. In a print environment all client computers connect to this (print-) server and use the shared printers for printing (not in diagram). Inepro Back Office Suite... -
Page 43: Configuration B
Determine System Model 1 central server, remote management All the server tasks remain concentrated on a single server, the configuration of the software is done via a workstation in the network which has a database connection to the server. -
Page 44: Configuration C
The database resides on a dedicated database server, all server modules on the print server connect via the network to the database server, and also the Inepro Back Office Manager on the workstation connects to the central database. Inepro Back Office Suite... -
Page 45: Configuration D
Determine System Model Single site, 1 database server, 2 print servers, and remote management The database resides on a dedicated database server. The first print server has the module to communicate with all Terminals in the network and he manages his local print queues. The second print server only manages his local print queues. -
Page 46: Configuration E
Furthermore are there 2 remote sites with live connection to the database that handle their own print jobs and control the local networked Terminals. All three locations are able to use the User management options via the Back Office Manager. Inepro Back Office Suite... -
Page 47: Define
§ Subscription Printer Licence (if used) Where § Main Menu\Tools\Connection Settings Attach a Admin PayCon and/or Card Printer The Inepro Back Office Suite can be ordered with a card printer and an Administrative PayCon. 1. In 'Tool' menu, choose 'Connection... -
Page 48: Assign Authorization Rights
There are three ways to define a customized rights profile: § Preselect a template § Placing or removing check marks at the check boxes for every right § Using the Enable User Rights Admin function Inepro Back Office Suite... - Page 49 Login is the name the employee will use to log in on the Inepro Back Office Manager. The First Name, Infix, Last Name and the password fields are self explanatory. The Employee Code and Employee PIN are used for PosPRO employees.
- Page 50 Using Enable User Rights Administrator Enable User Rights Administrator will enable can be used to administer different function rights within the Inepro Back Office Manager in a instinctive visual manner. The desired functions are simply accessed while the Inepro Back Office Manager is in the User Rights Administrator mode (uncheck the checkbox 'Execute default action', so that the action isn't executed while assigning rights).
- Page 51 Define 2. Click on 'Enable User Rights Admin' in the Tools menu. 3. There will only be a couple of seconds before the default action is started! Uncheck the tick box 'Execute default action'. 4. By unchecking the tick box, Ronald's right to view AccessPRO devices is revoked. 5.
-
Page 52: Users
When printing user cards it is very useful to see w hich cards have already been printed. Printed This field w ill be set to 'true' if a card is printed. Current Access Zone Set The current Acces Zone of the User. Inepro Back Office Suite... - Page 53 Define Photo In the photo field a picture can be loaded. This is accomplished by right-clicking the photo area to enter the context menu (left-clicking will show an example of the picture). Capture photo Load photo from file Load a photo from a file on the current hard disk(s). Select a photo on the hard disk. Capture photo Capture a photo using a webcam.
-
Page 54: Cards
Side Bar Menu\Cards Cards Cards (in Inepro terminology) are objects that have a chip (either pure on the inside, or also visible from the outside), that can store data (for example; the users current balance) and have a unique ID. -
Page 55: Creating A Card With The Admin Terminal
Define Purse Sub Type What is the target use of the budget Purse Type Is it a balance or a unlimited budget? Balance What is the balance? View View the current data and the changes that are scheduled to occur real/scheduled data View the current data and the changes that are scheduled to occur... -
Page 56: Print And Create User Cards
Main Menu\Basic\Cards Print and Create User Cards The card printer enables the printing of cards and connects them at the same time to the Users in the Inepro database in batches. This means cards can be printed for every User in the database without having to create every card manually with the Administrative PayCon and the design of the User cards can be edited. - Page 57 Define Create Cards with the Card Printer Prerequisites: § Card Printer connected & configured § Admin Terminal connected & configured § Card Layout defined Where § Main Menu\Basic\Cards Create Cards with the card printer Create and print multiple cards in one go. When the card printer that can create cards while printing them is available, that printer can be used to create user card, saving the time and the expenses to do both processes separately.
- Page 58 3. Select the Card Group the selected user(s) belong to and the validation period. 4. Click . Select the appropriate Card Purses. Click 5. Check if the group layout is correct, and if not overwrite the card group with 'Overwrite using...'. 6. Click Inepro Back Office Suite...
-
Page 59: Printing A Card Without Creating It
Define 7. The cards will now be created. Check the report before clicking for cards that haven't been printed and/or created correctly. Printing a Card without Creating it Prerequisites: § Card Printer connected & configured § Card Layout defined Where §... -
Page 60: Accounts - Tags
Store Value Server system. Look up the difference here Although a Tag might physically be able to store data, it's still a Tag as long Inepro is concerned as long as there is no Inepro data stored. - Page 61 Define Second screen (Purses): The field 'Purse Sub Type' consist of the Purse Type and the Purse Sub Type, for example 'Balance' + 'Personal', where 'Balance is the 'Purse Type', and 'Personal' the 'Purse Sub Type'. Purse Sub Type What is the target use of the budget Purse Type Is it a balance or a unlimited budget? Balance...
-
Page 62: Product Groups
By default a small number of product groups are provided. The Product Group properties: Name The name of the Product Group Description A free field to enter extra information such as a description of the object or it's location. Inepro Back Office Suite... -
Page 63: Vat
Define Prerequisites: § None Where § Main Menu\Data\VAT Fill in the VAT rates that are used in the system. The fields are self-explanatory. -
Page 64: Products & Paper Prices
DocuPRO will then inquire which printer is sending the job, if it has a product with such (Paper Price Only!) a paper type and then charge the price of that product. Never assign the same paper type twice to the same printer! Inepro Back Office Suite... - Page 65 This is a timestamp (notation of date and time) that is created when this record is altered. Example: Let us add a 'healthy meal pack'. This is a compound product, it consists of other existing products in the Inepro Back Office Suite database.
- Page 66 4. Linked 5. Linked 6. Linked 7. Compound Content Type 1-7. Pieces Content Factor 1-6. 1 (Pieces) 6 (pieces) Tare 1-7. Not applicable V.A.T. 1-7. <Fill in an existing V.A.T. rate, or leave it blank if unused> Inepro Back Office Suite...
- Page 67 Define Second V.A.T. 1-7. <Fill in an existing V.A.T. rate, or leave it blank if unused> Description 1. O-Jay 2. Bread 3. Ham 4. Cheese 5. Yogurt 6. Apple 7. Lunch Pack Selling 1-7 Enabled Paper Type (Paper Price Only) 1-7 Not applicable...
-
Page 68: Product Template(S)
Use the left blue double arrow to add all products, to remove products from the template use the right arrows. Inepro Back Office Suite... - Page 69 Define The Product Template properties: Name The name of the Product Template Device Type The type of the Device Description A free field to enter extra information such as a description of the object or it's location. Choose the products that are needed in this template by either drag-and-dropping them from the product pool or select them and press the Add Device button.
-
Page 70: Price Lines
2.50 in plastic cups at the cafeteria, but it is also sold in a nice sturdy soup cup at a more luxurious location. Or when all of the sites are connected to one Inepro Back Office Suite database and the prices at different sites must change but cannot be changed simultaneously. - Page 71 Define Adding a price line 1. Press the 'Insert' button to add a new price line. 2. Enter a description and press the 'Insert' button to add a price deviation. Note that the 'Item Price' and the 'Normal Price' will remain empty. 3.
- Page 72 The 'Price Lines' are linked to the 'Site Types'. A site must have a 'Site Type', the sites with that site type will then the appropriate 'Price Line'. These price lines can be linked to a product and the deviated price in that product price line tab can be set. Inepro Back Office Suite...
-
Page 73: Site Types
Define Site Types Prerequisites: § Defined Price Lines Where § Main Menu\Advanced\Site Types Site Types Site type are used in combination with 'Price Lines'. Give a site a typ that would define if and what kind of price deviation is needed on that site. -
Page 74: How To Use The Organisation Structure
How to use the Organisation structure Every instance of the Inepro Back Office Manager needs a site defined. A site can be part of a location, and a location can be part of a organisation. When the Inepro Back Office manager is started for the first time, or when the setup wizard is started or when either the 'Organisation', 'Location' or 'Site' option is chosen directly the organisational structure can be adapted. -
Page 75: Organisation
Organisation Organisation is the top group of the hierarchical structure of an organisation such as a national department (like Inepro Holland, MacDonald's Holland or Microsoft Holland). It is the top level group that can be used to group by in the reports. An Organisation can have one or more Locations, which in turn can have Sites. -
Page 76: Location
/ insert menu: Fill out the location name and the organisation. The location name can be a city but it may also be an area or any other name. The idea is to group the data by location. Inepro Back Office Suite... -
Page 77: Site
Site can be 'Amsterdam - Kalverstraat' or 'New York City - Times Square' but it can also be Room 205 or Administration, it all depends on how the organisational structure within the Inepro Back Office suite has been planned. Go to menu Edit --> Site:... -
Page 78: Docupro Device(S)
Product Template is a pre-set list of Products or Paper Prices with certain settings already configured. Manually configure large Template groups of products at once. Site The site the user, device, product or PayCon is located. Description A free field to enter extra information such as a description of the object or it's location. Inepro Back Office Suite... -
Page 79: Cashpro Device(S)
Main Menu\Basic\CashPRO Device(s) CashPRO Devices CashPRO devices the devices that make money exchanges within the Inepro Back Office Suite. For example the vending machines, MPV's, reloaders, PosPRO cash register (or till), and PayCon cash registers. 1) Go to 'CashPRO Devices' and click the 'Add' button. -
Page 80: Printer Rule Sets
Acknow ledge w ill show s a message w ith an 'OK' button. The action can Acknow ledge not be stopped. The user w ill confirm that he has seen the message, and the action w ill be executed. Inepro Back Office Suite... - Page 81 Define Acknow ledge or Decline w ill show a message w ith an 'OK' and 'Cancel' Acknow ledge button. The user can stop the action by pressing 'Cancel'. The job w ill then or Decline not be printed. Notify w ill show the user a message notifying him of the applied rule. In the Notify mean w hile the action is executed.
-
Page 82: Printer Pool(S)
Printer Pool(s) A Printer Pool within the Inepro Back Office Suite is a collection of printers that can use follow-me. That is if one printer in the pool is busy, broken or for any other reason not the first choice to print at, the job can be collected by another printer in that pool. - Page 83 Define Description A longer description of the Printer Pool Printer Rule Sets When a Printer Rule Set has been created that set can be added here to apply to all the printers in the pool. Link the Printer to a Printer Pool The area below will show all the devices in the printer pool.
- Page 84 Go to the printer or multifunctional in the DocuPRO devices and link the printer pool to the printer. An additional Printer Rule set may be added. When retuning to the Printer Pool window, the printer in the area below is shown. Configuring the printer will treated in this section: Configure Printers on page: Inepro Back Office Suite...
-
Page 85: Regional Settings
Define Regional Settings Prerequisites: § None Where § Main Menu\Tools\Regional Settings Regional Settings The settings in these Windows are self-explanatory. Just set them to the local settings and values. -
Page 86: Card / Account Settings
Accounts can be credited without the user and or card present Supported technologies: · Contact chip card · Magnetic stripe card · Mifare proximity card · Legic proximity card · Hitag proximity card · Barcode card · Proximity card · Inepro Back Office Suite... -
Page 87: Departments
(Only if they are assigned here) defined Cost Centre(s) Where § Main Menu\Advanced\Departments Departments A Department in Inepro Back Office Suite is used as a User group to book their costs to a Cost Centre. Go to Edit --> Department:... - Page 88 These settings will overwrite the settings of the multifunctional enabling or disabling settings for a certain department. So even if the settings are disabled in the multifunctional, they will be enabled if these settings are set to true. This function is only available for the embedded API terminals! Inepro Back Office Suite...
-
Page 89: Device Groups
Define Device Groups Prerequisites: § (Only if the devices are added here rather then assigning Device Groups to Devices) Defined Devices Where § Main Menu\Advanced\Device Groups Device groups The Device Group is used to create a more orderly report. If groups are actively used the Devices are seen neatly divided in sub headers on the reports and this will give a better overview. -
Page 90: Card Layout(S)
'misusing' the fields 'Address Line 2' and 'Address Line 3' if they are not (and will not be) used by the system otherwise. Import the correct information with either CSV or Active Directory see page: § Go to 'Advanced -> Card Layouts' § Click 'Add new Card Layout'. Inepro Back Office Suite... - Page 91 Define Worksheet § Enter a name and click 'Adjust Layout' § In general it's easier to start from scratch than to adapt the default layout, but if a chip card layout must be created, leave the golden square that represents the chip card for position purposes. In all other cases follow the steps below: §...
- Page 92 Set the 'Datafield' to 'Customer Code' (remember each data component must be linked to the database like this (via data field)). § Create a label. It now has the same font and size as the 'DBText' object. Set the label text to 'Customer code:' and place it before de DBText. Inepro Back Office Suite...
- Page 93 Define Database image § Select a DBImage. Set the width to '20000' and the hight to '30000' (Right-click => 'position'), as this will give the 2x3 ratio for pictures. Make sure to check Stretch to ensure the picture won't fill more then the area assigned to it, and check 'MaintainAspectRatio' to ensure it get stretched out of proportions.
- Page 94 Select the bar code type. Save the design § Close the designer, it will not be asked to save the progress but don't worry, this is done in the Layout window. § Give the layout a name and press 'OK'. Inepro Back Office Suite...
-
Page 95: (Deprecated) Subscription Layout(S)
Define Subscription Layout(s) Prerequisites: § (if the layout is to be used) A Subscription Printer § (if the layout is to be used) A Card Printer Licence Where § Main Menu\Advanced\Site Types A Subscription Layout See Define - A Card Layout... -
Page 96: Cost Centres
To let a group of users book their costs on one or more Cost Centres a department must be created. Cost centres are needed if the costs of a user must be kept completely separated for instance: business groups, lunch, copying, multiple business cases, etc.. Go to Edit --> Cost Centre: Inepro Back Office Suite... - Page 97 Define Press the Add button to open the new / insert / add menu: The cost centre code is a alphanumeric code that is assigned to a Cost Centre. Also fill out the long and short name of the Cost Centre and the description. Maximum Spending Amount The maximum spending amount is the total amount that can be booked on a Cost Centre.
-
Page 98: Product Tare
The number of pieces. Time The time in seconds. Volume The volume of the container in litres. The weight of the container that is sold with the actual Weight product. (ie. the glass salad bowl) in gram Inepro Back Office Suite... -
Page 99: Card / Account Groups
Define Card / Account groups Prerequisites: § A Card Layout Where § Main Menu\Advanced\Card / Account Groups Card / Account Groups The Card Groups are used to create a more orderly report. If groups are actively used the Cards will be neatly divided in sub headers on the reports and this will give a better overview. -
Page 100: Customer Groups
Using User groups will enable the software to give an entire group (that consist of multiple departments and/or cost centres or has other reasons to not fit in those two groups) certain rights. Inepro Back Office Suite... -
Page 101: Accesspro Zones
Define AccessPRO Zones Prerequisites: § None Where § Main Menu\Advanced\Site Types AccessPRO Zones An area that has access controlled doors by AccessPRO is called a AccessPRO zone. Each zone has at least one door, each door has two sides. Each door side should have a AccessPRO Device connected to it. To enter a zone a door must be opened or an access portal must be crossed. - Page 102 Doors on the outside of a building and the zones connected to these doors are entered as 'root nodes' in the tree structure in Inepro Back Office. Zones that are accessible exclusively by another zone have that zone as a parent in the tree structure.
- Page 103 Define Zone A Zone A lies directly next to the outside world, so enter 'Zone A' as name and select 'Outside World' as parent node. Zone B Zone B lies directly next to the outside world, so enter 'Zone B' as name and select 'Outside World' as parent node. Zone I Zone I lies directly next to Zone A, so enter 'Zone I' as name and select 'Zone A' as parent node.
-
Page 104: Accesspro Devices
AccessPRO Groups defined (Only if used) Where § Main Menu\Advanced\Site Types AccessPRO Devices An AccessPRO Device is a terminal that will validate a user and according to that validation allow or deny a user access to an AccessPRO zone. Inepro Back Office Suite... - Page 105 Define Field Description Short Name A name, less then 15 characters long. This field is stored and optionally displayed on the PayCon. Long Name The full AccessPRO Device name (this name will be used in reports and in the manager). Address This field can be used to specify the exact location of the device.
-
Page 106: Access Rules
When will the access be granted? It can be a period or a time-frame in certain week days Has Access Determine if the access will be granted or denied Offline Determine if the rule will apply if the Access Device is offline Inepro Back Office Suite... -
Page 107: Reasons
The reason that the user has received this discount General All other events Reload Money is directly added to the account or card via the Inepro Back Office Manger. This reason will describe why. Return The user returns a product or denies a service and wants his money back. -
Page 108: Budgets
Budgets Budgets in the Inepro Back Office Suite are used to define limitations to how many items of a Product or Product Group can be used or what amount might be spend on that Product or Product Group by a User, User Group or Department. -
Page 109: User Interface
Define Example The students may only buy one snack per day. Product Group: Snacks User Group: Students Quantity: Budget Amount: <blank> Period Selection: Daily Start Time: 00:00 (unlimited) End Time: 00:00 (unlimited) The description and valid field may be left blank. User Interface In the user interface the toolbars, divider bars and a detail screen are available. - Page 110 (it will end when the first user presents his card to the PayCon). The money from the first user would have 'disappeared'. The administrator can track the money and the user who took it via this session log. Inepro Back Office Suite...
-
Page 111: Toolbars
User Interface How to work with the Toolbars We have made a chapter for each toolbar: Navigation to navigate through the records Modify to modify the data Refresh & Filter to refresh and filter the data Table Properties to alter the properties of the table Run &... - Page 112 For example the information of some printers or Terminals could have been added to the database while the manager has already been active for a while. Or the history of users or devices could have been changed. Click 'refresh' to show the latest data. Inepro Back Office Suite...
- Page 113 User Interface Build Filter Use this button to build a custom filter. It will open the build filter screen shown below in which a filter can be build, saved to the disk, or load one that is saved earlier. Read more about building advanced filters in the chapter: How to build an advanced filter on page: How to use the Modify Bar This is the Modify Bar:...
- Page 114 Add / insert / new. Add a new object, this can be a new user, a new card, a new device or any other data object in Inepro Back Office Manager. After adding the new object, fill out the data required, for example, the name and department number of a new user.
- Page 115 User Interface How to use the Table Properties Bar This is the Table Properties Bar: This toolbar is used to select the data fields to view and to make the field spaces as efficient as possible. Fields Use this button to select which data fields to view, their widths and the order they should appear.
-
Page 116: Group Data
How to group data and build filters The data in the Inepro Back Office Suite is presented in a data grid, a matrix of cells not unlike Microsoft Excel in which the data is presented. In some cases the data can be sorted, grouped or filtered. - Page 117 User Interface The table is now grouped by the values in the field [price]. Each value can be expanded by clicking the plus [+], or collapsed by clicking the minus [-]. Note that the value '0,05' has been expanded and that the [Product Types] are 'Print' or 'Copy' and the [Product Groups] are 'Print', 'Copy' or 'special'.
-
Page 118: Build An Advanced Filter
Below the filter bar to indicate a filter is used can be seen. The column(s) that the filter applies to has a blue arrow in stead of a black arrow. Notice that the product group has to different values 'special' and 'Print'. Inepro Back Office Suite... -
Page 119: Context Menu
User Interface Add a new condition by clicking on 'press the button to add a new condition'. Set the field to 'Product Group', the operator to 'equals' and the condition to 'special' Click 'OK' Now only two records are shown, those who have the value 'special' in 'Product Group'. - Page 120 Steps Image 1 Image 2 Image 3 Inepro Back Office Suite...
-
Page 121: Configure System Settings
Configure System Settings Configure System Settings Prerequisites: § None Where § Main Menu\Tools\System Settings Configure System Settings The system setting are set with the installation of the software, they contain database catalog names and other system- wide behaviour settings. The settings can be restricted to either global or per server. Use setting global or per server Server setting can be used per server or globally. -
Page 122: Absencepro
'too late'. Often this data is also needed by a third-party software suite. The database connection setting for such a suite can be set here. The data that is first send to the Inepro Back Office Suite will then also be send to the third-party suite. -
Page 123: Docupro
DocuPRO DocuPRO is the software component of the Inepro Back Office Suite which governs the behaviour of the DocuPRO module. How print jobs are released, if and when they are purged, if job codes and the client are used, and how the customer interface of the client is set up. - Page 124 When an unknown card is presented by a known user who has entered a job code, if confirmed by the user, the card will be linked to this user by using the Windows login name under which the job code was generated. Inepro Client must be installed on the workstation to enable job code generation.
- Page 125 When 'Level 2 is selected, fall back to level 1 with alert' the Inepro scanner will fall back to the simple scanner and send an e-mail to the administrator warning him that the Inepro job scanner is no longer used and the software had to fall back to the simple scanner.
-
Page 126: Paycon Server
Only then the XML file will be deleted. If for some reason the data is corrupt, the corrupted XML will be stored as 'Failed transactions' in the 'Failed transactions' directory. Failed transactions will be retried at the specified time of 'Retry failed transactions at' option. Inepro Back Office Suite... - Page 127 When enabled the Cost Centre selection must be confirmed. Create new cards When presenting an Inepro card that is not yet known in the system it's possible to: 1. Create this as a new card without a warning. 2. Create this as a new card and send a warning.
-
Page 128: Inepro Back Office Manager
Main Menu\Tools\System Settings\Inepro Back Office Manager Inepro Back Office Manager Inepro Back Office Manager is the user interface for the Inepro Back Office Suite. Customer photo path The base path of the User image. When importing User data from a *.csv file photo's can also be imported. A photo import needs the complete name of a file (path + filename). -
Page 129: Accesspro
Configure System Settings AccessPRO Prerequisites: § AccessPRO hardware installed § AccessPRO devices connected with IBOS. Where § Main Menu\Tools\System Settings\AccessPRO AccessPRO PayCon server is the server component that controls and handles all the traffic to and from the Terminals. Anti-passback enabled The Anti-passback function will lock out a pass that has just been read for use in that direction trough the gate again, the pass must first be used in the other direction. -
Page 130: Create Discounts & Permissions
Create Discounts & Permissions To give discounts to a group can be a complex thing especially when multiple discounts compound each other. Inepro has a discount system that can handle these advanced discount models. Terms and concepts We use a number of terms and concepts in the Discount option that must be known. - Page 131 Create Discounts & Permissions Quantum Discount If multiple Quantum Discounts are in effect they would add up, for example if I have a 10% discount at 5 items and a 20% discount at 20 items and I would purchase 22 items, I would get a 30% discount (10%+20%) because I purchase 5 or more items and I would also purchase 20 or more items.
- Page 132 (Discount 3), the software will not take Discount 2 into account because it is further down the row then Discount 3 where a stop (the check box 'stop looking for further discount entries') has been placed. For a complete list of all the available options go to Appendix A: Discount Order List on page: Inepro Back Office Suite...
- Page 133 Create Discounts & Permissions The discount screen A discount can be created on a Product or on a Product Group. Discounts can be applied on even smaller groups by also selecting a Device Group, a Card Group, a Purse Type, Department (only PosPRO / CashPRO and printer discounts)
- Page 134 Now we will assign the 10% discount for old printer use for the teachers: Select the Device Group 'Old Printers' Select the Card Group 'Teacher' Set 'Cumulative Discount' to 10 (10%). Click to save this discount. Inepro Back Office Suite...
- Page 135 Create Discounts & Permissions Now we will assign the 10% discount for old printer use for the students: Select the Device Group 'Old Printers' Select the Card Group 'Student' Set 'Cumulative Discount' to 10 (10%). Click to save this discount. Now we will assign the 60% discount for 25 pages: Select the Product Group 'Print' Set Quantity to (25) (25 prints)
- Page 136 As has been seen the students can never print cheaper than their teachers. They could however get a better price per page if they would print more than 25 pages. The more pages (over 25) they print, the cheaper it would get because of the "Single Vend" mode described above. Inepro Back Office Suite...
- Page 137 Create Discounts & Permissions The 'Teacher' Discount: Moment Price per Copy Rush Hour € 0,0400 No Rush Hour, Day Time € 0,0364 Evening € 0,0388 The 'Teacher - Print for 50%' Discount: Moment Price per Print Rush Hour € 0,0200 No Rush Hour, Day Time €...
-
Page 138: Enable Reload Functions
To reload the Accounts with money the reload functions must be enabled by choosing the option in the Tools menu. After that an Account can be reloaded by right-clicking it and choosing 'Reload' and be able to replace card (and let the system transfer the balance to the new card). Inepro Back Office Suite... - Page 139 Enable Reload Functions Fill in the amount and if it was paid in cash or not. Press 'OK' to confirm. The ability to 'add' money to the system creates a risk. It can attract corruption and can cause unbalance in the bookkeeping.
-
Page 140: Link An Account And A Tag To A User
A message box will pop-up to confirm this. 2) Link to a Tag Go to Accounts Double-click an Account or select it and click 'Edit Account' Press 'Next' twice to get to the Tag screen Present a Tag to the Administrative terminal Inepro Back Office Suite... -
Page 141: Cards - Acounts - Tags
Tags are objects that can present a unique ID to a reader. They don't have the ability to be written, however objects that are used as a Tag sometimes do, like Mifare cards. When an object like a Mifare card has on it information from the Inepro system, it will also be a Inepro Card. To create a tag: Open the Account window, go to the tag screen and present the tag to the reader, the tag should be added and a dialog screen appears to confirm this. -
Page 142: Print Subscriptions
(period and user data) on the card. Inepro Back Office Manager supports these subscriptions and provides the user information in our database to be used for the creation of these subscription cards. -
Page 143: Replace A Card / Tag
Cards - Acounts - Tags Replace a Card / Tag Prerequisites: § None Where § Main Menu\Advanced\Site Types Replace a Card / Tag When a User has lost his old card or tag, it must be replaced. Follow these instructions to replace a card or tag. 1) Replace Card Make sure the rights to reload credit to a card in IBOS are available and that 'Enable Reload Functions' has been activated. -
Page 144: Block / Unblock A Card
Block / Unblock a Card In the Inepro Back Office Suite a card or tag can be 'locked' or 'blocked'. A card or tag can be locked when it has been taken from a terminal too soon, it can be blocked by a system administrator to prevent users to use the card. -
Page 145: Locked Cards
Locked Cards In the Inepro Back Office Suite a card or tag can be 'locked' or 'blocked'. A card or tag can be locked when it has been taken from a terminal too soon, it can be blocked by a system administrator to prevent users to use the card. -
Page 146: Moving Balance From An Account To A Card
Check and, if not correct, change the other information press next Check and, if not correct, change the purses, press next Check and, if not correct, change the Card Layout Finish (if the card print option was chosen, the card will now be printed) Inepro Back Office Suite... -
Page 147: Reports
In the scheduled tasks screen an overview of the tasks that are already scheduled is shown and this is also the place to schedule new tasks. Importing from LDAP or CSV should be scheduled in the Inepro Data Import Service! - Page 148 The existing file will be overwritten. We recommend using the Inepro Balance Scheduler for scheduling budget or other changes in the balance of user cards or accounts. We recommend using the Inepro Data Import Service for importing data from *.csv file or Active Directory.
-
Page 149: Advanced Tasks
Advanced Tasks Part... -
Page 150: Replacing A Server
Change host name / IP-address everywhere in the system to point to new database server. 6) Reload license file. Where to change the IP-addresses Business Server If address of the location of the Inepro Business Server has changed, change the address in the config managers to the correct address: Inepro Back Office Suite... - Page 151 Replacing a server License box If the license box must be pointed to the address of the license server, so if the IP-address of the license server has changed, please change it in the license box also.
- Page 152 Advanced Tasks Changing the IP-addresses / host name of the Database server DocuPRO: IBOS: Inepro Back Office Suite...
- Page 153 Replacing a server PayCon Server:...
-
Page 154: Remove User(S) From The System
Removing User (Data) from the System Users can not easily be deleted from the Inepro system once they have made a transaction. This is because a User has a Card and or an Account-Tag with transactions, these transactions cannot be deleted as they would cause a financial unbalance in the system. - Page 155 Warning: Always create a database backup before executing a cleanup action. When the Cleanup Tool is started from the Inepro Back Office Manger this window will be shown: 1. Because the Cleanup Tool will access the database, the manager (that also has access to the database) needs to be closed.
- Page 156 3. Every actions in the Cleanup Tool will have a confirmation box, make sure that the current action is the action that should be performed and that the financial balance between the data that should be deleted and the remaining data is zero. Inepro Back Office Suite...
-
Page 157: Terms & Concepts
Terms & Concepts Part... -
Page 158: Follow-Me
Disadvantages The user has to wait a fraction longer for the job to be copied Speed and processed from the moment the print job is pulled. Inepro Back Office Suite... -
Page 159: Configuration
Configuration Part... -
Page 160: Import Data
Data can be imported in different ways from different sources, this section will explain how. Mutate: Insert, edit or delete The Inepro Back Office Suite will allow to mutate data from different sources. These sources are: Manually Manually enter the data with the keyboard in the Inepro Back Office Suite Use the 'Tools ->... - Page 161 Import Data This table will show which data can be inserted with which method: Manually *.CSV file LDAP Inepro Data Import Services Devices Product Groups Product Templates Departments Cost Centres Department - Cost Centre link Users User import can be performed by all methods.
-
Page 162: Import Manually
We will create User using some example data, to replicate this three departments (1, 2, 3) and three Cost Centres (A, B, C) are needed. 1. Go to the "Users" window. 2. Click the "Insert User" button. 3. The screen shown below (twice) will open: Inepro Back Office Suite... - Page 163 This field w ill be set to 'true' if a card is printed. 4. First we fill in the user code, this should be a unique code. The Inepro Back Office Suite automatically generate the codes, it will do this by default, or the codes can be overwritten with custom codes. In this case the generated code was used (20060510153215).
- Page 164 Go to the Accounts tab. Press the Add button to create an Account for this user. Cards This will show all the Cards linked to the User. Go to the Cards tab. Present a card to the PayCon to add a new card. Inepro Back Office Suite...
-
Page 165: Import From Csv
Import Data Import from CSV Prerequisites: § Existing server Where § Main Menu\Tools\Import Users and related details via CSV... The screen shots are taken from the 'Easy' version of the wizard. - Page 166 'enhanced' by our support team, 'Easy' should always be chosen. Click Connect the *.csv files to the tables in the Inepro database by clicking the "File" button next to the table that needs to be filled and selecting a *.csv file.
- Page 167 Import Data For each table a screen like this will be shown. It must be defined which field in the file links to which field in the table in the database. Unless column headers are used, the columns in the file are represented by 'F1, F2, F3, etc.' The fields in the database are listed below on the panel 'User Fields'.
- Page 168 > System Settings -> Back Office Manager -> Customer photo base path'. Valid From Date / Time From which date can this user use the system. Valid To Date / Time Until which date can this user use the system. Inepro Back Office Suite...
- Page 169 Import Data In this window a card can be linked to the user, per *.csv file import one or mor cards or tags can be linked to a user. Link a card code to the card, this code is a unique code, used to identify the card. If using tags (in a SVC environment) the ID code of the tag must be known.
- Page 170 After the import a report is generated, this will show if there where errors, if the import has succeeded and how many records where imported, when it is done and the report is reviewed, click Check if the files are correctly imported! Inepro Back Office Suite...
- Page 171 Import Data Extrude required data for import from CSV from data available in an Excel file These formulas might be specific for a certain version of MS Excel and might not give the required result in everyone of the versions. They are provided as-is and are not supported or accepted as subject by our support department. Extruding customized gender type This Excel statement will convert textual gender data like 'M' and 'F' into the numeric data used in our database: =IF(<TextualGenderData>="";0;IF(<TextualGenderData>="<TextualFemaleGender>";2;IF(<TextualGenderData>="<Textu...
- Page 172 Use when fields from columns are needed to create a new field with the gathered data. In this case make an export from Users from the Inepro Back Office Manager and compare those records with the table that has the User code and some other extra field of data and give the matching extra data for that user code.
- Page 173 Purpose The purpose of this document is to help install and configure Inepro Data Import service. This document will not cover the installation of IBOS, the Active directory or the creation of CSV files. This document is intended for users that want to import user data into their existing and running IBOS installation.
- Page 174 Configuration Installation Installation IDIS can be installed by executing the setup file. The following welcome screen will be displayed. Click next to continue. Inepro Back Office Suite...
- Page 175 Import Data Please read the License agreement carefully and accept it, if there are no objections. Please select a destination folder for the installation of IDIS and press next to continue.
- Page 176 The following screen will ask where the programs shortcuts in the start menu should be placed, leave or edit this and press next to continue. The installation of IDIS is now completely configured, this screen will sum up all the settings that where made during the setup, click install to start the actual installation of IDIS. Inepro Back Office Suite...
- Page 177 Import Data If the installation was successful, the final screen of the installer is shown.
- Page 178 Configuration Configuration After IDIS is installed we can start configuring the service. IDIS can be configured by using the “Inepro Data Import Settings” program for which a shortcut has been created in the start menu. Make sure a recent backup of the IBOS database has been made before using IDIS! When IDIS is configured incorrectly or wrong data is imported, there is now way to revert any changes made to the database.
- Page 179 Import Data The following screen will appear...
- Page 180 When the OK button is clicked, the template will be shown in the details panel. Select the created template and use the “Edit template” button or right-click on the template and select “Edit template” from the menu. We can now start editing the selected template. Inepro Back Office Suite...
- Page 181 Import Data If a template description is entered during the creation of the template, it should show up in this screen as well, it can be modified. The next step is to make a choice for the import source, this can either be an LDAP server or a CSV file. The choices will affect the configuration options that must be entered later.
- Page 182 As a final check, the CSV data can be seen as it will be imported. Please check if all the columns are interpreted correctly. The configuration has now been completed for the CSV portion of the template, click next to continue setting up the final settings for the import. Inepro Back Office Suite...
- Page 183 Import Data Configuring LDAP templates After LDAP has been chosen as the data source in the previous screen, the following screen will appear. To setup the LDAP data source, enter the address of the LDAP server, this can be a DNS name, IP address or domain name. The correct LDAP version and port number should be modified, if they are not set to standard values.
- Page 184 After the data source has been configured completely, select the fields to import. Simply click on the ones to use, a summary of the selected fields will appear in the right column. After selecting the desired fields, click next to continue. After selecting the desired fields, connect these fields to the desired IBOS data fields. Inepro Back Office Suite...
- Page 185 Import Data To connect a data field to an IBOS field, simply click on the arrow next to the field to display a drop-down-list of the fields earlier selected and select one. All the fields displayed in red are mandatory. Furthermore, User code, Windows Login, Account Code and Tag ID Code MUST be unique.
- Page 186 When importing Departments, Card / Account Groups or Cost Centers configure IDIS to create these automatically when non-existent. Finally set the desired Date-format for the import. As noted before, always use 4-digit years. Configuration of this template is now complete, click Finish to save this template. The main screen will return automatically. Inepro Back Office Suite...
-
Page 187: Configuration
Import Data Starting the service After all the desired templates are completely configured, close the application. When prompted to start the import service. When choosing not to restart the service, this can be done manually via Windows Services Control or by restarting the server where IDIS is installed. If the rights to remotely restart the service, are not available to the current user, an error dialog will appear. -
Page 188: Import From Ldap
Fetch DN's (only for LDAP v. 3) Note: if setting up a connection to a LDAP v2 server, know the naming context to w hich a connection is made. Use SSL secured connection Use a Secure Sockets Layer connection. Inepro Back Office Suite... - Page 189 Import from LDAP Rem em ber connection All the connection setting including the log in settings w ill be kept. settings Usernam e A legitimate username on the domain w ith the necessary authentication. (usernam e@dom ain) Passw ord The passw ord of this username. Please check this option to make an anonymous connection w ith the server and skip the username and Anonym ous connection passw ord.
- Page 190 Check the boxes in front of the necessary columns. Note: Some of the columns will be needed in the table no matter what, a warning that this column is needed will be given, if it is inadvertently deselected. Inepro Back Office Suite...
- Page 191 The card group can be linked in 2 different ways: 1. By a pre-defined column in Active Directory in which data that has the Card Group that is known in the Inepro Back Office database. This column needs to be created in Active directory and should have the correct Card Group linked to each User.
-
Page 192: Create / Edit / Lookup Windows Login
When using the DocuPRO module to let User pay for printing, the user that is printing a job must be linked to the user in the Inepro Back Office Suite database. This is done by the Windows login name under which the user is printing. So the Windows login name of the user must be known in the Inepro Back Office Suite database. -
Page 193: Configure Terminals
Main Menu\Advanced\Terminals Configure Terminals For a User to interact with the Inepro system they need a terminal. These terminals can be anything; PayCon's, IP-readers, Payon Touche's, etcetera. They must be connected to the server to enable their use in the system. How each of these type should be connected is explained in this section. - Page 194 PayCon Server service and choose 'Run' then type 'cmd' to go to the command prompt and type 'ipconfig' and press enter. The IP-addresses of the default gateway and the subnet are shown in console screen. Inepro Back Office Suite...
-
Page 195: Configure Docupro Devices
Configure Terminals Set Server-IP in PayCon In the network menu of the PayCon ('Terminal Settings' --> 'Network'), the IP address of the server on which the PayCon Service service is installed must be manually set. The easiest way to check the IP-address of the server is go to the Start menu of the server on which the PayCon Service service is installed and choose 'Run' then type 'cmd' to go to the command prompt and type 'ipconfig' and press enter. -
Page 196: Configure Printer(S)
When the printer(s) has been added, start the Back Office Manager software. Now restart the services Tools --> Restart Services. In the manager now go to the Devices view and the newly added printers should be seen. Shouldn't the printers appear in the view, press the refresh button on the toolbar. Inepro Back Office Suite... -
Page 197: Configure Accounting Template
Configure DocuPRO Devices Configure Accounting Template Prerequisites: § DocuPRO § Windows printer queues § DocuPRO has been restarted after printer installation Where § Main Menu\Basic\DocuPRO Configure Accounting Template Configuring the DocuPRO accounting template, will set the DocuPRO behaviour. Printer pools and the interaction between the user and DocuPRO is set here. - Page 198 The user must identify him / herself at the PayCon and activate the print job Client side conformation The user must confirm the print job on the computer he or she is at in a pop-up screen Inepro Back Office Suite...
- Page 199 Configure DocuPRO Devices The next table provides an overview of the different templates and their specific needs: Requirement Network terminals Client Software User Import Accounting only Optional Optional Job Codes Secure Release Yes Optional Cost Centres Optional Optional The following print configurations are available: Accounting only Page Job codes...
- Page 200 This is the ideal solution for schools, libraries … The Job Code mode enables the user to send a number of print-jobs to the server and print only a selection of these jobs. Network scheme: Inepro Back Office Suite...
- Page 201 Configure DocuPRO Devices Secure release The Secure Release feature connects a login name to a specified id. Typically this id is the unique number of a the user's card connected with the Windows login name. Therefore all printed jobs can only be printed out using this particular id. This safe mode of printing can also be combined with the above modes of operations.
- Page 202 A Cost Centre is the location where, in bookkeeping, the costs of a product are being made. Users can book their costs on this Cost Centre. They can either do this directly or via their department. Network scheme: Inepro Back Office Suite...
-
Page 203: Configure Copier(S)
Configure DocuPRO Devices Configure Copier(s) Prerequisites: § None Where § Main Menu\Basic\DocuPRO Configure Copier(s) A copier under DocuPRO is a machine that is used in DocuPRO only to copy (and/or scan & fax) but not print! A device that can also print under DocuPRO is called a multi functional. To add a photocopier to the database start the Back Office Manager, and go to the Devices view. -
Page 204: Configure Multifunctional(S)
Shouldn't the printers appear in the view, press the refresh button on the toolbar. Then proceed to the Product Templates and change the template to a Multi functional device to also add the copier products for this multifunctional. Inepro Back Office Suite... -
Page 205: Configure Cashpro Devices
Configure CashPRO devices Configure Vending Machines Prerequisites: § CashPRO § A PayCon Vending installed in a running vending machine and connected to the network Where § Main Menu\Basic\CashPRO Configure Vending Machines Go to 'CashPRO Devices' and click the 'Add' button. Fill in the long and the short name. -
Page 207: Change Interface Settings
Change Interface Settings VIII Part... - Page 208 To change the font press this button. To change the text colour press this button. To confirm the changes press 'OK', to discard press 'Cancel'. To go back to the original or default setting press 'Restore default Settings'. Inepro Back Office Suite...
-
Page 209: Usb Stick Procedure
USB Stick Procedure Part... - Page 210 2. Wait until the data has been copied. 3. Remove the USB Stick. Load data onto the server 4. Go to the Inepro Back Office Suite system. 5. Click the option 'Read USB Stick' in the Tool menu. 6. Wait until the data has been copied.
-
Page 211: Balance Scheduler
Balance Scheduler Part... - Page 212 Adapt the balance of a user, Card / Account or department. Balance scheduler - User properties: Name Description Usercode The unique code to ID the user Username The username Destination Purse The purse to change the balance of Task The task description Inepro Back Office Suite...
- Page 213 Balance scheduler - Task properties: Name Description Task description A descriptive name of the task Task Active Is the task active or inactive What is the amount this task will work Amount with? Action Deduct, revalue or fillup to the amount? Reason Why is this task executed? With which purse will this task exchange...
-
Page 215: Scheduled Tasks
Scheduled Tasks Part... - Page 216 This can be done in the scheduled tasks screen. In this screen an overview of the tasks is shown. Those task are already scheduled. It is also the place to schedule new tasks. Importing from LDAP or CSV can be scheduled in the Inepro Data Import Service. Inepro Back Office Suite...
- Page 217 10-07 etcetera, etcetera. The existing file will be overwritten. We recommend using the Inepro Balance Scheduler for scheduling budget or other changes in the balance of user cards or accounts. We recommend using the Inepro Data Import Service for importing data from *.csv file or Active Directory.
-
Page 219: Troubleshooting
Troubleshooting Part... - Page 220 Troubleshooting Troubleshooting There are many variables that can impact the experience with a software suite as extensive as the Inepro Back Office Suite. In this area, solutions can be found for any technical issues encountered while using our solution. If trouble is encountered that's not addressed here? Contact our Inepro Support Desk.
-
Page 221: Tracking User Issues
If there are messages follow 'Update all Terminals' procedure. If the 'Posponed changes' remain contact Inepro Support Right-click the User and choose 'User log'. Look at the User log to find what has been done with his card or tag and if this is concurrent with the other information found. -
Page 222: Logs
(Windows XP) Logs Inepro's Back Office Suite stores it's process information, transactions and unexpected issues in log files. A log file is text file that has a date-time stamp and a description of the executed action or issue. Our support department will need the log files to analyze reported issues. -
Page 223: Registry
When the software detects an error an error message dialog might pop-up showing you an error message. The Inepro Support department will need to see the error message, so please either leave the message on the screen, do not click it away or make a screenshot an save it as an image. -
Page 224: Generic
Troubleshooting Card can not be reloaded The card can not be reloaded at the Inepro Back Office Manager 1) Button is not visible a) Perhaps the reload functions in the local manager are not enabled? (They should be.) b) Go to 'Tools -> Enable Reload Functions'. See page: 2) The right to reload a card is not granted. -
Page 225: Prices Are Not Transfered To The Terminal
If they are Contact the Inepro Support Desk 3) The device is a vending machine, and has the prices stored in the machine itself, not in the Inepro terminal attached to it a) The prices stored in the vending machine can not be changed from the Inepro Back Office Manager... -
Page 226: Terminal Is Not Sending The Transactions
A transaction with 'Violation of UNIQUE KEY constraint 'UK_TenderPurse'. Cannot insert duplicate key in object 'tblTenderPurse'' is caused during an database update and can only occur with software older than 4.10. This will need a 4.10 update (or higher) to resolve, contact the Inepro Helpdesk. 5) The problem is not solved by these solutions i) Call Inepro Support. -
Page 227: Paycon Ii
Remember the 'Enabled Reload options' have to be on before the 'Move credits to new card' button will be visible. 3) The card reader is defect or something else is causing the problem i) Contact the Inepro Support Desk... -
Page 228: Nine Digit Number
Present the user card, cycle trough the values and set the value 'Blocked' to '0'. iii) Test the card again, it should now be working fine again. b) In all other cases i) Contact the Inepro Support Desk. Inepro Back Office Suite... -
Page 229: Connection Failed
Set the server IP-address in the PayCon to the server the services are running on. 5) The ports needed to connect with the PayConServer are closed, check if all the ports needed for the Inepro System are opened. -
Page 230: Not Allowed
Check the terminal with the configuration tool or directly with the Administrator card if it has products in the product list. b) If it does not have products, add them in the Inepro Back Office Suite. 2) There is no valid budget on the card with enough credit a) Check in the Back Office Manager with the Administrative PayCon which purses are available on the card and how much credit each purse has. -
Page 231: Question Mark Returns Error Message
When I am printing a job, the User Name on top of the Inepro Client doesn't match my Account name or login name. 1) The login name in the Inepro Back Office Suite is probably linked to a different User. The Inepro Back Office Suite will first look for a link in the User table and display the name of the user it is corresponds to. -
Page 232: Paycon Can Not Find Print Jobs
For example the card number is 4567 but the User name is linked to card number 7654. Send a print job, the name is sent to the Inepro Back Office Suite and the job is linked to card number 7654. When the request to show which jobs are pending for the card is made, the card number 4567 is checked. -
Page 233: Error "Spool File Not Found
Disable Windows File Pooling. See Microsoft Knowledge base. 2) All other cases a) Contact Inepro Support User can not get in / out A User can not get access to a room or building he/she should get access to, why? 1) The Access Rules that apply to you are set incorrectly. -
Page 235: Glossery
Glossery XIII Part... -
Page 236: Field Names
Never assign the same paper type twice to the same printer! Inepro Back Office Suite... - Page 237 Field Names Code A unique code to identify this object. Changed This is a timestamp (notation of date and time) that is created when this record is altered. Card Type Defines the type of chip card, like SLE4442, Mifare. Long Name A long name (40 characters) is the name used in Windows and the receipt in the PayCon, every other time short name is used.
-
Page 239: Appendices
Appendices Part... -
Page 240: Appendix A - Discount Order List
Device Grp Card Grp Device Grp Product Card Grp Device Grp Product Grp Card Grp Device Grp Product Grp Product Not possible Quantum Quantum Product Quantum Product Grp Quantum Product Grp Product Not possible Quantum Device Grp Inepro Back Office Suite... - Page 241 Appendix A - Discount Order List Discount Discount Discount Discount Discount Discount Discount # Combination Quantum Device Grp Product Quantum Device Grp Product Grp Quantum Device Grp Product Grp Product Not possible Quantum Card Grp Quantum Card Grp Product Quantum Card Grp Product Grp Quantum...
- Page 242 Happy Hours Quantum Card Grp Device Grp Happy Hours Quantum Card Grp Device Grp Product Happy Hours Quantum Card Grp Device Grp Product Grp Happy Hours Quantum Card Grp Device Grp Product Grp Product Not possible Inepro Back Office Suite...
-
Page 243: Appendix B - Flowchart
Appendix A - Discount Order List Appendix B Output Manager Flowchart The output manager flowchart shows how the settings will effect the print job and the way it is handled. - Page 244 Appendices Inepro Back Office Suite...
-
Page 245: End User Licence Agreement I
7. Update Checks. You acknowledge and agree to allow Inepro Back Office Suite version and license status details to be sent to Inepro BV when you request to "Check for updates". This allows the Inepro Back Office Suite software to determine whether software updates are available in real-time. - Page 247 Button is not visible - C - Ch.Resp.Error Connection Failed Credit too low Context Menu Enable the reload functions - F - I can't move the credit from a card to another I can't reload a card Filter Nine Digit Number Advanced PayCon can not find print jobs Build...
Need help?
Do you have a question about the Back Office Suite and is the answer not in the manual?
Questions and answers