
Related Manuals for Inepro PayCon Touch - First Time Log On


Summary of Contents for Inepro PayCon Touch - First Time Log On
- Page 1 PayCon Touch - First Time Log On Installation Manual | PayCon Touch - First Time Log © 2019 Inepro B.V. All rights reserved...
- Page 3 PayCon Touch - First Time Log On The most versatile payment solution Congratulations on your selection of the Inepro . We are certain you will be pleased with your purchase of one of the flexibele solutions of the market. We want to help you get the best result from your . This manual contains information on how to do that;...
- Page 4 PayCon Touch - First Time Log On PayCon Touch - First Time Log On All rights reserved. No parts of this work may be reproduced in any form or by any means - graphic, electronic, or mechanical, including photocopying, recording, taping, or information storage and retrieval systems - without the written permission of the publisher.
- Page 5 Table of Contents Introduction Setup...
- Page 7 End of life dir ectives Inepro is pay ing a lot of attention to env ironmentally -friendly production. Your new dev ice contain materials w hich can be recy cled and reused. A t the end of its life specialised companies can dismantle the discarded dev ice to recy cle the reusable materials and to minimise the amount of materials to be disposed of.
- Page 9 Introduction Part...
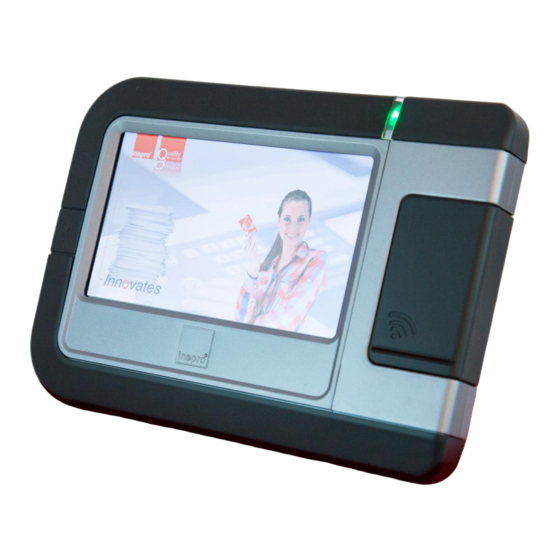
- Page 10 PayCon Touch LED indicator De LED on the PayCon touch can have 3 colours and indicates the status of the PayCon Touch. PayCon Touch Colour Status Blue Busy / Connecting... Green Standby No Connection / Error PayCon Touch - First Time Log On...
- Page 11 Setup Part...
- Page 12 Business Server is offline. In the setup menu, carry out the following: Fill out the Location ID and the Server address. PayCon Touch - First Time Log On...
- Page 13 Setup Enable or disable the DHCP. Fill out the IP and Netmask. Fill out the DNS and Gateway.
Need help?
Do you have a question about the PayCon Touch - First Time Log On and is the answer not in the manual?
Questions and answers