
Related Manuals for Klarstein MONTBLANC


Summary of Contents for Klarstein MONTBLANC
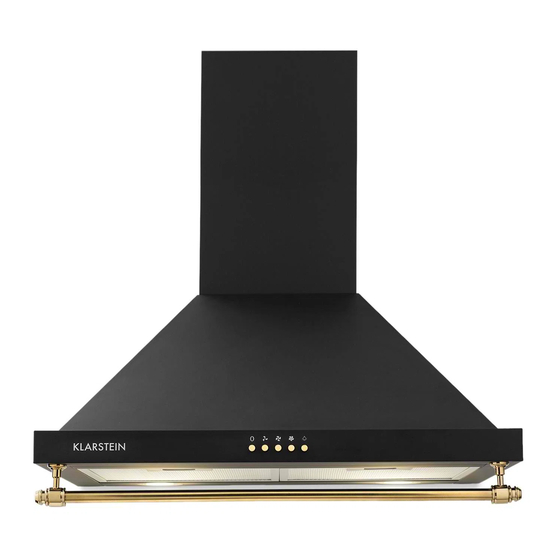
- Page 1 MONTBLANC Dunstabzugshaube Range Hood Campana extractora Hotte aspirante Cappa aspirante 10031992 10031993 10031994 www.klarstein.com...
-
Page 3: Table Of Contents
Sehr geehrter Kunde, wir gratulieren Ihnen zum Erwerb Ihres Gerätes. Lesen Sie die folgenden Hinweise sorgfältig durch und befolgen Sie diese, um möglichen Schäden vorzubeugen. Für Schäden, die durch Missachtung der Hinweise und unsachgemäßen Gebrauch entstehen, übernehmen wir keine Haftung. Scannen Sie den folgenden QR-Code, um Zugriff auf die aktuellste Bedienungsanleitung und weitere Informationen rund um das Produkt zu erhalten. -
Page 4: Sicherheitshinweise
SICHERHEITSHINWEISE • Lesen Sie sich alle Hinweise vor der Benutzung sorgfältig durch und bewahren Sie die Bedienungsanleitung zum späteren Nachschlagen gut auf. • Die Montagearbeiten dürfen nur von einer Elektrofachkraft oder einer qualifizierten Person durchgeführt werden. Bevor Sie die Dunstabzugshaube verwenden, stellen Sie sicher, dass die Spannung (V) und die auf der Dunstabzugshaube angegebene Frequenz (Hz) der Spannung und Frequenz der Stromversorgung in Ihrem Haushalt entsprechen. - Page 5 Wichtige Hinweise zum Abluftbetrieb WARNUNG Vergiftungsgefahr durch zurückgesaugte Abgase! Betreiben Sie das Gerät nicht im Abluftbetrieb, wenn es zusammen mit einer raumluftabhängigen Feuerstätte betrieben wird und keine ausreichende Luftzirkulation garantiert wird. Raumluftabhängige Feuerstätten wie Gas-, Öl-, Holz- oder Kohleheizungen, Boiler oder Durchlauferhitzer beziehen die Luft aus dem Raum und führen sie durch ein Abluftrohr oder einen Kamin ins Freie.
-
Page 6: Installation
INSTALLATION Wandinstallation • Sie können die Abluft ableiten oder zirkulieren lassen. • Hängen Sie das Gerät 65-75 cm über der Kochplatte auf. So erzielen Sie eine höchstmögliche Effizienz. Befestigung Haken Außen- kamin Sobald Sie die Montagehöhe Hängen Sie die Abzugshaube an den festgelegt haben, installieren Sie Haken und befestigen Sie den Kamin mit 4 den Haken an einem geeigneten... - Page 7 Innenkamin Außenkamin Abluft- rohr Befestigen Sie den Kamin an der Wand. Passen Sie den Innenkamin in der Höhe an und fixieren Sie ihn. Hinweis: Die maximale Kaminhöhe variiert je nach Modell. Detaillierte Wandinstallation Befestigung Befestigung Innenkamin Außenkamin Abluftrohr Haken...
- Page 8 Detaillierte Maße...
-
Page 9: Bedienfeld Und Tastenfunktionen
Wichtiger Hinweis zur Installation Der Biegewinkel, in dem das Rohr aus der Wad geführt wird sollte nicht mehr als 120° betragen. Vergewissern Sie sich, dass die Abzugshaube nach der Montage waagerecht und nicht schief hängt (siehe Bild). BEDIENFELD UND TASTENFUNKTIONEN Bedienfeld Stop Niedrige... -
Page 10: Reinigung Und Pflege
Tastenfunktionen Stop-Taste Drücken Sie auf die Taste, um den Motor anzuhalten. Niedrige Geschwindigkeit Drücken Sie auf die Taste, um den Motor bei niedriger Geschwindigkeit laufen zu lassen. Mittlere Geschwindigkeit Drücken Sie auf die Taste, um den Motor bei mittlerer Geschwindigkeit laufen zu lassen. - Page 11 Um die Aluminiumfilter zu entfernen, drücken Sie auf die Taste (siehe Bild) und entfernen Sie den Filter, indem Sie ihn vorsichtig nach unten ziehen. Waschen Sie den Filter und lassen Sie ihn an der Luft trocknen. Bauen Sie ihn danach in umgekehrter Reihenfolge wieder ein.
- Page 12 Abzugshaube reinigen Um das Gehäuse vor Korrosion zu schützen, sollte die Dunstabzugshaube mit heißem Wasser und nicht mit korrosiven oder ätzenden Reinigungsmittel gereinigt werden. Verwenden Sie nach Möglichkeit reinigende Produkte oder Schaumreiniger für Edelstahl, die zusätzlich zur Reinigung eine Schutzschicht an der Oberfläche hinterlassen.
-
Page 13: Fehlerbehebung
FEHLERBEHEBUNG Fehler Mögliche Ursache Lösung Das Licht ist an, aber der Die Lüftung ist blockiert. Entfernen Sie die Motor läuft nicht. Blockade. Der Kondensator ist Lassen Sie den kaputt. Kondensator ersetzen. Der Motor ist kaputt. Lassen Sie den Motor ersetzen. Der Motor riecht Lassen Sie den Motor merkwürdig. -
Page 14: Produktdatenblatt
PRODUKTDATENBLATT Angaben nach Verordnung (EU) Nr. 65/2014 Mess- und Berechnungsmethoden nach EN 61591:1997+A1:2006+A2:201 1+A1 1:201 4+A12:2015 Artikelnummer 10031992, 10031993, 10031994 Bezeichnung Symbol Wert Einheit Jährlicher Energieverbrauch 43,5 kWh/Jahr hood Energieeffizienzklasse fluiddynamische Effizienz 28,5 hood Klasse für die fluiddynamische Effizienz Beleuchtungseffizienz 13,5 Lux/W hood... - Page 15 Angaben nach Verordnung (EU) Nr. 66/2014 Mess- und Berechnungsmethoden nach EN 61591:1997+A1:2006+A2:201 1+A1 1:201 4+A12:2015 Artikelnummer 10031992, 10031993, 10031994 Bezeichnung Symbol Wert Einheit Jährlicher Energieverbrauch 43,5 kWh/Jahr hood Zeitverlängerungsfaktor Fluiddynamische Effizienz 28,5 hood Energieeffizienzindex 54,9 hood Gemessener Luftvolumenstrom im 327,1 m³/h Bestpunkt Gemessener Luftdruck im Bestpunkt...
-
Page 16: Hinweise Zum Umweltschutz
HINWEISE ZUM UMWELTSCHUTZ • Achten Sie während des Kochens auf eine ausreichende Luftzufuhr, damit die Dunstabzugshaube effizient und mit einem geringen Betriebsgeräusch arbeiten kann. • Passen Sie die Gebläsedrehzahl an die beim Kochen entstehende Dampfmenge an. Verwenden Sie den Intensivmodus nur bei Bedarf. Je niedriger die Gebläsedrehzahl ist, desto weniger Energie wird verbraucht. - Page 17 Dear Customer, Congratulations on purchasing this device. Please read the following instructions carefully and follow them to prevent possible damages. We assume no liability for damage caused by disregard of the instructions and improper use. Scan the QR code to get access to the latest user manual and more product information.
-
Page 18: Installation
INSTALLATION Wall Mounted Installation • The hood can be installed as extractor or recirculation hood. • The cooker hood should be placed at a distance of 65-75cm (26-30inch) from the cooking surface for the best effect. Fasteners Hook Outer chimney Install the hook on a suitable place Hang the range hood onto the hood plate once the installation height is fixed,... - Page 19 Inner chimney Outer chimney Exhaust pipe Finally, fix the external chimney to the wall. As Adjust the height of the picture 6 shows. inner chimney to the desired positionslightly widen the outer chimney and screw. Note: The maximum height of the chimney is variable, and depends of the model purchased.
- Page 20 Detailed measurements...
-
Page 21: Control Panel And Key Functions
Important Hints on Installation The bending angle of the pipe should be more than 120° and duct it out of the wall. Make sure thatthe range hood is vertical after installation. CONTROL PANEL AND KEY FUNCTIONS Control Panel Stop Low speed Mid speed High speed Light... -
Page 22: Care And Cleaning
Key functions Stop button Push stop button, and the motor will stop. Low Speed Button Push the Low button, and the motor runs at low speed. Mid Speed Button Push the middle speed button, and the motor runs at mid speed. High Speed Button Push the High speed button, and the motor runs at high speed. - Page 23 To remove aluminiumfilters press the metal tab back, remove the filter (one at a time) and gently pull down. After washing and drying them, places the filters following the passages of the assembly in inverse form. Lamp Change Before changing the bulbs, sure that the hood is not connected. Grasp the metal ring of the bulb, pull down and remove halogen cavity.
- Page 24 Cooker Hood Cleaning To protect the main steel body from corrosion over a long period of time, the cooker hood should be cleaned with hot water plus non corrosive detergent and then to maintain its brightness should be used products or foams for exclusive steel, which will leave a protective coating on the surface.
-
Page 25: Troubleshooting
TROUBLESHOOTING Fault Possible Cause Solution Light on, but motor does The leaf blocked. Get rid of the blocking. not work. The capacitor damaged. Replace capacitor. The motor jammed Replace motor. bearing damaged. The internal with of motor Replace motor. off or a bad smell from the motor. -
Page 26: Product Data Sheet
PRODUCT DATA SHEET Information according to Regulation (EU) No. 65/2014 Measurement and calculation methods according to EN 61591:1997+A1:2006+A2:20 1 1+A1 1:2014+A12:2015 Item number 10031992, 10031993, 10031994 Description Symbol Value Unit Annual Energy Consumption 43,5 kWh/Year hood Energy Efficiency class Fluid Dynamic Efficiency 28,5 hood Fluid Dynamic Efficiency class... - Page 27 Information according to Regulation (EU) No. 66/2014 Measurement and calculation methods according to EN 61591:1997+A1:2006+A2:20 1 1+A1 1:2014+A12:2015 Item number 10031992, 10031993, 10031994 Description Symbol Value Unit Annual Energy Consumption 43,5 kWh/Year hood Time increase factor Fluid Dynamic Efficiency 28,5 hood Energy Efficiency Index 54,9...
-
Page 28: Notes On Environmental Protection
NOTES ON ENVIRONMENTAL PROTECTION • During cooking, make sure that there is sufficient air supply so that the cooker hood can operate efficiently and with low operating noise. • Adjust the fan speed to the amount of steam produced during cooking. Use the intensive mode only when necessary. - Page 29 Estimado cliente, Le felicitamos por la adquisición de este producto. Lea atentamente las siguientes instrucciones y sígalas para evitar posibles daños. No asumimos ninguna responsabilidad por los daños causados por el incumplimiento de las instrucciones y el uso inadecuado. Escanee el siguiente código QR para obtener acceso a la última guía del usuario y más información sobre el producto.
-
Page 30: Instalación
INSTALACIÓN Instalación • Puede desviar el conducto de extracción o dejarlo circular. • Cuelgue el aparato a 65-75 cm por encima de la placa de cocción. Así conseguirá la mayor eficiencia posible. Fijación Ganchos Chimenea exterior En cuanto haya determinado Cuelgue la campana extractora de los la altura del montaje, instale ganchos y fije la chimenea con 4 tornillos. - Page 31 Chimenea interior Chimenea exterior Conducto de extrac- ción Fije la chimenea a la pared. Ajuste la chimenea interior en altura y fíjela. Advertencia: La altura máxima de la chimenea varía según modelo. Instalación detallada en pared Fijación Fijación Chimenea interior Chimenea exterior Conducto de extracción Ganchos...
- Page 32 Ganchos...
-
Page 33: Panel De Control Y Funciones De Los Botones
Indicaciones importantes para la instalación El ángulo de inclinación en el que el conducto debe ser conducido por la pared no debe ser superior a 120°. Asegúrese de que la campana está completamente horizontal tras el montaje y no queda oblicua (véase ilustración). PANEL DE CONTROL Y FUNCIONES DE LOS BOTONES Panel de control... -
Page 34: Limpieza Y Cuidado
Funciones de los botones Botón stop Pulse el botón para detener el motor Velocidad baja Pulse el botón para poner en marcha el motor a velocidad baja. Velocidad media Pulse el botón para poner en marcha el motor a velocidad media. Velocidad alta Pulse el botón para poner en marcha el motor a velocidad alta. - Page 35 Para retirar el filtro de aluminio, pulse el botón (véase ilustración) y retire el filtro tirando de él hacia abajo. Lave el filtro y deje que se seque al aire. A continuación, vuelva a montarlo siguiendo el orden inverso. Sustituir la bombilla Antes de cambiar las bombillas, desconecte la campana extractora del suministro eléctrico.
- Page 36 Limpiar la campana extractora Para proteger la carcasa de la corrosión, la campana extractora debe lavarse con agua caliente y no con productos de limpieza corrosivos o abrasivos. Dentro de lo posible, utilice productos o limpiadores de espuma para acero que, además de limpiar, dejan una capa protectora en la superficie.
-
Page 37: Solución De Problemas
SOLUCIÓN DE PROBLEMAS Problema Posible causa Solución La luz está encendida La ventilación está Retire aquello que pero el motor no funciona. bloqueada. obstruye la ventilación. El condensador está Sustituya el condensador. averiado. El motor está averiado. Sustituya el motor. El motor genera un olor Sustituya el motor. -
Page 38: Ficha Técnica Del Producto
FICHA TÉCNICA DEL PRODUCTO Información según el Reglamento (UE) nº 65/2014 Métodos de medición y cálculo según EN 61591:1997+A1:2006+A2:201 1+A1 1:2014 +A12:2015 Número de artículo 10031992, 10031993, 10031994 Descripción Símbolo Valor Unidad Consumo anual de energía 43,5 kWh/Año hood Clase de eficiencia energética eficiencia fluidodinámica 28,5 hood... - Page 39 Datos según el Reglamento (UE) nº 66/2014 Métodos de medición y cálculo según EN 61591:1997+A1:2006+A2:201 1+A1 1:2014 +A12:2015 Número de artículo 10031992, 10031993, 10031994 Descripción Símbolo Valor Unidad Consumo anual de energía 43,5 kWh/Año hood Factor de extensión temporal eficiencia fluidodinámica 28,5 hood Índice de eficiencia energética...
-
Page 40: Notas Para Cuidar Del Medio Ambiente
NOTAS PARA CUIDAR DEL MEDIO AMBIENTE • Durante la cocción, asegúrese de que haya un flujo de aire suficiente para que la campana extractora funcione eficazmente y con poco ruido de funcionamiento. • Ajuste la velocidad del ventilador a la cantidad de vapor producida durante la cocción. - Page 41 Chère cliente, cher client, Toutes nos félicitations pour l’acquisition de ce nouvel appareil. Veuillez lire attentivement et respecter les instructions de ce mode d’emploi afin d’éviter d’éventuels dommages. Nous ne saurions être tenus pour responsables des dommages dus au non-respect des consignes et à...
-
Page 42: Installation
INSTALLATION Installation murale • Vous pouvez diriger les gaz de combustion vers une conduite d’évacuation ou les laisser circuler. • Accrochez l’appareil environ 65-75 cm au-dessus de vos plaques de cuisson. Vous obtiendrez ainsi la meilleure efficacité possible. Fixation Crochets Cheminée extérieure Une fois que vous avez déterminé... - Page 43 Cheminée intérieure Cheminée extérieure Tuyau d’évacuation de l’air Fixez la cheminée au mur. Ajustez la hauteur de la cheminée intérieure et fixez-la. Remarque : la hauteur maximale pour la cheminée varie selon les modèles. Détails de l’installation murale Fixation Fixation Cheminée intérieure Cheminée extérieure Tuyau d’évacuation...
- Page 44 Détail des dimensions...
-
Page 45: Panneau De Commande Et Touches De Fonctions
Consigne importante pour l’installation L’angle d’inclinaison du tuyau à la sortie du mur ne doit pas être supérieur à 120°. Après le montage, vérifiez que la hotte aspirante est installée bien horizontalement et non de travers (voir schéma). PANNEAU DE COMMANDE ET TOUCHES DE FONCTIONS Panneau de commande Stop... -
Page 46: Nettoyage Et Entretien
Touches de fonction Touche Stop Appuyez sur cette touche pour arrêter le moteur. Vitesse lente Appuyez sur cette touche pour faire fonctionner le moteur à vitesse lente. Vitesse moyenne Appuyez sur cette touche pour faire fonctionner le moteur à vitesse moyenne. Vitesse rapide Appuyez sur cette touche pour faire fonctionner le moteur à... - Page 47 Pour retirer le filtre en aluminium, appuyez sur la touche (voir schéma) et démontez le filtre en le tirant doucement vers le bas. Lavez le filtre et faites-le sécher à l’air libre. Remontez- le ensuite en répétant les étapes dans l’ordre inverse.
- Page 48 Nettoyage de la hotte aspirante Pour protéger le boîtier contre la corrosion, nettoyez la hotte aspirante à l’eau chaude sans utiliser de produit corrosif ou autres produits caustiques de nettoyage. Utilisez si possible des produits ou mousses de nettoyage pour l’inox, qui nettoient et laissent une couche de protection sur la surface.
-
Page 49: Résolution Des Problèmes
RÉSOLUTION DES PROBLÈMES Problème Cause possible Solution La lumière est allumée La bouche d’aération est Éliminer la source du mais le moteur ne bloquée. blocage. fonctionne pas. Le condensateur est cassé. Faire remplacer le condensateur. Le moteur est cassé. Faire remplacer le moteur. Le moteur dégage une Faire remplacer le moteur. -
Page 50: Fiche De Données Produit
FICHE DE DONNÉES PRODUIT Informations selon le règlement (UE) n ° 65/2014 Méthodes de mesure et de calcul selon EN 61591:1997+A1:2006+A2:201 1+A1 1:201 4+A12:2015 Numéro d‘article 10031992, 10031993, 10031994 Description Symbole Valeur Unité Consommation annuelle d'énergie 43,5 kWh/Année hood Classe d'efficacité énergétique Efficacité... - Page 51 Informations selon le règlement (UE) n ° 66/2014 Méthodes de mesure et de calcul selon EN 61591:1997+A1:2006+A2:201 1+A1 1:201 4+A12:2015 Numéro d‘article 10031992, 10031993, 10031994 Description Symbole Valeur Unité Consommation annuelle d'énergie 43,5 kWh/Année hood Facteur d'extension de temps Efficacité dynamique des fluides 28,5 hood Indice d'efficacité...
-
Page 52: Informations Sur La Protection De L'environnement
INFORMATIONS SUR LA PROTECTION DE L‘ENVIRONNEMENT • Assurez-vous qu‘il y a une ventilation suffisante pendant la cuisson pour que la hotte aspirante puisse fonctionner efficacement et avec un faible niveau sonore. • Ajustez la vitesse du ventilateur à la quantité de vapeur produite pendant la cuisson. - Page 53 Gentile cliente, La ringraziamo per aver acquistato il dispositivo. La preghiamo di leggere attentamente le seguenti istruzioni per l’uso e di seguirle per evitare possibili danni. Non ci assumiamo alcuna responsabilità per danni scaturiti da una mancata osservazione delle avvertenze di sicurezza e da un uso improprio del dispositivo.
-
Page 54: Avvertenze Di Sicurezza
AVVERTENZE DI SICUREZZA Avvertenze generali • Prima dell‘uso controllare la tensione sull‘etichetta del dispositivo. Collegare il dispositivo solo ad una presa che corrisponde alla tensione indicata. In caso di dubbi, consultare un elettricista o il proprio fornitore di elettricità. • Se il cavo di alimentazione o la spina sono danneggiati, farli sostituire dal produttore, da un centro assistenza autorizzato o da un tecnico qualificato. - Page 55 Note importanti circa la modalità di estrazione AVVERTIMENTO Pericolo di morte, pericolo di intossicazione da gas di scarico! Non azionare l´apparecchio con funzione di scarico mentre è attivo un impianto di riscaldamento che utilizza l´aria ambiente, se l´areazione non è suffi ciente. Gli impianti di riscaldamento che sfruttano l´aria ambiente (ad es.
-
Page 56: Installazione
INSTALLAZIONE Installazione a parete nel dettaglio • E´ possibile espellere o far circolare l‘aria di scarico. • Posizionare il dispositivo sopra il piano cottura ad una distanza di 65-75 cm. In questo modo si ottiene la massima efficienza possibile. Elemento di fissaggio Gancio Camino... - Page 57 Camino interno Camino esterno Tubo di scarico Fissare il camino alla parete. Regolare l´altezza del camino interno e fissarlo. Nota: l´altezza massima del camino varia in base al modello. Installazione alla parete nel dettaglio Elemento di fissaggio Elemento di fissaggio Camino interno Camino esterno Tubo di scarico...
- Page 58 Dimensioni...
-
Page 59: Pannello Dei Comandi E Tasti Funzione
Nota importante sull‘installazione L‘angolo di inclinazione, nel quale il tubo viene condotto fuori dalla parete, non deve superare 120°. Dopo l‘installazione assicurarsi che la cappa aspirante non sia inclinata (vedere la figura). PANNELLO DEI COMANDI E TASTI FUNZIONE Pannello dei comandi Stop Velocitá... -
Page 60: Pulizia E Manutenzione
Tasti funzione Tasto Stop Premere il tasto per arrestare il motore. Velocità bassa Premere il tasto per mettere in funzione il motore a bassa velocità. Velocità media Premere il tasto per mettere in funzione il motore a velocità media. Velocità elevata Premere il tasto per mettere in funzione il motore ad alta velocità. - Page 61 Per rimuovere il filtro in alluminio, premere il tasto (vedere la figura) e rimuovere il filtro tirandolo delicatamente verso il basso. Lavare il filtro e lasciarlo asciugare. In seguito installare il filtro in ordine inverso. Sostituire le lampadine Prima di sostituire le lampadine, staccare la spina dalla presa. Afferrare l‘anello metallico della lampadina, tirarlo verso il basso e rimuovere il supporto.
- Page 62 Pulire la cappa aspirante Per proteggere le superfici dalla corrosione, lavarle con acqua calda e un detergente che non sia corrosivo. Se possibile, utilizzare prodotti per acciaio inox che, oltre a pulire, lasciano uno strato protettivo sulla superficie. Si consiglia di pulire l´alloggiamento almeno una volta al mese.
-
Page 63: Risoluzione Dei Problemi
RISOLUZIONE DEI PROBLEMI Problema Causa possibile Soluzione La luce è accesa ma il L´areazione è bloccata. Rimuovere l´ostruzione. motore non funziona. Il condensatore è guasto. Sostituire il condensatore. Il motore è guasto. Sostituire il motore. Il motore emette un odore Sostituire il motore. -
Page 64: Scheda Dati Del Prodotto
SCHEDA DATI DEL PRODOTTO Indicazioni conformi alla direttiva (UE) N° 65/2014 Metodi di misurazione e calcolo conformi a EN 61591:1997+A1:2006+A2:201 1+A1 1: 2014+A12:2015 Numero articolo 10031992, 10031993, 10031994 Definizione Simbolo Valore Unità Consumo energetico annuale 43,5 kWh/Anno hood Classe di efficienza energetica Efficienza fluidodinamica 28,5 hood... - Page 65 Indicazioni conformi alla direttiva (UE) N° 66/2014 Metodi di misurazione e calcolo conformi a EN 61591:1997+A1:2006+A2:201 1+A1 1: 2014+A12:2015 Numero articolo 10031992, 10031993, 10031994 Definizione Simbolo Valore Unità Consumo energetico annuale 43,5 kWh/Anno hood Fattore di incremento nel tempo Efficienza fluidodinamica 28,5 hood Indice di efficienza energetica...
-
Page 66: Indicazioni Per La Tutela Dell'ambiente
INDICAZIONI PER LA TUTELA DELL’ AMBIENTE • Mentre si cucina, assicurare un sufficiente flusso d’aria, in modo che la cappa aspirante possa funzionare in modo efficiente e con bassa rumorosità operativa. • Regolare la velocità della ventola in base alla quantità di vapore generato durante la cottura.
Need help?
Do you have a question about the MONTBLANC and is the answer not in the manual?
Questions and answers