
Summary of Contents for ProBot Anno
- Page 1 Started guide - PROBOT Anno Robot Arm Revision 2.1.0 2020-01-27 Applicable to PROBOT Anno Robot Arm (hardware version number V2.1.0)...
- Page 2 Attention Thank you for purchasing and using PROBOT Anno products.For your security and interests, please read user manual and all the data included carefully before using the product. RobotAnno co. LTD shall not be liable for any personal injury, property damage or other losses caused by your failure to operate and use the product in accordance with the user manual.
- Page 3 This manual only gives a brief description of the use of PROBOT Anno robot arm. Please read carefully and fully understand <User Manual of PROBOT Anno Robot Arm> before use. Use robot arm safely according to the instructions. Before robot arm is powered on, make sure the arm is in its initial state ...
-
Page 4: Table Of Contents
3.6 Shutdown and emergency stop..................16 3.7 Dragging teach........................ 17 3.8 Joint space inching control..................... 19 3.9 Workspace inching control..................... 19 3.10 IO Control........................20 3.11 Teaching point.......................21 4 Appendix ............................24 4.1 Video Tutorial........................24 4.2 References........................24 2020-01-27 Manual for PROBOT Anno robot arm... -
Page 5: Document Version
Document Version 日期 版本 作者 概要 2019-4-13 RobotAnno Initial version 2019-10-8 RobotAnno Add teaching point functions 2019-12-15 RobotAnno Add IO introduction Table 1: document version 2020-01-27 Manual for PROBOT Anno robot arm... -
Page 6: Hardware Configuration
BUTTON(STOP), RESET BUTTON(RESET), one-click start BUTTON(BUTTON);There is a red power switch behind the control box. (1) STOP BUTTON(STOP):In case of emergency, pressing the emergency STOP BUTTON downward can stop the operation of the robot arm in time;When starting the manipulator again, 2020-01-27 Manual for PROBOT Anno robot arm... - Page 7 DB25 relay station. The relay station leads to the relay module, which can connect the external 24V output device, and the external 24V input device can be directly connected to the input port of DB25 relay station . 2020-01-27 Manual for PROBOT Anno robot arm...
- Page 8 Physical system connection diagram 2020-01-27 Manual for PROBOT Anno robot arm...
- Page 9 DB25 relay station connection 2020-01-27 Manual for PROBOT Anno robot arm...
-
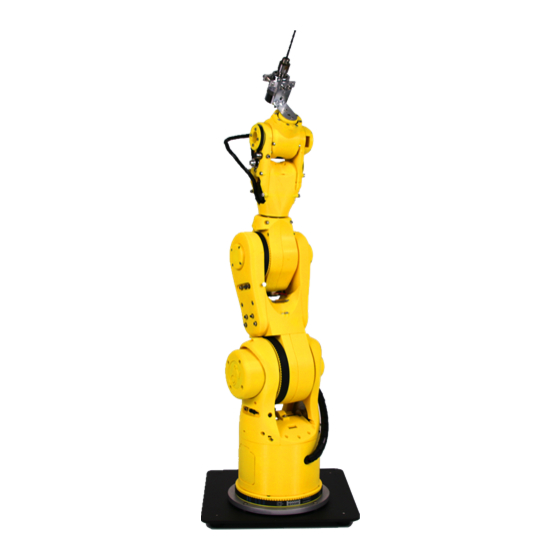
Page 10: Adjust The Initial Pose Of The Robot Arm
The starting position of each axis of the robot arm should be reset to zero, otherwise the manipulator is likely to run out of order, causing damage to the arm and causing danger. Physical picture of the initial position of the robot arm 2020-01-27 Manual for PROBOT Anno robot arm... -
Page 11: Ros Environment Setup
(1)Plug ROS2GO to PC ,start/restart PC ,and Enter the BIOS Settings and boot the usb drive using UEFI mode,( Different PC have different way into the BIOS system, please refer to guide of PC boot). BIOS set the usb flash drive start diagram 2020-01-27 Manual for PROBOT Anno robot arm... - Page 12 ROS2GO desktop Note: the use of PROBOT Anno is based on the ROS environment. If you need to install Ubuntu system and ros- related software on your PC, please refer to the user manual of PROBOT Anno -- ROS environment construction of host computer, and also refer to the README document of GitHub open source project https://github.com/ps-...
-
Page 13: Operate Robot Arm
(3)A buzzer will be heard when starting up, lasting about 1-2s. (4)Wait for about 20 seconds after power on.When you hear two continuous buzzers, which will last for a shorter time, you know that PROBOT Anno software and hardware system has been started successfully. -
Page 14: Start Ros Host Computer
ROS host computer starts up and runs in the simulation environment by default. Click the Sim/Live switch button in the control bar to switch to the real machine control environment, and the key will display Live 2020-01-27 Manual for PROBOT Anno robot arm... -
Page 15: Enable Robot Arm
3.4 Enable robot arm Click the Enable button in the control bar to enable robot arm, and the red indicator light turns green : 2020-01-27 Manual for PROBOT Anno robot arm... -
Page 16: Run Demo
Due to the loss of force at each link of the robot arm after emergency stop, it will move naturally due to gravity. Please pay attention to the safety of human and related equipment. 2020-01-27 Manual for PROBOT Anno robot arm... -
Page 17: Dragging Teach
(3)Click on Plan and Execute key in the Planning tab of the visual control area will enable the robot model to start the movement (during the movement, the Plan and Execute keys become gray and unoperable, so we need to wait for the completion of the current action). 2020-01-27 Manual for PROBOT Anno robot arm... - Page 18 (4)The robot moves from the current pose to the target pose until the interface shows that the two models coincide completely and the robot moves end. 2020-01-27 Manual for PROBOT Anno robot arm...
-
Page 19: Joint Space Inching Control
(1)All functions of spatial inching are in the Pose tab in the motion control area. (2)The robot manipulator workspace inching can be controlled by long press + , - and the End- Effector Velocity slider on the lower side can be adjusted. 2020-01-27 Manual for PROBOT Anno robot arm... -
Page 20: Io Control
(2)In the Input IOs column, you can see the level signal of the Input port (0/1). The tick in the box before the port number indicates that the Input is high level, otherwise it is low level/dangling. 2020-01-27 Manual for PROBOT Anno robot arm... -
Page 21: Teaching Point
3.11 Teaching point The storage and operation function of the teaching point is in the motion control area. (1) Add:Add a teaching point. 2020-01-27 Manual for PROBOT Anno robot arm... - Page 22 After clicking the Play button, the teaching point in the list will be looping from the first teaching point. After clicking the Stop button, the target point of the current running will turn into a green background. 2020-01-27 Manual for PROBOT Anno robot arm...
- Page 23 (6) Stop:Stop looping the list of points (7) Points Velocity:Adjust the speed of the teaching points 2020-01-27 Manual for PROBOT Anno robot arm...
-
Page 24: Appendix
This document is accompanied by a detailed video tutorial. Please refer to the following links : 《PROBOT_Anno 上手指南》:https://www.bilibili.com/video/av53771128 4.2 References 1. 《PROBOT Anno 机械臂用户手册》,精锋微控 2. ROS Wiki - PROBOT:http://wiki.ros.org/Robots/PROBOT_Anno 3. Github - PROBOT:https://github.com/ps-micro/PROBOT_Anno 4. MoveIt! Tutorials: http://docs.ros.org/kinetic/api/moveit_tutorials/html/index.html 5. 《ROS 机器人开发实践》,胡春旭编著,机械工业出版社 2020-01-27 Manual for PROBOT Anno robot arm...
Need help?
Do you have a question about the Anno and is the answer not in the manual?
Questions and answers