Table of Contents
Advertisement
Quick Links
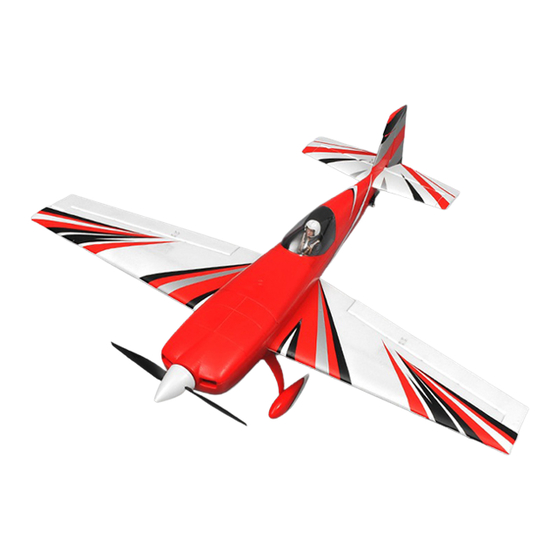
CARF-Models Extra 330SC (3.1m)
Instructions for Extra 330SC IMAC-
Airplane
Thank you very much for purchasing our CARF Extra 330SC all-composite aircraft, made
with the revolutionary Total Area Vacuum Sandwich (TAVS) technology.
Before you get started building and setting-up your aircraft, please make sure you have
read this instruction manual several times, and understood it. If you have any questions,
please don't hesitate to contact us. Below are the contact details:
Email: feedback@carf-models.com
or techsupport@carf-models.com
Telephone: Phone your C-ARF Rep!!! He will be there for you.
Website:
http://www.carf-models.com
Liability Exclusion and Damages
You have acquired a kit, which can be assembled into a fully working R/C model when
fitted out with suitable accessories, as described in the instruction manual with the kit.
However, as manufacturers, we at CARF are not in a position to influence the way you
build and operate your model, and we have no control over the methods you use to
install, operate and maintain the radio control system components. For this reason we are
obliged to deny all liability for loss, damage or costs which are incurred due to the
incompetent or incorrect application and operation of our products, or which are
connected with such operation in any way. Unless otherwise prescribed by binding law,
the obligation of the Composite-ARF company to pay compensation is excluded,
regardless of the legal argument employed. This applies to personal injury, death,
damage to buildings, loss of turnover and business, interruption of business or other
direct and indirect consequent damages. In all circumstances our total liability is limited to
the amount which you actually paid for this model.
BY OPERATING THIS MODEL YOU ASSUME FULL RESPONSIBILITY FOR YOUR
ACTIONS.
It is important to understand that CARF-Models Co., Ltd, is unable to monitor whether you
follow the instructions contained in this instruction manual regarding the construction,
operation and maintenance of the aircraft, nor whether you install and use the radio
control system correctly. For this reason we at CARF are unable to guarantee or provide
a contractual agreement with any individual or company that the model you have made
will function correctly and safely. You, as operator of the model, must rely upon your own
expertise and judgement in acquiring and operating this model.
1
www.carf-models.com
Advertisement
Table of Contents

Subscribe to Our Youtube Channel
Related Manuals for Carf-Models Extra 330SC


Summary of Contents for Carf-Models Extra 330SC
- Page 1 BY OPERATING THIS MODEL YOU ASSUME FULL RESPONSIBILITY FOR YOUR ACTIONS. It is important to understand that CARF-Models Co., Ltd, is unable to monitor whether you follow the instructions contained in this instruction manual regarding the construction, operation and maintenance of the aircraft, nor whether you install and use the radio control system correctly.
-
Page 2: Supplementary Safety Notes
www.carf-models.com CARF-Models Extra 330SC (3.1m) Supplementary Safety Notes Pre-flight checking: Before every session check that all the model’s working systems function correctly, and be sure to carry out a range check. The first time you fly any new model aircraft we strongly recommend that you enlist the help of an experienced modeller to help you check the model and offer advice while you are flying. -
Page 3: General Information About Fully- Composite Aircraft Structure And Design
www.carf-models.com CARF-Models Extra 330SC (3.1m) Check for vibrations through the whole throttle range. The engine should run smoothly with no unusual vibration. If you think that there are any excessive vibrations at any engine rpm’s, DON’T FLY at this time and check your engine, spinner and propeller for proper balancing. - Page 4 www.carf-models.com CARF-Models Extra 330SC (3.1m) The Fuselage: The fuselage is also made in negative moulds, and it is also constructed using TAVS technology, with carbon reinforcement in strategic positions. All the loadbearing internal parts are glued in during manufacture, to ensure accurate location and reduce the assembly time for you.
-
Page 5: Tools And Adhesives
www.carf-models.com CARF-Models Extra 330SC (3.1m) Tools and Adhesives Tools etc: This is a very quick and easy plane to build, not requiring difficult techniques or special equipment, but even the building of CARF aircraft requires some suitable tools! You will probably have all these tools in your workshop anyway, but if not, they should be available in all good hobby shops, or hardware stores. -
Page 6: General Information
Accessories Here is a list of the things you may need to get your CARF Extra 330SC into the air. Some of them are mandatory, some of them can be chosen by you. What we list here are highly recommended parts, and have been thoroughly tested. - Page 7 www.carf-models.com CARF-Models Extra 330SC (3.1m) General Tips: We recommend that you follow the general order of construction shown in this manual for the fuselage, as it makes access to everything easier and saves time in the end. The last item to be glued in position should be the Fuel tank mounting plate, as it makes access to the rudder tray and exhaust system less easy.
-
Page 8: Landing Gear
www.carf-models.com CARF-Models Extra 330SC (3.1m) Landing Gear The 1st job is to fit the landing gear legs (wheel pants and cuffs can be done later) - and you can leave these in place to protect the bottom of the fuselage during assembly. - Page 9 M4x20mm Screws. Leg Cuffs The Extra 330SC has fairings at the top of each LG leg where they enter the fuselage, and these are supplied in the kit as lightweight fibreglass mouldings. We suggest that they are glued in place onto the LG with silicone adhesive (bath sealant), so they can easily be removed if necessary.
-
Page 10: Cockpit Canopy
www.carf-models.com CARF-Models Extra 330SC (3.1m) cowling is secured to the fuselage with three M3 bolts each side, and the upper half secured with another three M3 bolts. All these bolts go into M3 T-nuts, which are glued to the inside of the cowling or fuselage, in reverse - that is with the ‘spikes’... - Page 11 www.carf-models.com CARF-Models Extra 330SC (3.1m) small drop of slow CA each (ZAP-O or Plasti-ZAP recommended). Note: Do NOT use any CA accelerator/kicker - you will immediately ‘fog’ the clear canopy! Temporarily tape the front and sides of the clear canopy to the inside the frame, in as many positions as possible.
- Page 12 www.carf-models.com CARF-Models Extra 330SC (3.1m) use too much force, otherwise a phenolic hinge post inside might break loose. Alternatively you can use 4mm carbon tubes which definitively will have to be greased. You have a choice of elevator servos. Anyway you should use only hi-power digital servos with more than 280Ncm torque.
- Page 13 www.carf-models.com CARF-Models Extra 330SC (3.1m) the factory during manufacture. Hinge the rudder to the vertical stabilizer with the 4mm Ø brass tube supplied, in the same way as the elevators. Check for smooth movement.
- Page 14 www.carf-models.com CARF-Models Extra 330SC (3.1m) Make up the pull-pull wires for the rudder from the hardware supplied, with a loop at the front that goes over the hooks on the output arms, and a ball-link with turnbuckle/threaded end and locknut at the rudder end (if using full metal arms, install a ball-link at the front as well).
- Page 15 www.carf-models.com CARF-Models Extra 330SC (3.1m) Engine and Exhaust Installation Here we show the installation of a Desert Aircraft DA-200 on KS canisters and DA-170 on KS tuned pipes which both are combinations with lots of power, and a very good throttle response throughout the whole range.
- Page 16 www.carf-models.com CARF-Models Extra 330SC (3.1m) Then adjust the black extension together with the plywood cuboid and your engine on the motor dome as described before. You won’t need any washers – right- and down/upthrust have to be adjusted by the position of the motor dome extension.
- Page 17 CARF-Models Extra 330SC (3.1m) www.carf-models.com Ignition It’s important that your ignition isn’t installed too close to the RC-Systems or the hot engine – try to keep it cool. We suggest to installing it as shown on the photos before. Use some foam rubber for shock absorption.
- Page 18 www.carf-models.com CARF-Models Extra 330SC (3.1m) Canisters You have a choice of canisters. We use the ones of MTW or Krumscheid KS. To fit the canisters at the fuselage we used the KS- ComfortMount mounting-system together with two aluminium That may happen to your profiles as shown at the photos.
- Page 19 www.carf-models.com CARF-Models Extra 330SC (3.1m) You will also need to make a rectangular cutout in the lower back edge of the cowling, as shown at the photos. Radius the corners of all the slots and cut-outs to reduce any chance of tearing of the composite skin.
-
Page 20: Fuel Tank Installation
www.carf-models.com CARF-Models Extra 330SC (3.1m) Fuel Tank installation The Fuel tank base is supplied as 9 cnc milled parts, from 3mm carbon-balsa composite material (see photo right). Assembly is self-explanatory as all parts have interlocking tabs &... - Page 21 www.carf-models.com CARF-Models Extra 330SC (3.1m) We use the excellent ‘Tygon’ brand of fuel tubing for all our models. It is totally gasoline and kerosene-proof, and does not go hard and crack with age. Secure the feed tube inside the tank to the clunk with a small cable tie.
-
Page 22: Rc-Installation
www.carf-models.com CARF-Models Extra 330SC (3.1m) Sm oke System If you want to use a smoke system, the smoke tank can be fitted as shown below. Follow the manufacturer’s instructions for fitting the smoke system. - Page 23 CARF-Models Extra 330SC (3.1m) www.carf-models.com all the components as shown at the photos. If you do it like that, you won’t need any lead to obtain the correct CG. It’s recommended to install all of the wiring to the inner skin of the fuselage.
-
Page 24: Final Check
www.carf-models.com CARF-Models Extra 330SC (3.1m) quick and easy! Once all wires are soldered to the gold- plated pins, fit a short length of heatshrink tube over each one. Finally protect all the connections from vibrations etc with a nice blob of glue from a hot-glue gun. - Page 25 www.carf-models.com CARF-Models Extra 330SC (3.1m) small drop loctite/thread locking compound on all the bolts that hold the servo arms to the servos, especially important with digital types, as the occasional ‘buzzing’ you hear is actually high- frequency vibration which, over some time, can cause the servo arm securing bolts to work loose.
- Page 26 "cracks". It’s up to you now - you can’t blame it on the aircraft anymore….! We hope that you enjoyed building your Extra 330SC. Please let us know if you think that any hardware is missing or inadequate. We tried to make this airplane as complete as possible. With good feedback from customers you will help us to continue making good things even better.
Need help?
Do you have a question about the Extra 330SC and is the answer not in the manual?
Questions and answers