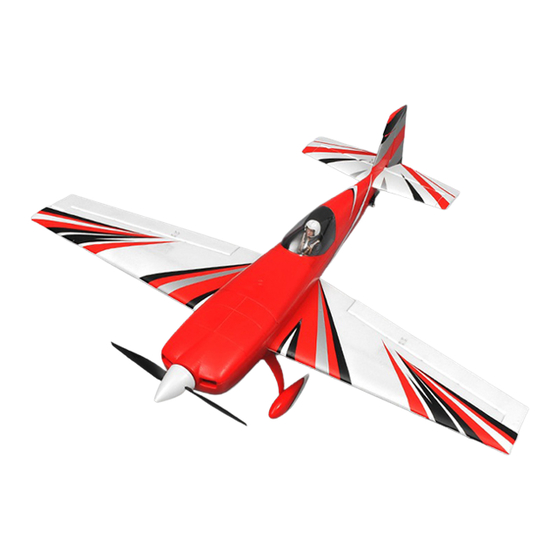
Carf-Models Extra 330sc Assembly Manual
Hide thumbs
Also See for Extra 330sc:
- Building instruction (17 pages) ,
- Instructions manual (27 pages)
Table of Contents
Advertisement
Quick Links
Advertisement
Table of Contents

Related Manuals for Carf-Models Extra 330sc


Summary of Contents for Carf-Models Extra 330sc
- Page 1 Assembly Manual CARF Extra 330sc 2.6m Page |...
- Page 2 And the fun factor is going to be UNLIMITED! Furthermore, the rigidity of a CARF-Models design will guarantee fun and joy for the whole season or two, or three, without glue joints falling apart, monokote wrinkling and coming off, fuselages getting twisty and wings getting soft.
- Page 3 Personal safety: There are a couple of things that are good to keep in mind when you are assembling your Extra 330SC. Some of them are common sense, but it doesn t hurt to be reminded. While you are working with tools and sharp implements, be aware of others around you and the environment you are working in.
-
Page 4: Servo Arms
Engine Choices: There is a multitude of engines available for you to use in your Extra 330SC. The airframe is suited to today s current crop of 100cc to 120cc engines. We used a DA120 in the process of producing this manual, the performance is excel- lent with an abundance of power, as well as being very light. -
Page 5: Build Requirements
For surface cleaning we recommend old fashioned liquid lighter fluid such as Ronsonol . Do not use acetone for cleaning the external painted surfaces, damage to the paint could occur. (If in doubt, test on a small area that will not be seen). CARF Extra 330sc 2.6m Page | 5... -
Page 6: Tools Required
Tools Required You will not require any specialized tools to build your Extra 330SC. However some items make the job a little eas- ier, such as a tapered reamer (RC car body reamer), a step drill bit and a centre drill bit. These items make drilling holes in the composite materials less problematic, and very simple. -
Page 7: Landing Gear
• The undercarriage legs for the Composite ARF Extra 330SC are very strong and very light, thanks to the laminated carbon manufacturing process that has been used. The legs are held in place with four - 6mm x 20mm cap head bolts, the legs are already pre drilled for you. -
Page 8: Tailwheel Assembly
The flat bottom surface of the Composite Arf Extra 330SC makes tailwheel assembly mounting very simple. During construction we elected to use a carbon leaf style tailwheel assembly from J&J Tailwheels. -
Page 9: Wheel Pants
Set the wheel pants to 65mm at the rear. You can now drill the 3mm hole required to secure the wheel pant. When you have done this in- sert a 3mm T-nut into place in the wheel pant. CARF Extra 330sc 2.6m Page | 9... -
Page 10: Engine Installation
The Extra 330SC cowl is shaped to accommodate a 5 spinner, and correct alignment will enhance the appearance when done correctly. - Page 11 7mm drill bit to enlarge the hole to suit the 6mm T-nut. Using a 6mm bolt and a washer pull the T-nuts into position. Mount your engine using the alloy standoff s supplied in your hardware pack. CARF Extra 330sc 2.6m Page | 11...
-
Page 12: Exhaust Installation
• Marking pen • Mounting a canister exhaust system in the Extra 330SC is pretty straight forward. Obviously there is a large selection of canisters on the market to purchase. During assembly we used KS86 canisters. However there is enough room in the fuselage to accommodate most brands and styles of exhausts. - Page 13 If positioned correctly you will have a nice straight path for your throttle push rod. We have provided a plywood throttle servo mount in the hardware pack for you. CARF Extra 330sc 2.6m Page | 13...
- Page 14 Alternatively you may want to use an aftermarket turnbuckle, such as those provided by SWB, Secraft or Hanger 9. A turnbuckle length of 50mm (2 ) is required. A suitable ball link may also be used in place of the alloy clevis. CARF Extra 330sc 2.6m Page | 14...
- Page 15 As before with the elevators you can use tape to keep the tube in location, or use the 4mm plas- tic plug as explained at the start of this section. CARF Extra 330sc 2.6m Page | 15...
- Page 16 When you have adjusted the push rod to the correct length, fit the push rods between the servo and control horn. Carefully move the aileron through its full travel to ensure there is no binding. CARF Extra 330sc 2.6m Page | 16...
- Page 17 The same measuring process as with the ply mounts applies. Work toward keeping the servo output shaft as close as possible to the centre of the hatch slot.) Don t forget to protect your servo and extension leads when and where they exit the wing or enter the fuse- CARF Extra 330sc 2.6m Page | 17...
- Page 18 • Fitting the canopy is one of the areas that people seem to dislike! Really it s not that difficult, and the Extra 330SC canopy is quite small, and fits in place beautifully. Fixing the canopy to the canopy frame can be accomplished with a good quality silicone sealant.
- Page 19 Leaving the canopy overnight is also a good option if you are unsure. When you remove the tape, simply rub away any silicone that has come above the tape. Mineral Turpentine with a soft cloth can make it easier. Jobs done! CARF Extra 330sc 2.6m Page | 19...
- Page 20 Before you epoxy the tray in place make sure that it is centred in the fuselage. You can use CA and kicker in a couple of spots to hold in position while the epoxy cures. CARF Extra 330sc 2.6m Page | 20...
- Page 21 Flip the model upside down, and directly underneath the servo draw the servo arm measurements onto so masking tape. Remember this measurement is dependent on which servo arms you use. CARF Extra 330sc 2.6m Page | 21...
- Page 22 Don t forget to leave room for tensioning adjustment at the ball link. You do not want everything wound right up and no thread left to fine tune the cable tension CARF Extra 330sc 2.6m Page | 22...
- Page 23 Before you permanently glue the tank tray in place, make mounting provisions for all your RX equipment. It s much easier to do this now, rather than after the tank tray is secured in place. CARF Extra 330sc 2.6m Page | 23...
- Page 24 Use the seam line as a reference to keep your vent slots nice and straight. The shape of the slots is not that important, but making them oval, and just large enough to accommodate the Dremel sanding drum makes the process easy. CARF Extra 330sc 2.6m Page | 24...
-
Page 25: Control Throws
C of G and Control Throws The centre of gravity position of the Extra 330SC is 90mm to 100mm from the leading edge of the wing at the tip. Pick- ing the completed model up at the tips will not harm the airframe, but due care should be taken in the method you use.
Need help?
Do you have a question about the Extra 330sc and is the answer not in the manual?
Questions and answers