Table of Contents
Advertisement
Quick Links
SAVE THESE INSTRUCTIONS. THIS MANUAL WILL HELP
YOU TO OBTAIN EFFICIENT, DEPENDABLE SERVICE
FROM THE HEATER, AND ENABLE YOU TO ORDER REPAIR
PARTS CORRECTLY. KEEP IN A SAFE PLACE FOR FUTURE
REFERENCE.
CAUTION! Please read this entire manual before you
install or use your new room heater. Failure to follow
instructions may result in property damage, bodily
injury, or even death. Improper Installation Could Void
Your Warranty!
SAFETY NOTICE: If this heater is not properly installed,
a house fire may result. For your safety, follow
the installation instructions. Never use make-shift
compromises during the installation of this heater.
Contact local building or fire officials about permits,
restrictions and installation requirements in your area.
This appliance is Certified for installation in the USA
and Canada. Tested per UL 1482-2011 (R2015) and
ULC-S627-00 (R2016). This appliance may be installed
in a mobile home U.S ONLY. Refer to markings on the
appliance for additional information.
This unit is not intended to be used as a primary source
ALL PICTURES SHOWN ARE FOR ILLUSTRATIVE PURPOSES
ONLY. ACTUAL PRODUCT MAY VARY DUE TO PRODUCT
ENHANCEMENT.
Ce produit peut vous exposer à des agents chimiques, y compris au monoxyde de
carbone, lesquels sont reconnus dans l'État de la Californie comme causant le cancer et
des malformations congénitales ou autres dommages au fœtus. Pour obtenir plus de
This manual is subject to change without notice.
renseignements, veuillez consulter le site www.P65warnings.ca.gov
CALIFORNIA PROPOSITION 65 WARNING:
This product can expose you to chemicals including carbon monoxide, which
is known to the State of California to cause cancer, birth defects and/or other
reproductive harm. For more information, go to www.P65warnings.ca.gov
U.S. Environmental Protection Agency
Certified
to
comply
particulate emissions standards.
of heat.
with
2020
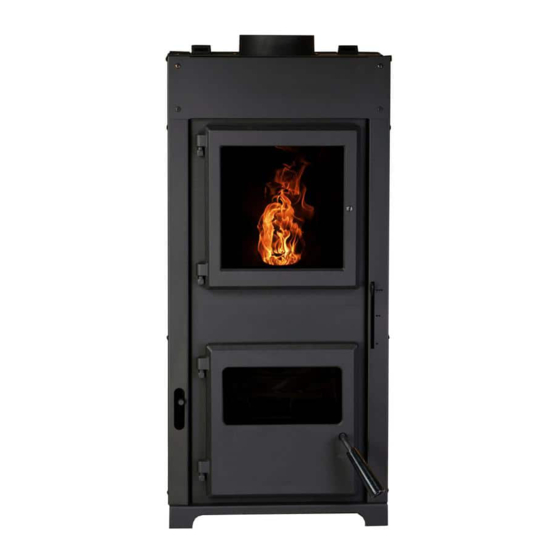
Model GW7400
United States Stove Company
227 Industrial Park Road
South Pittsburg, TN 37380
R
Report Number: F19-465
853705-4904i
Advertisement
Table of Contents

Related Manuals for United States Stove GW7400


Summary of Contents for United States Stove GW7400
- Page 1 State of California to cause cancer, birth defects and/or other reproductive harm. For more information, go to www.P65warnings.ca.gov U.S. Environmental Protection Agency Certified comply with 2020 particulate emissions standards. United States Stove Company Report Number: F19-465 227 Industrial Park Road 853705-4904i South Pittsburg, TN 37380...
-
Page 2: Fuel Considerations
The instructions pertaining to the installation of your pellet heater complies with UL 1482 (R2015) & ULC-S627-2000 standards. This manual describes the installation and operation of the USSC, GW7400 pellet fired heater. This heater meets the 2020 U.S. Environmental Protection Agency’s wood pellet fuel emission limits for wood heaters sold after May 15, 2020. -
Page 3: Safety Precautions
Safety Precautions • IMPORTANT: Read this entire manual before installing • Allow the stove to cool before performing any and operating this product. Failure to do so may maintenance or cleaning. Ashes must be disposed result in property damage, bodily injury, or even in a steel container with a tight fitting lid, and moved death. -
Page 4: Mobile Home Installations
MOBILE HOME INSTALLATIONS Manufactured or Mobile home installations require that the a solid fuel burning appliance be attached to the Mounting floor of the mobile home. For this appliance there are two Hole ways of doing this. Option 1: A mounting hole is provided in the rear of the unit. -
Page 5: Clearances To Combustibles
CLEARANCES TO COMBUSTIBLES It is of utmost importance that the clearances to combustible materials be strictly adhered to during installation of the stove. Clearances may only be reduced by means approved by a regulatory authority. Contact your local safety department or you may consult NFPA 211 if installing in the USA. Refer to the tables below in this section. FLOOR PROTECTION (EMBER PROTECTION) This heater must have a non-combustible floor protector (ember protection) installed beneath it if the floor is of combustible material. -
Page 6: Importance Of Proper Draft
• Floor to ceiling height must be at least 7’ (2.13m) in all cases. • Do not place any combustible material within 4’ (1.2m) of the front of the unit. • Never store your fuel within the specified clearances or within the space required for refueling and ash removal. •... - Page 7 RECOMMENDATIONS FOR EXCESSIVE DRAFT SAFETY NOTICE: IF THIS UNIT IS NOT PROPERLY INSTALLED, A HOUSE / BUILDING FIRE MAY RESULT. FOR YOUR SAFETY, CONTACT LOCAL BUILDING OR FIRE OFFICIALS ABOUT PERMITS, RESTRICTIONS, AND INSTALLATION REQUIREMENTS FOR YOUR AREA. If experiencing excessive draft and/or fuel consumption with this unit, the use of a barometric draft regulator is recommended.
- Page 8 CHIMNEY Your appliance may be hooked up with a 6” factory built or masonry chimney. If you are using a factory built chimney, it must comply with UL 103 or CAN/ULC-S629 standard; therefore it must be a Type HT (2100°F). It is extremely important that it be installed according to the manufacturer’s specifications.
-
Page 9: Factory Built Chimney
FACTORY BUILT CHIMNEY When a metal prefabricated chimney is used, the manufacturer’s installation instructions must be followed. You must also purchase (from the same manufacturer) and install the ceiling support package or wall pass-through and “T” section package, firestops (where needed), insulation shield, roof flashing, chimney cap, etc. -
Page 10: Combustible Wall Chimney Connector Pass-Throughs
COMBUSTIBLE WALL CHIMNEY CONNECTOR PASS-THROUGHS Method A. 12” (304.8 mm) Clearance to Combustible Wall Member: Using a minimum thickness 3.5” (89 mm) brick and a 5/8” (15.9 mm) minimum wall thickness clay liner, construct a wall pass-through. The clay liner must conform to ASTM C315 (Standard Specification for Clay Fire Linings) or its equivalent. -
Page 11: Outside Combustion Air
OUTSIDE COMBUSTION AIR It is recommended that this appliance be installed with an outside air intake. This type of installation is also required for Canadian installations, mobile homes and in air tight houses with negative pressure problems. You can purchase this option through your heater dealer or at your local hardware supply store. -
Page 12: Operation
Operation A. The unit is equipped with a temperature sensitive fuel B. Hopper flap. This will stop the fuel flow if the unit gets too hot, Lid Latch and will also close off the bottom of the hopper from the fire chamber when the unit is running out of fuel. Note: The reset handle should always be in the down position. - Page 13 IGNITION CAUTION: • Do not ever attempt to light the stove from the bottom of the primary burn grate. Always use the ignition port to start the unit. • Do not ever attempt to light the stove with the upper chamber access door open.
-
Page 14: Creosote - Formation And Need For Removal
WARNINGS • NEVER OVERFIRE YOUR STOVE. IF ANY PART OF THE STOVE STARTS TO GLOW RED, OVER FIRING IS HAPPENING. READJUST THE AIR INTAKE CONTROL AT A LOWER SETTING. • ATTEMPTS TO ACHIEVE HEAT OUTPUT RATES THAT EXCEED HEATER DESIGN SPECIFICATIONS CAN RESULT IN PERMANENT DAMAGE TO THE HEATER. -
Page 15: Maintenance
Maintenance CAUTION: Do not perform maintenance or cleaning on the unit until it has cooled to room temperature completely Your wood pellet stove is a high efficiency stove however, still requires that maintenance be performed on a regular basis. Maintenance is a vital key in maintaining your stove’s efficiency, operation, and longevity. It is important to perform a visual inspection of the appliance every time it is emptied and cleaned, in order to ensure that no parts have been damaged, in which case repairs must be performed immediately. -
Page 16: Off Season Maintenance
GASKETING WARNING: Never operate the appliance without a gasket or with a broken one. Damage to the appliance or even house fire may result. This unit’s doors use a 1/2” diameter rope gasket. It is recommended that you check your gaskets twice a month during the heating season and change the gaskets (which makes your stove air tight) once a year, in order to ensure good control over the combustion, maximum efficiency and security. -
Page 17: Troubleshooting
Trouble Shooting Problem: Possible Causes: Poor or lack of adequate draft. Air leaks in the upper burn chamber Too large of gap in upper chamber air wash (should be 0.08”) Extinguished Flame On Low Burn Air leaks between the upper and lower burn chambers Partially blocked primary burn grate Partially blocked secondary air ports Block in primary air... -
Page 18: Replacement Parts
Replacement Parts -18-... - Page 19 Replacement Parts Part # Description 83529 Hairpin 40292A 6” Flue Collar 28641 Burn Grate 88042 1/4” Rope Gasket 28647 Ignition Flap 610945 Top Filler W/Screen 610906 Secondary Baffle Weldment 29390 Top Cabinet 29162 Damper/Shaker Basket Tool 29389 Top Front Cabinet 29386 Right Shoulder 83968...
- Page 20 Replacement Parts Part # Description 83242 1/4-20 X 1/4 Allen Set Screw 893061 Allen Handle 893062 Roller Sleeve 83788 Socket Head Screw 891372 Pad, Door Hinge (Threaded) 40865 Viewing Door 88227 1/2” Overbraid Rope Gasket 4.3 ft 892965 Viewing Glass 28965 Air Wash Spacer 28721...
- Page 21 Notes -21-...
-
Page 22: Service Provider
Service Record It is recommended that your heating system is serviced regularly and that the appropriate Service Interval Record is completed. SERVICE PROVIDER Before completing the appropriate Service Record below, please ensure you have carried out the service as described in the manufacturer’s instructions. Always use the manufacturer's specified spare part when replacement is necessary. - Page 23 How To Order Repair Parts / Commande De Pièces De Rechange This manual will help you obtain efficient, dependable service from your heater, and enable you to order repair parts correctly. Keep this manual in a safe place for future reference. When writing, always give the full model number which is on the nameplate attached to the heater.