
Subscribe to Our Youtube Channel
Related Manuals for Emerson XM670


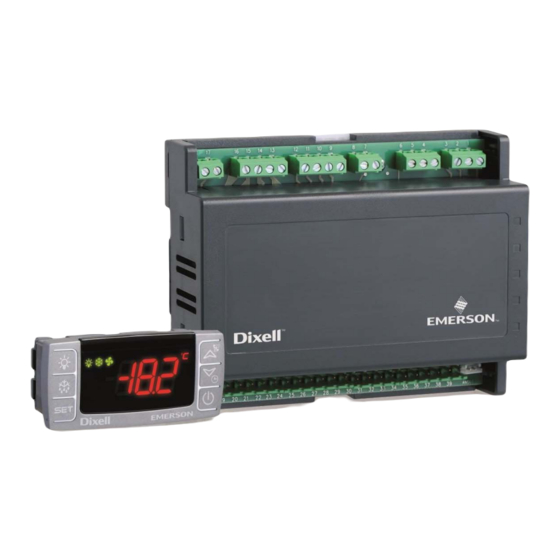
Summary of Contents for Emerson XM670
- Page 1 XM670-XM679 Controllers for Multiplexed Cabinets Installation and Operation Manual 026-1218 Rev 4...
- Page 3 Emerson Commercial and Residential Solutions 1065 Big Shanty Road NW, Suite 100 Kennesaw, GA 30144 USA 770-425-2724 • 1-800-829-2724 www.emerson.com...
-
Page 5: Table Of Contents
Contents 1 INTRODUCTION................................1 1.1. G ..............................1 ENERAL ARNING 2 OVERVIEW ................................... 1 2.1. G ..............................1 ENERAL ESCRIPTION 2.2. O ................................. 2 RDERING ODES 3 USER INTERFACE ..............................2 3.1. K ..............................2 EYS AND UNCTIONS 3.2. U LEDS ................................ - Page 6 16 UL RATINGS ................................26 17 CONNECTIONS ................................ 27 17.1. E2 XM D ..................27 EVICE OMMUNICATION ECOMMENDATIONS 17.1.1. Wiring Guidelines ............................. 27 17.2. XM670 - W ............................. 27 IRING IAGRAM 17.3. XM679 - 230VAC V ....................... 28 ALVES IRING IAGRAM 17.4.
-
Page 7: Introduction
• In case of failure or faulty operation, send the XM670/XM679 controllers can have six (6) relay device back to the distributor or to Emerson (see outputs to control the solenoid valve, defrost that can address) with a detailed description of the fault. -
Page 8: Ordering Codes
Part MODBUS-RTU compatible permits a simple XWEB Name Number interfacing. Depending on the model, the Hot Key connector can also be used to connect X-REP display. Solenoid Case Control XM670 318-6520 115V Solenoid Case Control XM670 318-6521 230V Pulse Case Control... -
Page 9: User Interface
Key Combinations Locks/Unlocks the keyboard Switches mode to programming mode Exits the programming mode Table 3-1 - XM670/XM679 Front Panel Keys and Functions Figure 3-1 - XM670 - XM679 Front Panel (Continued) 3.2. Use of LEDS 3.1. Keys and Functions... -
Page 10: How To Enter The Fast Access Menu
1. Enter the programming mode by pressing the SET and DOWN buttons for a few seconds (wait for the 3.3. How to Enter the Fast measurement unit to start blinking). Access Menu 2. The controller will show the first parameter present in Pr1. -
Page 11: How To Assign Amodbus Address
3.9. How to Assign a NOTE: During the OFF status, the Light and AUX buttons are active. MODBUS Address 1. To enter the programming mode, press and hold the SET and DOWN buttons together until the temperature measurements start blinking. 2. -
Page 12: Fast Access Menu
Fast Access Menu This menu contains the lists probes and some values that are automatically evacuated by the board, such as the superheat and the percentage of valve opening. The values below stands for: • nP or noP - probe not present or value not evacuate •... -
Page 13: Section Menu
Section Menu 5.1. To Set Energy Saving Times This menu allows the user to access to a particular feature of the XM series related to the LAN (Local Energy Saving cycle (0 to 23 h 50 min) Area Network) of controllers. Depending on the start during ... -
Page 14: Electronic Expansion Valve Menu (For Model Xm679 Only)
Electronic Controlling Loads Expansion Valve Menu (For Model 7.1. Solenoid Valve XM679 Only) The regulation is performed based on the temperature measured by the thermostat probe that can be a physical probe or a virtual probe obtained by a 1. Enter the programming mode by pressing the SET weighted average between the two probes (see and DOWN buttons for a few seconds Section 8, Parameters List) with a positive... -
Page 15: First Kind Of Regulation: Standard Regulation
Figure 7-1 - Regulation via PI Regulator Figure 7-3 - Second Kind of Regulation Opening percentage is the percentage of the cycle 7.3. Defrost period where the valve is open. For example, if CyP=6s (standard value) and the valve is opened at 50%, this means that the valve is opened for three (3) 7.3.1. -
Page 16: Fans
7.5. Anti-Sweat Heaters 7.4. Fans (If Present) 7.4.1. Control With Relay The fan control mode is selected by means of the FnC This control is performed when trA=AC. In this case, parameter: there are two ways to control the anti-sweat heaters: •... -
Page 17: Parameters List
Device display: (nP; P1; P2, P3, P4, P5, P6, tEr, dEF) it selects which probe is displayed by the device. P1, P2, P3, P4, P5, P6, tEr= virtual probe for thermostat, dEF= virtual probe for defrost. Table 8-1 - XM670 to XM679 Parameters List Auxiliary Output... - Page 18 Type of Pressure Transducer: (PP - LAn) it sets type of pressure transducer to use: PP= 4 to 20mA pressure transducer or ratiometric transducer 0 to 5V depending on P5C parameter, LAn= the pressure signal arrives from another XM600. Referred to Pb5 Table 8-1 - XM670 to XM679 Parameters List 12 • XM679K I&O Manual 026-1218 Rev 4...
- Page 19 Delay before starting defrost (related to dtP): (0 to 60 min) delay related to dtP. Table 8-1 - XM670 to XM679 Parameters List Auxiliary Output...
- Page 20 Fan stop temperature: (-58 to 230°F; -50 to 110°C) setting of temperature, detected by evaporator probe, above which the fan is always OFF. Table 8-1 - XM670 to XM679 Parameters List 14 • XM679K I&O Manual 026-1218 Rev 4...
- Page 21 Low temperature alarm (defrost probe): (ALC = rE, 0 to 90°F or 50 °C / ALC = Ab, - 67°F or - 55°C to ALU) when this temperature is reached and after the ALd delay time, the LAd alarm is enabled. Table 8-1 - XM670 to XM679 Parameters List Auxiliary Output...
- Page 22 Digital input 1 polarity: (cL - oP) CL: the digital input is activated by closing the contact; OP: the digital input is activated by opening the contact. Table 8-1 - XM670 to XM679 Parameters List 16 • XM679K I&O Manual...
- Page 23 LAN MANAGEMENT Defrost synchronization: y= the section send a command to start defrost to other controllers, n= the section don't send a global defrost command Table 8-1 - XM670 to XM679 Parameters List Auxiliary Output Parameters List • 17...
- Page 24 Probe 6 configuration: (nP - Ptc - ntc - PtM) nP= not present; PtC= Ptc; ntc= Ptc; PtM= Pt1000; (Only XM679) Probe 6 calibration: (-21 to 21°F/ -12.0 to 12.0°C) allows to adjust possible offset of the probe 6. (Only XM679) Table 8-1 - XM670 to XM679 Parameters List 18 • XM679K I&O Manual 026-1218 Rev 4...
- Page 25 Release software: (read only) Software version of the microprocessor. Parameter table: (read only) it shows the original code of the dIXEL parameter map. Access to the protected parameter list (read only) Table 8-1 - XM670 to XM679 Parameters List Auxiliary Output Parameters List • 19...
-
Page 26: Digital Inputs
Digital Inputs 9.4. Door Switch Input (dor) This input signals the door status and the corresponding relay output status through the odc The XM600 series of controllers can support up to parameter: no = normal (any change); Fan = Fan three (3) configurable digital inputs that are free of OFF;... -
Page 27: Fhu (Not Used )
10 Installation and 9.10. FHU (Not Used) Mounting This function enables the change in the kind of regulation: from cooling to heating and vice versa. The XM679 can operate without any user interface, 9.11. Energy Saving Input but normal application is with the CX660 keyboard. The CX660 keyboard should be mounted on a vertical (ES) panel, in a 29 mm x 71 mm hole, and secured using... -
Page 28: Electrical Connections
11 Electrical 13 How to Use the Connections Hot Key The XM670/XM679 controllers come with a screw XM controllers can download or upload the terminal block to connect cables with a cross section parameter list from its own non-volatile internal up to 1.6 mm... -
Page 29: Upload (From The Device To The Hotkey)
13.2. Upload (From the Device to the Hotkey) 1. When the XM controller is ON, insert the Hot Key into the 5-pin connector labeled HOT-KEY. 2. Press and release the up arrow button. 3. The upload will begin, and UPL will blink on the display. -
Page 30: Alarm Signals
14 Alarm Signals Message Cause Outputs KEYBOARD No display: the keyboard is trying to Press the UP arrow for three (3) seconds. Enter the SEC work with another board that is not menu, and select LOC entry. working or not present. Keyboard enabled Outputs unchanged Keyboard locked... - Page 31 Minimum superheat alarm Valve closed Maximum superheat alarm Outputs unchanged Minimum superheat alarm Outputs changed. CLOCK ALARM Defrost will be performed with ldF until the settings of Clock settings lost. RTC has been restored. Clock damaged. Defrost will be performed with ldF. OTHERS EEPROM failure All outputs OFF...
-
Page 32: Ee Alarm
14.1. EE Alarm The controllers are provided with an internal check for data integrity. Alarm EE flashes when a failure in the memory data occurs. In such cases, the alarm output is enabled. 14.2. Alarm Recovery Probe alarms, P1 (probe1 faulty), P2, P3, P4, P5, and P6 automatically stop 10 seconds after the probe restarts normal operation. -
Page 33: Technical Data
Kind of Action Pollution Grade Normal Software Class Operating Temperature 32 to 140°F (0 to 60°C) Storage Temperature -13 to 140°F (-25°C to 60°C) Relative Humidity 20 to 85% (no condensing) Table 15-1- XM670/XM679 Specifications Alarm Recovery Technical Data • 27... -
Page 34: Ul Ratings
Pulse Valve (not populated on XM66 series): Terminals 4, 5 and 6 230 V, 30 Watt Table 16-1- XM670/XM679 UL Ratings Temperature - Maximum ambient operating temperature 60°C Pollution Degree - 2 (Normally only non-conductive pollution. However, a temporary conductivity caused by condensation may be expected.) -
Page 35: Connections
POWER, LOADS, AND VALVE Allows a maximum wire size of 14 AWG (2 mm Table 17-1 - Wiring Guidelines 17.2. XM670 - Wiring Diagram Figure 17-1 - XM670 - ALL Power Supply E2 to XM Device Communication Recommendations Connections • 29... -
Page 36: Xm679 - 230Vac Valves/Wiring Diagram
17.3. XM679 - 230VAC Valves/Wiring Diagram Figure 17-2 - XM679 - 230VAC Valves Models at 115V Supply: Terminals 7-8 Valve at 115V: Terminals 4-5 17.4. XM679 - 24VAC Valves/Wiring Diagram Figure 17-3 - XM679 - 24VAC Valves NOTE: The jumper labeled as JMP is located inside the case of the controller. The JMP jumper should be closed only when driving the 24VAC valve. -
Page 37: E2 Modbus Network Wiring
38 terminal. • Terminate the end of the MODBUS network at the last XM670 - XM679 device on the daisy chain with the MODBUS termination block (P/N 535-2711), or by connecting a 150 ohm resistor between the MODBUS +/- terminals. -
Page 38: Wiring Layout For Sharing A Pressure Transducer On A Lan
19 Wiring Layout for Sharing a Pressure Transducer on a LAN RS485 Black White White Black I/O Board Ground Address01 Address02 Address08 Address01 XM679 XM679 XM679 MultiFlex XXX+ Circuit 1 RS485 RS485 RS485 RS485 Black White Black Black White Black White White Black... -
Page 39: Pressure Transducer Setup (Xm679 Only)
20 Pressure Slave device Master device Slave device pressure: pressure: pressure: Transducer Setup rPP: Shows the dPP = Shows rPP: Shows the value of pressure the value of value of received by pressure pressure (XM679 Only) remote pressure measured by received by probe connected pressure... - Page 40 If the LAN is well connected, the green LED will be ON. If the green LED blinks, then the connection is 20.1. Keyboard Display wrongly configured. The maximum distance allowed is 30m. CX660 20.3. Sensors for Superheat 1. Terminals -34 and +35 Control 2.
-
Page 41: Rs485 Net Monitoring Temperatures
Set the value of Adr parameter, then press 20.5. RS485 Net Monitoring SET to confirm the parameter. Press the two keys together to exit from Temperatures the menu or wait for about 10 seconds. 1. Terminals -36 and +37 20.6. How to Enable a 2. -
Page 42: Wiring Connection To Site Supervisor
21 Wiring Connection to Site Supervisor Figure 21-1 - Site Supervisor Wiring 36 • XM679K I&O Manual 026-1218 Rev 4... -
Page 43: Ect Modbus Networking To E2S
MODBUS. Reverse polarity of +/- on RS485 cable from E2 to the device. Connecting a XM670 - XM679 controller to an E2 requires the E2 to be version 2.84 or above. Contact Emerson for upgrade information if the controller is a... -
Page 44: E2 Setup Of Devices
Controller Info setup screens: 22.3.2.Add and Connect the Device To enable communications between E2 and the XM670 - XM679 units, the devices must be added and addressed in E2. 1. Log in to the E2 with Level 4 access. ... - Page 45 . or a device that has the latest version of firmware on In the list of MODBUS devices, choose the address number corresponding to the XM670 - XM679 E2 Setup of Devices ECT MODBUS Networking to E2s • 39...
-
Page 46: Wiring Types
Emerson specifies Belden #8761 shielded twisted pair cables for use as MODBUS wiring (or Belden #82761 and Belden #88761 for plenum installations). For MODBUS network wiring of XM670 - XM679 Figure 22-10 - MODBUS Termination Block (P/N 535-2711) controllers to E2, Belden #8641 (Emerson P/N 135-8641) is the recommended wire type to use. -
Page 47: Default Setting Values
23 Default Setting Values Label Value Menu Description Range - - - Setpoint LS - US REGULATION [1°F to 45°F] Differential [0.1°C to 25.5°C] Integral time for room temperature 0 to 255 s regulation Continuous regulation activation n(0) – Y(1) [-67°F to SET] Minimum setpoint [-55.0°C to SET]... - Page 48 Proportional band for superheat [1°F to 108 °F] regulator [0.1°C to 60.0 °C] [-21°F to 21°F] Band Offset for superheat regulator [-12.0°C to 12.0°C] Integration time for superheat regulator 0 to 255 s Probe error opening percentage 0 to 100 Probe error delay before stopping 0 to 239 s - On(240) regulation...
- Page 49 Defrost type EL(0) - in(0) Defrost mode: Interval in(1) [-67°F to 302°F] Heater setpoint during defrost [-55.0°C to 150°C] [1°F to 45°F] Differential for heater [0.1°C to 25.5°C] Time out for heater 0 to 255 (min.) Minimum temperature difference to start [1°F to 90°F] defrost [0.1°C to 50.0°C]...
- Page 50 Differential for fan / offset for anti sweat [-45°F to 45°F] heater [-25.5°C to 25.5°C] [1°F to 45°F] Proportional band for modulating output [0.1°C to 25.5°C] Minimum output for modulating output 0 to AMA Maximum output for modulating output AMi to 100 Time with fan at maximum speed 0 to 255 s ALARM...
- Page 51 DIGITAL INPUTS Digital input 1 polarity OP(0) - CL(1) EAL(0) - bAL(1) - PAL(2) - dor(3) - Digital input 1 configuration dEF(4) - AUS(5) -LiG(6) - OnF(7) - Htr(8) - FHU(9) - ES(10) - Hdy(11) Digital input 1 activation delay 0 to 255 (min.) Digital input 2 polarity OP(0) - CL(1)
- Page 52 Ld4 to 23.5(143) - nu(144) Workdays Fifth defrost start (hours.10min) Ld5 to 23.5(143) - nu(144) Workdays Sixth defrost start (hours.10min) 0.0 to 23.5(143) - nu(144) Holidays First defrost start (hours.10min) Sd1 to 23.5(143) - nu(144) Holidays Second defrost start (hours.10min) Sd2 to 23.5(143) - nu(144) Holidays Third defrost start (hours.10min)
- Page 53 P4 configuration nP(0) - Ptc(1) - ntc(2) - PtM(3) [-21°F to 21°F] P4 calibration [-12.0°C to 12.0°C] nP(0) - Ptc(1) - ntc(2) - PtM(3) - 420(4) P5 configuration - 5Vr(5) [-21°F to 21°F] P5 calibration [-12.0°C to 12.0°C] P6 configuration nP(0) - Ptc(1) - ntc(2) - PtM(3) [-21°F to 21°F] P6 calibration...
-
Page 54: Devices
COM2 supports two network segments: one on connector RS485-1A, and the second on connector RS485-1B. For information on the maximum recommended number of XR, XM, and XEV devices for each network segment (load and bandwidth calculations), contact Emerson Technical Support at 770-425-2724. 48 • XM679K I&O Manual 026-1218 Rev 4... - Page 55 Figure 1 - MODBUS COM Wiring Diagram MODBUS Termination BlocksAppendix A - Alternate MODBUS COM Wiring Method for E2, XR, XM, and XEV Devic- es • 49...
- Page 57 Emerson Climate Technologies Retail Solutions, Inc. and/or its affiliates (collectively “Emerson”), reserves the right to modify the designs or specifications of such products at any time without notice. Emerson does not assume responsibility for the selection, use or maintenance of any product. Responsibility for proper selection, use and maintenance of any product remains solely with the purchaser and end-user.
Need help?
Do you have a question about the XM670 and is the answer not in the manual?
Questions and answers