Table of Contents
Advertisement
Quick Links
Model:R311LA
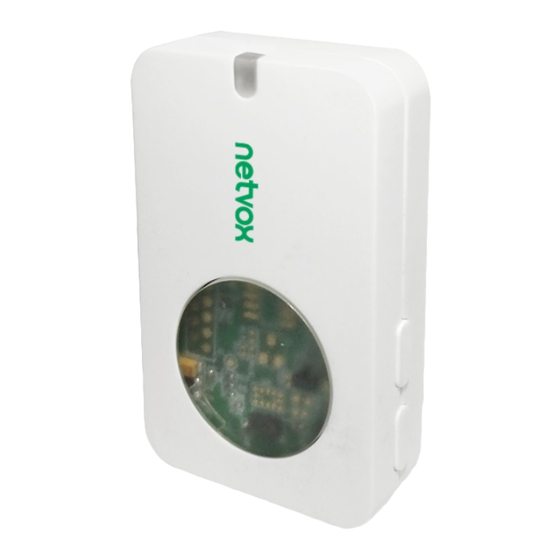
Wireless Infrared Proximity Sensor
Wireless Infrared Proximity Sensor
User Manual
Copyright©Netvox Technology Co., Ltd.
This document contains proprietary technical information which is the property of
NETVOX Technology. It shall be maintained in strict confidence and shall not be
disclosed to other parties, in whole or in part, without written permission of NETVOX
Technology. The specifications are subject to change without prior notice.
Advertisement
Table of Contents

Summary of Contents for netvox R311LA
- Page 1 This document contains proprietary technical information which is the property of NETVOX Technology. It shall be maintained in strict confidence and shall not be disclosed to other parties, in whole or in part, without written permission of NETVOX Technology. The specifications are subject to change without prior notice.
-
Page 2: Table Of Contents
Table of Content 1. Introduction ........................ 2 2. Appearance ......................... 2 3. Main Features ......................3 4. Set up Instruction ......................4 5. Data Report ......................... 6 5.1 ConfigureCmd ....................8 5.2 GlobalCalibrateCmd ..................11 5.3 ReportDataCmd ....................12 6. Installation ........................ 13 7. -
Page 3: Introduction
1. Introduction R311LA is a Wireless Infrared Proximity Sensor for Netvox ClassA type devices based on the LoRaWAN open protocol. It has an infrared proximity sensor that can detect if there is object existing within its detection range and transmits the detected data to Gateway for display via a wireless network. -
Page 4: Main Features
⚫ Available third-party platform: Actility / ThingPark, TTN, MyDevices/Cayenne ⚫ Low power consumption and long battery life Battery Life: ⁻ Please refer to web: http://www.netvox.com.tw/electric/electric_calc.html ⁻ At this website, users can find battery life time for various models at different configurations. -
Page 5: Set Up Instruction
4.Set up Instruction On/Off Insert batteries (users may need a screwdriver to open ) Power on Insert two sections 3V CR2450 button batteries and close the battery cover. Note: Require 2 button batteries to supply power at the same time. Turn on Press any function key and the indicator flashes once. - Page 6 Function Key Restore to factory setting / Turn off Press and hold for 5 The green indicator flashes 20 times: success seconds The green indicator remains off: fail The device is in the network: the green indicator flashes once and sends a report Press once The device is not in the network: the green indicator remains off Sleeping Mode...
-
Page 7: Data Report
2. The interval between two reports must be the MinTime. 3. If there are special customized shipments, the settings will be changed according to customer’s requirement. The device reported data parsing please refer to Netvox LoraWAN Application Command document and Netvox Lora Command Resolver http://loraresolver.netvoxcloud.com:8888/page/index... - Page 8 Determining the status of the object (1) The raw data of detection of infrared ranging is greater than the OnDistanceThreshold parameter setting value, the status would be 1, indicating the presence of the object. (2) The raw data of detection of infrared ranging is smaller than the OnDistanceThreshold parameter setting value, the status would be 0, indicating the absence of the object Threshold setting instructions A.
-
Page 9: Configurecmd
ReportReq (9Bytes, Fixed 0x00) Reserved ReadConfig MinTime MaxTime BatteryChange 0x82 (4Bytes, Fixed ReportRsp (2bytes Unit: s) (2bytes Unit: s) (1byte Unit: 0.1v) 0x00) R311LA 0xAA SetOnDistance OnDistanceThreshold Reserved 0x03 ThresholdRreq (2byte ) (7Bytes, Fixed 0x00) SetOnDistance Status Reserved 0x83 ThresholdRrsp... - Page 10 (2) Read Configuration: Downlink:02AA000000000000000000 Response: 82AA003C003C0100000000(Current configuration) (3) OnDistanceThreshold Configuration=3000 Downlink:03AAB80B00000000000000 Response: 83AA000000000000000000(Configuration success) 83AA010000000000000000(Configuration failure) (4) Read OnDistanceThreshold Downlink:04AA000000000000000000 Response: 84AAB80B00000000000000 (Current configuration) Example#1 based on MinTime = 1 Hour, MaxTime= 1 Hour, Reportable Change i.e. BatteryVoltageChange=0.1V Note: MaxTime=MinTime. Data will only be report according to MaxTime (MinTime) duration regardless BatteryVoltageChange value.
- Page 11 Example#2 based on MinTime = 15 Minutes, MaxTime= 1 Hour, Reportable Change i.e. BatteryVoltageChange= 0.1V. Example#3 based on MinTime = 15 Minutes, MaxTime= 1 Hour, Reportable Change i.e. BatteryVoltageChange= 0.1V. Notes: 1) The device only wakes up and performs data sampling according to MinTime Interval. When it is sleeping, it does not collect data.
-
Page 12: Globalcalibratecmd
(2bytes,Unsigned) (2bytes,Signed) 0x00) 1_Channel2,etc (1) Setting GlobalCalibrate Configuration: Assuming that the current measured distance of R311LA is 3001, it should be corrected to 3000, and the difference is 3000-3001=-1; Channel 1= 00,Multiplier = 0001,Divisor = 0000,DeltValue= -1 (0xFFFF) Downlink:01360000010000FFFF0000 Response:... -
Page 13: Reportdatacmd
4.This universal calibration supports calibration of positive and negative numbers. 5.3 ReportDataCmd Fport: 0x06 Battery Status RawSenseData Reserved 0x01 R311LA 0x AA (1Byte, unit:0.1V) (1Byte,0x01_On 0x00_Off) (2Bytes) (4Bytes,fixed 0x00) Uplink:01 AA 01 1E 01 0BB8 00000000 , 0BB8 H =3000D... -
Page 14: Installation
RawSenseData is the approach signal value. The closer the device is to the detected object, the larger the value; otherwise, the smaller the value. R311LA can be used in the toilet to detect whether the toilet paper is used up. R311LA... - Page 15 Detection Area Toilet Paper...
- Page 16 Battery Installation Steps: Warning: When replacing the battery, it must be done by professionals. Please must use 2 CR2450 batteries for this device, and a single battery specification is 3V. Please note that the positive and negative poles of the battery are not reversed. Step 1: Use a screwdriver, along the opening of the back cover (the red frame in the Fig.
-
Page 17: Important Maintenance Instruction
7. Important Maintenance Instruction Kindly pay attention to the following in order to achieve the best maintenance of the product: • Keep the equipment dry. Rain, moisture and various liquids or water may contain minerals that can corrode electronic circuits. In case the device is wet, please dry it completely.


Need help?
Do you have a question about the R311LA and is the answer not in the manual?
Questions and answers