Table of Contents
Advertisement
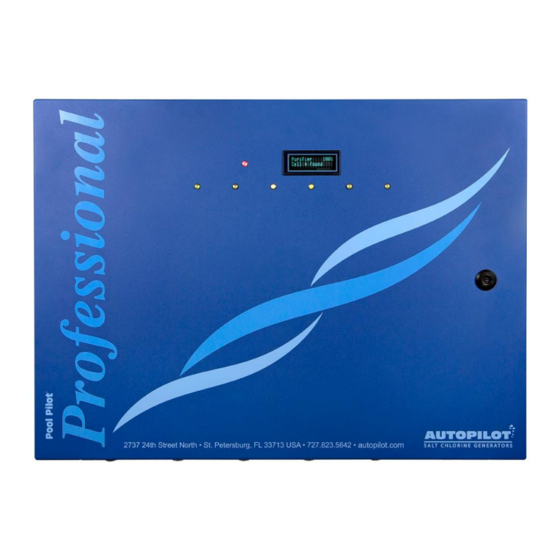
AutoPilot
®
Owner's / Installation Manual
®
Pool Pilot
Professional
Important!
®
This manual covers the installation and operation of the Pool Pilot
Professional Salt Chlorine Generators.
Read this manual and product labels before installing or operating this equipment.
INSTALLER: THIS DOCUMENT IS PURCHASER'S PROPERTY AND IS TO REMAIN WITH THE EQUIPMENT OWNER
LTP0155 REV 5
Advertisement
Table of Contents

Subscribe to Our Youtube Channel
Related Manuals for Autopilot Pool Pilot Professional PPP-2


Summary of Contents for Autopilot Pool Pilot Professional PPP-2
- Page 1 AutoPilot ® Owner's / Installation Manual ® Pool Pilot Professional Important! ® This manual covers the installation and operation of the Pool Pilot Professional Salt Chlorine Generators. Read this manual and product labels before installing or operating this equipment. INSTALLER: THIS DOCUMENT IS PURCHASER’S PROPERTY AND IS TO REMAIN WITH THE EQUIPMENT OWNER...
-
Page 3: Table Of Contents
Table of Contents Section 1 - Safety Information 1.1 Important Safety Instructions Section 2 - General Information 2.1 Contacting AquaCal AutoPilot, Inc. ® 2.2 Pool Pilot Professional Model Options 2.3 Main Components 2.3.a Control Center 2.4 Cells and Manifold Assembly Section 3 - Owner Quick Start &... - Page 4 7.1.c Up or Down ( △ / ▽ ) Buttons 7.1.d MENU/ENTER Button 7.1.e TEST Button (Diagnostic Menu) 7.1.f WARNING Light and Audible Alarm 7.1.g Cell Indicator Lights 7.1.h Display Overview 7.2 Basic Operational Programming 7.2.a Adjusting the Purifier Output % 7.2.b Boost 7.2.c Purifier Mode 7.2.d Purifier % Adjustment Procedure...
- Page 5 Section 9 - Troubleshooting 9.1 Troubleshooting Section 10 - Reference 10.1 Basic Water Chemistry 10.1.a Chlorine 10.1.b pH 10.1.c Total Alkalinity 10.1.d Calcium Hardness 10.1.e Cyanuric Acid 10.2 Using the Saturation Index 10.3 Salt Addition Chart Section 11 - Approvals 11.1 Agency Approvals 11.2 FCC Compliance...
-
Page 6: Section 1 - Safety Information
For personal safety, and to avoid damage to equipment, follow all safety instructions displayed on the ® equipment and within this manual. Repair and service of your AutoPilot chlorinator must be performed by qualified service personnel. - Page 7 Pool Pilot ® Salt is an inherently corrosive material. While the recommended level of salt for your AutoPilot product should not damage your equipment, excessively high chlorine levels can cause corrosion damage to pool fixtures and equipment.
- Page 8 Scraping or scratching the titanium blade’s edge or surface will damage the blade catalyst coating and cause premature failure of the cell. Never use any sharp or metallic objects to remove scale. The warranty will be voided. Reduced polarity reversing cycle times will reduce cell life and should only be used due to uncontrollable scale formation on the cell.
-
Page 9: Section 2 - General Information
SECTION 2 - GENERAL INFORMATION 2.1 Contacting AquaCal AutoPilot, Inc. If you need to call AquaCal AutoPilot, Inc. for questions, service, or parts, please have your model and serial numbers available. Also have the name of your installer and date of your equipment’s installation. -
Page 10: Main Components 2.3.A Control Center
® The chlorine output for each of the Pool Pilot Professional chlorinator models, which is based on a 24 hour chlorinator / pump run time and a salt concentration of 3,500 ppm (mg/L), is listed here. Model (w / Mfld Assy & PPC5 Cell) Chlorine Output lbs. -
Page 11: Cells And Manifold Assembly
2.4 Cells and Manifold Assembly The cell assembly consists of a clear PVC housing containing titanium metal coated cell blades. The electrolytic cell receives the low voltage DC power from the control center and initiates the electrolytic process. This process converts ordinary table salt (Sodium Chloride) to 100% pure Sodium Hypochlorite which in turn purifies your pool. -
Page 12: Section 3 - Owner Quick Start & Run
The system requires a low concentration of dissolved salt (sodium chloride) in the water that is ® normally maintained between 3,000 and 4,500 ppm (mg/L). The AutoPilot unit uses the salt to generate chlorine, which your pool / spa requires to remain sanitized. The chlorine reverts back to salt after treating the water. -
Page 13: Owner / Operator Control Buttons, Check System Fault And Audible Alarm
3.3 Owner / Operator Control Buttons, Check System Fault and Audible Alarm This section assumes the installer has already programmed the system for specific site parameters, established proper water balance and pretreated water to 1-3 ppm (mg/L) chlorine. Should Celsius vs. Fahrenheit, language preference, or other owner options require modification, refer to the "Programming"... -
Page 14: Test Button (Diagnostic Menu)
3.3.d TEST Button (Diagnostic Menu) Follow the instructions listed below to get accurate results. 1. If the unit is in the Boost mode, take the unit out of Boost mode. 2. Power the system off at the power breaker switch. Wait three (3) minutes for unit to completely discharge any remaining electricity to the cells. -
Page 15: Section 4 - Specifications And Approvals
SECTION 4 - SPECIFICATIONS AND APPROVALS 4.1 Specifications For more information on sizing, see our Commercial Sizing Calculator on our website at https://apservicecenter.com/sizing Model Designation PPP-2 PPP-3 PPP-4 PPP-5 PPP-6 Max. Chlorine Output w / PPC5 Cell 5.24 lbs/day 7.86 lbs/day 10.48 lbs/day 13.1 lbs/day 15.72 lbs/day... -
Page 16: Section 5 - Features
5.2 Water Manifold Assemblies - Available Options 5.2.a Automatic - Flow Bypass Manifold Assembly ® The AutoPilot manifold assembly is available with two (2), three (3), four (4), five (5), or six (6) cells, including the Tri-sensor. Each cell must have a corresponding power module. -
Page 17: Cell
® Pool Pilot Professional Manifold Assembly Options Figure 5 5.2.b Cell The cell is installed with unions on each end of the cell to allow for quick and easy removal. To remove and inspect the cell, loosen the unions and remove from the plumbing assembly. Figure 6 Page - 9... -
Page 18: Section 6 - Maintenance
6. Slide the power module up until the flange keyholes match the down screws and pull out until you can reach and disconnect the rear power connectors, then remove the power module. Professional Power Supply Power Module Location Figure 9 Figure 8 For a complete list of parts, visit www.autopilot.com. Page - 10... -
Page 19: Removing / Inspecting / Cleaning Tri-Sensor
6.2 Removing / Inspecting / Cleaning Tri-sensor 6.2.a Tri-sensor Assembly Overview The Tri-sensor Assembly is used to measure water flow, salt level, and water temperature. Note: The use of high strength magnet devices in the close proximity of the Tri-sensor can cause the flow switch to function incorrectly. -
Page 20: Cleaning Tri-Sensor / Salt Sensor
6.2.c Cleaning Tri-sensor / Salt Sensor If required, you can remove a calcium scale buildup by creating a solution of water and muriatic acid as follows. Do not use any metallic objects to scrape the blade surfaces or you will remove or damage the blade sensor coating. -
Page 21: Servicing The Cell
6.3 Servicing the Cell The cells may require removal for periodic visual inspections, or for servicing when debris or calcium mineral deposits develop. The need to inspect and service the cells is indicated by the WARNING light flashing. 6.3.a Removal The cells are installed with unions on each end to allow quick and easy installation and removal. -
Page 22: Manual Cleaning
Scraping or scratching the titanium blade’s edge or surface will damage the blade catalyst coating and cause premature failure of the cell... warranty will be voided. Never use any sharp or metallic objects to remove scale. 1. Place a PLA0113 cell cleaning plug (AutoPilot accessory) on the end of the cell as ®... -
Page 23: Spring Start Up
Drain all water from the manifold assembly (cell and Tri-sensor), pump, filter, supply and return lines prior to freezing weather. ® If desired, AutoPilot plug kit #996 may be purchased to cover the openings. The manifold assembly, including the cell, Tri-sensor and cables may be stored indoors. -
Page 24: Menu/Enter Button
7.1.d MENU/ENTER Button The MENU/ENTER button allows the operator to choose and set program menu options. The owner / operator should not normally need to access these features on a regular basis. △ ▽ Press to enter the menu options. Use the buttons to scroll through the menu and the MENU/ENTER button to select the desired function. -
Page 25: Cell Indicator Lights
7.1.g Cell Indicator Lights There are six (6) cell indicator lights on the control panel. The lights flash as the processor communicates to each specific cell. They will show solid green when a cell is generating chlorine. The light will not be illuminated if the cell is not generating chlorine at that time or if there is not a corresponding cell to that position. -
Page 26: Purifier Mode
If an external time clock or controller turns off power to the chlorinator while Boost is active, the Boost timer is stored in memory and the Boost time countdown will resume when power is reapplied to the unit. If water flow is stopped during a Boost cycle, chlorine generation will stop while there is no flow ®... -
Page 27: Review Of Main Menu Programming
After the optimal output percentage (%) has been determined, this setting will not normally require further adjustment. Select a Boost cycle to compensate for increased bather usage or heavy rainfalls (which can both quickly consume chlorine). 7.3 Review of Main Menu Programming Once programmed for the installation site, the following menu items should not require regular access. -
Page 28: Set Reverse Time
7.3.c Set Reverse Time Program cell’s self-cleaning cycle. CAUTION - Failure to heed the following may result in equipment damage. Reduced polarity reversing cycle times will reduce cell life and should only be used due to uncontrollable scale formation on the cell. Always test and adjust water balance before attempting scale control via shortening reverse period. -
Page 29: Review Of Installer Menu Programming
7.4 Review of Installer Menu Programming 7.4.a Calibrate Temperature You must wait a full two minutes after start up to calibrate temperature. Used only when it is ® desired to match the display of the Pool Pilot to another on-site thermometer. ▽... -
Page 30: Section 8 - Installation
SECTION 8 - INSTALLATION 8.1 Basic System Overview ® The Pool Pilot salt chlorination system is designed to operate in the following configurations: Shown with automatic flow bypass manifold assembly 941-615AC: Figure 17 Shown with the convection cell option (surge tank required). Page - 22... -
Page 31: Planning The Installation
8.2 Planning the Installation ® Before installing your Pool Pilot 1. Determine everything needed for installation is on hand. 2. Determine where the manifold assembly will be plumbed or surge tank located for convection cells, if applicable. 3. Identify a suitable mounting location for the Pool Pilot ®... -
Page 32: Plumbing The System
® Do not mount the Pool Pilot control center inside a panel or a tightly enclosed area lacking proper and full ventilation. The enclosure is designed to allow heat to dissipate from inside the box. It is important the top or bottom of the enclosure is not blocked and there is space behind the control center to allow for adequate ventilation. -
Page 33: Flow Rates 20 - 70 Gpm (76 - 265 L/Min)
8.5.c Flow Rates 20 – 70 gpm (76 – 265 L/min) The manifold can be directly plumbed (vertical position) into the system. If the flow rate for the system is less than 20 gpm (76 L/min), a larger pump must be installed (or steps taken to improve flow rate). -
Page 34: Steps To Prepare Water
Circular Area = Radius x Radius x 3.14 Gallons = area x average depth (ft ) x 7.5 Liters = area x average depth (m ) x 1,000 To determine the approximate number of gallons or liters in a more complex shaped pool: 1. -
Page 35: Programming At Installation
® Once the Pool Pilot is programmed to the pool water volume, the controller will automatically indicate how much salt is required to attain salt level of 3,000 ppm (mg/L). For information on amount of salt to be added relative to the volume of water to be treated vs. existing salt level, refer to the "Reference"... -
Page 36: Electrical Connections
8.8 Electrical Connections WARNING - Failure to heed the following may result in permanent injury or death. Ensure that all power is disconnected before wiring this unit. All electrical connections should be made by a licensed electrician or certified electrical contractor. A high voltage AC input provides power to the control center. -
Page 37: Low Voltage Wiring
8.10 Low Voltage Wiring 8.10.a Tri-sensor Cord The Tri-sensor cord is connected through the electrical access box. LBP0218 1. Remove front access panel. The access panel is secured by four (4) screws. Remove all four (4) of the screws Lift off the panel to view the electrical access box 2. -
Page 38: Orp Connection
Note: To avoid mismatching or crossing cell connections, each cell and cell cord should be appropriately labeled with markings to identify them. AquaCal AutoPilot, Inc. recommends using a marking system of A-1, A-2, A-3, etc. for each cell and cell cord, then marking the power supply with PS-A and Tri-sensor with TS-A, etc. -
Page 39: Section 9 - Troubleshooting
SECTION 9 - TROUBLESHOOTING 9.1 Troubleshooting No Cell X The unit has not detected a power module in that position. Typical Solution Confirm all connections are secure. Problem A ribbon connector may need to be replaced. Typical Solution Switch the ribbon connector with another power module to verify. Problem A power module may need to be replaced. - Page 40 4. Deactivate Boost mode or return purifier output % to the original setting. If test shows low volts and low amps, there may be a problem with the power module. Contact ® your local AutoPilot service center or AquaCal AutoPilot Customer Support for further assistance. Page - 32...
- Page 41 If test shows low volts and low amps, there may be a problem with the power module. Call your ® local AutoPilot service center or AquaCal AutoPilot Customer Support for assistance. CELL X light is not green Problem Possible low cell amperage.
- Page 42 3,000 ppm (mg/L). If message still appears, confirm salt level with a tester. If salt level is sufficient and error ® message still appears, contact your local AutoPilot Service Center. There may be a problem with the Tri-sensor or cell cord.
- Page 43 Pool Pilot salt display. 7. Possible Pool Pilot ® fault. Contact AquaCal AutoPilot Customer Support. Problem There are no warning messages on the display. The chlorine level is too low but the pool water looks fine. Typical Solution The test kit reagents or strips may be old or have been exposed to sunlight.
- Page 44 Ensure the cell cord is pressed completely onto the cell terminal. Check the terminals and clean with a dry cloth to remove possible dirt and corrosion. If the cell terminals leak, contact the AquaCal AutoPilot Customer Support department. Premature cell failure Typical Solution Abnormally high cell usage due to an insufficient stabilizer (Cyanuric acid) level.
-
Page 45: Section 10 - Reference
SECTION 10 - REFERENCE 10.1 Basic Water Chemistry ® The Pool Pilot is designed to produce chlorine on a daily basis. To monitor the system’s efficiency, the water chemistry ranges and a schedule of periodic checks should be followed. CAUTION - Failure to heed the following may result in equipment damage. Excessively high chlorine levels can cause premature cell depletion and corrosion damage to pool fixtures and equipment. -
Page 46: Chlorine
10.1.a Chlorine The desirable form of chlorine is called Free Chlorine. This form of chlorine is responsible for the actual sanitation activity in pools and spas. Free chlorine is highly reactive and, once added to pool / spa water, has a tendency to combine with organic matter in the pool / spa. It quickly attacks pathogens as well as other bather wastes. -
Page 47: Cyanuric Acid
10.1.e Cyanuric Acid Cyanuric Acid acts as water “Stabilizer” or “Conditioner”. This chemical goes by either trade name and allows your chlorine residual to last longer by protecting it from the UV rays of the sun. With low cyanuric acid, chlorine can be used up just as quickly as it is generated. Check local commercial codes for maximum acceptable cyanuric acid levels in commercial projects. -
Page 48: Salt Addition Chart
10.3 Salt Addition Chart The following salt charts are included for reference only; once programmed to the correct water volume, the controller will automatically indicate how much salt is required to achieve optimum water salinity. The salt in the pool is constantly recycled during normal operation. Loss of salt during a swimming season should be minimal. -
Page 49: Section 11 - Approvals
SECTION 11 - APPROVALS 11.1 Agency Approvals Tested to conform to the following specifications: SPECIFICATION DESCRIPTION UL1081 Safety Standard for Swimming Pool Pumps, Filters and Chlorinators. CAN/CSA-C22.2#218.2:2015 Ed.2 Spas, Hot Tubs and Associated Equipment Equipment and Chemicals for Swimming Pools, Spas, Hot Tubs and Other Recreational NSF/ANSI 50 Water Facilities 11.2 FCC Compliance... - Page 50 AquaCal AutoPilot, Inc. 2737 24 Street North St. Petersburg, Florida 33713 (727) 823-5642...
Need help?
Do you have a question about the Pool Pilot Professional PPP-2 and is the answer not in the manual?
Questions and answers