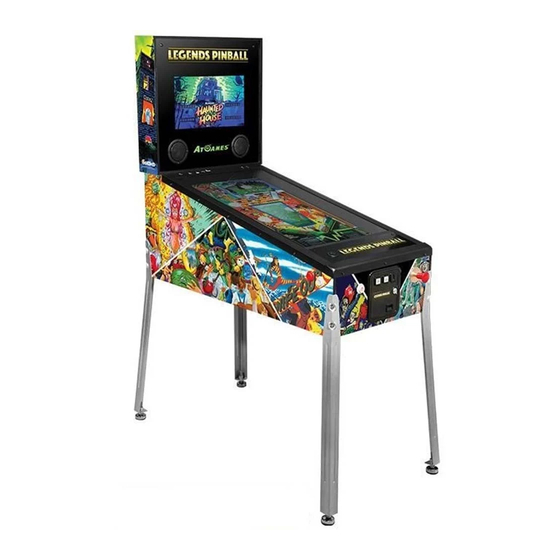
AtGames LEGENDS PINBALL Instruction Manual
Hide thumbs
Also See for LEGENDS PINBALL:
- Owner's manual (17 pages) ,
- Instruction manual (26 pages) ,
- Instruction manual (28 pages)
Table of Contents
Advertisement
Advertisement
Table of Contents

Summary of Contents for AtGames LEGENDS PINBALL
- Page 1 INSTRUCTION MANUAL...
- Page 3 Index Assembly Guide Packaging/Unboxing Warning Controls & Inputs Quick Start Guide How to Update Firmware How to Sign In with Your ArcadeNet Account ® Product Registration/Warranty Info Game List Safety Notice, FCC Statement ISED Statement...
-
Page 4: Assembly Guide
Assembly Guide Legends Pinball comes in two boxes. Due to the weight of the first box, it is recommended that you have another person help install the legs. TOOLS INCLUDED Hex key (included) Key (included) Wrench (not included) Playfield Backglass... - Page 5 Assembly Guide Hex key (included) Step 1. Take out the playfield, legs, and 8 [SA] screws. Put the playfield upside down on a soft surface. Attach the legs to the main cabinet and insert 8 [SA] screws to the matching holes with [a] hex key.
- Page 6 Assembly Guide Step 4. Attach the backglass to the top of the playfield. Tightly insert 4 [SB] screws to the matching holes. Securely connect the cords to the matching slots. Step 5. Attach the back cover of the backglass and tighten it with the included [b] key.
- Page 7 Packaging/Unboxing Warning • Please note that when assembling the machine that the top rear of the playfield has an opening for connecting the backglass. • Because of the weight of the cabinet body, carrying the cabinet body by grabbing onto this opening can cause serious damage to both the body and electronics inside.
- Page 8 Attaching Backglass Ribbon Cable • Carefully pull out the end of the connector of the Backglass FPC cable by gripping either side of the black slide lock and gently pull down. Fig.1 Fig. 1 • Connect the pin end of the cable from the main console to the Backglass cable connector.
-
Page 9: Controls & Inputs
Controls & Inputs D-Pad Rewind/Select Button Plunger Forward Nudge Start Button Power Switch AtGames/Menu Button HDMI Input USB 3.0 USB 2.0 Input Display Indicator HDMI Input Selector Volume +/- Buttons Nudge Button Flipper Button Located on the back of unit... -
Page 10: How To Update Firmware
Make sure the internet connection is stable during this process. 5. Once the firmware is downloaded successfully, select [Upgrade] and the device will reboot automatically to activate the new firmware version. Note: If you encounter any issues on firmware update, please refer to: https://www.atgames.net/arcades/faq/ or contact support@atgames.net... - Page 11 How to Sign In with Your ArcadeNet ® Account Go to [SETTINGS] and select [SIGN IN]. Sign up for a new account if you do not have one yet. Once you have an ArcadeNet® account, you can choose either to sign in with your email or with the QR code.
-
Page 12: Product Registration
Shipping and handling fees are to be paid for by the customer. To make a warranty claim, please submit a service request here: support@atgames.net. Standard warranty coverage for the AtGames Legends Pinball does not apply to and is considered invalid due to misuse, improper maintenance, self-repair, tampering, or invasive hardware modifications of any kind, and damages or dysfunction caused by shipping or non-manufacturing related causes. - Page 13 Games List Al’s Garage Band Goes Big Shot Black Hole on a World Tour Bone Busters Inc. Cactus Jack’s Centigrade 37 Cue Ball Wizard Central Park Class of 1812 El Dorado City of Gold Genie Gladiators Goin’ Nuts Haunted House Jacks Open Lights...
- Page 14 If there is still a problem, ensure the receiving threaded unit is clear of debris or imperfections and is seated properly in the unit. If you still have a problem, contact Support at support@atgames.net for further assistance.
-
Page 15: Safety Notice
Safety Notice • Do not submerge the arcade cabinet in water or expose it to extreme heat or to strong magnetic fields. Doing so may cause permanent damage to your device. • Always use a dry towel to clean the cabinet and the control top. •... - Page 16 ISED Statement • English: This device complies with Industry Canada license ‐ exempt RSS standard(s). Operation is subject to the following two conditions: (1) This device may not cause interference, and (2) This device must accept any interference, including interference that may cause undesired operation of the device. The digital apparatus complies with Canadian CAN ICES‐3 (B)/NMB‐3(B).
- Page 18 Sign Up at www.arcadenet.net © 2020 AtGames Interactive www.atgames.net PO Box 1691, El Segundo, CA 90245 All rights reserved. *Content and images are for reference only and subject to change. Made in China For additional support please email: support@atgames.net...


Need help?
Do you have a question about the LEGENDS PINBALL and is the answer not in the manual?
Questions and answers