Chapters
Table of Contents

Related Manuals for Hisense HS512


Summary of Contents for Hisense HS512
- Page 1 5.1.2CH Soundbar with wireless subwoofer & Dolby Atmos Model: HS512 USER MANUAL Before using the sound bar, please read this manual thoroughly and retain it for future reference.
-
Page 2: Table Of Contents
Contents Important Safety Instructions Basic Operation Safety Standby/ON Warning Select Modes Adjust the Bass Level What’s in the Box Turn the Surround Sound ON/OFF Identifying the Parts Adjust the Volume Adjust the Brightness Main Unit Select a Preset Sound Effect Wireless Subwoofer Set the Audio Delay Remote Control... -
Page 3: Important Safety Instructions
Important Safety Instructions third prong is provided for your safety. If the C AUTIO N provided plug does not fit into your outlet, RISK OF ELECTRIC SHOCK consult an electrician for replacement of the DO NOT OPEN obsolete outlet. AVIS 10 Protect the power cord from being walked on or pinched particularly at plugs, convenience RISQUE DE CHOC... -
Page 4: Warning
Caution: Battery usage CAUTION Use of controls or adjustments or performance To prevent battery leakage which may result in of procedures other than those described bodily injury, property damage, or damage to the herein, may result in hazardous radiation apparatus: exposure or other unsafe operation. - Page 5 Supported input audio formats The audio formats supported by this system are as follows. Format Function HDMI 1 HDMI 2 √ √ √ √ LPCM 2ch √ LPCM 5.1ch √ LPCM 7.1ch √ √ √ √ Dolby Digital √ Dolby TrueHD √...
- Page 6 Supported HDMI video formats The video formats supported by this system are as follows. Color [HDMI Signal Resolution Frame rate 3D Color space depth Format] setting RGB 4:4:4 YCbCr 8 bits 4:4:4 50/59.94/60 Hz YCbCr 8/10/12 4:2:2 bits 4096 x 2160p [enhanced format] YCbCr 10/12...
-
Page 7: What's In The Box
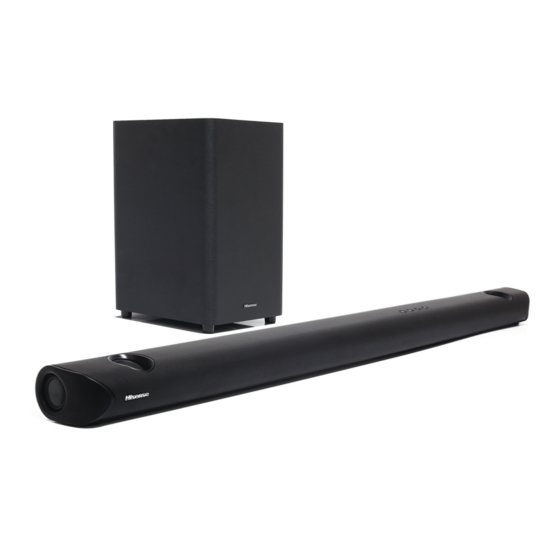
What’s in the Box Main Unit Remote Control / Wireless Subwoofer AAA Batteries x 2 User Manual / Adapter AC power Cord Quick Start Guide / (for Main Unit) Wall Mount Guide 3.5mm to 3.5mm Wall Mounting Screws (x2) / Brackets (x2) / HDMI Cable audio Cable Bracket Screw (x4) / Wall Anchors (x4) -
Page 8: Identifying The Parts
Identifying the Parts Main Unit 1 Overhead Sound 2 Surround Speakers 3 Display Window Show the current status. 4 Remote Control Sensor Receive signal from the remote control. 5 Screws Remove the screws then install the wall mounting screws into the back of the unit. (ON/OFF) button Switch the unit between ON and Standby mode. -
Page 9: Remote Control
Remote Control Switch the unit between ON and STANDBY mode. 2 MUTE Mute or resume the sound. 3 SOURCE Select the play function. 4 BT Select the Bluetooth mode. 5 VOL+/VOL- Increase/decrease the volume level. Skip to previous/next track in Bluetooth/USB mode. -
Page 10: Placement And Mounting
Placement and Mounting Placement A If your TV is placed on a table, you can place the unit on the table directly in front of the TV stand, centered with the TV screen. B If your TV is attached to a wall, you can mount the unit on the wall directly below the TV screen. Wall Mounting (if using option-B) Note: Installation must be carried out by qualified... -
Page 11: Connections
Connections Dolby Atmos® Dolby Atmos gives you amazing experience you have never before by overhead sound, and all the richness, clarity, and power of Dolby sound. DTS: X DTS: X The border sound is no longer constrained by fixed-position speaker placement or specific channel signals. -
Page 12: Use The Optical Socket
Connect the HDMI cable from unit's HDMI OUT (ARC) socket to the HDMI (ARC) socket on your ARC compliant TV. Then press the remote control to select HDMI ARC. Tips: • Your TV must support the HDMI-CEC and ARC function. HDMI-CEC and ARC must be set to On. •... -
Page 13: Connect Power
Connect Power Risk of product damage! Ensure that the power supply voltage corresponds to the voltage printed on the back or the underside of the unit. Before connecting the AC power cord, ensure you have completed all other connections. Soundbar Unwind the mains adapter and mains cable to their full length. -
Page 14: Basic Operation
Basic Operation Standby/ON Adjust the Brightness Press the DIMMER +/- button on the remote When you first connect the main unit to the mains socket, the main unit will be in Standby mode. control to select brightness level. • Press the button on the unit or on the Select a Preset Sound Effect remote control to switch the unit ON. -
Page 15: Bluetooth Operation
/ PAIR The display will show “PAIR” and you will hear "Pairing" from the unit. 3 Select “Hisense HS512” in the pairing list. After successful pairing, you will hear "Paired" from the unit, and the display panel shows “BT”. 4 Play music from the connected Bluetooth device. -
Page 16: Listen To Music From Bluetooth Device
To disconnect the Bluetooth function, you can : Switch to another function on the unit. Disable the function from your Bluetooth device.The Bluetooth device will be disconnected from the unit after the “Disconnected” voice prompt. Press and hold the button on the remote control. / PAIR Tips: •... -
Page 17: Troubleshooting
Troubleshooting To keep the warranty valid, never try to repair the system yourself. If you encounter problems when using this unit, check the following points before requesting service. No power • Ensure that the AC cord of the apparatus is properly connected . •... -
Page 18: Specifications
Specifications Model Name HS512 Soundbar Adapter Power Input AC120V~ / 220-240V~ 50/60Hz, 1.8A Adapter Power Output Main Unit Power Supply Input DC 23V 500mA Dimension (WxHxD) 1200 x 73 x 110 mm (47.2 x 2.9 x 4.3 inch) Net weight 8.8 lbs (4 kg) - Page 19 HS512...
- Page 20 Bară de sunet 5.1.2 canale cu subwoofer wireless și Dolby Atmos Model: HS512 MANUAL DE UTILIZARE Înainte de a utiliza bara de sunet, citiți cu atenție acest manual și păstrați-l pentru consultare ulterioară.
- Page 21 Conţinut Instrucțiuni importante de siguranță 3 Funcționarea de bază Siguranță Stare de veghe/PORNIT Avertizare Selectarea modurilor Reglarea nivelului de bas Conținutul cutiei ACTIVAREA/DEZACTIVAREA sunetului surround Identificarea pieselor Reglarea volumului Unitatea principală Reglarea luminozității Subwoofer wireless Selectarea unui mod de efect de sunet presetat Telecomandă...
-
Page 22: Instrucțiuni Importante De Siguranță
Instrucțiuni importante de siguranță borne și un conector de împământare. Borna C AUTIO N lată, sau conectorul de împământare, este RISK OF ELECTRIC SHOCK prevăzută pentru siguranța dvs. Dacă ștecherul DO NOT OPEN furnizat nu se potrivește în priză, adresați-vă unui electrician pentru înlocuirea prizei vechi. -
Page 23: Avertizare
Atenție: Utilizarea bateriilor ATENȚIE Utilizarea comenzilor sau reglajelor sau efectuarea Pentru a preveni scurgerea bateriilor, care poate duce altor proceduri decât cele descrise în acest la vătămări corporale, la pagube materiale sau la document poate duce la expunerea la radiații deteriorarea aparatului: periculoase sau la alte operațiuni nesigure. - Page 24 Formate audio de intrare acceptate Formatele audio acceptate de acest sistem sunt următoarele. Format Funcție HDMI 1 HDMI 2 √ √ √ √ LPCM 2ch √ LPCM 5.1ch √ LPCM 7.1ch √ √ √ √ Dolby Digital √ Dolby TrueHD √...
- Page 25 Formate video HDMI acceptate Formatele video acceptate de acest sistem sunt următoarele. Spațiu de Adâncimea Setarea [Format Rezoluție Frecvența cadrelor 3D culori culorii semnal HDMI] RGB 4:4:4 YCbCr 8 bits 4:4:4 50/59,94/60 Hz YCbCr 8/10/12 4:2:2 bits 4096 × 2160p [format îmbunătățit] YCbCr 10/12...
-
Page 26: Conținutul Cutiei
Conținutul cutiei Unitate principală Telecomandă / Subwoofer wireless Baterii AAA × 2 Manual de utilizare/ Adaptor Cablu de alimentare c.a. × 2 Ghid de pornire rapidă/ (pentru unitatea principală) Ghid de montare pe perete Șuruburi de montare pe perete (× 2) / Cablu audio Cablu HDMI Suporturi (×... -
Page 27: Identificarea Pieselor
Identificarea pieselor Unitatea principală 1 Sunet de sus 2 Difuzoare surround 3 Fereastră de afișare Afișarea stării curente. 4 Senzor de telecomandă Primirea semnalului de la telecomandă. 5 Șuruburi Scoateți șuruburile, apoi instalați șuruburile de montare pe perete în partea din spate a unității. Buton PORNIRE/OPRIRE Comutați unitatea între modul PORNIT și modul Stare de veghe. -
Page 28: Telecomandă
Telecomandă Comutați unitatea între modul PORNIT și modul STARE DE VEGHE. FĂRĂ SUNET Dezactivați sau reactivați sunetul. SOURCE Selectați funcția de redare. Selectați modul Bluetooth. VOL+/VOL- Măriți/reduceți nivelul volumului. Treceți la piesa anterioară/următoare în modul BT/USB. Redare/pauză/reluare redare în modul BT/ / PAIR USB. -
Page 29: Poziționare Și Montare
Poziționare și montare Amplasare A Dacă televizorul dvs. este așezat pe o masă, puteți așeza unitatea pe masă direct în fața suportului televizorului, centrată cu ecranul televizorului. B Dacă televizorul dvs. este fixat pe un perete, puteți monta unitatea pe perete, direct sub ecranul televizorului. -
Page 30: Conexiuni
Conexiuni Dolby Atmos® Dolby Atmos vă oferă o experiență uimitoare pe care nu ați trăit-o niciodată cu sunetul deasupra capului, precum și toată bogăția, claritatea și puterea sunetului Dolby. DTS: X DTS: X Sunetul marginal nu mai este constrâns de amplasarea difuzoarelor în poziție fixă sau de semnale de canal specifice. -
Page 31: Utilizarea Mufei Optical
Conectați cablul HDMI de la mufa HDMI OUT (ARC) a unității la mufa HDMI (ARC) a televizorului dvs. compatibil ARC. Apoi apăsați pe butonul corespunzător de pe telecomandă pentru a selecta HDMI ARC. Sfaturi: • Televizorul dvs. trebuie să accepte funcțiile HDMI-CEC și ARC. HDMI-CEC și ARC trebuie activate. •... -
Page 32: Conectarea De Alimentare
Conectarea de alimentare Risc de deteriorare a produsului! Asigurați-vă că tensiunea de alimentare corespunde tensiunii indicate pe spatele sau pe partea inferioară a unității. Înainte de a conecta cablul de alimentare c.a., asigurați-vă că ați finalizat toate celelalte conexiuni. Bară de sunet Desfășurați adaptorul de curent și cablul de curent pe toată... -
Page 33: Funcționarea De Bază
Funcționarea de bază Stare de veghe/Pornit Selectarea unui mod de efect de sunet presetat Când conectați unitatea pentru prima dată la priza În timpul redării, apăsați butonul EQ de pe de curent, unitatea va fi în modul Stare de veghe. •... -
Page 34: Funcționarea În Modul Bluetooth
/ PAIR Afișajul va afișa „ASOCIERE” și veți auzi „Asociere” din unitate. 3 Selectați „Hisense HS512” în lista de asociere. După o asociere reușită, veți auzi „Asociat” din unitate, iar pe panoul de afișare apare „BT”. 4 Redați muzică de pe dispozitivul Bluetooth conectat. -
Page 35: Ascultarea De Muzică De Pe Dispozitivul Bluetooth
Pentru a deconecta funcția Bluetooth, puteți să: Comutați la o altă funcție a unității. Dezactivați funcția de pe dispozitivul Bluetooth. Dispozitivul Bluetooth va fi deconectat de la unitate după mesajul vocal „Deconectat”. Țineți apăsat butonul de pe telecomandă. / PAIR Sfaturi: •... -
Page 36: Depanare
Depanare Pentru a păstra valabilitatea garanției, nu încercați niciodată să reparați singur sistemul. Dacă întâmpinați probleme în utilizarea acestei unități, verificați următoarele puncte înainte de a solicita service. Lipsă alimentare • Asigurați-vă că ați conectat corect cablul de c.a. al aparatului. •... -
Page 37: Specificații
Specificații Numele modelului HS512 Bara de sunet Intrare curent adaptor 120 V CA ~ / 220-240 V ~ 50/60 Hz, 1,8 A Ieșire curent adaptor 23 V 3 A Intrare sursă de alimentare unitate 23 V CC 3 A principală 500 mA Dimensiuni (L × Î × A) 1200 ×... - Page 38 HS512...
Need help?
Do you have a question about the HS512 and is the answer not in the manual?
Questions and answers