
Related Manuals for AHA Chamfer-Pro

Summary of Contents for AHA Chamfer-Pro
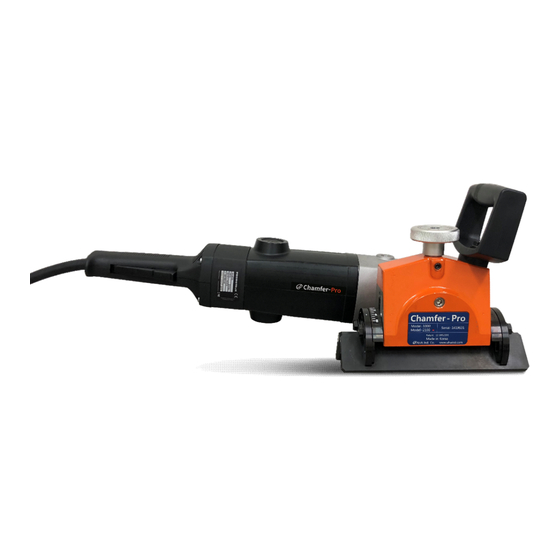
- Page 1 User’s Manual Portable beveling Machine #312, Migun Techno World 2, 187 Techno 2-Ro, Yuseong-Gu, Daejeon, 34025, S.Korea Tel : +82-10-4473-1022 / Web : www.ahaind.com E-mail : aha.overseas@gmail.com...
-
Page 2: Table Of Contents
● Usage of Built-in Speed Controller ・・・・・・・・・・・・・・ ・・・・・・・・・・・・・・・・・・・・・ 13 ● Usage of Roller Plate ・・・・・・・・・・・・・・・・・・・・ 15 ● Usage of Roller Clamp ・・・・・・・・・・・・・・・・・・・・・・・・・・ 17 ● Warranty ● Chamfer-Pro 1000 Parts List / Drawings ・・・・・・・・・・・・ ● Chamfer-Pro 2100 Parts List / Drawings ・・・・・・・・・・・・ ● Motor Drawings ・・・・・・・・・・・・・・・・・・・・・... -
Page 3: Specifications
11. Upon completion of one piece of work, remove the chip or dust from the equipment by air blowing or etc. Chamfer-Pro User’s Manual - 3 - AHA Industrial Co / www.ahaind.com... -
Page 4: Beveling Depth Adjustment
* Even if the beveling depths set are the same, as per different angles, actual results of the beveling are different. * The above drawings are mathematical calculations only and actual results of the beveling could be different as per the working conditions. Chamfer-Pro User’s Manual - 4 - AHA Industrial Co / www.ahaind.com... -
Page 5: Beveling Angle Adjustment
To turn off the motor, push and release the long black switch underneath. 5. Start the motor first and then approach to the workpiece. Move the machine slowly from the top and chamfer the workpiece from left to right. Chamfer-Pro User’s Manual - 5 - AHA Industrial Co / www.ahaind.com... - Page 6 For CP1000, set the inserts to be placed at the center of the cutter wedge. For CP2100, set the inserts to be placed at the center of the two cutters facing each other. Chamfer-Pro User’s Manual - 6 - AHA Industrial Co / www.ahaind.com...
- Page 7 17. The insert tip (List No. 10) is Kyocera Korea Precision’s product. .This product is coated by titanium and the part numbers are as below : • Part No. : PP9130 SECN120308-AHA-IC * The wearing rate of these inserts depends upon the materials to be beveled.
-
Page 8: Cp2100'S Characteristics Of Beveling Angle And Beveling Depth
(List No.6) using the height adjustment Shim (List No.7) as follows. ( ※ The above drawing is an example, and may have a tolerance depending on the thickness or location of the shim.) Chamfer-Pro User’s Manual - 8 - AHA Industrial Co / www.ahaind.com... -
Page 9: Troubleshooting
(Regularly) Tools and Parts Provided 1. 3mm hexagonal T-Handle Wrench 2. 4mm Ball L-Wrench – long axis 3. 13mm Spanner Composition Wrench 4. Air Valve Chamfer-Pro User’s Manual - 9 - AHA Industrial Co / www.ahaind.com... -
Page 10: How To Chamfer Outside Diameters Of Pipes
2. When you do the beveling work with shorter pipes, it is easier for you to erect the pipes and do the work by putting the Chamfer-Pro on top of the pipes. For longer pipes, you can do the beveling work by laying down the pipes and do the work on top of the pipes, by rotating the pipes. -
Page 11: How To Convert From Cp-2100 To Cp-1000
(List No. 21) and List No. 12, 11 and 6 parts in sequence. After that, assemble Shim (List No. 7-1) first and then reassemble List No. 6, 7-2, 11, 12 and 21 parts in sequence and tighten the bolt (List No. 13). Chamfer-Pro User’s Manual - 11 - AHA Industrial Co / www.ahaind.com... -
Page 12: Usage Of Built-In Speed Controller
Usage of Built-in Speed Controller 1. Purpose The Chamfer-Pro motor has a built-in speed controller that can be operated from level 1(1800 RPM) to level 6(5850 RPM) speed without load. (Depending on load amount when beveling) To longer the life of the inserts, the RPM can be adjusted according to the type of materials to be beveled for efficient beveling, and especially for the stainless steel. -
Page 13: Usage Of Roller Plate
Roller Plate, as illustrated below, thereby enabling even beveling results and better workability. [Starting point ] [Ending point ] Cutter position Cutter position beveling direction Roller Plate Roller Plate Chamfer-Pro User’s Manual - 13 - AHA Industrial Co / www.ahaind.com... - Page 14 1mm, by inserting supplementary 1t plate to the Roller Plate at the starting point and ending point of the work, you can improve the stability of the beveling works. 1t Plate 1t Plate Roller plate Chamfer-Pro User’s Manual - 14 - AHA Industrial Co / www.ahaind.com...
-
Page 15: Usage Of Roller Clamp
Keep on turning the handle clockwise so that the roller could be completely stuck to the workpiece by the power of the spring inside. Chamfer-Pro User’s Manual - 15 - AHA Industrial Co / www.ahaind.com... - Page 16 When you do the beveling work using 1t supplementary extension plates explained in 4-b above, you need to have the roller of the Clamp not to be touched to the workpiece. Chamfer-Pro User’s Manual - 16 - AHA Industrial Co / www.ahaind.com...
-
Page 17: Warranty
4. In case it is proven that the defects are caused by defective materials or poor workmanship of the manufacturing, repair or replacement of defective parts will be provided free of charge by this warranty. Chamfer-Pro User’s Manual - 17 - AHA Industrial Co / www.ahaind.com... -
Page 18: Chamfer-Pro 1000 Parts List / Drawings
Chamfer-Pro User’s Manual - 18 - AHA Industrial Co / www.ahaind.com... -
Page 19: Chamfer-Pro 2100 Parts List / Drawings
Chamfer-Pro User’s Manual - 19 - AHA Industrial Co / www.ahaind.com... -
Page 20: Motor Drawings
Chamfer-Pro User’s Manual - 20 - AHA Industrial Co / www.ahaind.com...
Need help?
Do you have a question about the Chamfer-Pro and is the answer not in the manual?
Questions and answers