Advertisement
Advertisement
Table of Contents

Related Manuals for DAYLIFF DSD Series


Summary of Contents for DAYLIFF DSD Series
- Page 1 SUBMERSIBLE BOREHOLE PUMP Installation & Operating Manual...
- Page 2 INDEX PUMP SPECIFICATIONS 2. DELIVERY AND STORAGE i Delivery ii Storage & Handling 3. PUMP ACCESSORIES i Delivery Pipe ii Electric Cable iii Well Head 4. ELECTRICAL CONNECTIONS i General Information 5. INSTALLATIONS i Pump Application ii Pump Position iii Pump Lowering 6.
-
Page 3: Pump Specifications
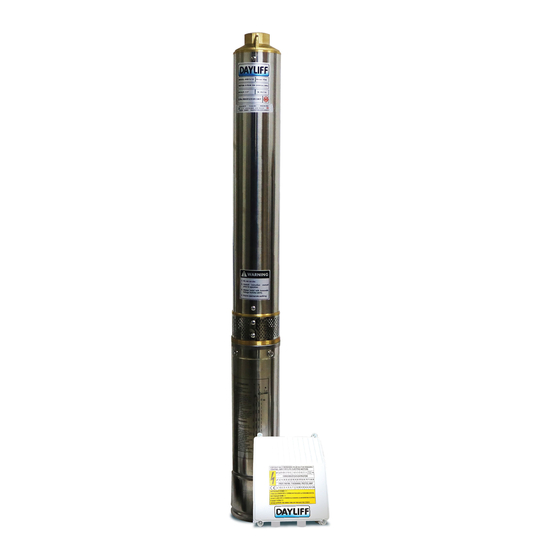
Congratulations on selecting a Dayliff DSD borehole Pump. They are manufactured to the highest standards and if installed and operated correctly will give many years of efcient and trouble free service. Careful reading of this Installation Manual is therefore important, though should there be any queries they should be referred to the equipment supplier. - Page 4 Dayliff SCM control boxes for operation and protection against overload, dry running and over/under voltage. Three phase motors require a remote DOL starter; A DAYLIFF SCT electronic Pump Controller is recommended for comprehensive pump control including low level, motor overload and irregular power supply protection.
-
Page 5: Delivery & Storage
2. DELIVERY & STORAGE Delivery DAYLIFF DSD pumps are supplied from the factory in proper packing in which they should remain until they are to be installed. During unpacking and prior to installation, care must be taken when handling the pump to ensure that misalignment does not occur due to bending. -
Page 6: Electrical Connections
DAYLIFF well head assembly being r e c o m m e n d e d . T h e a s s e m b l y includes a delivery outlet with isolating... - Page 7 The required voltage quality for DAYLIFF DSD motors measured at the motor Ÿ terminals is -10%/+10% of the nominal rated voltage during continuous operation including variations in the supply voltage and cable losses. All motors must be fitted with a mains isolator and coarse current protection in Ÿ...
-
Page 8: Installation
Function Switch “Store” button S T U V W Check Valve Valve Upper Probe Lower Probe Com Probe Water Well Fig. 4 Wiring diagram for SCT 5. INSTALLATION Pump Application Different pump models are available and the pump selected must be matched Ÿ... - Page 9 Pumps can be installed either vertically or horizontally, Ÿ though if installed horizontally the discharge outlet should never fall below the horizontal plane. For all horizontal Allowed installations a flow sleeve should be used and also there should be a minimum of 0.5m water depth above the pump to prevent the formation of a vortex.
-
Page 10: Pump Operation
When positioning the pump it is important to ensure adequate motor Ÿ cooling through water flow past the motor. It is recommended that the complete pump is submerged at least 3m below Ÿ the dynamic water level and if possible the pump should be installed at least 3m from the bottom of the borehole to prevent silting damage. -
Page 11: Maintenance
As the valve is being opened, the water output should be monitored to ensure Ÿ that the pump output does not exceed the borehole capacity as indicated by the pump starting and stopping on the low level relay (if fitted) or uneven water flow at the outlet. -
Page 12: Troubleshooting Guide
8. TROUBLE SHOOTING GUIDE Problem Possible Cause Solution Replace the blown fuses. If the replacements blow too, The fuses are blown the electric installation and the submersible drop cable should be checked The ELCB or the voltage- Re-set the circuit breaker operated ELCB has tripped Contact the power supply No electricity supply... - Page 13 The discharge valve is Open the valve closed Increase the installation depth of the pump, throttle No water or very low level in the pump or replace it with borehole a smaller model to obtain reduced capacity The pump runs but The non-return valve is stuck Pull out the pump and clean gives no...
- Page 14 Adjust the intervals of the electrodes to ensure suitable time between the cutting-in and cutting-out of the pump. The water level electrodes If the intervals between or level switches have not stop/start cannot be changed been installed correctly automatically, the pump capacity may be reduced by throttling the discharge valve Frequent...
-
Page 15: Terms Of Warranty
9. TERMS OF WARRANTY i) General Liability • In lieu of any warranty, condition or liability implied by law, the liability of Davis & Shirtliff (hereafter called the Company) in respect of any defect or failure of equipment supplied is limited to making good by replacement or repair (at the Company's discretion) defects which under proper use appear therein and arise solely from faulty design, materials or workmanship within a specified period. - Page 16 www.davisandshirtliff.com INS393B-02/20...
Need help?
Do you have a question about the DSD Series and is the answer not in the manual?
Questions and answers