Table of Contents
Advertisement
Quick Links
Instructions
Instruction and Maintenance
Technical sheet + Curve + Spare parts list
Pump serial No.
- Original -
Manual
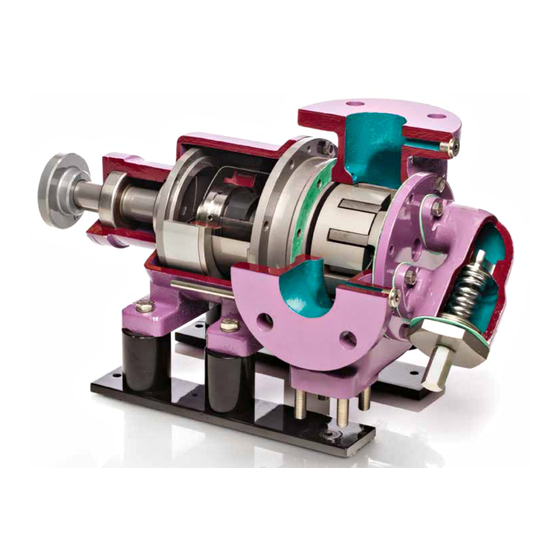
Internal gear pumps
Type R
ATEX version
Contents
www.victorpumps.com
20010790 / 07.01.2020 / 1 - 22
2
3
5
8
14
18
19
20
21
Annexes
Advertisement
Table of Contents

Related Manuals for Victor Pumps R250


Summary of Contents for Victor Pumps R250
-
Page 1: Table Of Contents
Instructions 20010790 / 07.01.2020 / 1 - 22 - Original - Instruction and Maintenance Manual Internal gear pumps Type R ATEX version Contents A. Declaration of Conformity - ATEX Certificate B. Introduction C. ATEX - Information D. Installation E. Maintenance F. -
Page 2: Declaration Of Conformity - Atex Certificate
Instructions 20010790 / 07.01.2020 / 2 - 22 - Original - A. Declaration of Conformity - ATEX Certificate With this Declaration of Conformity we declare that type internal gear pumps comply with the following directives: ⇒ EC Machinery Directive 2006/42/EC, Annex II A. ⇒... -
Page 3: Introduction
Instructions 20010790 / 07.01.2020 / 3 - 22 - Original - B. Introduction 1. Introduction The instruction manual contains important information on how to operate the pump in a safe, adequate and effective manner. Compliance with these instructions will help you avoid dangerous situations, reduce any repair costs and downtime, and improve the reliability and durability of the pump. - Page 4 Instructions 20010790 / 07.01.2020 / 4 - 22 - Original - Check that the data mentioned on the goods label correspond to those in the transport document and in the purchase order, to ensure that the pump received is actually the one ordered. 4.
-
Page 5: Atex - Information
Instructions 20010790 / 07.01.2020 / 5 - 22 - Original - C. ATEX - Information 1. Marking Internal gear type pumps are marked as follows: with code +2A for equipment of category II 2G Ex h IIB T4… T1 Gb with code +2AC for equipment of category II 2G Ex h IIC T4…... - Page 6 Instructions 20010790 / 07.01.2020 / 6 - 22 - Original - 2. ATEX requirements Pumps with a mechanical seal: It might leak. If the pumped liquid is flammable, the area next to the pump must be declared as Zone 1 (category 2). Pumps with a double balanced double mechanical seal, type 6 ..: Standard grease (+P) lubrication must be present or an API 51, 52 or 53 type quench system must be installed.
- Page 7 Instructions 20010790 / 07.01.2020 / 7 - 22 - Original - 2.16 For pumps that are used in Zone 1 (+2A and +2AC) following instruction is mandatory. For pumps that are used in Zone 2, it is not mandatory but we recommend it as well. To avoid running dry or the prolonged use of the safety valve, proceed as follows: Always monitor the operation of the pump and stop it flow...
-
Page 8: Installation
Instructions 20010790 / 07.01.2020 / 8 - 22 - Original - D. Installation 1. Installation Check and follow all the points of paragraph C.2 “ATEX requirements” on page 6. The pumps can be supplied in various ways: ⇒ bare shaft pump: Select a coupling, coupling cover and ATEX standard motor adequate for the performance of the pump, install them according to the instructions of the various manufacturers. - Page 9 Instructions 20010790 / 07.01.2020 / 9 - 22 - Original - CAUTION The safety valve must not be considered a flow control valve. To change the flow rate of the pump, use a variable speed drive or an external by-pass line. 1.13 Pumps equipped with a heating jacket can be heated with steam, at a maximum pressure of 10 bar, or with diathermic oil up to 250°C.
- Page 10 Instructions 20010790 / 07.01.2020 / 10 - 22 - Original - Figure 1 - Direction of rotation Start the motor and check the direction of rotation. See Figure 1. If the pump is fitted with a safety valve, the cover and the adjustment screw must be on the side of the suction port.
- Page 11 Instructions 20010790 / 07.01.2020 / 11 - 22 - Original - Start the pump. 2.10 Check the priming of the pump and wait a few minutes until the pump runs as expected. CAUTION Any change in normal working conditions (such as power, temperature, vibrations, noise, etc.) or alarm signals to the system indicate malfunctioning.
- Page 12 Instructions 20010790 / 07.01.2020 / 12 - 22 - Original - (f) Excessive vacuum in the suction line. Reduce the vacuum, for example by reducing the geodetic height of the pump. (g) Rotation speed too low. In the case of liquids with viscosity lower than 20 mm²/s (cSt), the rotation speed should not be less than ⅓...
- Page 13 Instructions 20010790 / 07.01.2020 / 13 - 22 - Original - EXCESSIVE WEAR. Possible causes: (a) Liquid containing objects with a diameter larger than 0.5÷1 mm. Install a suction filter. Liquid containing abrasive impurities. Reduce the motor revs. In the case of abrasive liquids, the rotation speed should be reduced by ⅓...
-
Page 14: Maintenance
Instructions 20010790 / 07.01.2020 / 14 - 22 - Original - E. Maintenance 1. Maintenance After starting, it is necessary to check the noise and correct priming of the pump at the following time intervals: 10 min. / 1 hour / 10 hours / 1 day / 1 week / 1 month. The check can then be carried out at monthly intervals, unless the conditions of use change. - Page 15 Instructions 20010790 / 07.01.2020 / 15 - 22 - Original - The level of the quench liquid can increase or decrease depending on the temperature or tightness of the seal. In the event of liquid leakage, empty half the reservoir and check every day for a week if the mechanical seal is leaking.
- Page 16 Instructions 20010790 / 07.01.2020 / 16 - 22 - Original - Loosen the screws (Pos. 52) and push the seal gland backwards (Pos. 13). Remove the old rings (Pos. 49) and clean the seal housing. Check the wear of the shaft surface and replace it if necessary. Insert new rings, one after the other, and pre-seal them offsetting the terminals by 180°.
- Page 17 1.75 ½ ⅔ R200 1.75 ½ ⅔ R250 ½ R = screw rotation Classes: A = standard (as supplied normally) B = pumps for viscous liquids C = pumps for highly viscous liquids C+ = wide tolerances for special applications Table for pumps with a product temperature exceeding 180°C...
-
Page 18: Repairs
Instructions 20010790 / 07.01.2020 / 18 - 22 - Original - F. Repairs 1. Introduction Comply with the recognized technical standards for safe and professional work, in addition to the instructions for use and the mandatory accident prevention regulations applicable at the place of use. -
Page 19: Safety Valve
Instructions 20010790 / 07.01.2020 / 19 - 22 - Original - G. Safety valve Safety valve (by-pass) 1. Introduction Internal gear pumps can reach a high pressure that can damage both the pump and the pipes/hoses. The safety valve can prevent the problem of over pressures. On request, the pump can also be equipped with a safety valve integrated in the pump cover. -
Page 20: Coupling For Bi-Block Pumps
Instructions 20010790 / 07.01.2020 / 20 - 22 - Original - H. Coupling for Bi-Block Pumps 1. Description Bi-Block type pumps (Abbreviation .BB.) have a built-in coupling. For all other couplings check the separate instructions. The coupling consists of two hubs and a polyamide sleeve. 2. -
Page 21: Temperature Sensor
Instructions 20010790 / 07.01.2020 / 21 - 22 - Original - I. Temperature sensor 1. Instructions In all the pumps (magnetic drive versions excluded) there is a hole in the flanges to fit a pressure gauge and a temperature sensor. In all magnetic pumps there is a hole for the installation of a PT100 temperature sensor. - Page 22 Instructions 20010790 / 07.01.2020 / 22 - 22 - Original - Screw the compression fitting with the gasket (if provided) into the selected hole up to half the total length of the thread. Insert the temperature sensor into the compression fitting until the head touches the shell.
- Page 23 Deutschland Italia Victor Pumpen GmbH Victor Pumps srl Dieselstr. 7 Viale Svezia 2 85551 Kirchheim bei München 35020 Ponte S. Nicolò (Padova) Tel. +49 (0)89 9048660 Tel. +39 0498961266 Fax +49 (0)89 9043447 Fax +39 0498961255...
Need help?
Do you have a question about the R250 and is the answer not in the manual?
Questions and answers