Xerox Versant 280 Press Quick Start Manual
Hide thumbs
Also See for Versant 280 Press:
- User documentation (375 pages) ,
- Manual (44 pages) ,
- Security manual (15 pages)
Table of Contents
Advertisement
Advertisement
Table of Contents

Related Manuals for Xerox Versant 280 Press


Summary of Contents for Xerox Versant 280 Press
- Page 1 Version 1.0 November 2020 702P08367 Xerox Versant 280 Press ® ® Quick Start Guide...
- Page 2 © 2020 Xerox Corporation. All rights reserved. Xerox ® , Xerox and Design ® , and Versant ® are trademarks of Xerox Corporation in the United States and/or other countries. Adobe ® and the Adobe logo, InDesign ® , Illustrator ®...
-
Page 3: Table Of Contents
5 Troubleshooting ........................33 Paper Jams ..........................34 Paper Jams in the Document Feeder ................34 Press Paper Jams......................37 Paper Jams in the Bypass (Tray 5) ..................41 Calling for Service ........................42 Xerox ® Versant ® 280 Press Quick Start Guide... - Page 4 Table of Contents Xerox ® Versant ® 280 Press Quick Start Guide...
-
Page 5: Getting Started
Getting Started This chapter contains: • Press Components........................6 • Power On or Off the Press......................8 • Power Saver ..........................9 Xerox ® Versant ® 280 Press Quick Start Guide... -
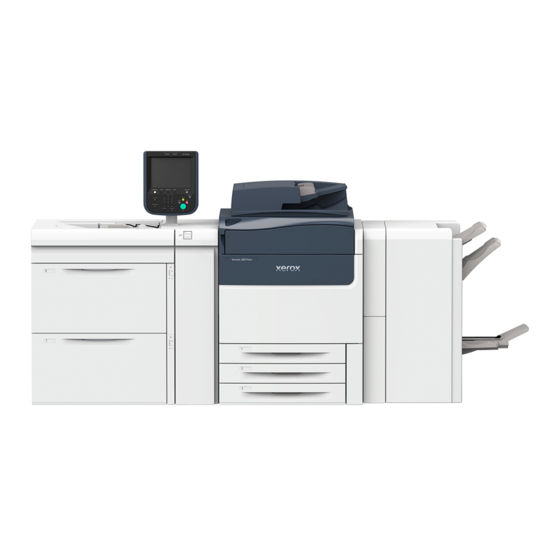
Page 6: Press Components
4. Press Power Switch 11. Tray 5 (Bypass) Top Cover 5. Dry Ink/Toner Front Cover 12. USB Memory Port 6. Press Front Door 13. Offset Catch Tray (OCT) 7. Trays 1-3 Xerox ® Versant ® 280 Press Quick Start Guide... -
Page 7: Locating The Press Serial Number
Paper Tray 1 drawer: a. At the press, fully open Tray 1. b. At the left of the tray, on the press frame, locate the plate with the serial number (SER#). Xerox ® Versant ®... -
Page 8: Power On Or Off The Press
Wait until the lights on UI stop blinking, as this allows the fuser to begin cooling. 2. Switch Off the Main Power switch behind the Front Door. Note: Allow the press to remain off for a minimum of 10 seconds before switching on the power again. Xerox ® Versant ® 280 Press... -
Page 9: Power Saver
The press exits Power Saver mode by doing one of the following: • Pressing the Power Saver button on the press UI • Receiving print data for an incoming job to be printed • Programming and performing a copy or scan job Xerox ® Versant ®... - Page 10 Getting Started Xerox ® Versant ® 280 Press Quick Start Guide...
-
Page 11: Copy
Copy This chapter contains: • Basic Copying with the Document Feeder (DADF) ..............12 • Basic Copying with the Document Glass..................13 Xerox ® Versant ® 280 Press Quick Start Guide... -
Page 12: Basic Copying With The Document Feeder (Dadf)
• 2-Sided Copying • Original Type • Lighten/Darken The features displayed on the main Copy window vary depending on how it is configured by the administrator. 6. Enter the quantity. 7. Press Start. Xerox ® Versant ® 280 Press Quick Start Guide... -
Page 13: Basic Copying With The Document Glass
• 2-Sided Copying • Original Type • Lighten/Darken The features displayed on the main Copy window vary depending on how it is configured by the administrator. 6. Enter the quantity. 7. Press Start. Xerox ® Versant ® 280 Press Quick Start Guide... - Page 14 Copy Xerox ® Versant ® 280 Press Quick Start Guide...
-
Page 15: Paper And Media
Paper and Media This chapter contains: • Loading Paper in Trays 1, 2, and 3....................16 • Loading Paper in the Bypass (Tray 5)..................17 • Loading Envelopes in Tray 5 (Bypass) ..................19 Xerox ® Versant ® 280 Press... -
Page 16: Loading Paper In Trays 1, 2, And 3
If necessary, make the desired changes to paper curl and alignment adjustment. c. Select Save until you are returned to the Paper Tray settings/Tray Properties window. d. Select Confirm or OK to save the information and close the Paper Tray settings/Tray Properties window. Xerox ® Versant ®... -
Page 17: Loading Paper In The Bypass (Tray 5)
6. Insert the paper or media into the tray until it stops. 7. Adjust the paper guides so that they touch the edges of the stack. If enabled by your System Administrator, the Paper Tray settings/Tray Properties window may be displayed on the UI. Xerox ® Versant ®... - Page 18 (precut tab), and, if necessary, paper curl and/or alignment option. 9. Select Confirm or OK to save the information and close the Paper Tray settings/Tray Properties window. Xerox ® Versant ®...
-
Page 19: Loading Envelopes In Tray 5 (Bypass)
Paper Weight field. A paper weight of 220 is a good starting point. If the printing is blurred or smeared, enter a higher value. 5. Select the Bypass Tray (Tray 5) as the Paper Source. Xerox ® Versant ®... - Page 20 Paper and Media Xerox ® Versant ® 280 Press Quick Start Guide...
-
Page 21: Maintenance
Maintenance This chapter contains: • Cleaning the Press Overview....................... 22 • Replacing Consumable Supplies ....................25 Xerox ® Versant ® 280 Press Quick Start Guide... -
Page 22: Cleaning The Press Overview
C C l l e e a a n n i i n n g g t t h h e e D D o o c c u u m m e e n n t t C C o o v v e e r r a a n n d d G G l l a a s s s s 1. Cleaning the document cover a. Raise the document feeder. Xerox ® Versant ®... - Page 23 The second-side scanning lens assembly is located along the left side of the document cover. The assembly consists of the mirrored-glass strip, a metal strip, a white-plastic strip, and rollers. All parts of the assembly must be cleaned to ensure the best image quality when making copies. Xerox ® Versant ®...
- Page 24 If you touch the document cover with your bare hands, wipe it clean before closing the document feeder. 5. Gently close the document feeder. Xerox ® Versant ® 280 Press...
-
Page 25: Replacing Consumable Supplies
O O r r d d e e r r i i n n g g S S u u p p p p l l i i e e s s Xerox supplies, paper, and throughput material can be ordered from the web site www.xerox.com clicking on the Supplies link. For any item that is not orderable from the web site, contact your Xerox Service Representative. Note: The cleaning pads used with the ROS Window cleaning wand are not orderable. -
Page 26: Checking The Status Of Consumables
Dry Ink/Toner Waste Bottle, and any applicable optional devices (such as the OHCF feed rolls). Note: The status of the Fuser and Suction Filter are not shown, but a message displays when these items require replacing. Xerox ® Versant ® 280 Press... -
Page 27: Replacing A Dry Ink/Toner Cartridge
5. Dispose of or recycle the cartridge per your local authorities and regulations. In the United States, also refer to the Electronic Industries Alliance website: www.eiae.org. For more information about Xerox environmental programs, go to www.xerox.com/environment. 6. Remove the new dry ink/toner cartridge from its packaging. -
Page 28: Replacing The Dry Ink/Toner Waste Bottle
8. Hold the center part on the top of a new bottle and insert it evenly and gently into the press until it comes to a stop. 9. Close the waste bottle door. 10. Close the press front door. Xerox ® Versant ®... -
Page 29: Replacing A Drum Cartridge
Caution: Replace drum cartridges while the press is powered ON. 1. Ensure that the press is stopped and is not currently printing jobs. 2. Open the press Front Door. Xerox ® Versant ® 280 Press... - Page 30 5. Unwrap the sheet covering the new drum cartridge and place it under the cartridge. Some drum cartridges may include a protective film. Remove the film on the drum cartridge, if the film is present. Xerox ® Versant ®...
- Page 31 8. Install the new drum cartridge into the press following the guides with the side marked front facing the front. Xerox ® Versant ®...
- Page 32 10. Immediately close the drum cartridge drawer to protect the other drums from light. 11. Return the Release Handle to its original position. 12. Return the R1-R4 handle to the original position and close the front door. 13. Insert the used drum cartridge into an empty container for recycling. Xerox ® Versant ®...
-
Page 33: Troubleshooting
Troubleshooting This chapter contains: • Paper Jams ..........................34 • Calling for Service ........................42 Xerox ® Versant ® 280 Press Quick Start Guide... -
Page 34: Paper Jams
4. If instructed to open the inner cover, lift up the lever, then open the inner cover. Remove the jammed document. Note: If the document is stuck, do not pull on it forcefully, as this could damage the document. Xerox ® Versant ® 280 Press... - Page 35 Ensure that there are not any torn, wrinkled, or folded documents in the document set. To scan torn, wrinkled or folded documents, use the Document Glass, only. The already scanned document sheets are automatically skipped and scanning resumes from the document sheet last scanned prior to the jam. Xerox ® Versant ®...
- Page 36 Ensure that there are not any torn, wrinkled, or folded documents in the document set. To scan torn, wrinkled or folded documents, use the Document Glass, only. The already scanned document sheets are automatically skipped and scanning resumes from the document sheet last scanned prior to the jam. Xerox ® Versant ®...
-
Page 37: Press Paper Jams
2. Rotate Handle 2 to the right until it is in the horizontal position, then pull out the transfer module. 3. Remove the visible jammed paper. 4. After clearing the jammed sheets, ensure that no torn paper pieces are left in the press. Xerox ® Versant ®... - Page 38 8. Return Handle 2e to its original position. 9. Pull down Handle 2f and remove the jammed paper. 10. Return Handle 2f to its original position. 11. Push in the transfer module completely and rotate Handle 2 to the left. Xerox ® Versant ®...
- Page 39 Troubleshooting 12. Close the press Front Door. 13. Run five blank sheets to clean left-over toner from the fuser roll and resume the copying/printing process. Xerox ® Versant ® 280 Press Quick Start Guide...
- Page 40 This may cause a malfunction. Check where the paper jam occurred before clearing the problem. 1. Open the tray where the paper jam occurred. 2. Remove the jammed paper. 3. Push the tray in gently until it comes to a stop. Xerox ® Versant ® 280 Press...
-
Page 41: Paper Jams In The Bypass (Tray 5)
If paper is torn, check inside the press and remove it. 2. Open the Bypass Top Cover and remove jammed paper. 3. Close the cover. 4. Reload paper into the tray and resume copying / printing. Xerox ® Versant ®... -
Page 42: Calling For Service
4. If possible, use a phone near the press when calling for assistance. Follow the instructions provided by the operator. 5. For system support, user help, and service support, call the appropriate number. For the specific number in your area, go to www.xerox.com and select the Support link. Xerox ®...
Need help?
Do you have a question about the Versant 280 Press and is the answer not in the manual?
Questions and answers