Table of Contents
Advertisement
Available languages
Available languages
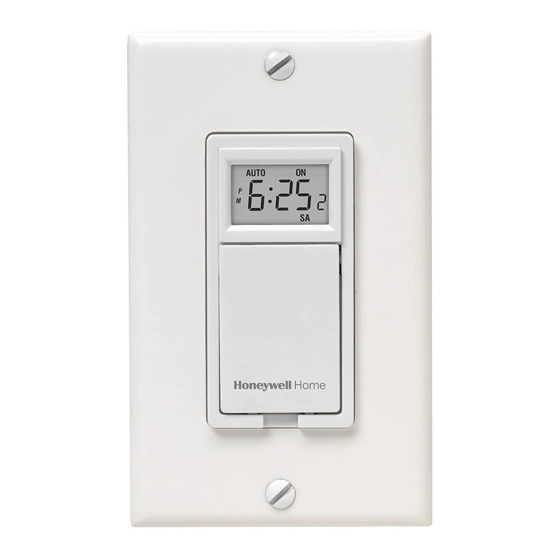
PLS530A/PLS531A
PROGRAMMABLE WALL SWITCH
1. APPLICATIONS
The PLS530A/PLS531A switch can be used in a single-
pole or 3-way installation with the following types of
lighting:
• Incandescent
• Halogen
• Low-voltage halogen with transformer
• Fluorescent
THE PLS530A/PLS531A SWITCH CANNOT BE USED
WITH A LOAD BELOW 40 W, A LOAD ABOVE 500 W OR A
MOTOR.
2. INSTALLATION
1. Cut power at the circuit breaker to avoid electric
shock.
2. Remove the existing switch. (For a 3-way installa-
tion, identify and label the wire that is connected to
the "common" screw.)
3. Install the new switch (refer to the appropriate sec-
tion below).
4. Apply power at the circuit breaker.
NOTE: The white wire is not the neutral wire but the wire
going to the load.
SINGLE-POLE INSTALLATION
Line
120 VAC
Neutral
Line
120 VAC
Neutral
Connect wires "2" and "C" of the PLS530A/PLS531A to the
line (120 V) wire.
EXISTING 3-WAY INSTALLATION
120 VAC
Jumper
Connect wire "C" of the PLS530A/PLS531A to the
"common" wire, identified when removing the old switch.
Connect the other two PLS530A/PLS531A wires to the
two remaining wires.
At the other 3-way switch, connect the jumper wire
between the "common" screw and the screw where wire "1"
of the PLS530A/PLS531A is connected.
OWNER'S GUIDE
See NOTE
See NOTE
Red
Red
3-wire cable
69-2502EFS-05
Advertisement
Table of Contents

Related Manuals for Honeywell PLS530A


Summary of Contents for Honeywell PLS530A
- Page 1 Neutral the “common” screw.) Connect wires "2" and "C" of the PLS530A/PLS531A to the 3. Install the new switch (refer to the appropriate sec- line (120 V) wire. tion below).
-
Page 2: Selecting The Operating Mode
PLS530A/PLS531A NEW 3-WAY INSTALLATION 5. SELECTING THE OPERATING MODE 120 VAC See NOTE The programmable switch has 2 operating modes: manual (MAN) and automatic (AUTO). To switch mode, press the switch door for 3 seconds. Manual Mode The programmable switch operates as a regular switch. -
Page 3: Technical Specifications
PLS530A/PLS531A Clearing a Program the date of first purchase by the original purchaser. If at Press the PGM button until the desired program is any time during the warranty period the product is selected. Hold the PGM button for 3 seconds. - : - - determined to be defective due to workmanship or appears when the program is erased. - Page 4 © 2020 Resideo Technologies, Inc. All rights reserved. The Honeywell Home trademark is used under license from Honeywell International, Inc. This product is manufactured by Resideo Technologies, Inc. and its affiliates. Tous droits réservés. La marque de commerce Honeywell Home est utilisée avec l’autorisation d’Honeywell International, Inc.
-
Page 5: Installation
(4) 2. S’assurer que le sélecteur ON/OFF sélecteur On/Off est placé à ON. neutre 3. Réinitialiser l’interrupteur à Relier les fils «2» et «C» du PLS530A/PLS531A à la ligne l’aide d’un trombone. 0:00 120 Vca. clignotera à l’écran. 69-2502EFS-05... -
Page 6: Régler L'horloge
PLS530A/PLS531A Pour déroger temporairement à l’horaire programmé, Si rien n’est affiché à l’écran : appuyer sur l’interrupteur. Le nouvel état (ON ou OFF) • S’assurer que le sélecteur ON/OFF est bien mis à la clignotera pour indiquer que l’état est temporaire. La position ON. -
Page 7: Dépannage
PLS530A/PLS531A Panne de courant : L'interrupteur est muni d'une pile déterminera si le produit doit être retourné à l’adresse rechargeable pour sauvegarder vos programmes lors suivante : Resideo Return Goods, 1985 Douglas Dr. N., d’une panne de courant. Cependant, l'écran reste éteint Golden Valley, MN 55422, ou si un produit de durant la panne. - Page 8 © 2020 Resideo Technologies, Inc. All rights reserved. The Honeywell Home trademark is used under license from Honeywell International, Inc. This product is manufactured by Resideo Technologies, Inc. and its affiliates. Tous droits réservés. La marque de commerce Honeywell Home est utilisée avec l’autorisation d’Honeywell International, Inc.
-
Page 9: Instalación
Si en la pantalla no apareciera nada: • Asegurarse de que el selector ON/OFF esté bien neutro colocado en ON. Empujarlo a la derecha con un pequeño destornillador. Conectar los cables “2” y “C” del PLS530A/PLS531A a la línea de 120 Vca. 69-2502EFS-05... -
Page 10: Ajuste De La Hora Y El Día
PLS530A/PLS531A • Si el interruptor controla una lámpara con un es temporaria. La cancelación quedará activada hasta interruptor integrado, poner el interruptor de la que se presione nuevamente el interruptor o hasta el lámpara en “encendido” (On). inicio del programa siguiente. -
Page 11: Solución De Problemas
PLS530A/PLS531A Corte de corriente : El interruptor tiene una pila recar- Si el producto está defectuoso gable para salvaguardar los programas en caso de un (i) devuélvalo, con una factura de venta o cualquier otro corte de electricidad. Sin embargo, la pantalla se apaga comprobante de compra con fecha, al lugar donde lo durante el corte. - Page 12 © 2020 Resideo Technologies, Inc. All rights reserved. The Honeywell Home trademark is used under license from Honeywell International, Inc. This product is manufactured by Resideo Technologies, Inc. and its affiliates. Tous droits réservés. La marque de commerce Honeywell Home est utilisée avec l’autorisation d’Honeywell International, Inc.
Need help?
Do you have a question about the PLS530A and is the answer not in the manual?
Questions and answers