Table of Contents
Advertisement
COMPONENT SYSTEM/COMPACT HI-FI SYSTEM
XD SERIES
XD-751/XD-701
XD-771S
XD-551/XD-501
XD-571S
INSTRUCTION MANUAL
KENWOOD CORPORATION
This instruction manual is used to describe multiple models listed above.
Model availability and features (functions) may differ depending on the country and sales
area.
B60-3768-00 00 MA
99/12 11 10 9 8 7 6 5 4 3 2 1 98/12 11 10 9 8 7 6 5 4 3 2 1
(Y,M,X,T,Q)
MC
‰
Advertisement
Table of Contents

Related Manuals for Kenwood XD-751


Summary of Contents for Kenwood XD-751
-
Page 1: Instruction Manual
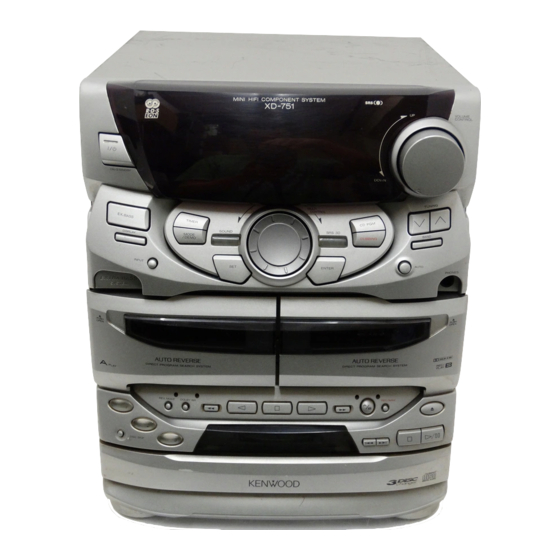
COMPONENT SYSTEM/COMPACT HI-FI SYSTEM XD SERIES XD-751/XD-701 XD-771S XD-551/XD-501 XD-571S INSTRUCTION MANUAL KENWOOD CORPORATION This instruction manual is used to describe multiple models listed above. Model availability and features (functions) may differ depending on the country and sales area. B60-3768-00 00 MA... -
Page 2: Before Applying Power
Before applying power Units are designed for operation as follows. U.S.A. and Canada ... AC 120 V only Austraria ... AC 240 V only Safety precautions WARNING : TO PREVENT FIRE OR ELECTRIC SHOCK, DO NOT EXPOSE THIS APPLIANCE TO RAIN OR MOISTURE. -
Page 3: Table Of Contents
Contents Preparation section Before applying power ... 2 Safety precautions ... 2 Special features ... 4 Handling of discs and tapes ... 5 System connection (XD-7...series)... 6 Connection of the System Accessories ... 6 Connection of Options (Optional Parts) ... 8 System connection (XD-5...series)... -
Page 4: Special Features
Special features 3D Wide FL display Easy to operate, new multi control jog dial Built in sub woofer (XD-7...series only) 3-Disc carousel CD player Versatile tone and sound field adjustment Demonstration When the power supply is restored after a power failure or the power cord is unplugged and plugged in again during use, this unit auto- matically starts the demonstration function (display only). -
Page 5: Handling Of Discs And Tapes
Handling of discs and tapes Disc handling precautions Handling Hold compact discs so that you do not touch the playing surface. Label side Playing side Sticker, etc Do not attach paper or tape to either the playing side or the label side of com- pact discs. -
Page 6: System Connection (Xd-7
System connection (XD-7...series) Connection of the System Accessories This is the connection method for system and accessories. Please look carefully at the illustration and connect cor- rectly in the order of the numbers. AM loop antenna The supplied antenna is for indoor use. Place it as far as possible from the main system, TV set, speaker cords and power cord, and set it to a direction which provides the best reception. - Page 7 Speaker and TV installation If there is a magnet or other device generating magnetic force nearby, interaction between the magnet and speaker may cause color blotching onthe TV. If this happens, move the speaker at least 20 cm away from the TV set. FM indoor antenna The accessory antenna is for temporary indoor use only.
-
Page 8: Connection Of Options (Optional Parts)
Connection of Options Connect separately sold parts as shown in the figure. Do not plug the power cord into the power outlet until all of the required connections have been made. Audio output Audio input OUTPUT OUTPUT INPUT INPUT LEVEL MIN. - Page 9 1. All of the optical-fiber cables sold in audio stores cannot always be used. If the cable you purchased cannot be connected to this unit, please consult your dealer or KENWOOD distributor. 2. Insert the optical-fiber cable straight into the connector until it clicks.
-
Page 10: System Connection (Xd-5
System connection (XD-5...series) Connection of the System Accessories This is the connection method for system and accessories. Please look carefully at the illustration and connect cor- rectly in the order of the numbers. AM loop antenna The supplied antenna is for indoor use. Place it as far as possible from the main system, TV set, speaker cords and power cord, and set it to a direction which provides the best reception. - Page 11 FM indoor antenna The accessory antenna is for temporary indoor use only. For stable signal reception we recommend using an outdoor antenna. Remove the indoor antenna if you connect one outdoors. Speaker (left) Speaker Unit Twist Caution regarding placement To maintain proper ventilation, be sure to leave a space around the unit (from the largest outer dimensions including projec- tions) equal to, or greater than, shown below.
-
Page 12: Connection Of Options (Optional Parts)
Connection of Options Connect separately sold parts as shown in the figure. Do not plug the power cord into the power outlet until all of the required connections have been made. Audio output Audio input OUTPUT MIN. INPUT INPUT LEVEL MIN. - Page 13 1. All of the optical-fiber cables sold in audio stores cannot always be used. If the cable you purchased cannot be connected to this unit, please consult your dealer or KENWOOD distributor. 2. Insert the optical-fiber cable straight into the connector until it clicks.
-
Page 14: Controls And Indicators
Controls and indicators Main Unit POWER (For U.S.A. and Canada) ON/STANDBY 1— MIC —2 PUSH OPEN ¡ PLAY ™ ¶ DISC DISC • DISC SKIP ª MINI HiFi COMPONENT SYSTEM MULTI CONTROL SOUND VOL. REV.MODE DOLBY NR DISC SRS ( VOLUME CONTROL DOWN... - Page 15 Receiver 1 ON/STANDBY ( POWER) key Power ON/OFF switching is executed. 2 EX. BASS (Extra bass) key Switches the extra bass play on and off. 3 DISPLAY key Switches the displayed information. 4 INPUT key Press to select the input source. When TAPE or CD is selected, playback starts automatically provided that a tape or disc has already been loaded.
-
Page 16: Display
Display (The displays given in this manual are approximations only. They may differ from what actually appears on the display.) R.D.S EON TP TA NEWS INFO. P.B.C. STEREO ECHO 1 RDS-related indicators (Provided except for some areas) 2 Tuner and applied CD operation indicators This section contains the indicators of the tuner operations and applied CD operations. -
Page 17: Remote Control Unit
Remote control Unit The keys on the remote control unit with the same names as on the main unit have the same function as the keys on the main unit. TA/NEWS /INFO. RDS DISP. DISC SKIP TIME RANDOM REPEAT TUNING P.CALL TAPE ENTER... -
Page 18: Operation Of Remote Control Unit
Operation of remote control unit Loading batteries 1 Remove the cover. Operation Plug the power cord into the mains power outlet and press the on/standby ( POWER) key of the remote control unit to turn power ON. After the power has been turned ON, press the desired key. - Page 19 MULTI CONTROL jog dial The MULTI CONTROL jog dial (or the MULTI CONTROL keys on the remote control unit) allows you to set (or enter) a variety of functions with an easy operation. The mode for setting (using) MULTI CONTROL is initiated when any of the CD PGM, DUBBING, SOUND, DISPLAY, TIMER and MODE/DEMO keys is pressed.
-
Page 20: Let's Put Out Some Sound
Let's put out some sound Basic use method Bass and treble compensation Muting the sound temporarily ON/STANDBY VOLUME CONTROL DOWN TIMER, MODE/DEMO EX.BASS ENTER 1. Switching the power ON (OFF) The power can also be turned ON by pressing the play key of the CD player, the play key of the cassette deck or the BAND key of the tuner. - Page 21 Muting the sound temporarily (Remote control unit only) MUTE Remote control unit ÷ Press again to resume the original volume. ÷ The sound muting is also canceled when the volume is controlled. Bass compensation (EX.BASS) ÷ Each press switches EX.BASS on and off alternately. ÷...
-
Page 22: Playback Of Cd
Playback of CD Playback from desired track TIME High-speed search in forward and reverse directions The tray opens when the key is pressed and closes when the key is pressed again. Time display on the CD player Each press of the TIME key of the remote control unit switches the displayed time information. -
Page 23: Skipping Tracks
Skipping tracks MULTI CONTROL To skip backward ÷ The tracks in the direction the dial is rotated are skipped, and the selected track will be played from the beginning. ÷ When the jog dial is rotated a little in the direction of counterclockwise once during playback, the track being played will be played from the beginning. -
Page 24: Playback Of Tape
Playback of tape Start playback Selection of reverse mode PUSH OPEN ¡ To wind tape at high speed To stop playback To stop playback Selection of Dolby NR 1. Load a cassette tape. 1 Open the door. 2 Insert a tape and close the door. 2. - Page 25 To wind tape at high speed To fast wind in direction | To fast wind in direction \ ÷ Press the & key to stop fast winding. Selection of reverse mode. REV.MODE Each press switches the modes as follows. 1 “[” ... Both sides are played back (recorded), and then the tape stops.
-
Page 26: Relay Play
Let's put out some sound XD-SERIES (En) Relay play When tapes are set in the decks A and B and the reverse mode is set to “[” (play of both sides), play of the second deck will be started automatically after play of the first deck has been com- pleted. -
Page 27: Searching For The Desired Music Program (Dpss)
Searching for the desired music program The DPSS (Direct Program Search System) is capable of detecting non-recorded spaces of more than 4 seconds as “blanks between programs” and, based on this information, can return to the beginning of the music program being played or the beginning of a desired program by skipping up to 16 other programs. -
Page 28: Receiving Broadcast Station
Receiving broadcast station It is also possible to receive them by one-touch operations by storing up to 40 stations in the preset memory. 1 TUNING ¡ 4 P.CALL ¢ To increase frequency To decrease frequency Select a station. MULTI CONTROL P.CALL Remote control... - Page 29 Collective presetting of stations (auto preset) Keep the AUTO key depressed (about 2 seconds). One-by-one presetting (manual preset) 1 Press the ENTER key during recep- tion. Presetting is cancelled when no opera- tion is executed for 10 seconds or more. 2 Select one of the preset numbers from 1 to 40.
-
Page 30: Let's Record
Let's record Recording (Deck B only) PUSH OPEN REV.MODE DOLBY NR Note that this cassette deck cannot record onto Metal tapes. Note Note When equalizer or another effect is applied to the sound, the sound with the applied effect can be recorded. 1. -
Page 31: Start Recording
Selection of the reverse mode REV.MODE Each press switches the modes as follows. 1 “[” ... Both sides are played back (recorded), and then the tape stops. 2 “”” .. Both sides are played back endlessly. (The tape stops after recording onto both sides.) 3 ““”... - Page 32 Beat cancel function There may be cases in which beat noise interferes with record- ing of MW/LW broadcasting. In such a case, press the A/B key during recording to reduce or suppress the beat noise. The A/B key acts as the demonstration key except during tuner recording.
-
Page 33: Copying Tape (Tape Dubbing)
Copying tape (Tape dubbing) The contents of the tape in deck A can be copied onto the tape in deck B. 1 Select the “TAPE” input. 2 Select “[” (double-side recording) or ““” (one-side recording). REV.MODE 3 Press the DUBBING key. 4 Select “TAPE DUBBING”... -
Page 34: Playback Of Cd
Playback of CD Listening in the desired sequence Any titles on the discs in the tray can be listened to in the desired sequence. (Max. 32 titles) Select the “CD” input. Check that the CD player is in the stop mode. If it is in play mode Press the CD PGM key. - Page 35 Check the programmed tracks (and replace, add or delete tracks as required). To check: To replace a track in the program: 1 Select the programmed disc or track to be replaced and press the SET MULTI key. CONTROL 2 Select a disc or track to replace the disc or track selected above (step 3- 1 and 2).
-
Page 36: Repeated Playback
Repeated playback Desired titles or discs can be played back repeatedly. Select the “CD” input. To repeat a disc 1 Confirm that the “PGM...” indica- tor is not lit. If the “PGM...” indicator is lit, press the CD PGM key to turn it off. 2 Press to select “DISC REPEAT”. - Page 37 Select the “CD” input. To repeat only one track 1 Confirm that the “PGM...” indica- tor is not lit. 2 Select “REPEAT”. REPEAT 3 Select the disc. DISC SKIP 4 Select the track. To repeat only the programmed tracks 1 Perform the procedure in “Listening in the desired sequence (program playback)”...
-
Page 38: Listening To An Unexpected Title Sequence (Random Playback)
Listening to an unexpected title sequence As the titles each time are selected randomly, the music can be enjoyed without getting tired of it. Select the “CD” input. Confirm that the “PGM...” indicator is not lit. If the “PGM...” indicator is lit, press the CD PGM key to turn it off. -
Page 39: Radio Data System) (Except For Some Areas)
R.D.S. (Radio Data System) (Except for some areas) RDS is a system which transmits useful information (dig- ital data) for FM broadcasts together with the broadcast signal. Tuners and receivers designed for RDS reception can extract the information from the broadcast signal for use with various functions such as automatic display of the station name. -
Page 40: Searching For A Desired Program Type (Pty Search)
Searching for a desired program type By specifying the type of program (genre) you want to lis- ten to, the tuner automatically searches for a station which is currently broadcasting a program of the specified type. Set the reception band to FM. Preset RDS stations with the auto preset function. ª Select the PTY search mode. - Page 41 Start the search. Press the key again during search to cancel To change to a different program type : Repeat steps 1, 2, 3. When searching for a Rock Music broadcast Display while the tuner is searching. Blinks R.D.S STEREO When a station is received.
-
Page 42: To Be Able To Listen To The Desired Information At Any Time
To be able to listen to the desired information at any time By using the EON function, which manages the informa- tion of other stations, listening to desired information like traffic information or news etc. can be reserved even when it is not being transmitted at the present. - Page 43 Wait for the desired information. CD or tape playback may also be started. As long as the unit is ON, the unit is always ready for the reception. Waiting for information while a RDS station without EON function is tuned If the EON indicator does not light with the RDS station in steps 3 and 4, the tuner will wait for only the desired information broadcast from the tuned RDS station provided that the desired...
-
Page 44: Convenient Cd Recording
Convenient CD recording Selection of the convenient CD recording type With this unit, the following edit recording is possible ac- cording to the purpose. Note that this cassette deck cannot record onto Metal Note Note tapes. If you want to select the track to be recorded while playing a CD If you want to record a CD in order of track num- bers... -
Page 45: Recording Only Desired Titles (Cd One Track Record)
Recording only desired titles At the time of CD playback, any desired title can be se- lected immediately for recording. When equalizer or another effect is applied to the sound, the sound with the applied effect can be re- corded. Recording preparations are required. -
Page 46: Recording Of An Entire Cd (Cd Record)
Recording of an entire CD Perform the following operation while the CD player is in stop mode to start recording at the same time as the start of playback. When equalizer or another effect is applied to the sound, the sound with the applied effect can be re- corded. -
Page 47: Giving Preference To The Tape Length Over The Title Sequence
Giving preference to the tape length over the title sequence (CD EDIT) When the tape recording time is specified, recording is ex- ecuted with changing the title sequence so that no title will be interrupted when the tape direction is changed at the end of one side. -
Page 48: Recording The Programmed Titles (Cd Pgm Record)
Recording the programmed titles Program the desired tracks from up to 3 CD discs in the desired order and record the programmed playback onto tape. When equalizer or another effect is applied to the sound, the sound with the applied effect can be re- corded. -
Page 49: Effective Sound Adjustment
Effective Sound Adjustment This unit permits selection of equalizer and sound field playback. Please select the equalizer as desired according to the music genre. Select the sound field mode according to the desired atmosphere. Adjustment of balance and input level Balance... -
Page 50: Listening With The Desired Sound (Equalizer Function)
Listening with the desired sound In addition to the 4 kinds of equalizer patterns which have been preset at the factory, 3 equalizer patterns created manually by the user can be stored in memory and recalled any time. A SOURCE DIRECT mode is provided for simple audio re- production by defeating the EX.BASS and SRS 3D circuits. -
Page 51: Creation And Memorizing Of An Equalizer Pattern
Creation and memorizing of an equalizer pattern You can edit desired patterns manually and store them in memory. 1 Switch on the equalizer mode. 2 Select the number to be used for storage. (MANUAL EQ1 ~ EQ3) 1. Select. MULTI CONTROL Go to step 3 within 15 sec. -
Page 52: Enjoying Sound Field Effects
Enjoying Sound Field Effects Experiencing SRS 3D The Sound Retrieval System is an epochal system which produces a three-dimensional sound space by applying the most suitable processing to the sound signal on the basis of the human listening mechanism. This permits real depth and sound location, considered as difficult to realize with conventional 2-channel stereo (general stereo). -
Page 53: Enjoying Karaoke (Except For Some Areas)
Enjoying Karaoke (Except for some areas) When CDs or tapes with recorded voice and instrument music are played, it is possible to lower the volume only for the voice part. In combination with mic mixing, this permits easy enjoyment of Karaoke. Connect a microphone. -
Page 54: Clock Adjustment
Clock adjustment This unit incorporates a clock function. Be sure to adjust the correct time before using the timer function. The time is displayed only while the power is off. Activate the clock adjustment mode. Select “TIME SET”. 2 Press the SET key. Enter the figure of hour. -
Page 55: Timer Operation
Timer operation Sleep timer (SLEEP) The power is turned OFF automatically after the specified period has elapsed. Operate easy To use Timer (O.T.T.) Playback of the selected input source starts at the specified time, and the power is switched off after one hour. This timer operates only once directly after setting. -
Page 56: Timer Programming
Timer programming Two 24-hour timer systems (PROG.1, PROG.2) (which can be used every day) and a sleep timer system (which works only once) are available. In each of PROG.1 and PROG.2, the timer data including the operating period and played contents can be set and selected to be activated or not as required. - Page 57 Enter the OFF time. The time is returned. Make the desired reservation. For timer playback or AI timer playback 1 Select the mode. Select “TIMER PLAY” or “AI PLAY”. MULTI CONTROL TIMER PLAY TIMER REC AI PLAY RETURN Enter it. 2 Select the input source.
- Page 58 Select the program number to be used and press the ENTER key. Set the POWER switch to OFF (STANDBY) position. When timer operation is not required 1 Press the TIMER key. 2 Select “PROG. ON/OFF” and press the SET key. 3 Select “PROG.
-
Page 59: Important Items
Important Items Maintenance Cleaning the head section Cleaning the heads and peripheral compo- nents For maintaining the best condition of the deck and Cotton swab for longer service life, always keep the heads (re- cording / playback / erase), capstan and pinch roller Capstan clean. -
Page 60: In Case Of Difficulty
In case of difficulty What seems to be a malfunction is not always so. Before calling for service, check the following table according to the symptom of your trouble. Operation to reset The microcomputer may fall into malfunction (impossibility to operate, erroneous display, etc.) when the power cord is un- plugged while power is ON or due to an external factor. - Page 61 A station has been preset but it cannot be received by pressing the P.CALL key. Demonstration starts suddenly. General Symptom No operation occurs when an operation key is pressed. Cassette deck Symptom Sound cannot be produced by pressing the play key or no operation occurs even when an operation key is pressed.
- Page 62 Recording cannot be started by pressing the record key. Volume of the recorded track changed. CD player Symptom A CD is placed in the player but it cannot be played. Sound is not produced. Sound skips. ÷ The recording protect tab of the cassette has been broken.
-
Page 63: Specifications
Tuning frequency range ... 153 kHz ~ 279 kHz SW Tuner section (RXD-771S/RXD-571S) Tuning frequency range ... 5.9 MHz ~ 17.9 MHz 1. KENWOOD follows a policy of continuous advancements in development. For this reason specifications may be changed without notice. Notes Notes 2. - Page 64 This instruction manual is used to describe multiple models listed above. Model availability and features (functions) may differ depending on the country and sales area. SURROND switch/ SPEAKERS trminals XD-751/XD-701 XD-771S YES (Except for Europe, XD-551/XD-501 U.K. and Russia) XD-571S ¡...