CORNING Centrix Jumper Routing
Hide thumbs
Also See for Centrix:
- Manual (37 pages) ,
- Installation instruction (16 pages) ,
- Instructions manual (8 pages)
Table of Contents
Advertisement
Quick Links
Advertisement
Table of Contents

Related Manuals for CORNING Centrix


Summary of Contents for CORNING Centrix
- Page 1 Jumper Routing in Centrix™ System Frame p/n 003-960, Issue 4 TPA-5743...
-
Page 3: Table Of Contents
Jumper Routing in Centrix™ System Frame p/n 003-960, Issue 4 related literature | 003-948 Centrix System Housing Installation 003-949 Centrix System Pigtailed Housing with Pigtailed Cassette Installation 003-950 Centrix System Frame Installation 003-951 Centrix System Stubbed Housing Installation 003-959 Centrix System Splitter/CWDM Cassette Installation... -
Page 4: Connect Jumpers
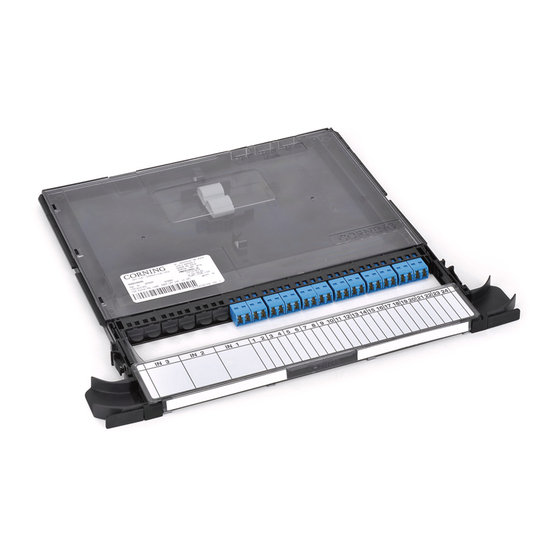
1. Connect Jumpers WARNING: Never look directly into the end of a fiber that may be carrying laser light. Laser light can be invisible and can damage your eyes. Viewing it directly does not cause pain. The iris of the eye will not close involuntarily as when viewing a bright light. - Page 5 Step 3: Remove dust caps and clean adapters and connectors per standard company practices or as described in Section 6. Connect jumpers as required (Figure Figure 3 TPA-4462 Step 4: Dress jumpers under the flaps on the handle and out the left side of the cassette (Figure Step 5: Then raise the handle until the buttons on each side engage to hold...
- Page 6 This page intentionally left blank. STANDARD RECOMMENDED PROCEDURE 003-960 | ISSUE 4 | OCTObER 2017 | PAGE 4 OF 18...
-
Page 7: Jumper Routing And Slack Storage When Cross-Connecting
2. Jumper Routing and Slack Storage when Cross- connecting in the Same Frame When cross-connecting jumpers within one frame, use a single-fiber jumper length of 4 m (13 ft) to eliminate the need to cut jumpers to a specific length. • Determine location of jumper termination. -
Page 8: Connecting Housing 5 To Housing 6
2.2. Connecting Housing 5 to Housing 6 Cross-connecting in the same frame Connecting housing 5 to housing 6 TPA-4453 Figure 6 STANDARD RECOMMENDED PROCEDURE 003-960 | ISSUE 4 | OCTObER 2017 | PAGE 6 OF 18... -
Page 9: Connecting Housing 1 To Housing 10
2.3. Connecting Housing 1 to Housing 10 Cross-connecting in the same frame Connecting housing 1 to housing 10 TPA-4452 Figure 7 STANDARD RECOMMENDED PROCEDURE 003-960 | ISSUE 4 | OCTObER 2017 | PAGE 7 OF 18... -
Page 10: Full Frame Composite Cross-Connect Routing
2.4. Full Frame Composite Cross-connect Routing EQ # 1 EQ # 2 EQ # 3 EQ # 4 EQ # 5 OSP # 1 OSP # 2 OSP # 3 OSP # 4 OSP # 5 TPA-4568 Figure 8 STANDARD RECOMMENDED PROCEDURE 003-960 | ISSUE 4 | OCTObER 2017 | PAGE 8 OF 18... -
Page 11: Cross-Connecting Jumpers In Adjacent Frames
3. Cross-connecting Jumpers in Adjacent Frames 3.1. Cross-connecting Jumpers in Adjacent Rear Cable Access Frames When cross-connecting jumpers to adjacent rear cable access frames, use a length of 6 m (16.25 ft), plus 1.0 m (3.3 ft) for every additional frame passed. -
Page 12: Cross-Connecting Jumpers In Adjacent Front Cable Access Frames
3.2. Cross-connecting Jumpers in Adjacent Front Cable Access Frames When cross-connecting jumpers to adjacent front cable access frames, use a length of 6 m (16.25 ft), plus 1.0 m (3.3 ft) for every additional frame passed. • Always use lower troughs to transition between frames. • Distribute fiber between different hubs in the inter-bay unit (IBU) to minimize fiber loading. -
Page 13: Cross-Connecting Jumpers Using Overhead Trough System
4. Cross-connecting Jumpers Using Overhead Trough System Use overhead trough systems to route jumpers as shown in Figure 11 when: • frames are not adjacent to each other in the same frame lineup or • frames are not in the same frame lineup. TPA-4455 Figure 11 STANDARD RECOMMENDED PROCEDURE 003-960 | ISSUE 4 | OCTObER 2017 | PAGE 11 OF 18... -
Page 14: Jumper Routing And Slack Storage When Interconnecting
5. Jumper Routing and Slack Storage when Interconnecting between Frames • Rear cable access frame: Always use rear troughs to transition between frames. • Front cable access frame: Always use bottom troughs or overhead trough system to transition between frames. • Distribute fiber between different troughs and hubs in the IBU to minimize fiber loading. -
Page 15: Subsequent Jumper Routing From Source Frame
5.2. Subsequent Jumper Routing from Source Frame TPA-4565 Figure 13 STANDARD RECOMMENDED PROCEDURE 003-960 | ISSUE 4 | OCTObER 2017 | PAGE 13 OF 18... -
Page 16: Interconnecting To Active Equipment
5.3. Interconnecting to Active Equipment Interconnect Routing between Centrix Frame and Actives Network Frame NOTE: Can be used with either front-facing single- ber connected jumpers or front-facing 12- ber MTP connectors TPA-4457 Figure 14 STANDARD RECOMMENDED PROCEDURE 003-960 | ISSUE 4 | OCTObER 2017 | PAGE 14 OF 18... - Page 17 Rear View Interconnect Routing between Centrix Frame and Actives Network Frame NOTE: Can be used with rear-facing 12- ber MTP connectors (Refer to SRP 003-1006 or 003-1011 for detailed instructions) TPA-4457b Figure 15 STANDARD RECOMMENDED PROCEDURE 003-960 | ISSUE 4 | OCTObER 2017 | PAGE 15 OF 18...
-
Page 18: Interconnecting Jumper Routing To Active Shelves In A Different Frame Lineup Using Overhead Trough System
5.4. Interconnecting Jumper Routing to Active Shelves in a Different Frame Lineup Using Overhead Trough System TPA-4459 Figure 16 STANDARD RECOMMENDED PROCEDURE 003-960 | ISSUE 4 | OCTObER 2017 | PAGE 16 OF 18... -
Page 19: Interconnecting Jumpers Between Distantly Spaced Ports
5.5. Interconnecting Jumpers between Distantly Spaced Ports • When connecting ports 1 through 12 of a 24-port cassette or ports 1 through 18 of a 36-port cassette to another cassette’s ports 1 through 12 or 1 through 18, it is recommended to add one additional inner hub to the routing path. -
Page 20: Connector Care And Cleaning
Step 3: Repeat previous step with a dry wipe. Corning Optical Communications LLC • PO Box 489 • Hickory, NC 28603-0489 USA 800-743-2675 • FAX: 828-325-5060 • International: +1-828-901-5000 • www.corning.com/opcomm Corning Optical Communications reserves the right to improve, enhance, and modify the features and specifications of Corning Optical Communications products without prior notification.
Need help?
Do you have a question about the Centrix and is the answer not in the manual?
Questions and answers