Table of Contents
Advertisement
Quick Links
•
Visit www.corning.com/opcomm/videos for additional information and videos.
•
Visit www.corning.com/opcomm/safety for full safety precautions.
1.
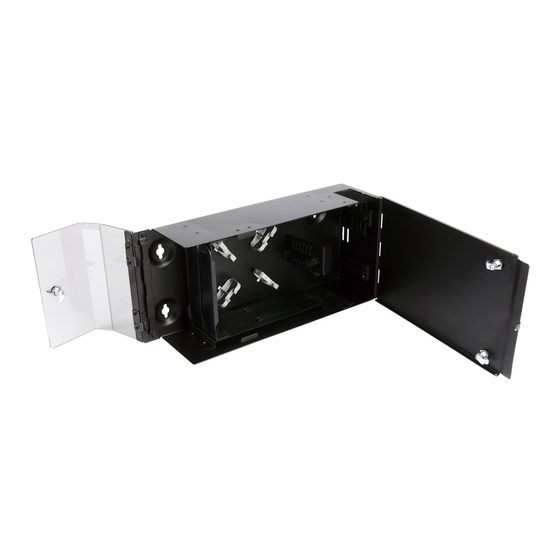
Carton Contents
•
Wall-mountable connector housing
(WCH)
•
WCH-02P hardware kit:
•
(1) Laser warning label
•
(2) Fiber identi cation labels
•
(3) Cable ties
•
(4) Mounting screws
WCH-02P
WCH-04P
WCH-06P
2.
Tools and Materials
•
Phillips screwdriver
•
Slotted screwdriver
3.
Additional Materials (Purchased Separately)
May or may not be required depending on your application
•
CCH pigtailed cassettes (CCH-CS12-59-P00RE)
•
CCH cassette (CCH-CS, CCH-CF)
•
Pigtailed panels (CCH-CPXX-YY-P03ZZ)
•
Connector panels (CCH-CPXX-YY)
•
Mounting hardware appropriate for your installation
•
Grounding kit (HDWR-GRND-KIT) for armored cable
•
Buffer tube fan-out kits (FAN-XX25-YY)
DIMENSIONS
18.8 cm x 42.2 cm 10.7 cm ( 74 in x 16.1 in x 4.2 in)
35.8 cm x 42.2 cm x 10.7 cm (14.1 in x 16.1 in x 4.2 in)
35.8 cm x 42.2 cm x 10.7 cm (14.1 in x 16.1 in x 4.2 in)
OCTOBER
Wall-mountable Connector
Housing
(WCH-02P/-04P/-06P)
003-982-AEN, Issue 2
•
WCH-04P/-06P (x2) hardware kit:
•
(1) Laser warning label
•
(6) Fiber identi cation labels
•
(3) Cable ties
•
(4) Mounting screws
•
Needle-nose pliers
•
Pencil, pen or marker
Advertisement
Table of Contents

Subscribe to Our Youtube Channel
Related Manuals for CORNING WCH-02P


Summary of Contents for CORNING WCH-02P
- Page 1 Wall-mountable Connector Housing (WCH-02P/-04P/-06P) 003-982-AEN, Issue 2 • Visit www.corning.com/opcomm/videos for additional information and videos. • Visit www.corning.com/opcomm/safety for full safety precautions. Carton Contents • Wall-mountable connector housing • WCH-04P/-06P (x2) hardware kit: (WCH) • (1) Laser warning label •...
- Page 2 Open doors with quarter-turn latches. Step 2: Using the housing as a template, mark the mounting hole locations. NOTE: Use the pre-installed bubble level for mounting accuracy. • WCH-02P: L = 11.985 in (30.44 cm) • WCH-04P/-06P L = 11.985 in (30.44 cm) H = 4.050 in (10.287 cm)
- Page 3 Prepare Cable Remove applicable knockout. CAUTION: Be careful not to damage the pre-installed dust brushes when removing a knockout. Loose tube cable Tight-buffered cable NOTE: Ground armored cable according to instructions provided with the kit; • Use (1) HDWR-GRND-KIT per armored cable.
- Page 4 Route Unconnectorized or Preterminated Cable Step 1: Remove blank adapter panel and install connector panel. Step 2: If ber is unconnectorized, terminate connectors onto the ber. Step 3: Secure buffer tube or buffer tube fan-out body to the transitional holder. Step 4: Route bers inside the routing guides.
- Page 5 A complete listing of the trademarks of Corning Optical Communications is available at www.corning.com/opcomm/trademarks. All other trademarks are the properties of their respective owners. Corning Optical Communications is ISO 9001 certi ed. © 2014 Corning Optical Communications. All rights reserved.
Need help?
Do you have a question about the WCH-02P and is the answer not in the manual?
Questions and answers