
Related Manuals for Dräger Carina


Summary of Contents for Dräger Carina
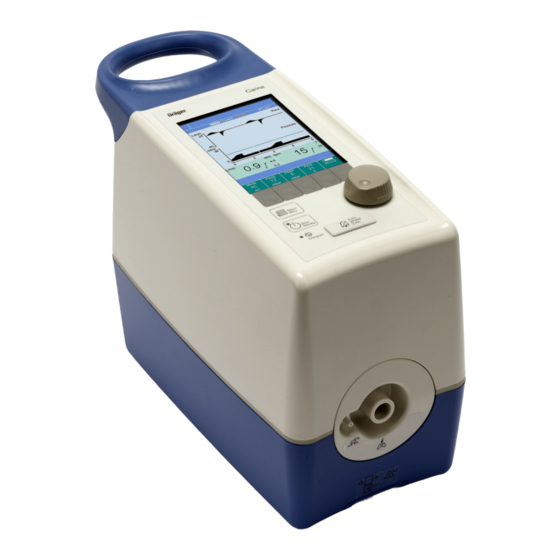
- Page 1 Instructions for use Carina Subacute Care Ventilator WARNING To properly use this medical device, Software 3.2n read and comply with these instructions for use.
- Page 2 – VentStar ® are trademarks owned by Dräger. – Virex ® is a trademark owned by Johnson Diversery. – Korsolex ® is a trademark owned by Bode Chemie. – BIPAP* Trademark used under license Instructions for use Carina SW 3.2n...
- Page 3 Service personnel Service personnel are persons who are responsible for the maintenance of the product. Service personnel must be trained in the maintenance of medical devices and install, reprocess, and maintain the product. Instructions for use Carina SW 3.2n...
- Page 4 Abbreviations and symbols For explanations refer to sections "Abbreviations" and "Symbols" in chapter "Overview". Instructions for use Carina SW 3.2n...
-
Page 5: Table Of Contents
Overview ......82 Carina with trolley ..... . . 36 Opening the configuration menu . - Page 6 Index ....... . 155 Instructions for use Carina SW 3.2n...
- Page 7 Monitoring ventilation ....14 Backup ventilation with an independent manual ventilation device ....14 Instructions for use Carina SW 3.2n...
-
Page 8: For Your Safety And That Of Your Patients
Dräger recommends that the medical device is only used together with accessories listed in the current list of accessories. Instructions for use Carina SW 3.2n... -
Page 9: Connected Devices
Risk of patient injury medical electrical equipment and medical electrical systems Electrical connections to equipment not listed in these instructions for use or these assembly instructions must only be made when approved by each respective manufacturer. Instructions for use Carina SW 3.2n... -
Page 10: Patient Safety
Instructions for use Carina SW 3.2n... -
Page 11: Functional Safety
128. Disposable products WARNING Risk of device accessory failure and of patient injury Disposable products were developed, tested and manufactured for single use only. Do not reuse, reprocess or sterilize disposable products. Instructions for use Carina SW 3.2n... -
Page 12: Product-Specific Safety Information
Do not allow the medical device to come into contact with sources of ignition. Instructions for use Carina SW 3.2n... - Page 13 Only use the filters listed in the current list of Risk of patient injury accessories. Hyperbaric chambers may impair correct functioning of the medical device. Do not use the medical device in hyperbaric chambers. Instructions for use Carina SW 3.2n...
-
Page 14: Monitoring Ventilation
PEEP voltage (SELV) to the connections for the serial and/or an increased inspiratory O port and the nurse call. concentration (for example, with the MR-100 manual breathing bag). Instructions for use Carina SW 3.2n... -
Page 15: Application
Intended use ......16 Definition of sub-acute care ... . . 16 Instructions for use Carina SW 3.2n... -
Page 16: Intended Use
Application Intended use Carina – long-term ventilator for ventilator- – For use by qualified medical personnel. dependent patients or ventilator-assisted patients. WARNING – For treatment of sub-acute care patients in Risk of patient injury hospital or medical rooms. Not intended for acute inpatient care of –... -
Page 17: Overview
Overview Carina basic device ....18 Top ........18 Bottom . -
Page 18: Carina Basic Device
D Rotary knob for setting and confirming functions and parameters E Audio paused 2 min. key for suppressing the alarm tone for 2 minutes and visual display of alarm status – Red: Warning – Yellow: Caution Instructions for use Carina SW 3.2n... -
Page 19: Patient Connection Panel
B Emergency air inlet and oxygen overflow L Connection for external battery C Connection for pilot line (for breathing circuit M Connection for power cable with expiratory valve) N No function O Connection for nurse call Instructions for use Carina SW 3.2n... -
Page 20: Trolley
G Red locking lever for column holder (under Wall mounting Bed mounting base) H Double castors with locking brake, set of 4 A Clamp with threaded handle B Spacer with 2 buffers C Carina holder Instructions for use Carina SW 3.2n... -
Page 21: Range Of Functions
– MVi and VTi correspond to the calculated – Measured value list inspiratory tidal volume of the patient. – Set value list – VC-SIMV, VC-AC and SPN-CPAP/PS (VG) control the calculated inspiratory tidal volume of the patient. Instructions for use Carina SW 3.2n... -
Page 22: Gas Supply
Optional bed and wall mountings are available for Gas supply fixing Carina to a bed or wall. An internal turbine supplies Carina with ambient air. supply – High Pressure Oxygen (HPO) from the central gas supply system or from compressed gas cylinders –... -
Page 23: Abbreviations
1 mbar = 100 Pa = 1 hPa FHSS Frequency-Hopping Spread 1 bar = 100 kPa = 1000 hPa Spectrum Airway pressure Inspiratory O concentration Paw high Airway pressure high HEPA High Efficiency Particulate Air Instructions for use Carina SW 3.2n... - Page 24 (set value) Inspiratory tidal volume SELV Safety Extra Low Voltage SPN- Spontaneous – Continuous CPAP/PS Positive Airway Pressure/Pressure Support, spontaneous breathing with continuous positive pressure level and with or without pressure support Instructions for use Carina SW 3.2n...
-
Page 25: Symbols
90 to 100 % Charge state of internal battery Labeling in accordance with 75 to 89 % Directive 93/42/EEC concerning medical devices Charge state of internal battery 50 to 74 % ESD warning symbol on device Instructions for use Carina SW 3.2n... - Page 26 Non-sterile STERILE Relative humidity for storage and transport Atmospheric pressure for storage and transport Temperature limitation for storage and transport Keep away from oil and grease Keep away from sunlight Batch code Keep dry Instructions for use Carina SW 3.2n...
-
Page 27: Operating Concept
......31 Display of associated ventilation parameters . . 31 Instructions for use Carina SW 3.2n... -
Page 28: Operating And Display Unit
C Rotary knob for setting and confirming functions and parameters Set: Turn the rotary knob. Confirm: Push the rotary knob. D Audio paused 2 min. key for suppressing the alarm tone for 2 minutes Instructions for use Carina SW 3.2n... -
Page 29: Screen
D Display for 2 measured values (value 1, value 2), configurable E Information line, e.g., for information when the limit of the setting range is reached. F Display of functions and ventilation parameters The display is activated by the associated key. Instructions for use Carina SW 3.2n... -
Page 30: Color Coding
(B). The following menus can be selected: – Vent.set. for ventilation settings, for detailed description see page 63 – Alarms menu for display and setting alarm limits, for detailed description see page 77 Instructions for use Carina SW 3.2n... -
Page 31: Setting Ventilation Modes
The color changes to yellow. 3 To set the value turn the rotary knob (B). 4 To confirm the value push the rotary knob (B). The color of the key changes to dark green. Instructions for use Carina SW 3.2n... - Page 32 This page intentionally left blank. Instructions for use Carina SW 3.2n...
-
Page 33: Assembly And Preparation
Power supply from the internal battery ..48 Preparing Carina..... . . 34 Connecting the gas supply ... . . 48 Installing the inlet filter . -
Page 34: Safety Information For Preparation
2 Insert the inlet filter (A) into the holder from below, fold it up and push it into the holder (B) Pillows and blankets will block air feed. until it locks into position. Do not place the device on the patient's bed. Instructions for use Carina SW 3.2n... - Page 35 Assembly and preparation 1 Place Carina on a horizontal, stable surface. 2 Keep ventilation slots (A) clear. 3 Keep emergency air inlet and oxygen overflow (B) clear. Toppling stability Do not tilt the device more than 15° while in use to ensure that it cannot topple over.
-
Page 36: Carina With Trolley
2 Accessories such as the standard rail handle (B) or universal holder with standard rail (B) are firmly attached. 3 The locking levers of the Carina holder (C) are closed. 4 The rubber components (D) of the device holder are in good condition. -
Page 37: Attaching Accessories To The Trolley
(D) on the holder to ensure that it is horizontal. locating pins (E). 4 Move Carina parallel to the base plate (F) of the device holder until it is resting safely on the base plate. -
Page 38: Attaching The Battery Holder
420 to 870 mm (16.54 to 34.25 in) WARNING Risk of damage to gas cylinders during transport Install gas cylinders so the pressure reducers are clear and do not project from the side of the trolley. Instructions for use Carina SW 3.2n... -
Page 39: Safety Information On Breathing Circuits And Additional Components
When using additional components, particular For this reason: care and monitoring are required. Check the patient state and the volume values of the device more frequently. Observe the instructions for use for the filters and components. Instructions for use Carina SW 3.2n... -
Page 40: Using Bacterial Filters
WARNING Risk of infection If no inspiratory bacterial filter is used, the patient can be infected by aspirated ambient air. Use an inspiratory bacterial filter Fit the bacterial filter onto the inspiratory port. Instructions for use Carina SW 3.2n... -
Page 41: Connecting Breathing Circuits
The device does not consider the compliance of the breathing circuit with volume-controlled settings. The volume losses must be manually corrected. For additional information, see chapter "Volume losses during ventilation" on page 136. Instructions for use Carina SW 3.2n... -
Page 42: Breathing Circuit With Leakage Valve
(E). Observe the direction. When using the disposable breathing circuit When using the disposable breathing circuit VentStar Carina LeakV (MP00312) the leakage VentStar Carina ExpV (MP00313) the valve is already fixed to the breathing hose. expiratory valve is already fixed to the breathing hose. -
Page 43: Connecting The Breathing Gas Humidifier
(A) and screw firmly into place. WARNING Risk of patient injury Increased resistance values may cause hypoventilation. When using a breathing gas humidifier do not use an additional heat and moisture exchanger (HME). Instructions for use Carina SW 3.2n... -
Page 44: Breathing Gas Humidifier With Inspiratory
5 If necessary, connect the thermometer (F). direction. Observe the instructions for use of the humidifier. 7 Connect the pilot line (H) to the plug (I). 6 Connect the leakage valve (G). Observe the direction. Instructions for use Carina SW 3.2n... -
Page 45: Preparing Aeroneb Pro Medication Nebulizer
This will reduce the flow During medication nebulization, do not use a through the leakage valve. HME. Use suitable external patient monitoring (capnography) to detect increased CO rebreathing. Instructions for use Carina SW 3.2n... -
Page 46: Connecting The Power Supply
Position cables safely. Avoid trip hazards. NOTE Use only power cables whose plugs conform to EN 60320 C17 or C13 and can be secured with a wire clip and whose mains plugs conform to the national regulations. Instructions for use Carina SW 3.2n... -
Page 47: Mains Power Supply
2 Connect the DC cable to the external battery (C). The LED flashes or lights depending on the charge of the internal battery. The external battery pack (EBP) has an internal charger. Instructions for use Carina SW 3.2n... -
Page 48: Connecting The Gas Supply
WARNING Carina shows the alarm message External power Risk of patient injury failure !! for 2 minutes. Then the alarm message Int. battery activated ! is displayed. - Page 49 O concentrator, see page 69. Make sure there is an emergency oxygen supply, e.g., O from compressed gas cylinders. Use external monitors to ensure that the oxygen dosage is accurate. Instructions for use Carina SW 3.2n...
-
Page 50: Connecting The Nurse Call
Check alarms on the medical device directly. 1 Plug the nurse call plug (A) into the socket (B). Make sure that the plug audibly locks into position. 2 Check the correct operation of the connected nurse call system. Instructions for use Carina SW 3.2n... -
Page 51: Using The Medibus Or Medibus
Risk of electric shock MEDIBUS and MEDIBUS.X are software protocols If the connectors of the interface and the for data transfer between Carina and other medical patient are touched simultaneously, there is a devices (e.g., patient monitors) or other devices risk of electric shock. -
Page 52: Intrahospital Patient Transport
CAUTION not the device. Risk of damage to device or personal injury If Carina is placed on the bed when transporting patients, the device may fall down. Do not place the device on the patient's bed. Instructions for use Carina SW 3.2n... -
Page 53: Moving The Trolley
Moving the trolley 1 Release all 4 locking brakes (A). 2 Hold and move the trolley by the standard rail handle (B) or the trolley column (C). Parking the trolley Lock all 4 locking brakes. Instructions for use Carina SW 3.2n... - Page 54 This page intentionally left blank. Instructions for use Carina SW 3.2n...
-
Page 55: Getting Started
Starting ventilation ..... 60 Auto wake-up ......60 Instructions for use Carina SW 3.2n... -
Page 56: Safety Information On Getting Started
Powering on the device Set the power switch (A) to Carina runs the selftest. The screen shows the progress display for the selftest. After the selftest the screen shows the last defined ventilation mode and the last defined parameters. -
Page 57: Checking Readiness For Operation
– Upper alarm limit Paw – Lower alarm limit Paw – Apnea ventilation Connecting the test lung Use only the test lung specified in the list of accessories. Plug the elbow into the patient connection. Instructions for use Carina SW 3.2n... -
Page 58: Checklist
Simulate a spontaneous breath by rhythmically compressing and releasing the test lung, then stop. 10 Disconnect the test lung from the breathing circuit. After the device check switch Carina to standby mode, see page 74. Instructions for use Carina SW 3.2n... -
Page 59: Selecting The Application Mode
When an expiratory valve is used only invasive The selected application mode is displayed in the ventilation is possible. status line of the screen. Prerequisite: Carina is in standby mode Additional information Using NIV application mode, see "Non-invasive ventilation (NIV)" on page 65. -
Page 60: Starting Ventilation
3 Set the alarm limits, see page 79. Press the Start/Standby (A) key. Auto wake-up 1 Connect the patient. 2 Carina starts ventilation on detection of the inspiratory effort with the previously set ventilation settings. 3 Monitor the start of ventilation. Check the ventilation settings and adjust if necessary. -
Page 61: Operation
Safety information for LPO ....69 Connecting the O concentrator to Carina ..70 Setting LPO mode ..... . 71 Setting the O concentration . -
Page 62: Safety Information On Ventilation
Critical airway pressures may result with Volume Guarantee. Set Pmax accordingly. CAUTION The Apnea !!! alarm is only displayed in an apnea situation if apnea monitoring is activated. Set the apnea alarm time Tapn. Instructions for use Carina SW 3.2n... -
Page 63: Setting Ventilation
Setting ventilation parameters The section describes how ventilation modes and ventilation parameters are set. The factory default ventilation parameters and setting ranges are Prerequisite: Carina displays the last set ventilation listed. mode. For the detailed description of the ventilation modes and parameters see section Description of the ventilation modes, page 137. -
Page 64: Setting Ranges For Ventilation
Ti, see page 141. 4) For SPN-CPAP/PS (VG) the following applies: Only with activated apnea ventilation or activated Volume Guarantee. 5) For SPN-CPAP/PS (VG) the following applies: Only with activated apnea ventilation. Instructions for use Carina SW 3.2n... -
Page 65: Non-Invasive Ventilation (Niv)
If the device is not ventilating, the WARNING mask must not remain on the patient. Risk of aspiration Instruct the patient on how to remove the Danger of aspiration due to high airway mask. pressures. Avoid high airway pressures. Instructions for use Carina SW 3.2n... -
Page 66: Using Apnea Ventilation
The device automatically adjusts the trigger ports (airflow masks) are not recommended for thresholds to the current leakage situation. An use with Carina. Use only masks with standard alarm is triggered if the patient leakage exceeds elbows (not airflow masks). Otherwise the 60 L/min. -
Page 67: Using The Autoadapt Function
2 Press the key for Aut.Adapt (E). Select On by turning the rotary knob and push to confirm. The AutoAdapt function is activated. The parameters of the AutoAdapt function are displayed: – Aut.Adapt (B) Δ – PSadpt (C) Instructions for use Carina SW 3.2n... -
Page 68: Displaying Setting And Measured Values
MVi, VTi, MVleak ExpV MV, VT, - - 1) MVleak always shows the total leakage, consisting of patient leakage and valve leakage. 2) MVleak is always at - - because no leakage is measured and compensated. Instructions for use Carina SW 3.2n... -
Page 69: Locking Keys
10 L/min. – O flow: max. 10 L/min If the device is not in ventilation mode, switch – O pressure: max. 500 hPa (max. 7.3 psi) off the oxygen source, e.g., O concentrator. Instructions for use Carina SW 3.2n... -
Page 70: Connecting The O 2 Concentrator To Carina
– For leakage valve: as a function of Pmean and LPO flow – For expiratory valve: as a function of minute volume and LPO flow Instructions for use Carina SW 3.2n... -
Page 71: Setting Lpo Mode
O concentrator. Use diagrams to Prerequisite: Carina is in standby mode. estimate the flow control, see page 72 and page 73. The use of an external O... - Page 72 Operation Diagram for operation with expiratory valve (MP00313) as a function of minute volume and LPO flow Minute volume in L/min Instructions for use Carina SW 3.2n...
-
Page 73: Switching Off Lpo Supply
10 L/min is supplied to the device, switch off LPO mode. Reduce the flow and switch on LPO mode again. 1 Switch Carina to standby mode. 2 Press the Select Menu (A) key. 3 Press the Config. (B) key. -
Page 74: Standby Mode
Activating standby mode Press the Start/Standby (A) key and confirm with the rotary knob (B). Carina is in standby mode. The LED in the (A) key flashes. The alarm message Standby – Patient not ventilated is displayed on the screen. -
Page 75: Ending Operation
Operation Ending operation Prerequisite: Carina is in standby mode. Set the power switch (A) to . The device switches off. The device cannot be switched off during ventilation. The device displays the Set standby to shut-off !! alarm message. The internal battery is still charged when the device is switched off. -
Page 76: Improving The Display Accuracy Of The Charging Capacity Of The Internal Battery
5 Connect the power cable again. The internal battery is charged, the LED flashes. Charge the internal battery completely until the LED remains steady. Do not interrupt the charging process. If there is no improvement, inform DrägerService. Instructions for use Carina SW 3.2n... -
Page 77: Alarms
Alarm limits and setting ranges ... . 79 Suppressing the alarm tone ... . . 80 Instructions for use Carina SW 3.2n... -
Page 78: Display Of Alarms
Alarms Display of alarms Visual alarm signals Carina displays the following visual alarm signals: – The alarm message is displayed in the alarm line (A), e.g.: Inlet filter missing !! – The LED in the Audio paused 2 min. key flashes or lights depending on the alarm priority. -
Page 79: Setting The Alarm Limits
Setting range Factory Current measured value setting 10 to 55 mbar 25 mbar Lower alarm limit 2 to 60 L/min 15 L/min 0.1 to 39 L/min 3 L/min RR high 10 to 74/min, Off 20/min Instructions for use Carina SW 3.2n... -
Page 80: Suppressing The Alarm Tone
The acoustic alarm signal is suppressed for 2 minutes. Inlet filter missing !! The device displays the (B) symbol in the alarm line. To reactivate the tone sequence before the suppression time has elapsed: Instructions for use Carina SW 3.2n... -
Page 81: Configuration
Selecting Ti or I:E ..... . 88 Setting the night mode....88 Instructions for use Carina SW 3.2n... -
Page 82: Overview
The following information about the device can be called in the Config. menu under Service: – System information – Information on contacting DrägerService – Logbook for technical alarm messages Instructions for use Carina SW 3.2n... -
Page 83: Opening The Configuration Menu
Menu 3 Night For switching night mode on or off Setting parameters 1 Press the key for the function or parameter. 2 Set the value by turning the rotary knob and push to confirm. Instructions for use Carina SW 3.2n... -
Page 84: Service Menu
Push the rotary knob to highlight the first confirmed. position (year). Set the year by turning the Carina shows the functions of the service menu: rotary knob and push to confirm. The next position is highlighted. – Syst.info (system information) –... -
Page 85: Setting The Volume Of The Alarm Tone
Prerequisite: The Config. menu is opened. The selected alarm tone sequence is set. 1 Press the Sound key. 2 Select the Dräger or Standard tone by turning the rotary knob and push to confirm. Instructions for use Carina SW 3.2n... -
Page 86: Selecting The Screen Display
A Flow waveform in real time D Value 2 field, configurable measured-value display B Pressure waveform in real time C Value 1 field, configurable measured-value display D Value 2 field, configurable measured-value display Instructions for use Carina SW 3.2n... -
Page 87: Selecting The Application Mode
2 In menu 2 press the O suppl. key. 3 Select LPO or HPO by turning the rotary knob and push to confirm. If LPO has been selected, LPO is displayed in the status line of the screen. Instructions for use Carina SW 3.2n... -
Page 88: Selecting Ti Or I:e
130 seconds. If the device is actuated or an alarm is active, the screen is switched on immediately. To switch off Select Off by turning the rotary knob and push to confirm. Instructions for use Carina SW 3.2n... -
Page 89: Problem Solving
Additional messages on the screen ..97 Rescue ventilation ..... 98 Instructions for use Carina SW 3.2n... -
Page 90: Failure Of The Power Supply
If the patient requires a higher O concentration: Restore the O supply immediately. If the turbine fails: The device can no longer ventilate. Disconnect the patient from the device and immediately resume ventilation using another, independent ventilator. Instructions for use Carina SW 3.2n... -
Page 91: Alarm - Cause - Remedy
Alarm texts in parentheses indicate technical alarms that are entered in the logbook. The entries for technical alarms in the logbook are only available in English. Instructions for use Carina SW 3.2n... - Page 92 If it is not required, switch off the function. Otherwise wait for the Tadpt time. Battery indication not Battery display is Improve the accuracy, reliable ! inaccurate. see page 76. If there is no improvement, inform DrägerService. Instructions for use Carina SW 3.2n...
- Page 93 After the leakages and loose disconnection alarm the connections. device delivers a constant flow. After repair of the leakage, the device automatically continues to operate with the previous ventilation settings. Instructions for use Carina SW 3.2n...
- Page 94 Restore mains power supply below 50 %. or power supply by charged external battery. Int. battery low !!! Battery charge has fallen Restore mains power supply below 25 %. or power supply by charged external battery. Instructions for use Carina SW 3.2n...
- Page 95 MV high !! Leakage in breathing Make sure that the breathing system system is leakage-free. MV high !! Device malfunction Disconnect the patient from the device and immediately resume ventilation using another, independent ventilator. Inform DrägerService. Instructions for use Carina SW 3.2n...
- Page 96 (Technical alarm !!!) If the device cannot be temperature sensor fault. switched off, disconnect the compressed gas hose from the central supply and then switch off the device. Inform DrägerService. Instructions for use Carina SW 3.2n...
-
Page 97: Additional Messages On The Screen
Additional messages on the screen Message Cause Remedy Standby activated The device is in standby mode, Start ventilation: Press the there is no ventilation. Start/Standby key. Key lock activated Locked function is active. Press the Locked key again. Instructions for use Carina SW 3.2n... -
Page 98: Rescue Ventilation
Rescue ventilation is a pressure-controlled ventilation with reduced quality. The trigger function is deactivated. Volume Guarantee is no longer available. Functions are not monitored. Instructions for use Carina SW 3.2n... -
Page 99: Cleaning, Disinfection And Sterilization
Reprocessing List ..... 104 Before reusing on patient ....104 Instructions for use Carina SW 3.2n... -
Page 100: Safety Information On Reprocessing
3 If fitted: Pull the water trap from the breathing hoses. 4 Pull the water trap container from the water trap. Drain the water trap. Observe the hospital hygiene regulations. 5 Pull the bacterial filter from the inspiratory port. Instructions for use Carina SW 3.2n... -
Page 101: Reprocessing Methods
Observe corresponding instructions for use. The medical device may have been tested with other Uncritical medical devices agents and under other conditions. Manual disinfection and simultaneous cleaning: – Virex Tb from Johnson Diversery Instructions for use Carina SW 3.2n... -
Page 102: Uncritical Medical Devices
Semicritical medical devices necessary, repeat manual disinfection. 4 Thoroughly shake out residual water. Allow Manual cleaning items to dry thoroughly. Perform manual cleaning preferably under running water and with commercially available cleaning agents (pH value ≤12). Instructions for use Carina SW 3.2n... -
Page 103: Visual Inspection
7 Check parts for visible dirt and damage. If necessary, repeat program or perform manual cleaning and disinfection. 8 Allow items to dry thoroughly. Visual inspection Inspect all items for damage and wear, e.g., cracking, embrittlement, or pronounced hardening, and residual soiling. Instructions for use Carina SW 3.2n... -
Page 104: Reprocessing List
Per patient/ weekly Possible Possible Reusable water trap Before reusing on patient For information on assembling the scope of equipment, see chapter "Assembly and preparation" on page 33. Check readiness for operation, see page 57. Instructions for use Carina SW 3.2n... -
Page 105: Maintenance
Replacing the inlet filter....109 Charging the internal battery ... . 109 Instructions for use Carina SW 3.2n... -
Page 106: Overview
Measures intended to determine and assess the actual state of a medical device Preventive Recurrent specified measures intended to maintain the functional condition of a maintenance medical device Repair Measures intended to restore the functional condition of a medical device after a device malfunction Instructions for use Carina SW 3.2n... -
Page 107: Inspection
– There is no visible damage 4 Using the instructions for use, check that all components and accessories needed to use the product are available. 5 Check the electrical safety according to IEC 62353. Instructions for use Carina SW 3.2n... -
Page 108: Preventive Maintenance
Interior of device Every 3 years Visual inspection, clean and Experts replace parts as required Repair Dräger recommends that all repairs are carried out by DrägerService and that only authentic Dräger repair parts are used. Instructions for use Carina SW 3.2n... -
Page 109: Replacing The Inlet Filter
Charge regularly depending on the ambient temperature: – at –20 to +35 °C every 3 months – at +35 to +55 °C once a month Instructions for use Carina SW 3.2n... - Page 110 This page intentionally left blank. Instructions for use Carina SW 3.2n...
-
Page 111: Disposal
Disposal of inlet filters ....113 Disposal of the medical device ... 113 Instructions for use Carina SW 3.2n... -
Page 112: Safety Information For Disposal
The battery installed Instructions for use Carina SW 3.2n... -
Page 113: Disposal Of Inlet Filters
Disposal of inlet filters Dispose of filters with municipal waste. Disposal of the medical device At the end of its service life: Consult the relevant waste disposal company for appropriate disposal. Observe the applicable laws and regulations. Instructions for use Carina SW 3.2n... - Page 114 This page intentionally left blank. Instructions for use Carina SW 3.2n...
-
Page 115: Technical Data
....... 132 Instructions for use Carina SW 3.2n... -
Page 116: Ambient Conditions
Only values from PEEP + 2 mbar can be set Leakage valve 5 to 40 mbar (or hPa or cmH Expiratory valve 5 to 50 mbar (or hPa or cmH Resolution 1 mbar (or hPa or cmH Instructions for use Carina SW 3.2n... - Page 117 On, Off Respiratory rate with apnea ventilation RRapn Area 5 to 50/min Resolution 1/min Tidal volume with apnea ventilation VTapn Area 100 to 2000 mL, BTPS Resolution 10 mL Volume Guarantee Area On, Off Instructions for use Carina SW 3.2n...
-
Page 118: Performance Characteristics
<3.5 mbar (or hPa or cmH MP00312 breathing circuit <4 mbar (or hPa or cmH 5704962 breathing circuit <4 mbar (or hPa or cmH 2166046 breathing circuit with MP00224 <4 mbar (or hPa or cmH leakage valve Instructions for use Carina SW 3.2n... - Page 119 5704962 breathing circuit <2.5 mbar (or hPa or cmH 2166046 breathing circuit with MP00224 <2 mbar (or hPa or cmH leakage valve 2166046 breathing circuit with MP00220 <2.5 mbar (or hPa or cmH expiratory valve Instructions for use Carina SW 3.2n...
-
Page 120: Displayed Measured Values
0.1 L/min Accuracy ±10 % of measured value or ±0.6 L/min, the greater value applies (without leakages, with reference to hose compliance correction, "Volume losses during ventilation" on page 136) approx. 35 s 0...90 Instructions for use Carina SW 3.2n... -
Page 121: Monitoring Functions
65 dB (A) to 80 dB (A) priority Power supply failure alarm and auxiliary alarm approx. 60 dB (A) Inspiratory minute volume Alarm for upper alarm limit If the upper alarm limit has been exceeded Area 2 to 60 L/min Instructions for use Carina SW 3.2n... -
Page 122: Operating Data Characteristics
At 240 V AC max. 0.5 A Maximum power consumption (operation, 90 W charging internal battery) Typical power consumption (operation, not 35 W charging internal battery) Internal battery Type NiMH enclosed, maintenance-free Charging capacity 2.5 Ah Charging time 130 Minutes Instructions for use Carina SW 3.2n... - Page 123 Typically 2 °C (35.5 °F), max. 5 °C (41 °F) Screen TFT color screen 13.7 cm (5.4 in) Device outputs Digital output RS232, interface for MEDIBUS or MEDIBUS.X protocol MEDIBUS or MEDIBUS.X protocol Baud rate 9600 baud Instructions for use Carina SW 3.2n...
- Page 124 IP class in accordance with IEC 60529 IP X1 Classification in accordance with Directive II b 93/42/EEC, Annex IX UMDNS code Universal Medical Device 14-355 Nomenclature System GMDN code Global Medical Device Nomenclature 42411 Instructions for use Carina SW 3.2n...
-
Page 125: Factory-Set Ventilation Parameters
Settings for typical ventilation Ventilation mode PC-BIPAP Pinsp 15 mbar (or hPa or cmH PEEP 5 mbar (or hPa or cmH 12/min Ramp Auto 1 : 1 40 % suppl. Operating temperature 25 °C (77 °F) Instructions for use Carina SW 3.2n... -
Page 126: Trolley
Technical data Trolley Dimensions with Carina holder (height x width x depth) Trolley 1 (63 cm) 730 x 570 x 670 mm (28.7 x 22.4 x 26.4 in) Trolley 1 (78 cm) 880 x 570 x 670 mm (34.7 x 22.4 x 26.4 in) - Page 127 Breathing circuits and valves (cont.) Relative humidity 10 to 90 %, non-condensing VentStar Carina ExpV (MP00313) VentStar Carina ExpV 200 cm (5704962) Carina disposable expiratory valve (MP00220) Inspiratory resistance at 50 L/min <1 mbar (or hPa or cmH Expiratory resistance at 50 L/min <4.5 mbar (or hPa or cmH...
-
Page 128: Alarm Delays
Instructions for use Carina SW 3.2n... - Page 129 (without transformer) to the public low-voltage power supply network that supplies buildings used for domestic purposes. Harmonic emissions Not applicable (IEC 61000-3-2) Voltage fluctuations/flicker Not applicable emissions (IEC 61000-3-3) Instructions for use Carina SW 3.2n...
-
Page 130: Electromagnetic Immunity
Dip >95 %, 5 seconds >95 %, 5 seconds device requires continued operation during mains power supply interruptions, it is recommended that the medical device is powered from an uninterruptible power supply or a battery. Instructions for use Carina SW 3.2n... - Page 131 150 kHz to 2.5 GHz and less than 1 V/m above 2.5 GHz. 2) ISM bands in this frequency range are: 6.765 MHz to 6.795 MHz; 13.553 MHz to 13.567 MHz; 26.957 MHz to 27.283 MHz; 40.66 MHz to 40.70 MHz. Instructions for use Carina SW 3.2n...
-
Page 132: Recommended Separation Distances To Portable And Mobile Radio Frequency Communication Devices
GSM 1800, GSM 1900 (limited to 1 W ERP) 0.19 m (0.62 ft) UMTS, DECT (limited to 0.25 W ERP) 0.09 m (0.30 ft) Bluetooth, WLAN 2450, RFID 2450 (limited to 0.1 W ERP) 0.03 m (0.10 ft) Instructions for use Carina SW 3.2n... -
Page 133: Principles Of Operation
......152 Volume measurement ....153 Instructions for use Carina SW 3.2n... -
Page 134: Pneumatic Function Description
The compressed air is sent to The breathing gas temperature is monitored by the the measuring unit (3) through a venturi (R2). The sensors (AT1 and AT2). Increases in temperature trigger an alarm message. Instructions for use Carina SW 3.2n... - Page 135 The oxygen enters the electrically controlled O proportional valve (V5), which is fully opened for operation with low- pressure oxygen. The O flow is not regulated. The admixture to ambient air is in the turbine (2). Instructions for use Carina SW 3.2n...
-
Page 136: Volume Losses During Ventilation
– PEEP = 5 mbar (5 cmH Volume loss not compensated by the device: approx. 70 mL The tidal volume VT must be manually increased by 70 mL to ensure that the patient receives the required volume. Instructions for use Carina SW 3.2n... -
Page 137: Description Of The Ventilation Modes
The mandatory breaths can be triggered by the synchronization of the mandatory breath reduces patient's inspiratory effort on PEEP level. A the expiratory time. mandatory breath can only be triggered within a "trigger window" by the flow trigger in synchrony Instructions for use Carina SW 3.2n... -
Page 138: Vc-Ac (Optional)
The minimal number of mandatory breaths is the duration of support exceeds a maximum determined by the respiratory rate RR. inspiratory time Timax. The maximum inspiratory time is limited to 130 % of Ti or a maximum of 4 seconds. Instructions for use Carina SW 3.2n... - Page 139 With AutoFlow the changes occur from breath to breath (NIV: in maximum 1 mbar steps, tube: in maximum 3 mbar steps). The maximum peak inspiratory pressure PIP is determined by the pressure limitation Pmax. Instructions for use Carina SW 3.2n...
-
Page 140: Pc-Bipap
PEEP with the patient's inspiratory effort. This prevents to the upper pressure level Pinsp is defined with the mandatory breath being applied during the Ramp setting. spontaneous expiration. Instructions for use Carina SW 3.2n... - Page 141 The pressure support is also terminated as soon as the duration of support exceeds a maximum inspiratory time Timax. The maximum inspiratory time is limited to 130 % of Ti or a maximum of 4 seconds. Instructions for use Carina SW 3.2n...
-
Page 142: Pc-Ac
The trigger window covers the expiratory time minus a refractory period at the beginning of the expiration. The expiratory time is determined by the respiratory rate RR and the inspiratory time Ti. Instructions for use Carina SW 3.2n... -
Page 143: Spn-Cpap/Ps
"Psupp – PEEP", the lung mechanics (resistance and compliance) and the patient's respiratory drive. The pressure rise from the lower pressure level PEEP to the upper pressure level Psupp is defined with the Ramp setting. Instructions for use Carina SW 3.2n... - Page 144 When the pressure support is not switched on, the patient's spontaneous breathing is supported by an increased PEEP. Δ Psupp via PEEP Pressure rise PEEP Start of inspiration End of inspiration Timax Inspiratory flow Instructions for use Carina SW 3.2n...
- Page 145 PIP is adjusted by breath (NIV: in steps of level of the volume support. maximum 1 mbar, tube: maximum 3 mbar steps). The basis for the adjustment is the tidal volume measured by the previous breaths. Instructions for use Carina SW 3.2n...
-
Page 146: Additional Settings For Ventilation
The tidal volume is determined with the VTapn setting. If the patient has successfully triggered at least 5 breaths per minute, the device automatically terminates apnea ventilation. The device switches back to the previous ventilation mode. Instructions for use Carina SW 3.2n... -
Page 147: Trigger
The trigger is also used for triggering and terminating the supported breaths with SPN-CPAP/PS, PC- BIPAP/PS and VC-SIMV/PS. Carina uses 3 trigger criteria to detect the breathing effort of the patient: – flow gradient (flow change rate) – Pressure –... -
Page 148: Pressure Rise Ramp
Flow dosing is faster than with patients who are not breathing spontaneously. The device automatically sets the pressure rise to 70 % of the average inspiratory time of the patient. Instructions for use Carina SW 3.2n... -
Page 149: Autoadapt
8 mbar/min is not exceeded in this case. Because the pressures remain below the therapeutic level during the Tadpt time, the patient condition must be continuously monitored. Set the alarm limits accordingly. Instructions for use Carina SW 3.2n... -
Page 150: Therapy Types
In this case, the result will be CO rebreathing by the patient. Patients must not be connected to the device if it is not operating. Instructions for use Carina SW 3.2n... -
Page 151: Additional Functions
0 to 60 s Non-Invasive 0 to 120 s Ventilation As soon as Carina has detected an inspiratory effort and therefore a reconnection with the aid of the trigger criteria, ventilation is continued with the previous settings. Trigger criteria, see page 147. -
Page 152: Syncplus
SyncPlus is based on 3 main functions: – Multi-sense trigger – Automatic leakage compensation – Cycle learning technology Multi-sense trigger Carina uses 3 trigger criteria during inspiration and expiration to detect the breathing effort of the patient: – Pressure – Flow –... -
Page 153: Volume Measurement
VTi and MVi, it is important to ensure that the measurement is not affected by leakages. NOTE Carina cannot automatically compensate for hose compliance. Breathing circuit with leakage valve The displayed values for VTi and MVi show the volume applied to the patient's lung. - Page 154 This page intentionally left blank. Instructions for use Carina SW 3.2n...
-
Page 155: Index
Functional units ..... . . 134 Central gas supply system ....49 Instructions for use Carina SW 3.2n... - Page 156 Reuse on patient ..... . 104 Medication nebulization ....22 Instructions for use Carina SW 3.2n...
- Page 157 Ventilation mode Set ......31, 63 Instructions for use Carina SW 3.2n...
- Page 158 These instructions for use only apply to Carina SW 3.2n with the Serial No.: If no serial number has been filled in by Dräger, these instructions for use are provided for general information only and are not intended for use with any specific medical device.
Need help?
Do you have a question about the Carina and is the answer not in the manual?
Questions and answers