Rational SelfCooking Center Operating Instructions Manual
Hide thumbs
Also See for SelfCooking Center:
- Training manual (96 pages) ,
- Operating manual (84 pages) ,
- Operating instructions manual (80 pages)
Table of Contents

Related Manuals for Rational SelfCooking Center


Summary of Contents for Rational SelfCooking Center
- Page 1 Operating instructions SelfCooking Center ® o u r e u p y o t t a k o f C L U W h y n r s h i p e m b e f r e e m...
- Page 3 And now enjoy your new SelfCooking Center ® Your RATIONAL AG You can reach our Technical Customer Support Service 7 days a week on: +44 1582 480388 For any queries relating to use please ring the RATIONAL ChefLine ® : +44 7743 38986 Dealer: Installer:...
-
Page 4: Table Of Contents
Contents Safety Instructions Explanation of the pictograms Safety Instructions Care, inspection, maintenance and repair Features Notes on using your unit Max. load sizes for each unit size Working with the core temperature probe Working with the hand shower Overview of the cooking modes General instructions for use SelfCooking Control ®... - Page 5 Reset to factory default Buzzer settings Modify the IP address/subnet mask/ gateway address Manual clean Maintenance Service Info Chef Line "Mod" unit and software identification Help function Fault messages Before you call customer service CLUB RATIONAL Notes - 5 -...
-
Page 6: Safety Instructions
Safety Instructions Explanation of the pictograms Danger! Warning: Caution! Directly hazardous situation that Potentially hazardous situation Potentially hazardous situation could result in very severe injury that could result in severe injury that could result in minor injury. or death. or death. Corrosive substances Risk of fire! Risk of burns! -
Page 7: Safety Instructions
Safety Instructions Warning: Incorrect installation, servicing, maintenance, cleaning or modifications to the unit may result in damage, injury or death. Read these operating instructions carefully before you start to use the unit. This unit must only be used to cook food in catering establishments. Any other use is not intended and is therefore considered dangerous. - Page 8 Safety Instructions Keep this manual handy so that it can always be consulted by anyone using the unit. This unit must not be used by children or people with limited physical, sensor or mental capacity or those without the necessary experience and/or knowledge, unless such people are supervised by a person who is responsible for their safety.
- Page 9 Safety Instructions Warning: Safety instructions during use - If containers are filled with liquid or contents which liquefy during cooking, do not use rack levels higher than those that allow the user to see into the slide-in containers - Risk of burns! Warning sticker is enclosed with appliance.
-
Page 10: Care, Inspection, Maintenance And Repair
Care, inspection, maintenance and repair Your unit must be cleaned every day to maintain the high quality of the stainless steel, for hygiene reasons and to avoid operating faults. To do this, follow the instructions in the "CleanJet ® functions“ or "Manual cleaning“ sections. -
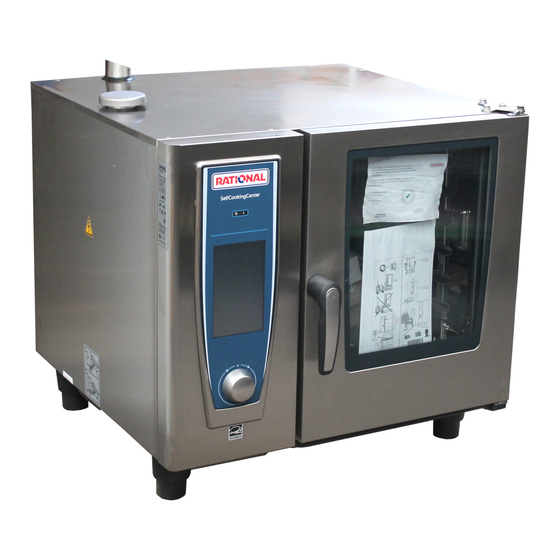
Page 11: Features
Features Unit number (can only be seen when the door is open) Draft diverter (optional) (gas units only) Interior lighting Unit door with double glass panel Door handle Table-top units: One-handed operation with slam function Floor units: One-handed operation Unlocking device to open double glass door panel (inside) Integral and self-draining door drip pan (inside) -
Page 12: Notes On Using Your Unit
Notes on using your unit - Avoid having heat sources (e.g. grill plates, deep-fat fryers etc.) near the unit. - You can only use the unit in areas with a room temperature > 40 °F (> 5 °C). For ambient temperatures of less than + 40 °F (+ 5 °C), you must heat the cooking cabinet to room temperature >+ 40 °F (>+ 5 °C) before starting. - Page 13 Notes on using your unit Table-top units with hanging racks (6 x 1/1 GN, 6 x 2/1 GN, 10 x 1/1 GN, 10 x 2/1 GN) - To remove, raise the hanging rack slightly in the middle and pull it out of the front locking mechanism. - Swivel the hanging rack to the middle of the cooking cabinet.
-
Page 14: Working With The Core Temperature Probe
Working with the core temperature probe Caution! The core temperature probe and its positioning aid may both be hot - Risk of burns. Wear oven gloves. Insert the needle of the core Use the positioning aid if there For Finishing ®... -
Page 15: Working With The Hand Shower
Working with the hand shower - If you use the hand shower, pull the hose at least 20 cm out of the park position. - You can select 2 jet strengths by pressing the control button. - Always let the hand shower slide slowly back into the park position. Caution! The hand shower and water from the hand shower may be hot –... -
Page 16: Overview Of The Cooking Modes
Overview of the cooking modes SelfCooking Control ® Combi-Steamer mode Programming mode mode Clean manual 320°F Level Control 0:15 copy change delete 11:34 Press the Moist Heat, Dry Heat or When you switch on or press the Pressing the “Prog” button Combination Moist Heat and Dry SelfCooking Control ®... -
Page 17: General Instructions For Use
General instructions for use Your unit has a touch screen. You can make settings on your unit by just touching it lightly with your finger. rare 65° welldone rare 70° welldone The cooking process (e.g. Joints) You can change the settings using Your settings are automatically is activated as soon as you press the central dial. -
Page 18: Selfcooking Control Mode
SelfCooking Control ® mode On/Off switch SelfCooking Control ® 9 cooking modes: Joints Pan-fried Poultry Fish Side dishes Potato products Egg dishes/desserts 11:34 Baking Finishing ® Function button Programming mode button Central dial with Push function - 18 -... - Page 19 SelfCooking Control ® mode The 9 SelfCooking Control ® modes (Joints, Pan-fried, Poultry, Fish, Bakery Products, Side Dishes, Potato Food thickness Products, Egg Dishes/Dessert, Finishing ® ) automati- cally detect product-specific requirements, the size of the food to be cooked and the load size. The cooking Gratineed time, temperature and the ideal cooking cabinet cli- mate are continuously adjusted to achieve the result...
- Page 20 SelfCooking Control ® mode We will now explain how to use the unit with reference to 5 examples. Your application manual will give you plenty of other helpful tips on how to make preparing meals child’s play. Alternatively you can simply follow the prompts on the display.
- Page 21 SelfCooking Control ® mode Example 2: Muffins savory baking baking baking pastries biscuits light dark with moisture Press the "Baking" button Select type of preparation (e.g. The browning can be changed Baking) – that’s it! individually. preheat load The preheating status is displayed As soon as the preheating tem- Insert core temperature probe in red and blue.
- Page 22 SelfCooking Control ® mode Example 3: Finishing ® – à la carte/LevelControl ® With Level Control ® you can enter and display an individual time for each rack in your unit. That way you can always see exactly when each rack is ready. The buzzer sounds and the indicated level flashes as soon as the preset time for the relevant rack is up.
- Page 23 SelfCooking Control ® mode Example 4: Finishing ® - Plated Banquet plated plates humid banquet à la carte container colouration short long Press the Finishing ® button Select Finishing ® – Plated Banquet The cooking cabinet climate and - that's it cooking time can be changed individually.
- Page 24 SelfCooking Control ® mode Example 5: Pasta with sauce steamed fried pasta rice rice with sauce pasta convenience short long with sauce roasted Press the "Side Dishes" button Select type of preparation (e.g. The cooking time can be changed pasta with sauce) – that’s it! individually.
-
Page 25: Combi-Steamer Mode
Combi-Steamer mode All the Combi-Steamer functions are available in Combi-Steamer mode. You switch to Combi-Steamer mode by pressing the Moist Heat or Dry Heat button or a combination of Moist Heat and Dry Heat. 160°F 0:15 - 25 -... - Page 26 Combi-Steamer mode Request current cooking data On/Off switch 3 cooking modes: Hold down Temperature button (2 seconds) Moist Heat The following values are displayed: Dry Heat • Current cooking cabinet humidity • Current cooking cabinet temperature • Elapsed cooking time Combination •...
-
Page 27: Moist Heat
Moist Heat In Moist Heat cooking mode, the steam generator generates hygienic fresh steam. You can set the cooking cabinet temperature from 85 °F (30 °C) to 265 °F (130 °C). Cooking methods: Steaming, stewing, blanching, simmering, soaking, vacuum cooking, thawing, preserving 212°... -
Page 28: Dry Heat
Dry Heat In "Dry Heat" cooking mode, powerful heating elements heat up the dry air. You can set the cooking cabinet temperature from 85 °F (30 °C) to 575 °F (300 °C). You can limit the cooking cabinet humidity if necessary. Cooking methods: Baking, roasting, grilling, deep-frying, gratinating, glazing 320°... -
Page 29: Combination Of Moist Heat + Dry Heat
Combination of Moist Heat + Dry Heat Moist Heat and Dry Heat cooking modes are combined. This combination creates a hot humid cabinet climate for especially intensive cooking. You can set the cooking cabinet temperature from 85 °F (30 °C) to 575 °F (300 °C). -
Page 30: Climaplus Control
ClimaPlus Control ® ClimaPlus Control ® measures and regulates the humidity in the cooking cabinet to within one percent. You can set the exact product-specific climate for each food in the clima window. Moist Heat Dry Heat Moist Heat + Dry Heat The factory setting for ClimaPlus ClimaPlus Control ®... -
Page 31: Time Settings
Time settings You can set the cooking time individually to suit your needs. Time settings Continuous operation 0:24 CONT. Press the Cooking Time button Press the Cooking Time but- and set the cooking time ton and turn the central dial anti-clockwise until "CONT."... -
Page 32: Air Speed
Humidification A powerful jet atomises bursts of water and distributes it throughout the cooking cabinet. Humidification cre- ates ideal rising conditions and gives bakery products an attractive glossy finish. Can be selected with Dry Heat or a combination of Moist Heat and Dry Heat. Humidification period: Humidification is limited to 2 seconds. -
Page 33: Cool Down
Cool down You have been operating your appliance at high cooking cabinet temperature and now want to continue work- ing at low cabinet temperature. The "Cool Down" function allows you to cool the cabinet quickly and gently. Warning: - Do not use the Cool-down function unless the air baffle has been locked correctly - Risk of injury. - During "Cool Down", the fan wheel does not switch off when the door is opened. -
Page 34: Programming Mode - Controls
Programming mode – Controls It takes no time at all to create your own cooking programs in Programming mode. Select program Clean manual Program name New program Level Control New LevelControl ® program copy Copy program Clean manual change Level Change program Control delete... -
Page 35: Programming - Selfcooking Control ® Mode
Programming – SelfCooking Control ® mode You can copy or adapt the 9 operating modes (Joints, Pan-fried, Poultry, Fish, Side Dishes, Bakery Products, Potato Products, Egg Dishes/Dessert, Finishing ® ) to meet your individual requirements and store them under a new name. -
Page 36: Programming - Combi-Steamer Mode
Programming - Combi-Steamer mode You can create a manual cooking program to suit your exact requirements. DEFGHIJ LMNOPQ Clean manual Level 9:24 Control copy change Press the Prog button Press "New" to create a cooking Enter a program name (e.g. Roast program veal) Roast veal... - Page 37 Programming - Combi-Steamer mode You can have an audible signal to indicate when each program step has ended. 00:24 english settings Press the Function button in the Select "Settings" Press the audible signal button program step 212° english 0:24 Press the Back button Continue programming - 37 -...
-
Page 38: Check Program Steps
Start the program Clean manual Lamb Level 9:24 Control copy change Press the Prog button Press the Program selection but- Select cooking process or a cook- ing program Lamb Level Control Start the cooking process or cook- ing program Check program steps Clean manual Lamb Level... -
Page 39: Change Program
Change program Clean manual Lamb Level 9:24 Control copy change Press the Prog button Press the Program selection but- Select cooking process or a cook- ing program Lamb_ copy change DEFGHIJK MNOPQRS delete delete store Press "Change" Delete and modify program name Save program name as required 212°... -
Page 40: Delete All Programs
Delete program Clean manual Lamb Level 9:24 Control copy change Press the Prog button Press the Program selection but- Select cooking process or a cook- ing program copy change delete delete Press "Delete" Confirm "Delete" Delete all programs Prog start time Prog 9:24 Press the Function button... -
Page 41: Copy Program
Copy program Clean manual Lamb Level 9:24 Control copy change Press the Prog button Press the Program selection but- Select cooking process or a cook- ing program Lamb copy change cdefghijkl nopqrstuv delete delete store Press "copy" Delete and modify program name Save program name as required If you do not change the program name, it is automatically assigned a consecutive index. -
Page 42: Create Levelcontrol ® Program
Create LevelControl ® program You can cook different products at the same time with LevelControl ® . Only the cooking time of the individual products will differ. All the other cooking parameters must be the same. You can enter and display a separate cooking time for each rack in your unit. - Page 43 Start LevelControl ® program 1 Broccoli Clean manual Level 9:24 Control copy change Press the Prog button Press the Program selection but- Select LevelControl ® program 212 ° 1 Broccol 1 Broccoli Level Preheat Control 15:00 Start LevelControl ® program Unit preheats automatically Load food and select the associ- ated level...
- Page 44 Change LevelControl ® cooking time 1 Broccoli 5:00 8:00 Press Level Set cooking time The display format is set at the factory to Minutes:Seconds. Reset LevelControl ® cooking time 1 Broccoli 1 Broccoli 8:00 Press Level and hold until "0:00" Level may be reassigned is displayed Reset LevelControl...
-
Page 45: Program Lock
Program lock A flexible safety concept allows you to lock the unit in two stages to prevent settings being changed. start time Prog 9:24 Press the Function button Select Chef's hat button Press Program lock button Level 1 _ X X X X Level 2 enter password Select "Level"... -
Page 46: Change Password
Change password You can change the existing 5-digit password "12345" to suit your requirements. start time Prog 9:24 Press the Function button Select Chef's hat button Press Program lock button ABCDEF HIJKLM Level 1 _ X X X X change enter old Level 2 password... -
Page 47: Cleanjet ® Cleaning
CleanJet ® cleaning CleanJet ® is the automatic cleaning system for cleaning the cooking cabinet. With 6 cleaning steps, it can be adjusted to suit the individual degree of soiling. Attention: - For hygiene reasons and to prevent malfunctions it is essential to clean the unit every day - Risk of fire - Please note that your unit must be cleaned every day, even if it is only operated using moist heat. - Page 48 CleanJet ® cleaning Warning: Always wear gloves when han- dling cleaner and rinse aid tabs – risk of chemical burns. Rinse aid tab: Remove outer pro- Place rinse aid tab (blue) with tective foil only. Do not damage clear protective film into the the transparent protective film! recess in the air baffle Cleaner tab: remove protective foil...
- Page 49 CleanJet ® cleaning Cleaning stage Description/application Tabs Rinse without tabs Rinse cooking cabinet with warm water. Rinse For non-greasy limescale deposits, Rinse aid e.g. after baking or working with moist heat. Interim cleaning "Short cleaning time" - for all soiling, but Cleaner without drying and rinsing.
-
Page 50: Cleanjet Aborted
CleanJet ® aborted After a power failure lasting longer than 10 minutes or after the unit is switched off the display reads "Interrupt CleanJet". If Interrupt CleanJet ® is not confirmed within 20 seconds by pressing the display, the activated CleanJet ®... -
Page 51: Cleanjet ® Request
CleanJet ® request This function allows you to enter a fixed number of operating hours after which CleanJet ® cleaning must be carried out. english settings 9:24 Press the Function button Select settings Press CleanJet ® symbol 24:00 Press the clock button and enter End process the operating hours using the central dial... -
Page 52: Delta-T Cooking
Delta-T cooking Delta T = difference between core temperature and cooking cabinet temperature. By gradually raising the temperature in the cabinet until the cooking process ends and maintaining a constant differential to the current core temperature, Delta-T the meat is cooked more slowly (can only be selected in Combi-Steamer mode). -
Page 53: 1/2 Power
1/2 Power The power consumption of the heating elements is reduced by 50% (e.g. model 10 x 1/1 GN from 18 kW to 9 kW). Cannot be selected in SelfCooking Control ® mode 88° 212 ° CleanJet 143° 0:15 start time Press the Function button Press 1/2 Power button "E/2"... -
Page 54: Automatic Start Time
Automatic start time You can allow your unit to start automatically. Attention: We would remind you that it is very bad food hygiene to keep food in an uncooled or unheated cooking cabinet for a prolonged period. start time start time 6:30 28.06.07 9:24... -
Page 55: Calcdiagnosis System ® (Cds)
CalcDiagnosis System ® (CDS) The CalcDiagnosis System ® rinses and drains the steam generator. The CalcDiagnosis System ® also monitors the limescale level in the steam generator. The display shows the limescale level in the steam generator as a red bar. start time 9:24 Press the Function button... -
Page 56: Descaling The Steam Generator
Descaling the steam generator To avoid damaging the unit, the steam generator must be descaled when the "CalcCheck" display appears. Always use the appliance manufacturer's descaling agent and accessories. - Electric descaler pump - Article no.: 60.70.409 - Descaler, 2.65 gal (10 litre) canister - Article no.: 6006.0110 Follow the instructions and safety notes on the canister and on the descaler pump. - Page 57 Descaling the steam generator Descaling fluid reacts with lime and can foam over. Insert hanging rack and fix hose Place canister of descaling fluid in with wire hooks the cooking cabinet and run the hose into the canister Descaling Warning: Aggressive chemical fluid - risk of chemical burns.
-
Page 58: Abort Descaling Process
Abort descaling process Not yet filled with descaling fluid. wait cool steam generator 2:01 Press Back button - that's it Already filled with descaling fluid. Warning: Aggressive chemical fluid - risk of chemical burns. There may be resi- dues of the descaling fluid in the hoses. Rinse descaling accessories thoroughly with water. -
Page 59: Descaling The Humidifying Nozzle
Descaling the humidifying nozzle Please check the humidifying nozzle for limescale deposits once a month. Switch unit off. Remove left hanging rack Open air baffle Warning: Aggressive chemical fluid - risk of chemical burns. Wear: protective clothing, safety goggles, gloves and face mask. Thoroughly rinse descaler hand pump with water. -
Page 60: Usb Data Memory (Usb Stick)
USB data memory (USB stick) You can use the USB stick to download cooking programs and HACCP data from the unit. You will need the USB memory stick from the unit manufacturer, article no.: 42.00.035 The status of the USB data memory appears on the display. start time 9:24 Insert the USB stick into the port... -
Page 61: Haccp Logging
HACCP logging HACCP process data is output continuously via the unit's interface. HACCP process data is also stored for a period of 10 days and can be output via the unit interface as required. You will need a PC/laptop. You will find more detailed explanations in the CombiLink ®... -
Page 62: Importing And Exporting Programs
Importing and exporting programs You can copy your cooking programs to a genuine USB memory stick from the unit manufacturer. The cooking programs can then be transferred to a computer. start time 9:24 Insert the USB stick into the port Press the Function button Press Stick button under the control panel... -
Page 63: Software Update
Software update You can update the unit software using the USB stick. start time 9:24 Insert USB stick with new software Press the Function button Press the Stick button into the port Prog HACCP Update Info Press the Update button, the soft- ware is updated - the unit starts automatically Download service data... -
Page 64: Settings
Settings settings 9:24 Press the Function button Select "settings" Real time Date Language am/pm 8:55 10.07.07 °C/°F english Press Real time and set with the Press Date and set with the cen- Press Language and set with the central dial tral dial central dial Real time format... -
Page 65: Contrast Setting
Settings settings 9:24 Press the Function button Select "settings" Contrast setting Reset to factory default english english english Press the Contrast button and set Press the Factory defaults button Confirmation, select and hold using the central dial briefly down "Reset factory default" but- ton. -
Page 66: Modify The Ip Address/Subnet Mask/ Gateway Address
Modify the IP address/subnet mask/ gateway address If your unit is equipped with an (optional) Ethernet interface card, you can incorporate the unit into your local computer network (LAN/Ethernet). You must enter an "IP address" and, if necessary, the "Subnet mask" and "Gateway address"... -
Page 67: Manual Clean
Manual clean Instead of cleaning with CleanJet ® you can clean your unit manually. For hygiene reasons and to prevent malfunctions it is essential to clean the unit every day. • Follow the safety instructions on the spray bottle and cleaner canister. •... - Page 68 Manual clean Clean manual Warning: Aggressive chemical fluid - risk of chemical burns. Level Control It is vital that you use protective clothing, safety goggles, gloves and facemask. Press "Clean manual" and close the cooking cabinet door Clean manual Clean manual rinse 0:10 Thoroughly rinse the cooking cabi-...
-
Page 69: Maintenance
Maintenance The following inspections can be carried out by experienced employees. Only use genuine spare parts from the unit manufacturer. Cleaning the air filter Replacing the door Replacing the halogen seal lamp First switch off the unit at the Push the lever to the left in order The door seal is fitted in a groove to release the lug. -
Page 70: Service Info
Chef Line You can display the Chef Line telephone number as required. Chef Line start time 9:24 Press the Function button Select Chef's hat button Select "Chef Line" ChefLine Tel: The Chef Line telephone number is displayed Service Info The following service notices can be displayed in the Service Info area. Service Info start time... -
Page 71: Mod" Unit And Software Identification
"Mod" unit and software identification The unit and software identification can be displayed using the “Mod” function. start time 9:24 Press the Function button Press the Technik button Select "Mod" SW.: Mod: ENGLISH The unit and software identifica- tion are displayed Help function Your unit has a number of help texts to enable you to use its extensive potential as fully and as simply as pos- sible. -
Page 72: Fault Messages
Fault messages Service 23 Tel: Tel: If faults occur on your unit, they Faults on your unit which allow are indicated on the display: you to carry on cooking can be suppressed by pressing the Back button. Fault mes- When and how Remedial action sage Service 10... - Page 73 Fault messages Fault mes- When and how Remedial action sage Service 25 Displayed for 30 seconds during CleanJet ® is not working. CleanJet ® cleaning. - Open the water tap fully - Check the incoming screen - Remove the container from the cooking cabinet - If no faults are found, please notify Customer Service.
-
Page 74: Before You Call Customer Service
Before you call customer service Error: Possible cause To eliminate Water dripping out of the Door is not closed correctly. If the door is closed correctly, the door handle unit’s door will point down on floor units. Door seal is worn or Replace the door seal (see the "Maintenance”... - Page 75 Before you call customer service Error: Possible cause To eliminate The unit does not indicate a External main switch is Switch on at the main switch. function after it is switched switched off. Fuse on the premises’ Check the fuses on the premises’ distribution distribution board has board.
-
Page 76: Club Rational
Quarterly newsletter So you are always well-informed. Free SelfCooking Center ® seminars Academy RATIONAL – Your route to becoming a SelfCooking Center ® professional. Frequently-Asked Questions What you've always wanted to know. Membership of the CLUB is free for you. - Page 77 - 77 -...
-
Page 78: Notes
Notes - 78 -... - Page 80 GREAT BRITAIN Tel: 00 44 (0) 1582 480388 Fax: 00 44 (0) 1582 485001 Tel: (03) 3812 -6222 E-mail: rational@rational-uk.co.uk Fax: (03) 3812 -6288 RATIONAL Ibérica Cooking Systems S.L. www.rational-uk.com info@rational-japan.com Ctra. de Hospitalet, 147-149 www.rational-japan.com Cityparc / Edif. Paris D RATIONAL AUSTRIA GmbH 08940 Cornellá...
Need help?
Do you have a question about the SelfCooking Center and is the answer not in the manual?
Questions and answers