Table of Contents
Advertisement
Advertisement
Table of Contents

Related Manuals for Rational whitefficiency


Summary of Contents for Rational whitefficiency
- Page 1 Operating Instructions SelfCookingCenter whitefficiency ® ®...
- Page 2 You can reach our technical Customer Support Service 7 days a week on +44 (0) 1582 480388 For any queries relating to us please ring the RATIONAL Chef✆Line: +44 (0) 7743 389863 We reserve the right to make technical changes in the interest of progress!
-
Page 3: Table Of Contents
Contents Explanation of the pictograms Initial start-up Safety Instructions Liability Care, inspection, maintenance and repair Features Notes on using your unit Working with the core temperature probe Working with the hand shower General instructions for use General notes Help function Explanation of pictograms Overview of the cooking modes Display after switch-on... - Page 4 CleanJet ® +care failure Maintenance Air filter service Replacing the door seal Replacing the halogen lamp Descaling the moisturing nozzle Fault messages Before you call Service: Club RATIONAL EU Declaration of Conformity for electrical appliances EU Declaration of Conformity for gas appliances...
-
Page 5: Explanation Of The Pictograms
Explanation of the pictograms Danger! Warning! Caution! Imminently hazardous Potentially hazardous Potentially hazardous situation, which, situation that may result in situation that may result in avoided, will result in severe severe injury or death. severe injury or death. injuries or death. Corrosive Risk of fire! Risk of burns! -
Page 6: Initial Start-Up
Initial start-up During initial start-up of your new device, you will be requested to start an automatic one-off self-test. This self-test takes about 45 minutes and is used to adapt the device to the specific environmental conditions. Please note the following: - For the self-test to be carried out, all the packaging materials must be have been removed from the device;... - Page 7 Initial start-up step info/button instructions The following test will take place automatically. The status is displayed in the upper field, the time remaining until the self-test has been completed is shown in the lower time field. Where gas appliances are used, exhaust gas measurement must always be carried out when the self-test has been completed.
-
Page 8: Safety Instructions
Safety Instructions Keep this manual handy so that it can always be consulted by anyone using the unit. This unit may not be used by children or anyone with limited physical, sensory or mental abilities or a lack of experience and/or knowledge, unless these people are supervised by someone responsible for safety. - Page 9 Safety Instructions Warning! Country-specific and local standards and regulations relating to the installation and operation of industrial cooking devices must be complied with. Incorrect installation, servicing, maintenance, cleaning or modifications to the unit may result in damage, injury or death. Read these operating instructions carefully before you start to use the unit.
- Page 10 Safety Instructions Warning! Gas units only - If your appliance is installed under an extractor hood, this must be switched on when the appliance is in use – Combustion gases! - If your appliance is connected to a chimney, the flue duct must be cleaned in compliance with specific regional regulations –...
- Page 11 Safety instructions and liability Warning! Safety instructions during use - If containers are filled with liquid or contents which liquefy during cooking, only use rack levels at a height at which the user can see into the slide-in containers – risk of burns. There is a warning sticker enclosed with the unit.
-
Page 12: Liability
Safety instructions and liability Liability Installations and repairs that are not carried out by authorised specialists or using genuine spare parts, and any technical change that is not approved by the manufacturer will invalidate the manufacturer’s warranty and product liability. 12 / 61... -
Page 13: Care, Inspection, Maintenance And Repair
Care, inspection, maintenance and repair Your unit must be cleaned every day or when a request for cleaning appears to maintain the high quality of the stainless steel, for hygiene reasons and to avoid operating faults. To do this, follow the instructions in the “CareControl” section. Continuous operation at high cooking cabinet temperatures (≥260°C) or the use of high browning levels (brown 4/5) and a production with predominantly high-fat and gelatin- containing foods may lead to more rapid wear of the door seal. - Page 14 Care, inspection, maintenance and repair Warning! Servicing the incoming air filter. The device automatically recognises when the air filter is soiled. You receive a service message and a request to clean or replace the air filter when the air filter is soiled. The unit must not be operated without air filter. Please heed the following when replacing the air filter: Unit size 6 x 1/1 GN, 6 x 2/1 GN, 10 x 1/1 GN and 10 x 2/1 GN Air filter part number: 40.03.461...
- Page 15 Care, inspection, maintenance and repair Inspection, maintenance and repair Danger – high voltage - Inspection, maintenance and repair work may only be carried out by trained technicians. - The unit must be switched off at the mains on-site when cleaning (except CleanJet ®...
-
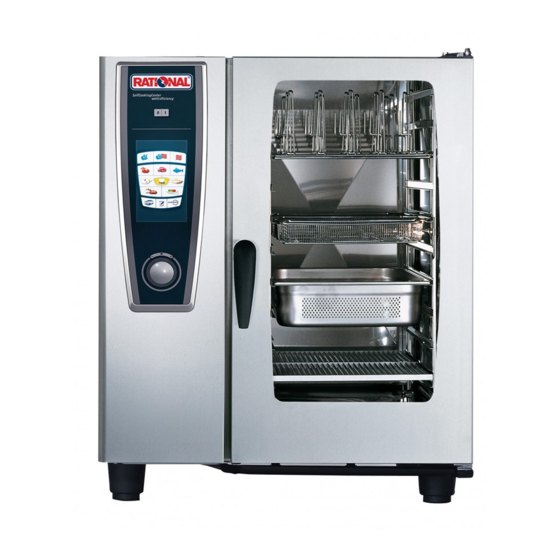
Page 16: Features
Features Appliance number (visible only when door is open) Draft diverter (optional) (gas appliances only) Interior lighting Appliance door with double glass panel Door handle Table-top units: One-handed operation with slam function Floor units: One-handed operation Unlocking device to open double glass door panel (inside) Integrated and self-emptying door drip pan (inside) -
Page 17: Notes On Using Your Unit
Notes on using your unit - Avoid having heat sources (e.g. grill plates, deep-fat fryers etc.) near the unit. - Only use the unit in areas with a room temperature > 5 °C. For ambient temperatures of less than + 5 °C, you must heat the unit to a temperature > + 5 °C before starting. - As soon as you open the cooking cabinet door, the heating and fan wheel shut down automatically. - Page 18 Notes on using your unit Max. load sizes for each unit size 6 x 1/1 GN 30 kg (max. 15 kg per rack) 6 x 2/1 GN 60 kg (max. 30 kg per rack) 10 x 1/1 GN 45 kg (max.
- Page 19 Notes on using your unit Working with mobile oven racks, mobile plate racks and transport trolleys for table-top units (option) - Remove the hanging rack as described above. - Place the run-in rail on the fixing provided on the unit's base.
-
Page 20: Working With The Core Temperature Probe
Notes on using your unit Working with the core temperature probe Caution! The core temperature probe and its positioning aid may both be hot – risk of burns. For Finishing with the ® Insert the core temperature Use the positioning aid if plate rack, insert the core probe into the thickest point the core temperature probe... - Page 21 Notes on using your unit Use a starting bit to make a hole in frozen foods. Drill a hole in the thickest part of the food to be cooked. To do this, place the food on a firm base and protect your hands. - Always correctly position the core temperature probe and the positioning aid in the park position provided –...
-
Page 22: Working With The Hand Shower
Notes on using your unit Working with the hand shower - If you use the hand shower, please pull the hose at least 20 cm out of the park position. - You can select 2 jet strengths by pressing the control button. - Always let the hand shower slide slowly back into the park position. -
Page 23: General Instructions For Use
General instructions for use Your unit has a touch screen. You can make settings on your unit by just touching it lightly with your finger. You can change the Alternatively, rough settings Your settings are accepted settings using the central can be made by adjusting/ within 4 seconds. -
Page 24: General Notes
General instructions for use General notes Back to start level Help function Programming mode Status display preheat, Cooking cabinet too hot The end of cooking is red arrow for preheat, blue – button flashing (see indicated by an acoustic arrow for cool down. the “Cool Down”... -
Page 25: Help Function
General instructions for use Help function So that you can use your device’s many possibilities as easily and efficiently as possible, detailed operating instructions and user help texts with practical examples and useful tips are stored on the device. The help function can be selected using the “?” button. The following functions are available in the help function. -
Page 26: Overview Of The Cooking Modes
Overview of the cooking modes Display after switch-on Combi-steamer mode On/Off switch Steam Dry heat Combination of steam and dry heat SelfCooking Control mode Meat Poultry Fish Side dishes Egg dishes/dessert Baking MySCC Finishing ® Further functions Help function Efficient LevelControl system ®... -
Page 27: Different Operating Modes
Overview of the cooking modes 3 different operating modes SelfCooking Control Combi-steamer mode Programming mode mode You enter combi-steamer Pressing the “program” After switching on or mode by pressing button switches to operating the home button the button “steam”, programming mode. you enter SelfCooking “combination”... -
Page 28: Selfcookingcontrol Mode
SelfCookingControl mode ® SelfCookingControl detects the size of the food and the load size. Cooking time, ® temperature and cooking cabinet humidity are adapted continually. The remaining time is displayed. See the application manual for examples and useful tips. Explanation of pictograms Cooking speed Core temperature/cooking level Delta-T... -
Page 29: Information And Requests During The Cooking Process
SelfCookingControl mode ® Convenience level Steam baking Information and requests during the cooking process Score Preheat display Add liquid Cool down display Request to cancel Options following the end of cooking Reposition core temperature Keep at temperature probe Heat to serving temperature Continue with time Crisp Load new batch... -
Page 30: Information Button
SelfCookingControl mode ® Information button The information button always shows you how many process steps the current cooking process is made up of and which subsequent options can be selected in addition. Indication of cooking sequence As an example, here is the cooking sequence for “roasting”: Preheat Load Set CT... -
Page 31: Combi-Steamer Mode
Combi-steamer mode All combi-steamer functions are available in combi-steamer mode. You enter combi- steamer mode by pressing the button “steam”, “dry heat” or “combination of steam and dry heat”. 3 manual operating modes Steam Dry heat Combination of steam and dry heat Explanation of pictograms Exact percentage setting for... - Page 32 Combi-steamer mode Help function Air speed Request the programming Cool down function back/cancel The current cooking data such as actual cooking cabinet humidity and temperature can be requested by pressing the cooking cabinet temperature button. Hold the button down for 10 seconds to display the actual values continuously until the next setting is made.
-
Page 33: Programming Mode
Programming mode It takes no time at all to create your own cooking programs in programming mode. The 7 operating modes (meat, poultry, fish, bakery products, side dishes, egg dishes/dessert, finishing) can be copied, adapted and saved under a new name according to your individual requirements, or you can create your own manual programs with up to 12 steps. - Page 34 Programming mode Selection window – indicate program details Selection window with the information button pressed In addition to the program names, further information can be requested or stored using the following buttons. Image of the food for the program Notes on the program Image of the accessories for the Additional attributes can be program...
-
Page 35: Image View
Programming mode Image view In the image view, the representation of all programs is reduced to a title image. If there is no image available, the title of the program is shown as a text in the image view. You can scroll in your view by Change to the image view. -
Page 36: Cleaning Request
CareControl Cleaning request CareControl recognises when CleanJet +care cleaning has to be carried out. CareControl ® takes individual cleaning and working habits into account, such as longer breaks or the end of work. The recommended cleaning stages are marked in different colours. Automatic display of cleaning request The recommended cleaning stage is highlighted in colour. - Page 37 CareControl step info/button instructions Please clean + care You are requested to clean the unit. Start CleanJet +care by pressing the button ® CleanJet+care or select “later”. Select the recommended cleaning stage medium highlighted in colour e.g. “medium” and follow the instructions shown in the menu.
-
Page 38: Starting Cleaning
CareControl Starting cleaning CleanJet +care is the automatic cleaning system for cleaning the cooking cabinet. ® With 7 cleaning steps, it allows you to adjust the cleaning process to match the individual degree of soiling. Warning! - For hygiene reasons and to prevent malfunctions it is essential to clean the unit every day - risk of fire. - Page 39 CareControl step info/button instructions Press the button “Cooking cabinet too hot” appears when the The cooking cooking cabinet temperature exceeds 75 °C. cabinet is too hot Select “cool down” (see the “Cool Down” section). light Select cleaning stage e.g. “light”. Open the cooking cabinet door, remove containers and trays (stainless steel grids, Open door...
- Page 40 CareControl Warning! - Do not open the cooking cabinet door while cleaning is in progress – chemical cleaner and hot vapour may escape – risk of chemical burns and scalding. - After terminating or after CleanJet +care cleaning has been completed, check the ®...
- Page 41 CareControl Before you start the CleanJet +care cleaning, make sure that the hanging racks or mobile ® oven rack are inserted correctly in the cooking cabinet. If you are using softened water, you can reduce the recommended number of cleaner tabs by up to 50 %.
-
Page 42: Cleaning Stages
CareControl Cleaning stages cleaning stage description/application tabs rinse without tabs Rinse cooking cabinet with warm water. For non-greasy limescale deposits, e.g. after rinse Care baking or steaming. “Short cleaning time” - for all soiling, but interim cleaning Cleaning agent without drying and rinsing. For lighter soiling, e.g. -
Page 43: Cleanjet ® +Care Failure
CareControl CleanJet +care failure ® After a power failure lasting longer than 10 minutes or after the unit is switched off the display reads "Interrupt CleanJet". If Interrupt CleanJet is not confirmed within 20 seconds by ® pressing the display, the activated CleanJet +care program runs through to the end without ®... -
Page 44: Maintenance
Maintenance Air filter service Table-top units type 6 x 1/1 GN, 6 x 2/1 GN, 10 x 1/1 GN and 10 x 2/1 GN: Loosen the air filter by pressing the frame in the two roughened spots. Tilt the filter down and remove it completely from the unit. -
Page 45: Replacing The Door Seal
Maintenance Replacing the door seal The door seal is fitted in a groove on the cooking cabinet. - Pull the old seal out of the groove. - Clean the guide rail. - Insert new seal into the groove (moisten the retaining lips with soapy water). -
Page 46: Descaling The Moisturing Nozzle
Descaling the moisturing nozzle Please check the moisturing nozzle for scale residue once a month. step info/button instructions Switch the unit off Swing the hanging rack and the air baffle into the centre. Loosen the union nut on the moisturing nozzle (turn anti-clockwise –... - Page 47 Descaling the moisturing nozzle step info/button instructions Assemble in reverse order – note the installation position 47 / 61...
-
Page 48: Fault Messages
Fault messages Displays for general faults If faults occur on your unit, Faults on your unit which they are indicated on the allow you to carry on display: Please note the cooking can be suppressed phone number for fast by pressing the “back”... - Page 49 Fault messages Please follow the remedial measure suggested in the table below. fault indication when and how remedial action Service 10 When it has been Can be rejected by pressing the “back” switched on for 30 button. The unit can be used for cooking. seconds, Please notify Customer Service.
- Page 50 Fault messages fault indication when and how remedial action cooking cabinet thoroughly with the hand shower (also behind the air baffle). - The unit can be used for cooking temporarily. Please notify Customer Service. Service 26 Displayed If the fault message occurs during CleanJet ®...
- Page 51 Fault messages fault indication when and how remedial action Service 35 When it has been Please connect UltraVent to the power ® switched on for 30 supply. seconds, Service 36 Displayed for 30 Cooking only possible with some restrictions seconds after –...
- Page 52 Fault messages fault indication when and how remedial action Service 120 Displayed Please notify Customer Service. continuously. 52 / 61...
-
Page 53: Before You Call Service
Before you call Service: error possible cause Rectification Water dripping out of Door is not closed If the door is closed correctly, the door the unit’s door. correctly. handle will point down on floor units. Door seal is worn or Replace the door seal (see the damaged. - Page 54 Before you call Service: of fat are cooked frequently or if the drop on the outlet pipe is too shallow. To remedy: Run the outlet pipe as described in the installation instructions. Clean the unit regularly with CleanJet ® +care. The unit does not External main switch is Switch on at the main switch.
- Page 55 Before you call Service: Gas unit constantly The gas supply to the Open the gas tap, switch on the displays Reset. unit is interrupted. ventilation cover. The gas pressure is Have the gas supply to the unit too low. checked. Cooking mode button The cooking cabinet is Use Cool Down to cool the cooking...
-
Page 56: Club Rational
Register now and become a member. Members of the Club RATIONAL also have access to a wide range of information and free downloads, and can also communicate with RATIONAL chefs or colleagues. Register for the club now under www.club-rational.com. -
Page 57: Eu Declaration Of Conformity For Electrical Appliances
EU Declaration of Conformity for electrical appliances 57 / 61... -
Page 58: Eu Declaration Of Conformity For Gas Appliances
EU Declaration of Conformity for gas appliances 58 / 61... - Page 59 At least three (3) years from delivery of products, RATIONAL AG will give to any third party who contact us at the contact information provided below, for a charge no more than our cost of physically performing source code distribution, a complete machinereadable copy of the corresponding source code covered under GPL v2/LGPL v2.1.
- Page 60 80.05.002 · V-04 · MDS/Ad · 08/13 · englisch...
Need help?
Do you have a question about the whitefficiency and is the answer not in the manual?
Questions and answers