Table of Contents
Advertisement
Quick Links
M
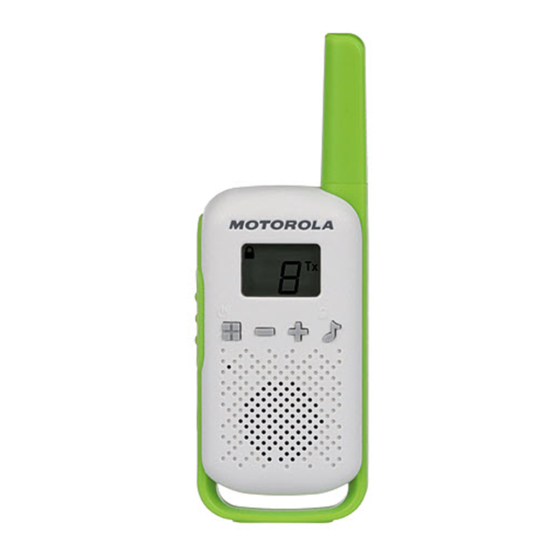
Talkabout T42
Owner's Manual
*MN004587A01*
MN004587A01-AA
Printed in
Talkabout T42 Owner's Manual
RF Energy Exposure and Product Safety Guide
for Portable Two-Way Radios
Attention!
Before using this product, read the RF Energy Exposure and
Product Safety Guide that ships with the radio which contains
instructions for safe usage and RF energy awareness and
control for compliance with applicable standards and
regulation.
T42 Twin Pack
Package Content
Radio
Belt clip
Stickersheet (16 pieces)
Owner's manual
Personalization Stickers:
Stickers are provided in order to personalize and keep track
of radios. Use permanent marker for the blank stickers.
Frequency Chart
Channel Frequency
Channel Frequency
(MHz)
(MHz)
1
409.75000
9
409.85000
2
409.76250
10
409.86250
3
409.77500
11
409.87500
4
409.78750
12
409.88750
5
409.80000
13
409.90000
6
409.81250
14
409.91250
7
409.82500
15
409.92500
8
409.83750
16
409.93750
Radio Control Buttons
PTT Button
Menu/Power
Button
Microphone
Easy Pairing
Button
Radio Display
3
4
5
1
6
2
7
8
Installing the Batteries
1. Make sure your radio is OFF.
2. To remove the battery compartment door, press the tab at
the bottom of the compartment door. Remove the door.
Insert three AAA batteries into the battery compartment.
3. Replace the battery compartment door.
Battery Level and Low Battery Alert
Blinks when battery power level is low; replace
batteries immediately.
Turning Your Radio On/Off
Press and hold the MENU/
button to turn your radio
ON/OFF.
Adjusting the Volume
Adjust the volume by pressing the
Talking and Listening
All radios in your group must be set to the same channel in
order to communicate.
1. Hold your radio 2 to 3 cm from your mouth.
2. Press and hold the PTT button while speaking. The
Transmit
3. Release the PTT button. You can now receive incoming
calls. When you do, the Receive
display.
For maximum clarity, hold the radio 2 to 3 cm away and avoid
covering the microphone while talking.
Talk Range
Your radio is designed to maximize performance and improve
transmission range. Ensure the radios are at least 5 feet
apart when in used.
Push-to-Talk Time-Out Timer
To prevent accidental transmissions and save battery life, the
radio emits a continuous warning tone and stops transmitting
if you press the PTT button for 60 seconds continuously.
Menu Options
en-US
Selecting the Channel
The radio uses channel as the frequency to transmit.
1. Press
2. Press
keys allows you to scroll through the channels rapidly to
browse the codes.
3. Press PTT button to exit menu or
up.
Sub-Code
This radio does not have sub-code feature. When using this
radio with radio models that use sub-code, please make sure
T42
the radios with sub-code have their sub-code disabled. Set
sub-code to Zero.
2
Call Tones
2
Your radio is equipped with a call tone. To transmit a call tone,
1
press /
1
Keypad Tones
You may enable or disable the keypad tones. You will hear
the keypad each time a button is pushed.
1. Press and hold the
turns the keypad tone OFF.
2. To turn the Keypad Tone ON, turn the radio OFF and ON
Channel Frequency
again without pressing the
(MHz)
17
409.95000
Roger Tone
18
409.96250
You can set your radio to transmit a unique tone when you
19
409.97500
finish transmitting. It is like saying "Roger" or "Over" to let
20
409.98750
others know you have finished talking.
1. Press and hold
the Roger Tone OFF.
2. Turn the radio OFF and ON again without pressing the
button to turn the Roger Tone ON.
Keypad Lock
To avoid accidentally changing your radio settings:
1. Press and hold / Key Lock until the Key Lock Indicator
icon displays.
2. You can turn the radio on and off, adjust the volume,
receive, transmit, send a call tone, when in the lock mode.
Antenna
All other functions remain locked.
3. Press / Key Lock and hold until the
is no longer displayed to unlock the radio.
Channel Scan Mode
Enables your radio to scan for active channels. When an
Volume/Scroll
activity is detected, your radio lands (stays) on that channel
Call Tone/Lock
for 2 seconds. To transmit on that channel, press the PTT
button. When an activity on the landed channel ends, your
radio continues scanning other channels.
Speaker
To turn the channel scan ON:
1. MENU/
2. / button to turn ON channel scan.
MENU/
Monitor Mode
Enables you to listen for weak signals on the current channel.
To turn the Monitor Mode ON:
1. Keypad Lock
1. MENU/
2. Easy Pairing
menu until
3. Mute
2. Press the / button for continuous listening. The
continues to blink.
4. Scan Indicator
To turn the Monitor Mode OFF:
5. Battery Level Meter
Press the MENU/
6. Transmit
icon stops blinking.
7. Receive
Easy Pairing
8. Channel Indicator
This feature allows a group of radio users to program all their
radios to the same Channel and Sub-Code settings quickly
and simultaneously. Any one radio within the group can be
designated as the "Leader's radio" and have it's Channel and
Sub-Code settings transmitted to and copied by all the other
radios in the group (Members' radios).
Note:
• When the leader radio has no sub-code feature, such as this
radio (T42), all radios in the group will have their sub-code set to
0 (Disable). When the sub-code is set to 0, all transmissions on
the selected channel will be heard, regardless of the transmitting
radio sub-code setting.
and
buttons.
icon appears on the display.
icon appears on the
Two Way Mode
Menu Key
Channel (1
)
Menu Key
Menu Key
Menu Key
Menu until the channel number starts to flash.
or
to change the channel. Long press on these
Menu to continue set
button.
button, while turning the radio ON, it
button.
button while turning the radio ON, it turns
Key Lock Indicator
to enter menu. Advance until
blinks.
or PTT to turn OFF Scan mode.
button to enter menu. Advance through the
icon blinks.
button to return to "Normal" mode. The
1. Pick any one of the radios as the "Leader's radio". On this
radio, program the Channel and Sub-Code to the desired
settings. See "Selecting the Channel" and "Selecting the
Sub-Code" sections in this user manual. The sub-code for
T42 radio is fixed at zero and cannot be programmed.
2. To copy the channel and Sub-Code combination to all the
other "Members' radios", press and hold the
the Members' radios until you hear a beep. Release the
button after the beep, and wait for the transmission from
the Leader's radio.
Note:
• Icon
blinks on the display. This confirms that the radio is in
Easy Pairing mode waiting to receive the Channel and Sub-Code
settings from the Leader's radio. All Members' radios remain in
this mode for 3 minutes.
• A group with many radios should have all users take this step at
the same time, so all radios can be programmed in one go.
3. On the Leader's radio, press and hold down the
until you hear a double beep.
Note:
• At the double beep, this radio's Channel and Sub-Code settings
will be transmitted, which will be received and copied by all the
other (Members') radios.
• The Leader's radio must make this transmission when all the
Members' radios are still in the Easy Pairing mode, otherwise the
transmission will not be picked up.
• On the Leader's radio, user must remember not to release the
button on the first (single) beep, otherwise this radio will become
another Member's radio. If that happens, you can press PTT to
escape, and retry the steps described in #3 again.
• When the Leader's radio does not have sub-code feature, all
members' radios will have their sub-code set to zero (Disable).
When a radio sub-code is set to zero, all transmissions received
on the channel will be sent to the speaker, regardless of the sub-
code embedded in the transmission.
• This radio (T42) does not have sub-code feature and is not
compatible with radios with sub-code enabled. Please ensure all
radios in the group have their sub-code disabled (Sub-code is set
to Zero). With Easy pairing, either use T42 as the leader, or ask
the Leader to set sub-code to zero before performing easy
pairing.
Warranty Information
The authorized Motorola Solutions dealer or retailer where
you purchased your Motorola Solutions two-way radio and/or
original accessories will honour a warranty claim and/or
provide warranty service.
Please return your radio to your dealer or retailer to claim
your warranty service. Do not return your radio to Motorola
Solutions.
In order to be eligible to receive warranty service, you must
present your receipt of purchase or a comparable substitute
proof of purchase bearing the date of purchase. The two-way
radio should also clearly display the serial number. The
warranty will not apply if the type or serial numbers on the
product have been altered, deleted, removed, or made
illegible.
What Is Not Covered By The Warranty
• Defects or damage resulting from use of the Product in
other than its normal and customary manner or by not
following the instructions in this user manual.
• Defects of damage from misuse, accident or neglect.
• Defects of damage from improper testing, operation,
maintenance, adjustment, or any alteration or modification
of any kind.
• Breakage or damage to aerials unless caused directly by
defects in material or workmanship.
• Products disassembled or repaired in such a manner as to
adversely affect performance or prevent adequate
inspection and testing to verify any warranty claim.
• Defects or damage due to range.
• Defects or damage due to moisture, liquid or spills.
• All plastic surfaces and all other externally exposed parts
that are scratched or damaged due to normal use.
• Products rented on a temporary basis.
• Periodic maintenance and repair or replacement of parts
due to normal usage, wear and tear.
Copyright Information
The Motorola Solutions products described in this manual
may include copyrighted Motorola Solutions programs, stored
semiconductor memories or other media. Laws in the United
States and other countries preserve for Motorola Solutions,
certain exclusive rights for copyrighted computer programs,
including the exclusive right to copy or reproduce in any form,
the copyrighted Motorola Solutions programs.
Accordingly, any copyrighted Motorola Solutions computer
programs contained in the Motorola Solutions products
described in this manual may not be copied or reproduced in
any manner without express written permission of Motorola
Solutions. Furthermore, the purchase of Motorola Solutions
products shall not be deemed to grant either directly or by
implication, estoppel, or otherwise, any license under the
copyrights, patents or patent applications of Motorola
Solutions, except for the normal non-exclusive royalty free
license to use that arises by operation of law in the sale of a
products.
icon
MOTOROLA, MOTO, MOTOROLA SOLUTIONS and the Stylized M
logo are trademarks or registered trademarks of Motorola Trademark
Holdings, LLC and are used under license. All other trademarks are
the property of their respective owners.
© 2018 Motorola Solutions, Inc. All rights reserved.
button on
button
Advertisement
Table of Contents

Related Manuals for Motorola solutions Talkabout T42


Summary of Contents for Motorola solutions Talkabout T42
- Page 1 Warranty Information 3. Press PTT button to exit menu or Menu to continue set regulation. The authorized Motorola Solutions dealer or retailer where T42 Twin Pack you purchased your Motorola Solutions two-way radio and/or Sub-Code original accessories will honour a warranty claim and/or This radio does not have sub-code feature.
- Page 2 7. 接收 都將聽到所選頻道上的所有傳輸訊號。 8. 頻率指示燈 安裝電池 1. 請確保您的無線電對講機已關閉。 2. 按下電池盒蓋底部的卡扣,以移除電池盒蓋。移除盒蓋。插 入三枚 AAA 電池到電池盒內。 3. 蓋上電池盒蓋。 電池電量及電量不足警示 電池電量不足時閃動;請立即更換電池。 無線電對講機開/關 持續按下功能表/ 按鈕以開/關您的無線電對講機。 調整音量 按下 和 按鈕以調整音量。 MOTOROLA、MOTO、MOTOROLA SOLUTIONS 和 M 標誌設計為 Motorola Trademark Holdings, LLC 之商標或註冊商標, 且已獲授權使用。所有其他商標均為其各自所有者的財產。 © 2018 Motorola Solutions, Inc. 保留所有權利。...
Need help?
Do you have a question about the Talkabout T42 and is the answer not in the manual?
Questions and answers