Table of Contents
Advertisement
Quick Links
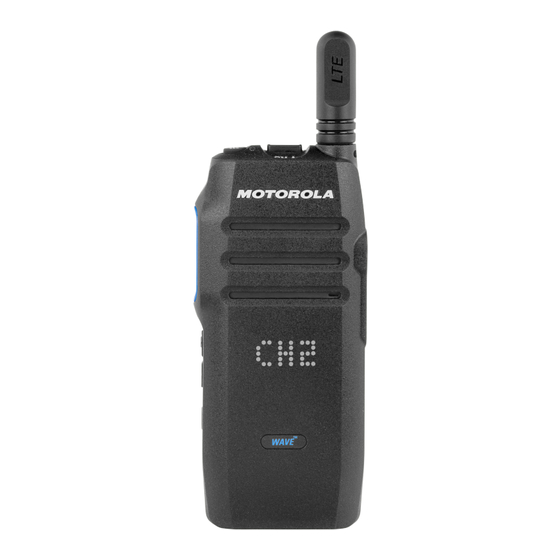
WAVE™ TWO-WAY RADIO
TLK 100j
USER GUIDE
en-US
ja-JP
□
本
社
東京都品川区南品川 2-7-18
□
関 西 支 店
大阪市西区千代崎 1-24-11
□
札 幌 営 業 所
□
名古屋営業所
□
仙 台 営 業 所
□
九 州 営 業 所
h t t p s : / / w w w . j e n i x . c o . j p /
営業所住所はこちら
APRIL 2019
© 2019 Motorola Solutions, Inc. All rights reserved.
TEL 03-5715-2351
TEL 06-6583-7700
*MN005651A01*
MN005651A01-AA
Advertisement
Chapters
Table of Contents

Related Manuals for Motorola solutions TLK 100j


Summary of Contents for Motorola solutions TLK 100j
- Page 1 九 州 営 業 所 h t t p s : / / w w w . j e n i x . c o . j p / 営業所住所はこちら APRIL 2019 *MN005651A01* © 2019 Motorola Solutions, Inc. All rights reserved. MN005651A01-AA...
-
Page 2: Table Of Contents
English Contents Audio Tones..........18 Indicator Tones........18 Chapter 4: Radio Calls ..........19 Important Safety Information.......... 4 Talkgroup and Contact List........19 Notice to Users...............5 Switching Groups or Contacts....19 Handling Precautions............. 6 Group Calls............19 Software Version............7 Responding to Group Calls.....19 Copyrights and Trademarks........... - Page 3 Chapter 6: Authorized Accessories List....... 29 Batteries and Chargers Warranty.........31 The Workmanship Warranty......31 The Capacity Warranty........31 Limited Warranty............32 MOTOROLA SOLUTIONS COMMUNICATION PRODUCTS...... 32 I. WHAT THIS WARRANTY COVERS AND FOR HOW LONG:..........32 II. GENERAL PROVISIONS......33 III. STATE LAW RIGHTS:........33...
-
Page 4: Important Safety Information
Compliance with applicable standards and Regulations. For a list of Motorola Solutions-approved antennas and other accessories, visit the following website: http://www.motorolasolutions.com Any modification to this device, not expressly authorized by Motorola Solutions, may void the user's authority to operate this device. -
Page 5: Notice To Users
• This device must accept any interference received, including interference that may cause undesired operation. CAUTION: Changes or modifications made to this device, not expressly approved by Motorola Solutions, could void the authority of the user to operate this equipment. -
Page 6: Handling Precautions
English Handling Precautions • Keep your radio clean and exposure to water should be avoided to help ensure proper functionality and performance. • To clean the exterior surfaces of the radio, use a diluted solution of mild dishwashing detergent and fresh water (for example, one teaspoon of detergent to one gallon of water). -
Page 7: Software Version
English Software Version All the features described in the following sections are supported by the software version R01.01.40.0000 or later. Check with your dealer or system administrator for more information. -
Page 8: Copyrights And Trademarks
Open Source Software rights for copyrighted computer programs. Accordingly, any copyrighted Motorola Solutions computer programs This Motorola Solutions product described in this document contained in the Motorola Solutions products described in may contain Open Source Software. For information this document may not be copied or reproduced in any... -
Page 9: Disclaimer
Please refer to your Motorola Solutions contact for further information. -
Page 10: Getting Started
English Getting Started How to Use This Guide This user guide covers the basic operation of the TLK 100j Wave Two-Way Radio. Your dealer or system administrator can customize your radio for your specific needs. Check with your dealer or system administrator for more information. -
Page 11: Chapter 1: Basic Operations
English Basic Operations 2 Attach the battery cover by aligning it in place and slide the battery latch until it snaps into place. This chapter explains the operations to get you started on using the radio. Attaching the Battery 1 Align the battery contacts with the contacts inside the battery compartment. -
Page 12: Charging The Battery
CAUTION: charger exactly as described in the charger user If you must replace the antenna, ensure that you guide. use TLK 100j antennas only. Neglecting this action damages your radio. See Authorized Accessories List on page 29 for recommended antennas. -
Page 13: Turning The Radio On Or Off
English • To attach the antenna, set the antenna in the NOTICE: receptacle and turn clockwise. To turn on your radio when your radio is charging, press and hold the Power/Info button. The green LED illuminates and the display shows a power-on animation. -
Page 14: Chapter 2: Radio Controls
English Radio Controls 5 Volume Up and Volume Down buttons 6 Menu/Contact List Button This chapter explains the buttons and functions to control 7 LED Display the radio. 8 Microphone 9 USB Port 10 Audio Accessory Port 11 High-Output Speaker 12 LTE Antenna 13 Charging Contacts 1 Talkgroup/Contact List Scroll Rocker... -
Page 15: Chapter 3: Status Indicators
English Status Indicators Icon Description Brightness Level This chapter explains the Icons, battery capacity information, LED indicators, and tones used in the radio. Do Not Disturb On Icons Do Not Disturb Off The following table shows icons which appear on your Voice Announcement On radio display, and their description. -
Page 16: Battery Capacity
English Battery Capacity Icon Description Radio Location On The following table provides the battery capacity information of your radio. Icons and LED Indication appear when you press Power/Info button. Radio Location Off Table 2: Battery Capacity Downloading Software/Software Available Icon LED In- Voice An- Descrip-... -
Page 17: Led Indicators
English Icon LED In- Voice An- Descrip- LED Indica- Operational Mode Charge Only dication nouncement tion tion Mode Blink- Battery low Less than • During call hang- 5% capacity ing red time Solid red Not applicable Rapid charge LED Indicators Blinking red •... -
Page 18: Tones
English LED Indica- Operational Mode Charge Only Periodic Tone tion Mode Sounds periodically depending on the duration set by • Radio is idle the radio. Tone starts, stops, and repeats itself. Tones Repetitive Tone A single tone that repeats itself until it is terminated by The following are the tones that sound through on the radio the user. -
Page 19: Chapter 4: Radio Calls
English Radio Calls • The green LED blinks. • Your radio generates a momentary incoming call alert tone before unmuting to the caller's audio. This chapter explains the operations to receive, respond to, make, and stop calls. Calls supported are Group, Private, 1 To respond to the call, press PTT button. -
Page 20: Private Calls
English 3 Wait for the Talk Permit Tone to end and speak 2 To select contact, scroll contact list using clearly into the microphone. Talkgroup/Contact List Scroll Rocker until the right contact is displayed. 4 Release the PTT button to listen. NOTICE: The green LED blinks when the target radio If "X"... - Page 21 English • You hear a short alert tone the moment the transmitting radio releases the PTT button, indicating the channel is free for you to respond. 1 To respond to the call, press PTT button. The green LED lights up. 2 Wait for the Talk Permit Tone to end and speak clearly into the microphone.
-
Page 22: Chapter 5: Utilities
English Utilities 9 Radio Name This chapter explains the operations of the utility functions Checking Battery Strength available in your radio. Follow the procedure to check the battery level of your Checking Radio Information radio. Press the Power/Info button. Short press the Power/Info button repeatedly. The radio displays one of the following depending on One of the following occurs: the mode/state. -
Page 23: Cellular And Wi-Fi Values
English Cellular and Wi-Fi Values Turning DND On or Off The number of bars displayed represents the radio signal 1 To scroll through a list of menu items, short press strength. the Menu/Contact List button. Four bars indicate the strongest signal. This icon is only displayed while receiving. -
Page 24: Turning Voice Announcement On Or Off
English Turning Voice Announcement On or • All Voice Announcement tones are turned off. Turning Radio Alert Tones On or Off The Voice Announcement feature enables radio audible feedback. 1 To scroll through a list of menu items, press the Menu/Contact List button. -
Page 25: Adjusting The Display Brightness
English Adjusting the Display Brightness 3 To turn on Radio Location, press the Volume Up button. To turn off, press the Volume Down button. 1 To scroll through a list of menu items, press the If Location is on, the following occurs: Menu/Contact List button. -
Page 26: Turning Radio Cellular On Or Off
Voice Announcement sounds Wi-Fi Off. enabled device (accessory) through a Bluetooth • The display shows an "X" mark beside the Wi-Fi icon. connection. Your radio supports both Motorola Solutions and Commercially available Off-The-Shelf (COTS) Turning Radio Cellular On or Off Bluetooth-enabled devices. -
Page 27: Turning Bluetooth On Or Off
English Device (POD). Multiple connections with Bluetooth-enabled Searching for Bluetooth Devices devices of the same type are not supported. Refer to the user manual of your respective Bluetooth- To search for other Bluetooth devices, press the enabled device for more details on the full capabilities of Power/Info button until you see the Bluetooth icon. -
Page 28: Disconnecting From Bluetooth Devices
English Disconnecting from Bluetooth Devices NOTICE: If the DND mode is enabled during the scan mode, your radio prioritizes the DND mode. 1 When the Bluetooth accessory goes out of range or turn off, it will be disconnected from the radio Turning Scan On or Off automatically. -
Page 29: Chapter 6: Authorized Accessories List
Chargers Authorized Accessories List • Micro USB Charger, 5 W, 100 V–240 V, Japan plug (PS000042A11) Motorola Solutions provides a list of accessories to improve the productivity of your radio. • Multi-unit Charger, Japan Plug (PMLN7107_) • Single Unit Rapid Rate Charger, Japan Plug... - Page 30 English Miscellaneous Accessories • Battery Door (HKLN4678_)
-
Page 31: Batteries And Chargers Warranty
日本語 目次 オーディオ トーン........19 インジケータ トーン......19 章 4: 無線機通話............20 重要な安全情報.............. 4 グループと連絡先リスト........20 ユーザーへのお知らせ........... 5 グループと連絡先の切り替え....20 使用上のご注意.............. 6 グループ通話............. 20 ソフトウェア バージョン..........7 グループ通話への応答......20 著作権および商標............8 グループ通話の発信....... 20 免責条項................. 9 個別通話............21 はじめに............... 10 個別通話の発信........21 章 1: 基本操作............. 11 個別通話への応答........ -
Page 32: Limited Warranty
Bluetooth のオン/オフの切り替え...28 Bluetooth デバイスの検索...... 29 Bluetooth デバイスへの接続....29 Bluetooth デバイスからの切断....29 スキャン............29 スキャンのオンとオフの切り替え..30 章 6: 認可されたアクセサリ リスト......31 バッテリおよび充電器の保証........33 ワークマンシップ保証........33 キャパシティ保証..........33 限定保証............... 34 MOTOROLA SOLUTIONS 通信製品....34 I. この保証の対象と期間:........34 II.全般的な規定..........34 III.州法の権利.............35 IV.保証サービスを受ける方法......35 V. 本保証の対象とならないもの....... 35... -
Page 33: General Provisions
日本語 重要な安全情報 注意! この無線機は、一般消費者の使用に対応できるように設計 されています。本無線機をご使用になる前に、 『携帯型業務 用無線機の電磁波エネルギー被曝および製品の安全性に関 するガイド』をよくお読みください。安全にお使いいただ くための取り扱い方法と、電磁波エネルギーについての重 要な説明が記載されています。また、電磁波エネルギー被 曝限度についての該当基準および法規制に対する適合情報 も記載されています。 Motorola Solutions 承認アンテナおよびその他のアクセサ リのリストは、次の Web サイトでご確認ください。 http://www.motorolasolutions.com Motorola Solutions から明示的な承認を得ないで本製品を 変更した場合、無線機を操作するためのユーザーの権限が 無効になることがあります。... -
Page 34: ユーザーへのお知らせ
日本語 ユーザーへのお知らせ 次の条件により、この機器は FCC 規則パート 15 に準拠し ています。 この機器は有害な干渉を発生しません。 • この機器は、不適切な動作の原因となり得る干渉も含 • め、受信したあらゆる干渉の影響を受けます。 注意: Motorola Solutions による明示的な承認なくして本 機器に変更または改変を加えた場合、本機器を操作 するためのユーザーの権限が無効になることがあり ます。... -
Page 35: Governing Law
日本語 使用上のご注意 適切な機能および性能を保つために、無線機を清潔に保 • ち、浸水を避けてください。 無線機の外面をクリーニングするには、低刺激性の食器 • 用洗剤を真水で希釈した液体 (たとえば、 3 リットルの水 に大さじ 1 杯の洗剤) を使用してください。 定期的な外観検査で汚れやグリースがあることに気が • 付いたときは、必ず外面をクリーニングしてください。 注意: 特定の化学物質とその蒸気は、 特定のプラスチッ クに有害な影響を及ぼす場合があります。エア ゾール スプレー、チューナー クリーナーなどの 化学製品は使用しないでください。... -
Page 36: ソフトウェア バージョン
日本語 ソフトウェア バージョン 次のセクションで説明されているすべての機能は、ソフト ウェア バージョン R01.01.40.0000 以降でサポートされま す。 詳細については、ディーラーまたはシステム管理者にご確 認ください。... -
Page 37: 著作権および商標
日本語 著作権および商標 商標 MOTOROLA、MOTO、MOTOROLA SOLUTIONS、および 2019 Motorola Solutions, Inc. 無断複写、 転載を禁じます。 Stylized M ロゴは、 Motorola Trademark Holdings, LLC の商 © 標または登録商標であり、許可の下に使用されます。その 本書に記載されている Motorola Solutions 製品には、 著作権 他すべての商標は、個々の商標権者に帰属します。 取得済み Motorola Solutions コンピュータプログラムが含 まれている場合があります。米国およびその他諸国の法律 オープン ソース ソフトウェア で、著作権取得済みのコンピュータプログラムの一定の独 占権が Motorola Solutions のために保護されています。従... -
Page 38: 免責条項
日本語 免責条項 一部のシステムに対して、このマニュアルで説明する機能、 設備、性能が適用されない、またはライセンスされない場 合があります。また、無線機ユニットの特性や特定のパラ メータの設定に依存する場合もあります。詳しくは、 Motorola Solutions の担当者にご確認ください。... -
Page 39: はじめに
日本語 はじめに このガイドの使用方法 このユーザー ガイドでは、TLK 100j Wave の双方向無線機 に関する基本的な操作について説明しています。 ディーラーやシステム管理者は、特定のニーズに向けて無 線機をカスタマイズできます。詳細については、ディーラ ーまたはシステム管理者にご確認ください。 ディーラー/システム管理者からの情報 以下については、ディーラーまたはシステム管理者にお問 い合わせください。 各ボタンの機能は何か? • 自分のニーズに対応するオプション アクセサリはどれ • か? 効果的に通信するには、無線機をどのように使用すれば • 良いか? 無線機の寿命を延長する保守手段は何か? •... -
Page 40: 章 1: 基本操作
日本語 基本操作 この章では、無線機を使い始めるための操作について説明 します。 電池パックを装着 1 無線機内の電池パック格納部の端子と、電池パック の端子を揃えます。 a まず、電池パックの接続側を挿入します。 b 電池パックをそっと押して所定の位置に収めま 2 電池カバーを取り付けるには、所定の位置に収めて す。 電池パック ラッチが収まるまでスライドさせます。... -
Page 41: 電池パックの充電
日本語 3 スライドを左に動かしてしっかりとロックさせま 電池パックの充電 す。 無線機の電源は、リチウム イオン (Li-lon) 電池パックです。 保証条件に準拠するため、および損傷を防ぐために、 • 充電器のユーザー ガイドに従い、Motorola Solutions 製充電器で電池を充電してください。 注記: Motorola Solutions の充電器はすべて、 Motorola Solutions が認定した電池のみを充 電できます。他の電池は充電できません。充 電中は無線機の電源を切っておくことをお勧 めします。... -
Page 42: アンテナの取り付けと取り外し
日本語 最高な性能を引き出すには、最初に使用する前に新 • しい電池パックを 4 ~ 5 時間充電してください。 電池パックの充電は室温でするのが最適です。 表示部に、電池充電アニメーションが瞬間的に表示されま す。充電中は、赤色の LED が点灯します。充電が完了する と、充電器を取り外すまで緑色の LED が点灯します。 アンテナの取り付けと取り外し 注意: アンテナを取り外すには、アンテナを反時計回りに • アンテナ交換が必要な場合、TLK 100j アンテナのみ 回します。 を使用するようにしてください。他のアンテナを使 用すると、無線機が損傷します。推奨するアンテナ 無線機の電源のオンまたはオフ については、認可されたアクセサリ リスト ページ を参照してください。 無線機の電源を入れるには、電源・情報ボタンを長 • 無線機の電源を切ります。 押しします。 注記: アンテナを取り付けるには、アンテナをレセプタク • 充電中の無線機に電源を入れるには、電源・ ルにセットして時計回りに回します。... -
Page 43: 音量の調節
日本語 音量の調節 音量レベルを上げるには、音量アップボタンを押し • ます。 音量レベルを下げるには、音量ダウンボタンを押し • ます。... -
Page 44: 章 2: 無線機コントロール
日本語 無線機コントロール 5 音量アップおよび音量ダウン ボタン 6 サイドボタン (メニュー・連絡先選択) この章では、無線機を制御するボタンと機能について説明 7 LED 表示部 します。 8 マイク 9 USB 端子 10 オーディオアクセサリ端子 11 高音量スピーカ 12 LTE アンテナ 13 充電端子 1 スクロールノブ (グループ・連絡先選択) 2 電源・情報ボタン 3 LED インジケータ 4 PTT (プッシュトゥトーク) ボタン... -
Page 45: 章 3: ステータス インジケータ
日本語 ステータス インジケータ アイコン 説明 明るさレベル この章では、無線機で使用されるアイコン、電池残量の情 報表示、LED インジケータ、およびトーンについて説明し 作業中モード オン ます。 作業中モード オフ アイコン 音声ガイダンス オン 次の表に、無線機の表示部に表示されるアイコンとその説 明を示します。 音声ガイダンス オフ 表 1: 表示部アイコン アラート音 オン アイコン 説明 アラート音 オフ 電池残量レベル LTE 信号レベル 充電中 LTE 接続に失敗/SIM なし/無効な 充電エラー Wi-Fi 信号レベル 音量レベル... -
Page 46: 電池残量
日本語 電池残量 アイコン 説明 無線機の位置情報 オン 次の表に、無線機の電池残量に関する情報を示します。電 源・情報ボタンを押すと、アイコンと LED が表示されま す。 無線機の位置情報 オフ ソフトのダウンロード/ソフトの 表 2: 電池残量 アップデート アイコン 音声ガイダン 残量の状態 ログを作成/ログのアップロー ス ド 緑点 まんじゅうで 80% - 100% Bluetooth オン 灯 ん 黄色 ざんりょう 60% - 80% Bluetooth オフ ちゅう... -
Page 47: Led インジケータ
日本語 アイコン 音声ガイダン 残量の状態 動作モード 充電専用モー ス ド 赤点 ざんりょう 5% 未満 赤点滅 圏外 充電失敗 • • 滅 てい 充電失敗 電池パッ • • クのエラ 電池パックのエ • LED インジケータ ー ラー LED インジケータは、無線機の操作時の状態と電池パック 赤点滅 無線範囲外 無線範囲外 の充電時の状態を示します。 緑色と黄色点 作業中モード 滅 表 3: 操作時の状態と充電時の状態 黄色点滅... -
Page 48: トーン
日本語 トーン 瞬間トーン 以下は、無線機のスピーカから鳴るトーンです。 無線機で設定した短いトーンが 1 回鳴ります。 インジケータ トーン 高いトーン タスクを実行するアクションが行われた後、インジケータ 低いトーン トーンによりステータスが音声で通知されます。 オーディオ トーン ポジティブ インジケータ トーン オーディオ トーンは、無線機の状態や無線機が受信したデ ータへの応答を音で知らせます。 ネガティブ インジケータ トーン 連続トーン モノ トーン音。終了まで連続音が鳴ります。 定期トーン 無線機で設定した期間、定期的に音が鳴ります。トーン が開始、中止、反復されます。 反復トーン ユーザーが停止するまで、 シングル トーンが繰り返され ます。... -
Page 49: 章 4: 無線機通話
日本語 無線機通話 緑色の LED が点滅します。 • 無線機は、発信者の音声をミュート解除する前に着信ア • ラート音を一瞬再生します。 この章では、通話の受信、応答、発信、停止の操作につい て説明します。通話は、グループ通話、個別通話、および 1 通話を開始するには、PTT ボタンを押します。 ブロードキャスト通話をサポートしています。 緑色の LED が点灯します。 グループと連絡先リスト 2 通信開始ビープ音が鳴り止むまで待機し、マイクに グループと連絡先リストを表示してスクロールするには、 向かってはっきりと話します。 スクロールノブ (グループ・連絡先選択) を使用します。 3 相手の声を聴くには、PTT ボタンを放します。 グループと連絡先の切り替え 注記: 音声アクティビティがないまま、事前に定め グループと連絡先を切り替えるには、サイドボタン られた時間が経過すると、 通話が終了します。 (メニュー・連絡先選択) を長押しします。 グループ通話の発信 グループ通話 1 アクティブなグループのチャネルを選択します。 ユーザー... -
Page 50: 個別通話
日本語 3 通信開始ビープ音が鳴り止むまで待機し、マイクに 2 連絡先を選択するには、スクロールノブ (グループ・ 向かってはっきりと話します。 連絡先選択)を使用して、目的の連絡先が表示される まで連絡先リストをスクロールします。 4 相手の声を聴くには、PTT ボタンを放します。 注記: 相手先の無線機が応答すると、LED が緑色に点滅し 連絡先の前に「X」がある場合、連絡先は作業 ます。 表示部にグループのエイリアスが表示されま 中モードであるため、PTT ボタンを押すと拒 す。 否トーンが鳴ります。 注記: 3 PTT ボタンを押して通話を発信します。 音声アクティビティがないまま、事前に定め られた時間が経過すると、通話が終了しま 緑色の LED が点灯します。表示部に、発信者のエイ す。 通話を開始する前の画面に戻ります。 リアスが表示されます。 4 通信開始ビープ音が鳴り止むまで待機し、マイクに 個別通話 向かってはっきりと話します。 個別通話とは、1 台の無線機から別の 1 台の無線機への通 5 相手の声を聴くには、PTT ボタンを放します。... - Page 51 日本語 送信無線機で PTT ボタンが離された瞬間、 短いアラート • 音が鳴ります。これは、そのチャネルが応答できるよう になったことを示します。 1 通話を開始するには、PTT ボタンを押します。 緑色の LED が点灯します。 2 通信開始ビープ音が鳴り止むまで待機し、マイクに 向かってはっきりと話します。 3 相手の声を聴くには、PTT ボタンを放します。 注記: 音声アクティビティがないまま、事前に定め られた時間が経過すると、 通話が終了します。...
-
Page 52: 章 5: ユーティリティ
日本語 ユーティリティ 8 ログのアップロード 9 無線機名 この章では、無線機で使用できるユーティリティ機能の操 作について説明します。 電池残量の確認 無線情報の確認 下記の手順に従って、電池残量レベルを確認します。 電源・情報ボタンを繰り返し短押しします。 電源・情報ボタンを押します。 モード/状態に応じて、無線機に次のいずれかが表示 下記のいずれかの状態になります。 されます。 LED が緑色に点灯し、満充電状態であることを示しま • 1 無線機能停止 す。 2 電池残量/充電時の状態 LED が黄色に点灯し、 残量が中程度であることを示しま • 3 Wi-Fi の状態 す。 4 携帯電話の状態 LED が赤色に点滅し、 残量が少なくなっていることを示 • します。 5 ソフトウェアのダウンロード 6 ソフトのアップデート... -
Page 53: Lte および Wi-Fi の値
日本語 LTE および Wi-Fi の値 作業中モードのオン オフの切り替え 表示されるバーの数は、無線機の信号強度を表します。 1 メニュー項目のリストをスクロールするには、サイ バーが 4 本のときが最大強度です。このアイコンは受信時 ドボタン (メニュー・連絡先選択) を短押ししま のみに表示されます。 す。 2 [作業中モード] アイコンを確認します。 LTE または Wi-Fi の信号強度を確認 3 作業中モードをオンにするには、音量アップ ボタン [LTE 信号強度] アイコンまたは [Wi-Fi 信号強度] ア を押します。オフにするには、音量ダウン ボタンを イコンが表示されるまで、電源・情報ボタンを長押 押します。 しします。 作業中モードがオンの場合、次の状態になります。 無線機に、現在の値を示す... -
Page 54: 音声ガイダンスのオンとオフの切り替え
日本語 音声ガイダンスのオンとオフの切り替 表示部で [音声ガイダンス] アイコンの横に「X」マーク • が表示されます。 え 音声ガイダンス トーンがすべてオフになります。 • 音声ガイダンス機能により、無線機の音声フィードバック が有効になります。 無線機のアラート音のオン オフの切り 替え 1 メニュー項目のリストをスクロールするには、サイ ドボタン (メニュー・連絡先選択) を押します。 1 メニュー項目のリストをスクロールするには、サイ 2 [音声ガイダンス] アイコンを確認します。 ドボタン (メニュー・連絡先選択) を押します。 3 音声ガイダンスをオンにするには、音量アップ ボタ 2 [アラート音] アイコンを確認します。 ンを押します。オフにするには、音量ダウン ボタン を押します。 3 アラート音をオンにするには、音量アップ ボタンを 押します。オフにするには、音量ダウン... -
Page 55: 表示部の明るさの調整
日本語 無線機の位置情報のオン オフ 音声ガイダンスが、全てのアラート音がオフであること • を通知します。 注記: 表示部で [アラート音] アイコンの横に「X」マークが表 • この機能は、有効な場合にのみアクセスできます。 示されます。 詳細については、ディーラーまたはシステム管理者 音およびアラートはすべてオフです。 にご確認ください。 • 表示部の明るさの調整 1 メニュー項目のリストをスクロールするには、サイ ドボタン (メニュー・連絡先選択) を押します。 1 メニュー項目のリストをスクロールするには、サイ 2 [無線機の位置情報] アイコンを確認します。 ドボタン (メニュー・連絡先選択) を押します。 3 [無線機の位置情報] をオンにするには、音量アップ 2 [表示部の明るさ] アイコンを確認します。 ボタンを押します。オフにするには、音量ダウン ボ タンを押します。 3 明るさレベルを選択するには、音量ボタンで切り替... -
Page 56: Wi-Fi のオン/オフの切り替え
日本語 LTE 無線機の電源のオン オフ 表示部で [位置情報] アイコンの横に「X」マークが表示 • されます。 1 メニュー項目のリストをスクロールするには、サイ Wi-Fi のオン/オフの切り替え ドボタン (メニュー・連絡先選択) を押します。 2 [LTE] アイコンを確認します。 1 メニュー項目のリストをスクロールするには、サイ ドボタン (メニュー・連絡先選択) を押します。 3 LTE をオンにするには、音量アップ ボタンを押しま す。オフにするには、 音量ダウン ボタンを押します。 2 [Wi-Fi] アイコンを確認します。 LTE がオンの場合、次の状態になります。 3 Wi-Fi をオンにするには、 音量アップ ボタンを押しま 音声ガイダンスが、LTE がオンであることを通知しま... -
Page 57: Bluetooth
Bluetooth Bluetooth 接続を介して、お使いの無線機と Bluetooth 対応 1 メニュー項目のリストをスクロールするには、サイ デバイス (アクセサリ) を連携できます。お使いの無線機で ドボタン (メニュー・連絡先選択) を押します。 は、 Motorola Solutions 製および COTS (市販既製品) の両方 の Bluetooth 対応デバイスをサポートしています。 2 [Bluetooth] アイコンを確認します。 Bluetooth は、 直線距離 10 メートル (32 フィート) の範囲内 で動作します。これは、 無線機と Bluetooth 対応デバイスと 3 Bluetooth をオンにするには、音量アップボタンを押... -
Page 58: Bluetooth デバイスの検索
日本語 Bluetooth デバイスの検索 Bluetooth デバイスからの切断 他の Bluetooth デバイスを検索するには、電源・情報 1 Bluetooth アクセサリが通信範囲外に出た、またはオ ボタンを [Bluetooth] アイコンが表示されるまで押し フになっている場合、無線機から自動的に切断され ます。 ます。 Bluetooth アクセサリから切断後、通知トーンが無線 無線機に [Bluetooth 検索] アイコンが表示され、音声 機から鳴ります。 ガイダンスが Bluetooth を検索中であることを通知 します。 2 再接続タイマーで設定されている時間内、無線機は 同じ Bluetooth アクセサリに再接続を試行します。 Bluetooth デバイスへの接続 スキャン 1 検索中、 無線機は最後に接続された Bluetooth アクセ サリを検索します。... -
Page 59: スキャンのオンとオフの切り替え
日本語 注記: 表示部で [スキャン] アイコンの横に「X」マークが表示 • スキャン モード中に作業中モードが有効の場合、無 されます。 線機は作業中モードを優先します。 スキャンのオンとオフの切り替え 1 メニュー項目のリストをスクロールするには、サイ ドボタン (メニュー・連絡先選択) を押します。 2 [スキャン] アイコンを確認します。 3 スキャンをオンにするには、音量アップ ボタンを押 します。オフにするには、音量ダウン ボタンを押し ます。 スキャンがオンの場合、次の状態になります。 音声ガイダンスが、スキャンがオンであることを通知し • ます。 表示部で [スキャン] アイコンの横にチェック マークが • 表示されます。 黄色の LED が点滅します。 • スキャンがオフの場合、次の状態になります。 音声ガイダンスが、スキャンがオフであることを通知し... -
Page 60: 章 6: 認可されたアクセサリ リスト
日本語 認可されたアクセサリ リスト 充電器 Micro USB 充電器、5W、100V ~ 240V、日本プラグ • (PS000042A11) Motorola Solutions では、お使いの無線機の生産性を向上さ せるアクセサリのリストをご用意しています。 マルチユニット充電器、日本プラグ (PMLN7107_) • シングルユニット急速充電器、日本プラグ • アンテナ (PMLN7115_) アンテナ識別バンド、グレー、10 個パック • 小型イヤホンとイヤピース (32012144001) アンテナ識別バンド、黄、10 個パック (32012144002) 有線リモート スピーカ マイク (EP 110) • • アンテナ識別バンド、緑、10 個パック (32012144003) インライン... - Page 61 日本語 その他のアクセサリ 電池ドア (HKLN4678_) •...
-
Page 62: バッテリおよび充電器の保証
MOTOROLA, MOTO, MOTOROLA SOLUTIONS and the Stylized M Logo are trademarks or registered trademarks of Motorola Trademark Holdings, LLC and are used under license. All other trademarks are the property of their respective owners. © 2019 Motorola Solutions, Inc. All rights reserved.
Need help?
Do you have a question about the TLK 100j and is the answer not in the manual?
Questions and answers