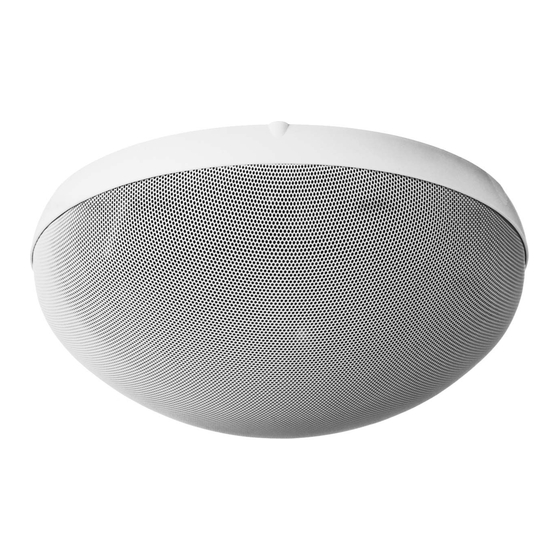
Toa H-2 Operating Instructions Manual
Hide thumbs
Also See for H-2:
- Operating instructions manual (12 pages) ,
- Brochure & specs (6 pages) ,
- Specifications (2 pages)
Table of Contents
Advertisement
Quick Links
SPEAKER SYSTEM
Please follow the instructions in this manual to obtain the optimum results from this unit.
We also recommend that you keep this manual handy for future reference.
TABLE OF CONTENTS
OPERATING INSTRUCTIONS
TOA Corporation
H-2
H-2WP
2
3
3
3
4
5
8
9
9
10
10
11
11
11
12
12
Advertisement
Table of Contents

Summary of Contents for Toa H-2
-
Page 1: Table Of Contents
6.3. Mounting the Speaker using Supporting Rails 6.4. Removing the Front Grille 7. OUTDOOR USE (H-2WP ONLY) 7.1. Waterproofing 7.2. Speaker Mounting Angle 8. REPAINTING THE GRILLE AND TRIM PIECE 9. PROTECTION CIRCUITRY INFORMATION 10. EQUALIZATION 11. SPECIFICATIONS Accessories TOA Corporation... -
Page 2: Safety Precautions
When the Unit is in Use • Should the following irregularity be found during use, immediately stop operating the unit and contact your nearest TOA dealer. Make no further attempt to operate the unit in this condition as this may cause fire or electric shock. -
Page 3: General Description
• Detachable screw terminals facilitate connection. Dual positive and negative terminals also facilitate bridge connections. • The H-2's enclosure and front grille are made of fire-resistant ABS (UL Standard 94: V-0 Grade). • The structure of the speaker's front grille is specially designed for ease of refinishing and repainting. -
Page 4: Nomenclature
5. NOMENCLATURE [Front Panel] [Side Panel] Unit: mm Front grille (Grille) Front grille (grille frame) [Side Panel] Anti-slip piece Aiming marker [Rear Panel] Accessory (Base frame) Lock tab Detachable input connector Connector for impedance selection [Installation Example] (For mounting to an electrical box) -
Page 5: Installation
6. INSTALLATION 6.1. Direct Wall/Ceiling Mounting Step 1. Base frame mounting 1-1. Pull the cables out of the wall or ceiling through the hole in the center of the base frame, then strip the insulation back about 5mm from the cable ends. •... - Page 6 2-2. Insert the stripped cable ends into the input • When not bridging • When bridging connections connections connector, and tighten the connector screws. From amplifier Note When not bridging connections, be sure to also tighten the screws of the terminals not in use to avoid vibration or rattle noises.
- Page 7 Step 3. Speaker and grille mounting 3-1. Rotate the three speaker lock tabs away from their Lock tab locking position on the edge of speaker. 3-2. After aligning the speaker with the base frame, rotate Base frame the three lock tabs back into position to clamp the speaker to the base frame.
-
Page 8: Mounting The Speaker Using An Electrical Box
3-4. Set the front grille's aiming marker to the speaker Speaker front Stud screw front (i.e. speaker orientation) so that the three stud screws align with the corresponding stud receptacles, then push the grille onto the speaker. Stud receptacle Aiming marker 6.2. -
Page 9: Mounting The Speaker Using Supporting Rails
6.3. Mounting the Speaker using Supporting Rails The speaker system can also be mounted to walls or ceilings using supporting rails. Mount the base frame to the rails using four holes shown in the figure below. Follow Steps 2 and 3. 6.4. -
Page 10: Outdoor Use (H-2Wp Only)
7. OUTDOOR USE (H-2WP ONLY) 7.1. Waterproofing The H-2WP's base frame has a gasket for watertightness. To completely prevent water from getting into a gap between the base frame and wall or ceiling panel, apply Gasket caulking agent over the inside of the gasket before mounting the base frame. -
Page 11: Repainting The Grille And Trim Piece
10. EQUALIZATION • The H-2 and H-2WP are designed to provide good quality sound without additional equalization. However, by equalizing them as shown below, sounds can be made more powerful and intelligible. -
Page 12: Specifications
Note : The design and specifications are subject to change without notice for improvement. • Accessories Base frame UNC No. 6-32 x 32 mm Electrical box mounting screw Spring washer M4 x 25 Plain washer UNC No. 8-32 x 32 mm Printed in Japan TOA Corporation 133-01-415-8A...


Need help?
Do you have a question about the H-2 and is the answer not in the manual?
Questions and answers