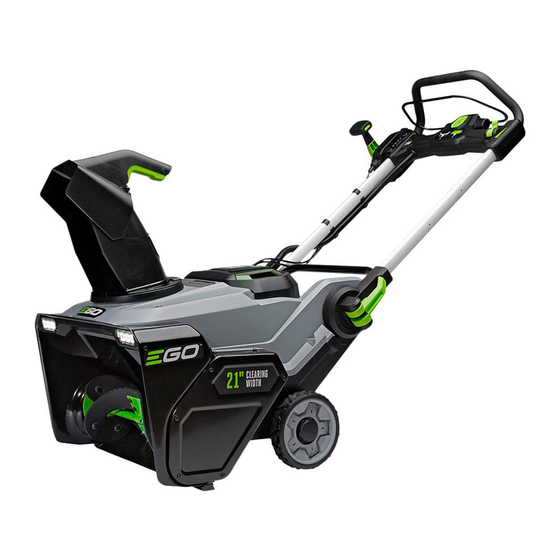
EGO POWER + SNT2100 Operator's Manual
56-volt lithium-ion cordless brushless snow blower
Hide thumbs
Also See for POWER + SNT2100:
- Operator's manual (108 pages) ,
- Operator's manual (108 pages)
Advertisement
Advertisement
Table of Contents

Related Manuals for EGO POWER + SNT2100


Summary of Contents for EGO POWER + SNT2100
- Page 1 OPERATOR'S MANUAL 56-VOLT LITHIUM-ION CORDLESS BRUSHLESS SNOW BLOWER Français p. 35 Español p. 71 MODEL NUMBER SNT2100 WARNING: To reduce the risk of injury, the user must read and understand the Operator’s Manual before using this product. Save these instructions for future reference.
-
Page 2: Table Of Contents
TABLE OF CONTENTS Safety Symbols ......... . 4 Safety Instructions . - Page 3 READ ALL INSTRUCTIONS! READ & UNDERSTAND INSTRUCTION MANUAL WARNING: Some dust created by power cutting contains chemicals known to the state of California to cause cancer, birth defects or other reproductive harm. Some examples of these chemicals are: ◾ ◾ Lead from lead-based paints ◾...
-
Page 4: Safety Symbols
SAFETY SYMBOLS The purpose of safety symbols is to attract your attention to possible dangers. The safety symbols and the explanations with them deserve your careful attention and understanding. The symbol warnings do not, by themselves, eliminate any danger. The instructions and warnings they give are no substitutes for proper accident prevention measures. -
Page 5: Safety Instructions
SAFETY INSTRUCTIONS This page depicts and describes safety symbols that may appear on this product. Read, understand, and follow all instructions on the machine before attempting to assemble and operate. Safety Alert Indicates a potential personal injury hazard. Always wear safety goggles or safety glasses Eye Protection with side shields and a full face shield when operating this product. -
Page 6: Safe Operation Practices For Walk-Behind Snow Blower
Minutes Time Alternating Type of current Current Direct Current Type or a characteristic of current No Load Speed Rotational speed, at no load ... /min per Minute Revolutions per minute WARNING: To ensure safety and reliability, all repairs should be performed by a qualified service technician. - Page 7 ◾ ◾ If the snow blower strikes a foreign object follow these steps: 1) Stop snow blower. Release the switch. 2) Remove the battery packs. 3) Inspect for damage. 4) Repair any damage before restarting and operating the snow blower. ◾...
- Page 8 OPERATION ◾ ◾ Do not put hands or feet near or under rotating parts. Keep clear of the discharger opening at all times. ◾ ◾ Exercise extreme caution when operating on or crossing gravel drives, walks, or roads. Stay alert for hidden hazards or traffic. ◾...
- Page 9 ◾ ◾ Use only with the battery packs and chargers listed below: BATTERY PACK CHARGER CH2100 BA1120, BA1400, BA2240 BA2800, BA4200 CH5500 NOTICE: For best performance, recommend for use with 2pcs 4.0Ah or higher Ah batteries. CLEARING A CLOGGING DISCHARGE CHUTE Hand contact with the rotating auger assembly inside the discharge chute is the most common cause of injury associated with snow blowers.
-
Page 10: Specifications
It has been designed, engineered and manufactured to give you the best possible dependability and performance. Should you experience any problem you cannot easily remedy, please contact EGO customer service center 1-855-EGO-5656. This manual contains important information on to the safe assembly, operation and maintenance of your snow blower. -
Page 11: Assembly
ASSEMBLY WARNING: To prevent accidental starting that could cause serious personal injury, always remove the battery packs from the tool when assembling parts. WARNING: If any parts are damaged or missing, do not operate this product until the parts are replaced. Use of this product with damaged or missing parts could result in serious personal injury. - Page 12 UNFOLDING/FOLDING THE SIDE RAILS WARNING: Do not attempt to start the snow blower when the side rails are folded down. To unfold the side rails 1. Your snow blower is shipped with the side rails in the compact, locked position (Fig. 1). 2.
- Page 13 To fold the side rails 1. Push the chute-rotation handle forward to the farthest so that the chute is towards left discharging direction and tilt down the chute deflector maximumly by squeezing the trigger in the chute deflector handle (Fig. 5). 2.
- Page 14 INSTALLING THE CHUTE Chute 1. Loosen the two bolts in the chute Housing housing with the supplied hex wrench and remove them from the chute housing (Fig. 7). 2. Align the grooves of the chute with the slot on the chute housing and then push the chute into place (Fig.
-
Page 15: Description
DESCRIPTION Handle Safety Button Chute-Rotation Handle Bail Switch (Switch Lever) Knobs Variable Auger Battery Cover Speed Adjustment Side Rail Rear Handle Chute-Deflector Handle Quick Release Lever Chute Deflector Back Housing Main Housing Wheels Drive-Belt Cover Front Metal Deck Battery-Release Button LED Headlights Rubber Paddle Switch Button for... - Page 16 Safety Button The safety button must be pressed down before the motor can be started. Bail Switch The bail switch is located on the upper handle of the snow blower. The switch engages and disengages the motor and auger. WARNING: The bail switch and the safety button are safety devices.
-
Page 17: Operation
OPERATION WARNING: Do not allow familiarity with this product to make you careless. Remember that a careless fraction of a second is sufficient to inflict serious injury. WARNING: Always wear eye protection with side shields marked to comply with ANSI Z87.1. Failure to do so could result in objects being thrown into your eyes and other possible serious injuries. - Page 18 TO ATTACH/DETACH THE BATTERY PACK CHARGE BEFORE FIRST USE. NOTE: For best performance, we recommend for use with 2 x 4.0Ah batteries and higher Ah arc lithium 56V batteries. WARNING: If any parts are broken or missing, do not attempt to attach the battery packs to the snow blower or operate the snow blower until the broken or missing parts are replaced.
- Page 19 STARTING/STOPPING THE SNOW BLOWER CAUTION: Do not attempt to override the operation of the safety button and bail switch. WARNING: The operation of a snow blower can result in foreign objects being thrown into your or others’ eyes, which can damage eyes severely.
- Page 20 NOTICE: The tool can only be started by depressing the safety button first, followed by squeezing the bail switch; the reverse operation will not start the tool. To Stop the Snow Blower Bail Switch (Fully released) 1. Fully release the bail switch (Fig. 16). Safety Button (Fully released) 2.
- Page 21 The throwing distance of the snow blower is adjusted by moving the chute Triggle deflector up or down (Fig. 19). Release the bail switch before adjusting the chute deflector. Chute Deflector 1. Squeeze the trigger on the chute deflector handle and move the chute deflector up or down (Fig.
- Page 22 LED HEADLIGHTS (Fig. 20) The LED headlights are located on the front of the snow blower. 1. To turn on the lights, press the LED button (Fig. 21 & 22). The headlights provide bright light in front of the snow blower. Headlights 2.
- Page 23 POWER INDICATOR MEANING ACTION Snow blower is working Shining green properly; each battery has at least 15% of its charge. Both of batteries are low Stop the snow blower and Shining red charge. charge the battery packs. Both of batteries are Stop the snow blower and Flashing red nearly depleted.
- Page 24 BATTERY HIGH-TEMPERATURE PROTECTION To prevent battery high temperature protection, don’t try to use only one battery to power the snow blower when the snowfall is over 3 inch depth or snowfall in very wet/ icy condition. Always keep two batteries working simultaneously. This is helpful to release out the peak power of the snow blower.
- Page 25 ◾ ◾ If the unit comes in contact with any type of obstruction or debris during use, stop the snow blower, remove the battery packs, remove the obstruction, and inspect the unit carefully for damage before proceeding. WARNING: Never reach into the discharge chute or place any body part in front of the snow blower when the unit is operating or when the battery packs are installed.
-
Page 26: Maintenance
MAINTENANCE WARNING: To avoid serious personal injury, always remove the battery packs from the snow blower before cleaning or performing any maintenance. WARNING: When servicing, use only identical replacement parts. Use of any other parts may create a hazard or cause product damage. To ensure safety and reliability, all repairs should be performed by a qualified service technician. - Page 27 2. Turn the snow blower on its side (Fig. 24). 3. To reduce the risk of injury, please Bolt wear gloves first and then use a 4mm hex wrench to remove the 5 bolts (Fig. 24). Detach the worn Scraper Bar scraper bar from the snow blower (Fig.
- Page 28 REPLACING THE RUBBER 8 sets of bolts PADDLE and nuts WARNING: Make sure to turn off the bail switch, remove the battery packs before performing any maintenance task on your snow blower. 4 sets of bolts, washers and NOTICE: nuts separately on both sides When replacing the worn rubber paddles, pay close attention to the order in which you remove them.
- Page 29 2. Remove the spring from the hook by needle nose pliers (not included) to release the belt tension (Fig. 30 & 31). 3. Remove the drive belt by slowly turning the auger pulley counterclockwise while pulling the belt outwards (Fig. 32). Needle nose pliers 4.
- Page 30 STORING THE SNOW BLOWER CAUTION: Ensure all melted snow that may drip from the snow blower is properly wiped up to prevent a slip and fall hazard. ◾ ◾ Remove the battery packs and store in a secure location out of the reach of children.
-
Page 31: Troubleshooting
TROUBLESHOOTING WARNING: Always remove the battery packs when servicing or transporting the snow blower. Always protect your hands by wearing gloves when performing any maintenance on the snow blower auger or scraper. PROBLEM CAUSE SOLUTION ◾ ◾ ◾ ◾ Knobs on the side rails Make sure that knobs on the and/or handle-clamp side rails are fully tightened and... -
Page 32: Warranty
LIMITED SERVICE WARRANTY FOR FIVE YEARS from the date of original retail purchase, this EGO product is warranted against defects in material or workmanship. Defective product will receive free repair. FOR THREE YEARS from the date of original retail purchase, the EGO Power+ System battery pack and charger are warranted against defects in material or workmanship. - Page 33 This warranty gives you specific legal rights, and you may also have other rights which vary from state to state. For customer service contact us toll-free at:1-855-EGO-5656 or EGOPOWERPLUS.COM EGO Customer Service, 120 Ionia Street SW / Suite 102 Grand Rapids, MI 49503 56V LITHIUM-ION CORDLESS BRUSHLESS SNOW BLOWER — SNT2100...
Need help?
Do you have a question about the POWER + SNT2100 and is the answer not in the manual?
Questions and answers