Table of Contents
Advertisement
Advertisement
Table of Contents

Related Manuals for SKY-WATCHER Star Adventurer 2i


Summary of Contents for SKY-WATCHER Star Adventurer 2i
- Page 1 INSTRUCTION MANUAL Star Adventurer 2i 200430V1 Copyright © Sky-Watcher...
- Page 2 Mode Dial which allows you to use your favorite settings without initiating the Wi-Fi communication. For your Safety To prevent damage to your Sky-Watcher product or injury to yourself or to others, read the following safety precautions entirely before using this equipment. Keep these safety instructions available to all users of the product.
-
Page 3: Table Of Contents
CONTENT Features ............................Introduction ............................ The Sky-Watcher Star Adventurer 2i Body ..............The Optional Accessories ....................Preparation ............................ Setup Tripod ......................Mount Star Adventurer 2i ....................Mount The Imaging Equipment ..................For Astrophotography ..................For Time-Lapse Photography ................ Provide Power Source .................. -
Page 4: Features
Features: • High precision, portable and stable celestial tracking system • Built-in Wi-Fi with free App for Android and iOS platforms • Multi-language support • Solar, lunar, sidereal and customized tracking speeds for astrophotography • Supports unguided dithering option for easily removing hot/cold pixels •... -
Page 5: Introduction
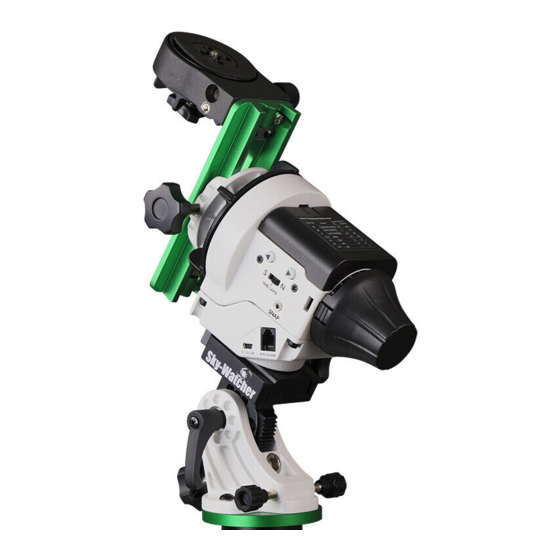
Introduction: The Sky-Watcher Star Adventurer 2i Body 1:Mode Dial 14:Mounting Platform 2:Mode Index 15:Locking Knob 3:Polar Scope Cap 16:Knurled Ring of Polar Scope 4:Battery Case Cover 17:Polar Scope 5:Polar Scope Cover 18:Date Graduation Circle 6:Quick Polaris Finder 19:Time Meridian Indicator... -
Page 6: The Optional Accessories
1/4" to 3/8" Convert Screw Adapter - To convert the default socket for 3/8" thread screw to the socket for 1/4" thread screw in order to mount the Star Adventurer 2i to a standard quick release plate of the tripod with 1/4" thread screw. - Page 7 DSLR Shutter Control Cable - To connect the DSLR Shutter Control Port of Star Adventurer 2i to your DSLR's external shutter control port. This allows Star Adventurer 2i to directly control the DSLR's shutter release with preprogrammed shutter interval. You can order an optional cable for your camera from your local resellers.
-
Page 8: Preparation
With Equatorial Wedge: Make sure the 1/4" to 3/8" Convert Screw Adapter is not in the 3/8" threaded socket at the bottom side of the Star Adventurer 2i. If it is, use a Slot Screwdriver to remove it. Mount the Star Adventurer 2i on the (optional) Equatorial Wedge (Fig 3). - Page 9 With Tilt-head/ Ball-head: Make sure the 1/4" to 3/8" Convert Screw Adapter is in the 3/8" threaded socket at the bottom of the Star Adventurer 2i. If it is not, use an Slot Screwdriver to install it. Mount the Star Adventurer 2i to the quick release plate on the tripod.
-
Page 10: Mount The Imaging Equipment
For Astrophotography: Star Adventurer 2i +3/8” Ball Head Adapter + Ball head + Camera + Shutter Control Cable: Note: Make sure the locking bolt of the Mounting Platform has locked on the indentation on the side of the 3/8"... - Page 11 Star Adventurer 2i + Dovetail + Dual Ball Heads +Dual Cameras + Shutter Control Cable: Take the Dovetail from the Fine-Tuning Mounting Assembly to mount two Ball Heads Ball Head Star Adventurer 2i + Fine-Tuning Mounting Assembly + Ball-Head + Camera+ Telescope...
-
Page 12: For Time-Lapse Photography
For Time-Lapse Photography: (For reference only: you can assemble very different configurations to create more interesting time-lapse photography) Horizontal Rotation Time-Lapse Photography: Vertical Rotation Time-Lapse Photography:... -
Page 13: Provide Power Source
Provide Power Source: Star Adventurer 2i allows two power source options. One is inserting 4 AA type batteries; the other is providing DC 5V through USB port (type mini-B). insert 4 AA batteries plug in USB power... -
Page 14: Start Using Star Adventurer 2I
Start Using Star Adventurer 2i Overview: Star Adventurer 2i is the next generation of Star Adventurer. It's a compact and versatile camera tracking platform that lets you make truly unique photographs and time-lapse videos. While keeping previous high-accuracy tracking and the friendly Mode Dial with preprogrammed functions, it also adds Wi-Fi capability to allow users easily configure their favorite photographic settings through free Star Adventurer mini Console App. - Page 15 2 times of sidereal speed. For other modes, the auto-guiding signal has no effect. USB Port: Star Adventurer 2i contains a USB port (Type Mini-B) to support external USB power and to support control commands for firmware upgrade or App control.
-
Page 16: Led Status Indicators
Both of Mode Dial LED and Button LEDs Repeatedly Blink 3 times: Indicate the Star Adventurer 2i is ready for firmware update or firmware update is in progress. Now is time to learn more about Star Adventurer 2i in each of following sections. -
Page 17: Basic Operation In App Mode
"Wi-Fi Off on Run". To resume Wi-Fi, press the Right/Left Button briefly until the Button LEDs starting flashing. Re-connect to Wi-Fi as described above. Following we will start to explain the most popular function of Star Adventurer 2i, Astrophotography and explain how Star Adventurer 2i makes this challenge job... -
Page 18: Astrophotography And Astro Time-Lapse
With Star Adventurer 2i, astrophotography is now something you can do, too. You won’t be able to produce photographs that have the same image scale as those taken by the Hubble, but you will be able to make beautiful portraits of constellations and large regions of the Milky Way galaxy showing star clouds, star clusters, and light and dark nebulae. - Page 19 Earth’s rotation while a sufficiently long exposure of An equatorial mount rotates to the night sky is being made. Star Adventurer 2i’s prevent star trailing in your photo tracking capability keeps a specific area of the sky by precisely countering Earth’s...
-
Page 20: Astro Time-Lapse
In Astro Time-Lapse we take multiple images as well, and the camera moves with each exposure. But, unlike in astrophotography, Star Adventurer 2i returns the camera to the starting point after each exposure is completed. Now, when the frames are sequenced into a video, you see the night sky moving about a fixed terrestrial reference point. -
Page 21: Polar Alignment
Polar Alignment in the Northern Hemisphere To polar align Star Adventurer 2i with the NCP follow this procedure. It is best to do this at dusk when you can just see Polaris, but before it is completely dark so that you can more easily see what you are doing. - Page 22 12. After complete the polar alignment. Connect the SNAP camera control cable between Star Adventurer 2i and your camera. Point your camera at your subject, then proceed to set up Star Adventurer 2i via the Star Adventurer mini Console or 6 preprogrammed function modes.
- Page 23 Using the Polar Clock Utility for Polar Alignment in the Northern Hemisphere Now tap on the Polar Clock Utility in the Main Menu of the Star Adventurer mini Console. Tap on Northern Hemisphere if it is not already selected. The app shows you a drawing that matches the view in the Polar Scope.
-
Page 24: Polar Alignment In The Southern Hemisphere
Polaris situated just 2/3 of a degree from the North Celestial Pole. This makes a quick alignment of an equatorial device like Star Adventurer 2i very easy to accomplish. Just find Polaris and point Star Adventurer 2i so that you can see Polaris in the field of view of the Polar Scope. - Page 25 Using the Sigma Octantis Clock Utility Once you can see the Sigma Octantis group in your Polar Scope field of view you are ready to fine-tune your polar alignment to the SCP. 1. Bring up the Star Adventurer mini Console and tap on the Polar Clock Utility.
-
Page 26: Using Star Adventurer Mini Console In App Mode
Using Star Adventurer mini Console in APP mode Now that you have Star Adventurer 2i set up with your camera gear attached it’s time to learn how to use the Star Adventurer mini Console. This section assumes that you installed the app on your device. -
Page 27: Using The Star Adventurer Mini Console For Astrophotograhy
Star Adventurer 2i can be set to track “nearby” objects more accurately by setting this parameter. Choose Sidereal if you are taking a constellation or Milky Way portrait and Lunar if you are tracking the Moon (e.g., to record the stages of... - Page 28 Star Adventurer 2i control the camera shutter and is not guided through Auto-Guiding Port. WiFi Off on Run: When enabled, Star Adventurer 2i will automatically turn off Wi-Fi at the start of a task to save power. Wi-Fi can be restored at any time in APP mode by pressing the Right/Left Button until Button LEDs start slowly blinking.
-
Page 29: Using The Star Adventurer Mini Console For Astro Time-Lapse
Using the Star Adventurer mini Console For Astro Time-Lapse One of the most unique features of Star Adventurer 2i is its ability to create time-lapse videos of celestial vistas. This feature combines Star Adventurer 2i’s astrophotography functions with its time-lapse functions giving you a powerful tool to create stunning and unique time-lapse videos. - Page 30 Start the Task: Once your tripod, Star Adventurer 2i and camera gear are set up and all of your task parameters are set, just press Run to initiate the task.
-
Page 31: Using The Star Adventurer Mini Console For Time-Lapse Photography
Lapse screen you cannot change the value for Exposure. It is fixed at 0.5 seconds, which is a requirement in order for Star Adventurer 2i to provide an adequate signal to control the shutter of your camera. Note: This 0.5 second period is automatically taken into consideration when the App calculates the Video Time Span parameter. - Page 32 Speed (Deg/Hr): Speed determines how quickly Star Adventurer 2i will pan. In most cases, you do not need to set this parameter unless you want to control the panning speed but are not concerned with the actual video time span.
- Page 33 Start the Task: Once your tripod, Star Adventurer 2i and camera gear are set up and all of your task parameters are set, just press Run to initiate the task.
-
Page 34: Manual Control With The Star Adventurer Mini Console
Tap or touch and hold the arrow symbols to nudge or continuously move Star Adventurer 2i to the left or right, respectively. Release the arrow symbol to stop Star Adventurer 2i’s movement. The angle you have rotated through will show up between the arrows. -
Page 35: Settings With The Star Adventurer Mini Console
2i’s Right/Left Button. Note: Wi-Fi is not needed once parameters for a given task have been set. Auto-Run Task: If enabled, Star Adventurer 2i will automatically re-start the previous photography process when next time the Mode Dial is turned into APP mode. -
Page 36: Wifi Network
2i while simultaneously being connected to a wireless network (e.g., for internet access) or want to control Star Adventurer 2i remotely via the internet. Be sure that you have the correct STA SSID and Password information. If you enter the incorrect information you may need to reset Star Adventurer 2i to its factory settings using the procedure outlined in Appendix Ⅳ... -
Page 37: Six Preprogrammed Function Modes
Astrophotography mode with lunar tracking, Astro Time-lapse mode, Regular- Exposure Time-Lapse mode and Long-Exposure Time-Lapse mode. All you have to do is turning the Mode Dial to corresponding mode, then Star Adventurer 2i will automatically execute the preprogrammed function with your favorite settings. The default factory settings will be used if user haven't customized their own settings. -
Page 38: Appendix I : Calibrate The Polar Scope
4. If, during rotation, you see the object wandering off, calibration is needed. You should rotate the Star Adventurer 2i to find the point where the object is at the longest distance from the crosshair center, and then you should move the crosshair halfway towards the object (Fig 2), using the 3 tiny adjustment screws on the side of the Polar Scope (Fig 1). - Page 39 5. Repeat steps 1 to 4 a few times until the object remains at the center of the reticle when rotating the mount in R.A. axis. 6. Turn the Date Graduation Circle to align Oct 31 to the 0 of the Time Graduation Circle.
- Page 40 It is recommended to do this calibration at daytime, aiming at a point object (such as a • distant rooftop) because the delicate operation with the tiny allen screws is even more delicate in the dark.
-
Page 41: Appendix Ⅱ : Fine-Tuning Mounting Assembly
Fine-Tuning ¼’’ Mounting Element The Fine-Tuning Mounting Assembly connects a telescope to Star Adventurer 2i and allows rotation in the other direction (at 90°, DEC direction). You can adjust the tightness of the rotation with the clutch knob. You also can fine-tune the camera or telescope orientation slightly in DEC direction by using the fine-tuning knob. -
Page 42: Appendix Ⅲ : Equatorial Wedge
The accuracy is 1°. When you install the Mounting Plate on the Star Adventurer 2i, Make sure the Stopper is facing forward as figure shown above to avoid equipment slippage, before you fasten the Locking Knob. -
Page 43: Appendix Ⅳ : How To Restore Factory Settings
Appendix Ⅳ : How to Restore Factory Settings From time to time you may need to reset Star Adventurer 2i to its factory settings. For instance, if you accidentally enter any incorrect Wi-Fi settings or If you have forgotten the password, then you may need to restore Star Adventurer 2i to factory settings. - Page 44 Factory Settings for preprogrammed Landscape Time-Lapse Regular-Exposure Long-Exposure Exposure(sec) Frame Period (sec) Photos Swing Range (Deg) unchecked Swing Count Speed (Deg/Hr) unchecked Clockwise Slide-switch selection Slide-switch selection WiFi Off on Run Disabled Disabled...
-
Page 45: Appendix Ⅴ : Firmware Upgrade Procedure
1. Download “ Motor Controller Firmware Loader " V1.73 or higher and the newest firmware from www.skywatcher.com 2. Connect Star Adventurer 2i to the computer with the mini USB cable. If this is the first time the device is connected to this computer, please wait for a few minutes for the computer to load the driver. -
Page 46: Appendix Ⅵ : Specification
Appendix Ⅵ : Specification Sky-Watcher Star Adventurer 2i Type Ultra compact equatorial tracking platform Preprogrammed: Celestial, solar and lunar tracking rate Tracking speed APP controlled: Customized Max payload 5 kg (11 lb) Wheel Gear 86mm dia. 144 teeth aluminum alloy Worm Gear 13mm dia. - Page 47 Sky-Watcher cannot be held liable for any damage resulting from the inappropriate use of this product. While every effort has been made to ensure that the information in this manual is accurate and complete, any errors you might find should be reported to Sky-Watcher Copyright 2020.
- Page 48 CAUTION! EVER USE YOUR TELESCOPE TO LOOK DIRECTLY AT THE SUN. PERMANENT EYE DAMAGE WILL RESULT. USE A PROPER SOLAR FILTER FIRMLY MOUNTED ON THE FRONT OF THE TELESCOPE FOR VIEWING THE SUN. WHEN OBSERVING THE SUN, PLACE A DUST CAP OVER YOUR FINDERSCOPE OR REMOVE IT TO PROTECT YOU FROM ACCIDENTAL EXPOSURE.
Need help?
Do you have a question about the Star Adventurer 2i and is the answer not in the manual?
Questions and answers