Advertisement
Quick Links
SYNGUIDER Ⅱ USER'S MANUAL
060613V1
GETTING STARTED
PREPARING THE SYNGUIDER
BASIC OPERATIONS
OPERATION UNDER THE NIGHT SKY
SPECIFICATIONS
Thank you for choosing the SynGuider. The
SynGuider can guide an equatorial mount
without the help of a computer. It will
improve the image quality and help you
achieve pin-point stars in you long-exposure
photography.
1
3
4
9
15
Advertisement

Summary of Contents for SKY-WATCHER SynGuider II
- Page 1 SYNGUIDER Ⅱ USER'S MANUAL GETTING STARTED PREPARING THE SYNGUIDER BASIC OPERATIONS OPERATION UNDER THE NIGHT SKY SPECIFICATIONS Thank you for choosing the SynGuider. The SynGuider can guide an equatorial mount without the help of a computer. It will improve the image quality and help you achieve pin-point stars in you long-exposure photography.
- Page 2 ABOUT THE SYNGUIDER II PACKAGE Please take some time to check your new SynGuider II package and become familiar with each component. Some parts are installed on the SynGuider main body out of the box. You will need to uninstall them before using the SynGuider.
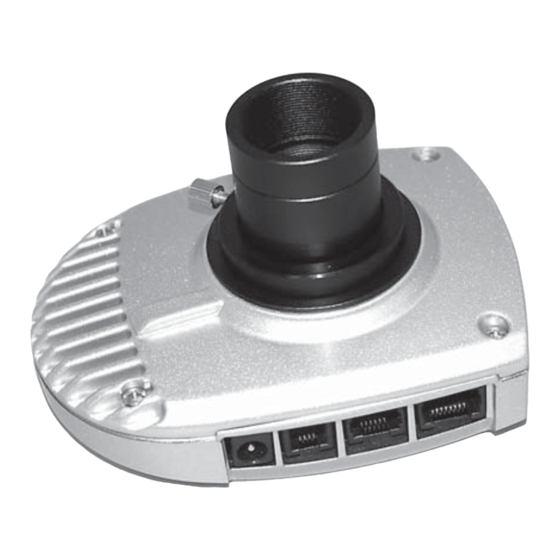
- Page 3 SYNGUIDER II MAIN BODY FRONT VIEW REAR VIEW A. M42 thread B. Image Sensor C. Power Jack D. USB Port E. Autoguider Port F. Hand Pad Port G. LCD Screen...
- Page 4 PREPARING THE SYNGUIDER PREPARING THE POWER SUPPLY User can use four D type 1.5V batteries (not included) with the battery case as the power supply for SynGuider. To use a different power supply, it must match the following require- ments: DC 4.5V~14V output voltage, a +5V power supply is recommended.
-
Page 5: Basic Operations
BASIC OPERATIONS It is highly recommended that you familiarize yourself with the basic operations of the SynGuider indoors before going out under the dark sky. ATTACHING SYNGUIDER TO A GUIDE SCOPE There are two ways to install the SynGuider on a guide scope: Option 1: The SynGuider can be threaded onto a telescope with a M42 thread adapter. - Page 6 BASIC OPERATIONS USING THE HAND CONTROL There are nine illuminated buttons on the hand pad: Menu: Used to open up the main menu. ESC: Used to cancel an operation or quit from the menu. Enter: Used to enter a submenu or confirm an operation. +: Used to increase the exposure time.
- Page 7 BASIC OPERATIONS OPERATING THE MENUS Press the Menu button to activate the main menu tree. Use the UP or DOWN buttons to scroll through the menu items. Press the ENTER or the RIGHT button to choose between the following submenus: ZM STAR or ZM CTR.
- Page 8 BASIC OPERATIONS GUIDE Menu: This menu is used to activate or de-activate autoguiding. Use the UP/DOWN button to choose from the following three options: AUTO CAL: The SynGuider will start an auto-calibration routine prior to the start of autoguiding. RESUME: The SynGuider will immediately start autoguiding with the previous guiding parameters. STOP: The SynGuider will stop autoguiding and return to the locked mode.
- Page 9 BASIC OPERATIONS If there is no noise spot appear in the image zone of the LCD, it might mean that the cut-off value is set too high and this might reduce the sensitivity of the SynGuider for detecting faint stars. You should reduce the cut-off value until you can see some noise dots diversify evenly in the image area.
- Page 10 OPERATING UNDER THE NIGHT SKY The key steps of operating the SynGuider are: Step 1: Adjust the focus (PREVIEW mode) Step 2: Align the SynGuider with the mount (Very important. Do not skip) Step 3: Find and lock a guide star (LOCKED mode) Step 4: Start autoguiding (GUIDING mode) The following sections explains the practical operations of the SynGuider: ADJUST FOCUS (PREVIEW MODE)
- Page 11 OPERATING UNDER THE NIGHT SKY Follow these steps to adjust the focus of the guide scope: 1). Insert an optical eyepiece into the eyepiece holder of the guide scope. Activate tracking of the mount. Center a bright star in the eyepiece’s field of view. 2).
- Page 12 OPERATING UNDER THE NIGHT SKY 1). Loosen the locking screw on the par-focal ring. Insert an optical eyepiece into the eyepiece holder through the par-focal ring, as shown on the right. 2). Slowly move the eyepiece in and out of the eyepiece holder until the image of the star is the sharpest.
- Page 13 OPERATING UNDER THE NIGHT SKY FINDING AND LOCKING A GUIDE STAR 1). Point the primary telescope to the target deep sky object (DSO). Activate tracking on the equatorial mount. The guide scope should also be pointed to the same region in the sky. 2).
- Page 14 OPERATING UNDER THE NIGHT SKY The diagram on the right is a example of the LCD display. LOCK: a) (DX, DY) are the locked star’s offset to its original locked position. b) (X0, Y0) are the position of the center of the image in 5.32 4.38 sensor’s pixel matrix.
- Page 15 OPERATING UNDER THE NIGHT SKY The following diagram is what you will see in the GUIDING mode. A crosshair is GUIDING displayed for you to Exposure time monitor the effects Brightness of the star of autoguiding. The R.A. and Dec. guiding center of the cross agressiveness in mS/Pixel is the position of...
-
Page 16: Specifications
2, 5, 15, 30, 70, 100, 200, 300, 400, 500, 600 mS SENSITIVITY Typically, the SynGuider II can capture and guide a star with up to the magnitude of 8.5 under the following conditions: Regular 80mm aperture refractor, 500ms exposure time, and good seeing...


Need help?
Do you have a question about the SynGuider II and is the answer not in the manual?
Questions and answers