Table of Contents
Advertisement
Available languages
Available languages
Quick Links
Advertisement
Chapters
Table of Contents

Related Manuals for Megasat Shipman Kompakt


Summary of Contents for Megasat Shipman Kompakt
- Page 1 Shipman Kompakt Bedienungsanleitung...
-
Page 2: Table Of Contents
Inhaltsverzeichnis 1. Einführung 1.1 Sicherheitshinweise Vorsicht - Unsachgemäße Handhabung kann zu schweren Schäden an diesem Gerät führen. Die Verantwortlichen können auch für daraus resultierende weite- 1. Einführung re Schäden am Gerät verantwortlich gemacht werden. 1.1 Sicherheitshinweise .......................03 1.2 Kurzbeschreibung ........................03 Hinweis –... -
Page 3: Systemkomponenten
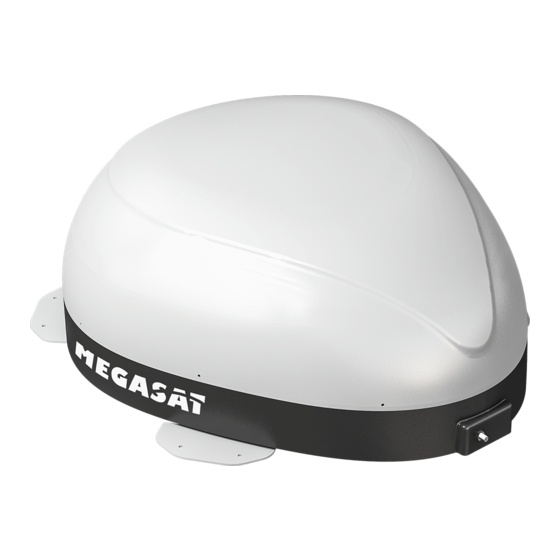
1. Einführung 1. Einführung 1.4 Systemkomponenten 1.5 Bezeichnungen und Anschlüsse Öffnen Sie den Karton und entnehmen Sie das Steuergerät, die Anschlusskabel und das Verpackungsmaterial. Heben Sie die Antenne gerade nach oben aus dem Karton. Stellen Sie die Anlage niemals auf den Kopf! Kunststoffgehäuse Montagefüße zum Steuergerät... -
Page 4: Satellitenübertragung
2. Satellitenübertragung 3. Anschluss der Komponenten Direct Broadcast Service (DBS) strahlt Audio, Video und Daten über den Satelliten aus, der sich in ca. 38.000 km Höhe über der Erde befindet. Mit einer Empfangsstation wie der Antenne und einem Satelliten Receiver werden die Signale vom Satelliten empfangen und verarbeitet. -
Page 5: Inbetriebnahme Und Bedienung
4. Inbetriebnahme und Bedienung 4. Inbetriebnahme und Bedienung 4.1 Betrieb während der Fahrt (Bewegungs-Modus) 4.4 Betrieb am festen Standort 1. Schalten Sie das Steuergerät am Netzschalter ein. 1. Vergewissern Sie sich, dass das Steuergerät ausgeschaltet ist. 2. Während dem Bootvorgang (ca. 15-30 Sekunden) leuchten alle Satelliten LEDs an der 2. -
Page 6: Firmwareupdate
6. Fehlerbehebung 5. Firmwareupdate 1. Kopieren Sie die Firmware-Datei (z. B. CONT_D_W.bin) auf einen USB Stick. Die Datei Es gibt eine Reihe von Ursachen, die die Empfangsqualität oder den Betrieb der Antenne muss sich im Hauptverzeichnis des USB Sticks befinden (ohne Unterordner). beeinflussen können. -
Page 7: Ausleuchtzone
7. Ausleuchtzone 8. Montageabmessungen Fahrtrichtung 83,8 cm Fahrtrichtung Hinweis In den Randgebieten der Ausleuchtzone kann es zu Empfangsstörungen kommen. DEUTSCH DEUTSCH... -
Page 8: Kabelverschraubung
9. Montage auf dem Dach 9. Montage auf dem Dach Vergewissern Sie sich vor der Montage, dass alle benötigten Teile und Werkzeuge bereit liegen! 1. Kabel zum Receiver (1 m) 2. Kabel zur Antenne (12 m) 3. Stromversorgungskabel 4. Spezialklebstoff 5. - Page 9 9. Montage auf dem Dach 9. Montage auf dem Dach Die benötigen Teile zur Montage der Dachdurch- Verlegen Sie das Kabel wie hier abgebildet. Versiegeln Sie mit dem Spezialklebstoff den Rand Verschrauben Sie die Dachdurchführung mit den führung. der Dachdurchführung. M4 x 20 Schrauben.
-
Page 10: Technische Daten
Gewicht und Abmessungen sind nicht die absolut exakten Werte. Technische Daten können jederzeit ohne vorherige Ankündigung geändert werden. Konformitätsinformation Hiermit erklärt die Firma Megasat Werke GmbH, dass sich folgendes Gerät in Überein- stimmung mit den grundlegenden Anforderungen und den übrigen einschlägigen Bestimmungen der Richtlinie EMC 2004/108/EC befindet: Megasat Shipman Kompakt (Artikel-Nr. - Page 11 Shipman Kompakt User manual Version 1.0 (Juni 2017) // Technische Änderungen, Druckfehler und Irrtümer vorbehalten. Megasat Werke GmbH | Industriestraße 4a | D-97618 Niederlauer | www.megasat.tv | info@megasat.tv...
- Page 12 Content 1. Introduction 1.1 Safety instructions Caution: Improper handling by unqualified personnel can cause serious dama- ge to this equipment. Unqualified personnel who tamper with this equipment may be held liable for any resultant damage to the equipment. 1. Introduction 1.1 Safety instructions..................
-
Page 13: System Components
1. Introduction 1. Introduction 1.4 System components 1.5 Description and connections Open the box and remove the controller, cables and packaging material. Lift the antenna straight up out of the box. Place the system never on the head! Plastic housing Mounting feet to control unit Control unit front view... -
Page 14: Satellite Transmission
2. Satellite transmission 3. Connecting the components Direct Broadcast Service (DBS) satellites broadcast audio, video and data information from satellites located 23.600 miles in space. A receiving station, such as the antenna, should include a dish and satellite receiver to receive the signals and process them for use by the consumer audio and video equipment. -
Page 15: Operation And Usage
4. Operation and Usage 4. Operation and Usage 4.1 Operation while driving (Motion mode) 4.4 Operation at stationary location 1. Switch on the control unit by pressing the power switch. 1. Make sure the control unit is switched off. 2. During the booting process (approx. 15-30 seconds), all satellite LEDs on the front of 2. -
Page 16: Firmwareupdate
6. Troubleshooting 5. Firmwareupdate 1. Copy the firmware file (eg. CONT_D_W.bin) to a USB stick. The file must be located There are a number of common issues that can affect the signal reception quality or the in the main directory of the USB stick (without subfolder). operation of the antenna. -
Page 17: Footprint
7. Footprint 8. Monting dimensions driving direction Footprint 83.8 cm driving direction Note In the outskirts of the footprint there may be interference. ENGLISH ENGLISH... -
Page 18: Mounting On The Roof
9. Mounting on the roof 9. Mounting on the roof Before installation make sure that all required parts and tools are available! 1. Cable to set-top box (1m) 2. Cable to antenna (12 m) 3. Power cable 4. Special adhesive 5. - Page 19 9. Mounting on the roof 9. Mounting on the roof The parts needed to install the roof outlet. Route the cable as shown here. Seal with special glue the edge of the roof outlet. Bolt the roof outlet with the M4 x 20 screws. Cover now the screw heads with the special glue.
-
Page 20: Specifications
Weight and dimensions are not absolutely exact values. Specifications are subject to change without notice. Conformity information Hereby declare the company Megasat Werke GmbH that the following devices is in compliance with the essential requirements and other relevant provisions of Directive EMC 2004/108/EC: Megasat Shipman Kompakt (Art-No. - Page 21 Shipman Kompakt Mode d’emploi Version 1.0 (June 2017) // Technical changes, misprints and errors reserved. Megasat Werke GmbH | Industriestraße 4a | D-97618 Niederlauer | www.megasat.tv | info@megasat.tv...
- Page 22 Sommaire 1. Introduction 1.1 Consignes de sécurité Attention - Une mauvaise manipulation peut endommager cet appareil gra- vement. Cette personne peut également être tenu responsable pour autres dégâts qui sont le résultat de cette mauvaise manipulation. 1. Introduction 1.1 Consignes de sécurité ................03 Remarque –...
-
Page 23: Composants De Système
1. Introduction 1. Introduction 1.4 Composants de système 1.5 Les noms et les connexions Ouvrez le carton et prenez l’appareil de commande, les câbles de raccordement ainsi que le matériau d’emballage. Retirez l’antenne de l’emballage vers le haut. Placez le sys- tème jamais à... -
Page 24: Diffusion Par Satellite
2. Diffusion par satellite 3. Connexion des composants Direct Broadcast Service (DBS) diffuse des fichiers audio, vidéos et données par satellite qui se trouve 35.000 km au-dessus de la terre. Les signaux du satellite sont reçus et traités par un poste récepteur comme l’antenne et un récepteur satellite. Le système demande une vue nette du satellite pour profiter au maximum de la réception des signaux. -
Page 25: Description Des Fonctions
4. Description des Fonctions 4. Description des Fonctions 4.1 L’utilisation en conduisant (Mode de déplacement) 4.4 Utilisation à l’emplacement fixe 1. Allumez l’appareil de commande avec l’interrupteur du réseau. 1. Assurez-vous que l’appareil de commande est éteint. 2. Pendant le démarrage (env. 15-30 secondes) toutes les DEL satellites sont allumées 2. -
Page 26: Sous Tension
6. Dépannage 5. Mise à jour du Programme 1. Copiez le fichier du firmware (p.ex. CONT_D_W.bin) sur une clé USB. Le fichier doit Il y a une rangée de raisons qui peuvent influer sur la qualité de réception ou l’utilisation être dans le répertoire principal de la clé... -
Page 27: Zone De Couverture
7. Zone de couverture 8. Dimensions de montage Direction de conduite Zone de couverture 83,8 cm Direction de conduite Remarque Dans les zones périphériques de la zone de couverture, des perturbations de la réception peuvent se produire. FRANÇAIS FRANÇAIS... -
Page 28: Installation Sur Le Toit
9. Installation sur le toit 9. Installation sur le toit Avant l‘assemblée que toutes les pièces et les outils nécessaires sont disponibles! 1. Câble au récepteur (1 m) 2. Câble à l‘antenne (12 m) 3. Câble d‘alimentation 4. adhésif spécial 5. - Page 29 9. Installation sur le toit 9. Installation sur le toit Equipement pour lancer l‘installation du Mettez le câble à l‘intérieur du support de câble Appliquez de la adhésifs spéciaux autour du Fixer le passe toit sur le toit du véhicule avec 3 support de câble.
-
Page 30: Spécifications Techniques
être modifiés à tout moment sans annonce préalable. Informations de conformité Par la présente, l’entreprise Megasat Werke GmbH déclare que l’appareil suivant est en conformité avec les exigences essentielles et les dispositions pertinentes de la directive EMC Directive 2004/108/EC: Megasat Shipman Kompakt (Numéro d’article: 1500167) - Page 31 Version: 1.0 (Juin 2017) // Sous réserve de modifications techniques, de fautes d’impression et d’ e rreurs. Megasat Werke GmbH | Industriestraße 4a | D-97618 Niederlauer | www.megasat.tv | info@megasat.tv...
Need help?
Do you have a question about the Shipman Kompakt and is the answer not in the manual?
Questions and answers