RR Mechatronics Starrsed TL Installation Manual
Hide thumbs
Also See for Starrsed TL:
- User manual (249 pages) ,
- Instructions for use manual (137 pages) ,
- Work instructions (5 pages)
Table of Contents
Advertisement
Quick Links
Advertisement
Table of Contents
Troubleshooting

Related Manuals for RR Mechatronics Starrsed TL


Summary of Contents for RR Mechatronics Starrsed TL
- Page 1 Installation manual Starrsed TL MRN-173-EN Version 1.02...
-
Page 3: Table Of Contents
Clean........... MRN-173-EN Version 1.02 Starrsed TL... - Page 4 TL........... . 7.1 - - Appendix - PC connections for Starrsed TL (Windows 10)......
-
Page 5: Document History Overview
• Gripper check/adjusting Start-up first time • Vacuum flow regulation • Update tubing system • Update for TLAX109100 1.01 February 2018 H. Schavemaker version incl. GLP Track connection • First issue 1.00 August 2016 H. Schavemaker MRN-173-EN Version 1.02 Starrsed TL... -
Page 6: Copyright
The Netherlands De Corantijn 13 Office address: 1689 AN Zwaag The Netherlands © Copyright RR Mechatronics Manufacturing B.V. All rights reserved. Subject to changes without prior notice. Issued by the Support Department of RR Mechatronics MRN-173-EN Version 1.02 Starrsed TL... -
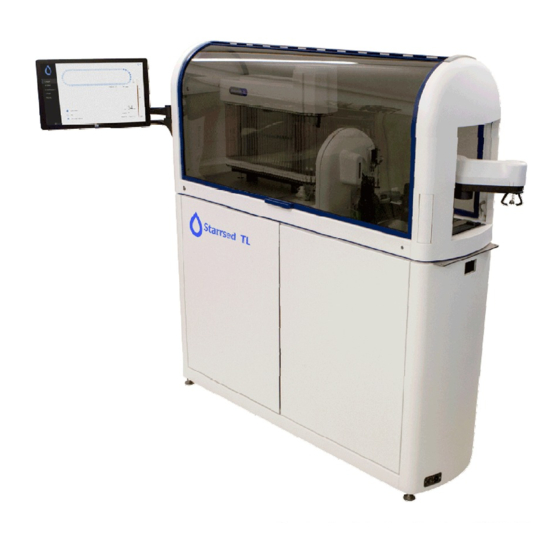
Page 7: Instrument Description
Instrument description The Starrsed TL picks a tube from the track and moves the tube to a barcode reading position. Barcode label is read and checked if an ESR is requested. The tube is then moved to the mix position into the tube disk and the blood is rotated 12 times, as recommended by the ICSH. - Page 8 A special adapter can be manually filled with sample tubes in a rack to be able to sample with high priority outside track feeding. This instrument uses large bulk containers for reagent supply and is delivered with level sensors. MRN-173-EN Version 1.02 Starrsed TL...
-
Page 9: Technical Specifications
Instrument description 1.1 - Technical specifications Technical specifications for the Starrsed TL: Model name Catalogue number (REF) Instrument model Starrsed TL TLAX109100 Westergren method ESR method ICSH J. M. Jou; Int. Journal of Laboratory Hematology 2011; 33: 125-132 CLSI Procedures for the Erythrocyte Sedimentation Rate Test;... - Page 10 140 kg Weight empty LIS connectivity: Ethernet (TCP/IP), bi-directional according various protocols Communication Data storage: Hard disk on external PC Storage medium approx. 5 Mb per 1000 samples (results and raw data) Storage capacity indication MRN-173-EN Version 1.02 Starrsed TL...
-
Page 11: General Safety Information
The following symbols can be used in this manual and for the instrument: Warning sign to prevent personal injury due to biohazard. Warning sign to prevent personal injury due to rotating parts. Warning sign to prevent personal injury due to sharp objects. MRN-173-EN Version 1.02 Starrsed TL... - Page 12 Warning sign to prevent personal injury due to hot surfaces. Warning sign to prevent personal injury due to electrical shocks. General warning. General note. This symbol indicates a reference to this or other product documentation MRN-173-EN Version 1.02 Starrsed TL...
-
Page 13: Pre-Installation Requirements
Check the nearest location for a possible connection on the drain (max. of 5m) Warning: Please get the necessary information from your local authorities about the rules of disposing the waste into the drain. It's the user's responsibility to follow all appropriate laws and regulations. MRN-173-EN Version 1.02 Starrsed TL... - Page 14 Pre-installation requirements MRN-173-EN Version 1.02 Starrsed TL...
-
Page 15: Unpacking The Starrsed Tl
The instrument itself is mounted on two trolleys, two boxes contains accessories, reagents and some parts (e.g. the hoods and robot gripper). Before unpacking the Starrsed TL, we recommend that the packaging should be checked for damage (Triggered tip and tells/"shock and tell".). Any damage must be reported to the distributor. - Page 16 Unpack the instrument at a location with a high ceiling, the cardboard box is 1.60 meter high. If the ceiling is low you have to cut the cardboard open and use one of the corner sides for an easier cut of the cardboard. MRN-173-EN Version 1.02 Starrsed TL...
-
Page 17: Installation
2. Avoid droughts which may cause temperature changes. 3. Do not place in direct airflow of an air conditioning unit. 4. Place the Starrsed TL aligned and horizontally leveled, with no nearby vibration. Do not move/replace the Starrsed TL without trolleys ! Legs can be adjusted with use of the delivered tool QWGR500001. -
Page 18: Installation Second Phase
7. Place the UTP cable for the LAS connection in the other port. 5.2 - Installation second phase 1. Re-check the leveling of the pipette unit by using the leveling-gauge, which is situated at the carousel. 2. Unblock the vacuum compressor: MRN-173-EN Version 1.02 Starrsed TL... -
Page 19: Main Power Connection
Disclaimer: Check the specifications of the central waste system for rules about discharging the waste. Waste line TLAX070026 (5 meters) is delivered with the instrument. Please note that there is no internal waste blockage alarm. MRN-173-EN Version 1.02 Starrsed TL... -
Page 20: Start-Up The First Time
If more than one type of tube is used, the calibration on the gripper has to be checked and tested with all used types at site. See also Appendix - System calibration and Robot arm calibration 4. Adjust the Starrsed TL to the track system. Perform the last calibration, the pick-up position on track. 5. Perform the Reagents preparation 6. -
Page 21: Reagents Preparation
Check if the nut on the sensor rod is fixed and if the sensor is triggered when a tube is picked up by the gripper. 6.2 - Reagents preparation Use the genuine Mechatronics bulk reagent containers with level sensors. Each container has a specific position. MRN-173-EN Version 1.02 Starrsed TL... - Page 22 Make sure to place the appropriate level sensors in the containers by checking the colored labels/colored tubes matching the color codes on the containers. The tubes and the reagents have the following color codes: Reagent Color code Starrsed Rinse solution Green Starrsed Diluent Grey MRN-173-EN Version 1.02 Starrsed TL...
-
Page 23: Starrsed Rinse Solution
QRR010905: 1 bag of 2 bottles 6.3 - General settings Check the general settings and select the required options 1. 30 minutes (Default is OFF) 2. EDTA mode (Default is ON) 3. Temperature correction (Default is ON) MRN-173-EN Version 1.02 Starrsed TL... -
Page 24: 60 Or 30 Minute Method
This function will show the current pipette number at the Measure station position, Rinse station position and the Fill station position. If the position is not according the pipette numbers on the belt enter the correct numbers. 6.7 - Set room temperature Select Settings General settings Temperature (°) MRN-173-EN Version 1.02 Starrsed TL... -
Page 25: Priming The Fluid System
After each aspiration, the fill nozzle is flushed with de-ionized water. ▪ Prime Waste system: During a pipette rinse cycle, a small amount of disinfectant is flushed around the bottom of the pipette and into the waste system. MRN-173-EN Version 1.02 Starrsed TL... -
Page 26: Fill & Clean Adapter Preparation
1. Adjust the tube part with the two bolts (B) to the exact height and horizontal position above the needle. (Normally already performed during the installation phase.) 2. The Fill & Clean adapter is ready for use. A. Adapter cap B. Adjustment screws C. Dummy sample tube D. Tube disk MRN-173-EN Version 1.02 Starrsed TL... -
Page 27: First Fill And Clean
- Place red cap on dummy sample tube and turn adapter again, fill the adapter completely. Check for air in the dummy sample tube. 5. Ensure that the Starrsed TL is in Service mode and the TL indication light is yellow. MRN-173-EN Version 1.02 Starrsed TL... - Page 28 Run the fill and clean and check that the pipettes are not leaking. When pipettes are leaking use WI-175 Pipette handling, valve tube or/ and WI-168 Pipette handling valve to solve the leakage of the pipette. MRN-173-EN Version 1.02 Starrsed TL...
-
Page 29: Vacuum Flow Settings
6. Place plyers again on point A 7. Check if the flow value = 50, if not adjust flow to 50 with the Offset potential meter 8. Remove plyers and vacuum gauge MRN-173-EN Version 1.02 Starrsed TL... - Page 30 Start-up the first time MRN-173-EN Version 1.02 Starrsed TL...
-
Page 31: Lims Connection Testing
Start-up the first time 6.12 - LIMS connection testing Before connecting the Starrsed TL to the LIMS, the data string output can be tested. Mind the limit error settings if results are expected but not send to the LIMS. The Interface Test Software from RR Mechatronics can be used to check that the correct data is being sent from the analyser PC. -
Page 32: Final Check
The instrument is tested in the factory, all the necessary adjustments are done and in principle there is almost no need for (re-) adjustment. This section describes the final checks and checkpoints for the Starrsed TL. Make sure you are familiar with all the movements and sequences of the robotic arm. -
Page 33: Troubleshooting
6.15 - Troubleshooting 6.15.1 - Comport error If one or more COM-ports are not set as expected a warning screen appears: Select Starrsed TL and press "Port settings". It is possible the ESR-unit or other units are not connected to the correct COM-port. -
Page 34: Lims Connection Testing
Service - ESR unit settings. 6.15.2 - LIMS connection testing Before connecting the Starrsed TL to the LIMS, the data string output can be tested. Mind the limit error settings if results are expected but not send to the LIMS. - Page 35 For all Starrsed units with a PC, go to the service tab and use "Test barcode reader". Before the barcode readers are reprogrammed check the following which barcode label is used in the LAB. ▪ In the Starrsed TL only Cognex barcode readers array are used. MRN-173-EN Version 1.02 Starrsed TL...
-
Page 36: Appendix For Starrsed Tl
Appendix for Starrsed TL Appendix for Starrsed TL Appendix section MRN-173-EN Version 1.02 Starrsed TL... -
Page 37: Appendix - Pc Connections For Starrsed Tl (Windows 10)
Appendix for Starrsed TL 7.1 - Appendix - PC connections for Starrsed TL (Windows 10) Connections Windows 10 PC QTST109002: The computer has the following connections: 1. Connection to PC reset on cabinet 2. Connection to PC indicator light 3. When a printer is used connect the printer cable onto the 25 pin printer port connector (via External connection bracket) 4. - Page 38 Appendix for Starrsed TL MRN-173-EN Version 1.02 Starrsed TL...
-
Page 39: Appendix - Track Connection Integration Kits Starrsed Tl
TLAX110032 Cover to be placed on GLP track at Starred TL location ▪ TLAX110933 Inside panel, to be placed at the side of the GLP track at Starrsed TL location ▪ TLAX110030 Connection Bracket, to fix the Starred TL to the GLP track and to place the track sensor ▪... -
Page 40: Appendix - System Calibration And Robot Arm Calibration
Release tube function. If more than one type of tube is used, the calibration has to be tested with several types of sample tubes (sizes of tube and cap). Test in case of barcode reader position with the tube with the smallest cap, in other positions the tube with the largest cap. MRN-173-EN Version 1.02 Starrsed TL... - Page 41 The carrier will depart a few seconds after calibration. 3. Press "Calibrate" (the robot arm is set free and can be moved manually). MRN-173-EN Version 1.02 Starrsed TL...
- Page 42 4. Adjust the gripper to the correct width with the "-" button. 5. Press Save. 6. Check the settings with the manual movement functions on the screen. (If Service-TLAX settings necessary with all used sample tube types) MRN-173-EN Version 1.02 Starrsed TL...
- Page 43 7. Choose "Manual position #2". 8. Press "Calibrate" (the robot arm is set free and can be moved manually). 9. Move robot arm on the correct horizontal position: centered just above the tube cap. MRN-173-EN Version 1.02 Starrsed TL...
- Page 44 4. Press "Calibrate", the robot arm moves to the rack input position 5. Move robot arm carefully by hand until the fingers of the gripper arms are just below the tube cap. 6. Press "Set location". MRN-173-EN Version 1.02 Starrsed TL...
-
Page 45: Appendix - Error List Starrsed Tl
Appendix for Starrsed TL 7.4 - Appendix - Error list Starrsed TL Last updated: 08-10-2018 Error Extra explanation Reason/Solution • Power cable not connected E2: Communication error! (Board: Communication lost after 3 retries on the communication PCB %s (%x), Command: %x, TWSR: between Computer and Starrsed mounted on the back panel. - Page 46 • Check communication cable E30: No ACK/NACK received from No response from Host within a between Host and Starrsed TL host after sending inquiry! certain time limit after sending an computer. inquiry 3 times. • Check serial port settings (baud rate, etc...)
- Page 47 • Faulty TLAX PCB(s). • Check communication cable E221: No response from LAS LAS system did not response to a between Starrsed TL and the system! message from Starrsed TL LAS system. • Check serial port settings. E222: NACK received from LAS LAS system rejected “Status”...
- Page 48 • Faulty TLAX PCB(s). • Rack feeder blocked. E238: TLAX manual rack feeder The rack feeder did not reach its timeout! position within a certain time limit • Faulty rack feeder. • Faulty TLAX PCB(s). MRN-173-EN Version 1.02 Starrsed TL...
- Page 49 (not deep enough). • Incorrect tube (e.g. diameter too small). • Faulty tube holder. E247: Not possible to place tube in rack. Original position in rack not empty! E248: Connection with TSM server lost! MRN-173-EN Version 1.02 Starrsed TL...
- Page 50 Faulty gripper motor. • Faulty TLAX PCB(s). • Faulty gripper ‘close’-sensor E256: Error while closing gripper! Error in ‘close’-routine. detection. • Faulty internal mechanics of the gripper. • Faulty gripper motor. • Faulty TLAX PCB(s). • MRN-173-EN Version 1.02 Starrsed TL...
- Page 51 E264: Not possible to place a tube, Not possible to place a tube at the location. already another tube present! concerning location, another tube is already present at that location. • Faulty tube detect sensor at the concerning location. MRN-173-EN Version 1.02 Starrsed TL...
- Page 52 Sample mode stops. • Check tubing draining! • Check Liquid sensor E272: Needle system failure. Liquid Drain failures detected during detected in needle tube before drying. Sample mode stops. • Check tubing sampling! MRN-173-EN Version 1.02 Starrsed TL...
-
Page 53: Appendix - Default Settings Starrsed Tl
Appendix for Starrsed TL 7.5 - Appendix - Default settings Starrsed TL General settings [Settings] > General settings Software Factory Setting Client Settings Default Setting 30 min. Method EDTA mode Temp correction Check for duplicate IDs Virtual keyboard Print after measurement Temperature 18 °C... - Page 54 COM3 COM3 (Inpeco) Hood safeguard Baud rate 9600 9600 Starrsed TL settings [Service] > ESR settings Software Client Settings Factory Setting Default Setting ESR analyser unit connected COM2 COM2 to comport Printer port LPT1 LPT1 MRN-173-EN Version 1.02 Starrsed TL...
- Page 55 Appendix for Starrsed TL Barcode reader port COM1 COM1 Result path Search in example history MRN-173-EN Version 1.02 Starrsed TL...
-
Page 56: Appendix - Tube Connections Starrsed Tl
Appendix for Starrsed TL 7.6 - Appendix - Tube connections Starrsed TL MRN-173-EN Version 1.02 Starrsed TL... -
Page 57: Appendix - List Of Supported Tube Types Starrsed Tl
Appendix for Starrsed TL 7.7 - Appendix - List of supported tube types Starrsed TL Supported tube types Note: Sarstedt Monovette is currently not supported. This will be available in future updates MRN-173-EN Version 1.02 Starrsed TL... -
Page 58: Article Reference List Starrsed Tl
Appendix for Starrsed TL 7.8 - Article reference list Starrsed TL The Starrsed TL is delivered with a complete accessories kit TLAX110990. This reference list is for article order numbers only. Article Ordering Description number ESRI010246 SESRI010246 Pinch Valve Tube... - Page 59 SQWLV090011 Peristaltic Pump Tube Assembly TLAX029126 STLAX029126 Gripper Sub-Assembly TLAX090901 STLAX090901 Needle assembly TL TLAX110023 STLAX110023 Needle holder TLAX110026 STLAX110026 Locking strip assembly TLAX110905 STLAX110905 Track Sensor Assembly TLAX110906 STLAX110906 Fill & Clean Container Assembly MRN-173-EN Version 1.02 Starrsed TL...
-
Page 60: Index
Instrument description....Appendix - PC connections for Starrsed TL (Windows 10)...... - Page 61 TL....Vacuum flow settings....Waste line connection to central waste system 19 MRN-173-EN Version 1.02 Starrsed TL...
Need help?
Do you have a question about the Starrsed TL and is the answer not in the manual?
Questions and answers