Table of Contents
Advertisement
Quick Links
Advertisement
Table of Contents

Related Manuals for Johnson Controls Tyco HSM2HOST


Summary of Contents for Johnson Controls Tyco HSM2HOST
-
Page 1: [632] Wireless Key
HSM2HOST 2-Way Wireless Transceiver Installation Manual WARNING: This manual contains information on limitations regarding product use and function and information on the limitations as to liability of the manufacturer. The entire manual should be carefully read. -
Page 2: Table Of Contents
Table of Contents Specifications and features Compatible Devices Safety instructions Introduction Installation Process Overview Controls and indicators Status LEDs Tamper Installing the HSM2HOST Temporary mounting requirements Connecting the HSM2HOST to the alarm panel Enrolling The HSM2HOST Permanently mounting the HSM2HOST and wireless devices Other Options Wireless device setup and programming [804][000] Enrolling wireless devices... - Page 3 HSM2HOST Installation Manual [804] Wireless programming [804][000] Wireless Device Enrollment – Zones [804][000] Wireless device enrollment – Wireless keys [804][000] Wireless device enrollment – Wireless keypads [804][000] Wireless device enrollment – Wireless repeaters [804][001]-[248] Configure wireless zones 1-248 [804][551]-[566] Configure wireless sirens 1-16 (copy as needed) Toggle Options Toggle Options [804][601]-[632] Configure Wireless Keys (copy as needed)
-
Page 4: Specifications And Features
Specifications and features Specifications and features Current Draw: 60mA Voltage: Draws current from the PowerSeries Neo or PowerSeries Pro alarm controller (10.8VDC to 12.5VDC) - (Limited Power Supply) Frequency: 433MHz (HSM2HOST4), 868MHz (HSM2HOST8), 912-919MHz (HSM2HOST9 Zones - can receive signals from up to 128 wireless zones, plus 16 wireless keypads. Also sup-ports up to 32 wireless keys or 32 panic pendants Supervisory - programmable supervisory window Can be wired up to 1000 ft. -
Page 5: Compatible Devices
HSM2HOST Installation Manual Compatible Devices The HSM2HOSTx (x= 4/8/9) can receive signals from the devices listed in the following table. Refer to the individual device instruction sheet. Throughout this document, x in the model number represents the operating frequency of the device for one of the following models: 9 (912-919 MHz), 8 (868MHz), 4 (433MHz). -
Page 6: Safety Instructions
Safety instructions Safety instructions Read the safety information before you install the equipment. This equipment must be installed by a skilled person only. A skilled person is an installer with appro- priate technical training. The installer must be aware of potential hazards during installation and meas- ures available to minimize risks to the installer and other people. -
Page 7: Introduction
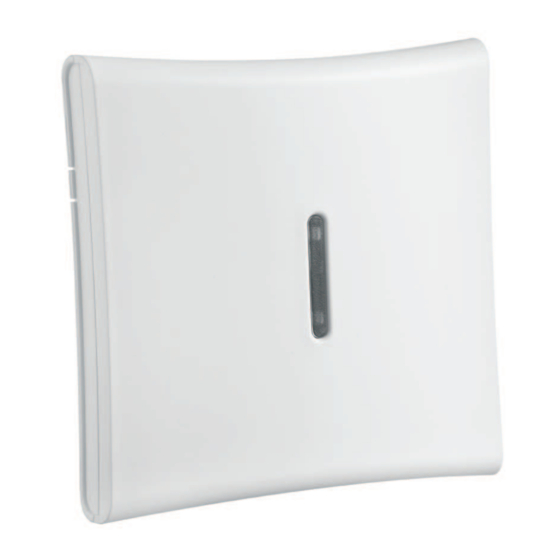
HSM2HOST Installation Manual Introduction The HSM2HOSTx two-way wireless transceiver adds wireless capability to alarm controllers, mod- els HS2016, HS2032, HS2064, HS2128, HS3248, HS3128, HS3032.The HSM2HOST receives sig- nals from wireless zones and wireless keys, and provides information to the alarm controller it is connected to. -
Page 8: Tamper
Tamper Status LEDs Red LED Operation Module Power On steady during module power-up sequence then off. Slow flashing = update in progress Firmware Update: Rapid flashing = update failed No trouble: 1 rapid flash every 10 seconds. If troubles are present, a series of flashes occur every 2 seconds. Each series of flashes indicate troubles as follows: Trouble Condi- 1 flash: Module not enrolled... -
Page 9: Installing The Hsm2Host
HSM2HOST Installation Manual Installing the HSM2HOST This section describes how to install the HSM2HOST module. Temporary mounting requirements Before installing the HSM2HOST, you must temporarily mount the HSM2HOST in a location that meets the following requirements. Ensure that the location is dry. Ensure that the location is within the operating temperature range. -
Page 10: Enrolling The Hsm2Host
Enrolling The HSM2HOST Enrolling The HSM2HOST The enrollment of a HSM2HOST to an alarm panel is dependent on the system configuration. Enrolling the HSM2HOST without a hardwired keypad To enroll the HSM2HOST without a hardwired keypad, complete the following steps: 1. -
Page 11: Other Options
HSM2HOST Installation Manual Mounting the HSM2HOST Other Options The following actions may be performed on the HSM2HOST: Section Action [902][106] Delete the HSM2HOST from the alarm system. [903][106] Confirm that the HSM2HOST is enrolled. [000][806] Add a label to appear on LCD keypads. [900][461] View HSM2HOST model information. -
Page 12: Wireless Device Setup And Programming
Wireless device setup and programming Wireless device setup and programming This section describes how to enroll and program wireless devices such as contacts, motion sensors and sirens on the alarm panel. [804][000] Enrolling wireless devices Once the HSM2HOST is installed and enrolled on the alarm panel, wireless devices can be enrolled using the following method: 1. -
Page 13: [801] Rf Jam Detect
HSM2HOST Installation Manual 2. Select a device to configure using the scroll keys or go directly to a specific device by entering a hotkey. 3. Use the scroll buttons or enter a hotkey to select a configuration option for the device. See device sheets for details. -
Page 14: [810] Wireless Option
[804][810] Wireless Option 1 UL/ULC Wireless Supervision Time UL/ULC specifications Maximum wireless supervision time window UL Residential Burglary (UL1023) 24 hours Home Health Care (UL1637) 24 hours ULC Residential Burglary (ULC/ORD-C1023) 24 hours UL Residential Fire (UL985) installations 200 seconds UL Commercial Burglary (UL1610/UL365) 4 hours ULC Residential Fire (ULC-S545) -
Page 15: [841] Motion Cameras
HSM2HOST Installation Manual On: the system cannot be armed if a wireless supervisory trouble RF Delin- exists. An RF delinquency trouble is generated. quency Off: wireless supervisory troubles do not prevent arming. On: if a supervisory or jamming trouble occurs during Away arming, Wireless the siren activates and the event is logged and reported. -
Page 16: [901]-[905] Deleting Wireless Devices
[804][901]-[905] Deleting wireless devices [804][901]-[905] Deleting wireless devices To delete wireless devices, complete the following steps: 1. Enter Installer Programming section [804] then select one of the following sub-sections: [901] – Delete wireless zone devices [902] – Delete wireless key [904] –... -
Page 17: [999] Reset To Factory Defaults
HSM2HOST Installation Manual 1. Enter Installer Programming section [804][990] then select one of the following sub-sections: [001] – All zones [002] – Repeaters [004] – Wireless keys [005] – keypads 2. Press [*] to select a wireless device type. The first available device is displayed. 3. - Page 18 [904] Placement testing of wireless devices Icon* LED+ Status Strong Strong signal strength Good Good signal strength Poor Poor signal strength Not Test 5 Displayed as the Now result if no test was performed Not Test 5 Always displayed as the 24-hour result when testing wireless keys *For Icon keypads, digit 1 indicates 24-hour test results;...
-
Page 19: Programming Worksheets
HSM2HOST Installation Manual Programming Worksheets Use these pages for recording custom programming options (Installers Programming: [*][8]). 000 - Auto Enroll 001 - Enroll Modules Enroll Module 002 - Module Slot Assignment (LED/ICON) 003 - Module Slot Assignment (LED only) 101 - Delete Keypads [902] 102 - Delete Zone Expander 103 - Delete Output Expander... -
Page 20: [000] Wireless Device Enrollment - Zones
[804][000] Wireless Device Enrollment – Zones [804][000] Wireless Device Enrollment – Zones Zone Defin- Zone Zone Label Partition ition Type... -
Page 21: [000] Wireless Device Enrollment - Wireless Keys
HSM2HOST Installation Manual [804][000] Wireless device enrollment – Wireless keys Key# Partition# User Label Key# Partition# User Label [804][000] Wireless device enrollment – Wireless keypads Keypad Keypad Keypad Label Keypad Label Keypad# Assignment Keypad# Assignment... -
Page 22: [000] Wireless Device Enrollment - Wireless Repeaters
[804][000] Wireless device enrollment – Wireless repeaters [804][000] Wireless device enrollment – Wireless repeaters Repeater# Repeater label... -
Page 23: [001]-[248] Configure Wireless Zones 1-248
HSM2HOST Installation Manual [804][001]-[248] Configure wireless zones 1-248 Zone#: Toggle Options [001] Device Options [003] High Traffic Shutdown ✓ 01 – Alarm LED ✓ 01 – Not Active ✓ 02 – Reed Switch 02 – Yes - No Delay 03 – External Input On 03 –... -
Page 24: [551]-[566] Configure Wireless Sirens 1-16 (Copy As Needed)
[804][551]-[566] Configure wireless sirens 1-16 (copy as needed) Zone#: Toggle Options 01 - Low Sensitivity 001-019 (Default: 008) 02- Mid Sensitivity [019] High Temperature Warning 03 - High Sensitivity +/- 000 to 999 [007] Detection Security [020] High Temperature Alarm 01 - Low Sensitivity +/- 000 to 999 02 - High Sensitivity... -
Page 25: Toggle Options
HSM2HOST Installation Manual Zone# Toggle Options [000] Partition Assignment 1 2 3 4 5 6 7 8 [001] Device Toggles [002] Strobe Alarm [004] Squawk ✓ 01 – Fire Alarm 01 – Disabled 01 – Disabled ✓ 02 – Gas/CO Alarm ✓... -
Page 26: [701]-[716] Wireless Keypad Programming (Copy As Needed)
-[632] Wireless Key 1-32 -[632] Wireless Key 1-32 Wireless Key# Partition Button Supervision Yes No User Number ✓ 1 2 3 4 5 6 7 8 Wireless Key# Partition Button Supervision Yes No User Number ✓ 1 2 3 4 5 6 7 8 Wireless Key# Partition Button... - Page 27 HSM2HOST Installation Manual 30 - Quick Bypass 00 - Null Key 31 - Local PGM Act- 13 - Global Away Arm 02 - Instant Stay Arm 14 - Global Disarming 61 - Partition Select 1 32 - Bypass Mode 03 – Stay Arm 15 - Temperature 62 - Partition Select 2 33 - Bypass Recall...
- Page 28 [804]-[701]-[716] Wireless Keypad Programming (copy as needed) [021] Keypad Option ✓ 01 – [F] Key Enabled ✓ 02 – [M] Key Enabled ✓ 03 – [P] Key Enabled ✓ 04 – Display Code or X's [022] Keypad Option ✓ 01 – Local Clock Display 02 –...
- Page 29 HSM2HOST Installation Manual Door Chime Zone Assignment: 1 ____ 2 ____ 3 ____ 4 ____ 5 ____ 6 ____ 7 ____ 8 ____ 9 ____ 10 ____ 11 ____ 12 ____ 13 ____ 14 ____ 15 ____ 16 ____ 17 ____ 18 ____ 19 ____ 20 ____ 21 ____ 22 ____ 23 ____ 24 ____ 25 ____ 26 ____ 27 ____ 28 ____ 29 ____ 30 ____ 31 ____ 32 ____ 33 ____ 34 ____ 35 ____ 36 ____ 37 ____ 38 ____ 39 ____ 40 ____ 41 ____ 42 ____ 43 ____ 44 ____ 45 ____ 46 ____ 47 ____ 48 ____ 49 ____ 50 ____...
-
Page 30: [801] Jam Detect
[804][801] Jam Detect [804][802] Supervisory [804][801] Jam Detect [804][810] Wireless Options Window UL EN UL EN Disabled UL EN 1 – RF Delinquency Disabled After 1 Hour Tamper UL – UL 2 – Missing/Jam After 2 Hours ✓ ✓ ✓ 20/20 Alarm After 4 Hours... -
Page 31: [901]-[905] Delete Wireless Devices
HSM2HOST Installation Manual [804][901]-[905] Delete Wireless Devices [901] Delete Zones [902] Delete Wireless Keys [903] Delete Sirens [904] Delete Repeaters [905] Delete Keypads [804][921]-[925] Replace Wireless Devices [921] Replace Zones [922] Replace Wireless Keys [923] Replace Sirens [924] Replace Repeaters [925] Replace Keypads [804][990] Show All Devices [001] Show All Zones... - Page 32 damage incurred in shipping or handling LIMITED WARRANTY damage caused by disaster such as fire, flood, wind, earthquake or lightning; Digital Security Controls warrants the original purchaser damage due to causes beyond the control of Digital that for a period of twelve months from the date of pur- Security Controls such as excessive voltage, mech- chase, the product shall be free of defects in materials and anical shock, water damage;...
- Page 33 facilities or services, down time, purchaser’s time, the product available at that time. The current market price of claims of third parties, including customers, and injury to the replacement product will be charged for each replace- property. The laws of some jurisdictions limit or do not ment unit.
- Page 34 through an area of insufficient coverage, disconnect a Smoke Detectors warning device, or interfere with or prevent the proper Smoke detectors that are a part of this system may not operation of the system. properly alert occupants of a fire for a number of reasons, Power Failure some of which follow.
- Page 35 Warning devices such as sirens, bells, horns, or strobes occupants to act prudently to prevent or minimize the may not warn people or waken someone sleeping if there harmful effects of an emergency situation. is an intervening wall or door. If warning devices are loc- IMPORTANT - READ CAREFULLY: DSC Software ated on a different level of the residence or premise, then purchased with or without Products and Components is...
- Page 36 (b) Storage/Network Use - The SOFTWARE sale or transfer of the HARDWARE, provided You retain PRODUCT may not be installed, accessed, displayed, no copies, You transfer all of the SOFTWARE run, shared or used concurrently on or from different com- PRODUCT (including all component parts, the media puters, including a workstation, terminal or other digital and printed materials, any upgrades and this EULA), and...
- Page 37 The place of arbitration shall be Toronto, Canada, and the NOR TO ASSUME FOR IT ANY OTHER language of the arbitration shall be English. WARRANTY OR LIABILITY CONCERNING THIS SOFTWARE PRODUCT. (e) EXCLUSIVE REMEDY AND LIMITATION OF 7. LIMITED WARRANTY WARRANTY - UNDER NO CIRCUMSTANCES SHALL DSC BE LIABLE FOR ANY SPECIAL, (a) NO WARRANTY - DSC PROVIDES THE...
-
Page 38: Fcc Compliance Statement
FCC Compliance Statement This equipment generates and uses radio frequency energy and if not installed and used properly, in strict accord- ance with the manufacturer’s instructions, may cause interference to radio and television reception. It has been type tested and found to comply with the limits for Class B device in accordance with the specifications in Sub- part “B”... - Page 39 HSM2HOST Installation Manual Note: For EN50131 compliant installations only, the intrusion portion of the alarm system has been investigated. Fire Alarm and Auxiliary (Medical) Alarm functions were not included in the eval- uation of this product under the requirements of the above mentioned standards. ©...
Need help?
Do you have a question about the Tyco HSM2HOST and is the answer not in the manual?
Questions and answers