Table of Contents
Advertisement
Quick Links
Advertisement
Table of Contents

Subscribe to Our Youtube Channel
Related Manuals for Systems Trading Corporation GZ3D

Summary of Contents for Systems Trading Corporation GZ3D
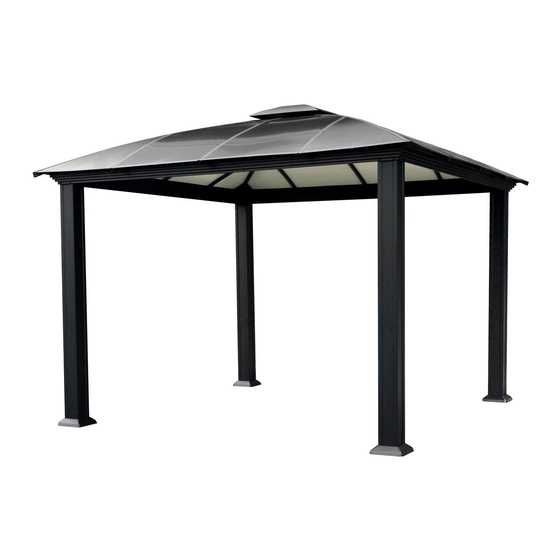
- Page 1 Gazebo GZ3D Aluminium Composite Roof Panels Paneles de Techo de Aluminio Compuesto Assembly Instructions Instrucciones de ensamblaje 7’1” 9’4.7” Systems Trading Corporation 450 7th Avenue Suite 2809, New York, NY 10123 Customer service: (877)782 4482 of 24 www.stcny.com...
-
Page 2: Introduction
Introduction Thank you for purchasing the Gazebo GZ3D. When properly assembled and maintained, this gazebo will provide many years of enjoyment! These instructions include helpful hints and important information needed to safely assemble and properly maintain the gazebo. Please read these instructions completely before you begin. -
Page 3: Table Of Contents
Introducción Les agradecemos el haber adquirido el Gazebo GZ3D. Al ser ensamblado y mantenido correctamente, disfrutarán del gazebo por muchos años. Estas instrucciones incluyen consejos útiles e información importante y necesaria para ensamblar de modo segu- ro y mantener de forma correcta el gazebo. Por favor lean estas instrucciones en su totalidad antes de empezar. -
Page 4: Table Of Contents
Table of Contents Safety Advice Introduction..............2 • The gazebo must be positioned and fixed on a flat level surface. • Dispose of all plastic bags safely. Keep them out of the reach of children. Table of Contents............3 • Keep children and pets away from the assembly area until the work is List of Parts.............. -
Page 5: List Of Parts
List of Parts - Lista de Partes The gazebo is shipped in three cartons. These cartons are heavy. Be careful when lifting them. Wear proper safety gear including work shoes, gloves and goggles. The parts are identified by removable stickers. Place all the parts for each step in staging areas, checking that you have all parts as you go. - Page 6 Profile Qty Step Profile Qty Step Núm. Descripción Ctd. Paso Núm. Descripción Ctd. Paso Ground Spike Screw M6*8 Estaca Tornillo M6*8 Screw M6*12 Concrete Bolt Perno de concreto Tornillo M6*12 Screw M6*18 Llave hexagonal magnética Magnetic Hex Key Tornillo M6*18 Spanner Screw M6*25 Llave...
-
Page 7: Step 1 Assembling The Corner Profiles
STEP 1 Assembling the Corner Profiles Ensamblando los perfiles de esquinas Place all the parts on a level surface. Make sure the pieces are in the correct positions before assembling. Carefully follow the order of assembly to ensure an easy installation. Wear proper safety gear including work shoes, gloves and goggles. - Page 8 Slide support frames (2) over lower end of corner profiles (1). Attach support plates (3) to corner profiles as shown, using two screws (21) for each plate. Deslice los marcos de soporte (2) sobre el extremo inferior de los perfiles de esquina (1). Adjunte las placas de soporte (3) a los perfiles de esquina como se muestra, usando dos tornillos (21) para cada placa.
-
Page 9: Step 2 Assembling The Rails
STEP 2 Assembling the Rails Ensamblando los rieles NOTE: The Rails (5) have a preassembled connecting parts to be inserted into Rails (6). NOTA: El Riel Largo (5) tien una parte conectora preensamblada para ser insertada dentro del Riel (6)). Components / Componentes Inner Roof Connector (7) Screw (18) - Page 10 Attach two outer roof connectors (8) to each rail set at pre-drilled screw holes, using screws (20). Adjunte dos conectores exteriores del techo (8) a cada juego de riel corto en los orificios pre-perforados, usando tornillos (20). VIEW FROM SIDE VISTA LATERAL VIEW FROM THE TOP VISTA SUPERIOR...
-
Page 11: Step 3 Attaching The Rails To The Corner Profiles
Attaching the Rails to the Corner Profiles STEP 3 Adjuntado los rieles a los perfiles de esquina Attach one roof profile set (5+6) to two corner profiles Components / Componentes (1) as shown, using screws (20) and supplied magnetic hex key (30) through holes in profile set. Adjunte un juego de perfil de techo (5+6) a dos perfiles de esquina (1) como se muestra, usando tornillos (20) Screw (20) - Page 12 Using at least 3 people, attach the remaining two roof profile sets (5+6) to corner profiles (1), connecting all four corner profiles (1). Fasten with four screws (20) and supplied magnetic hex key (30) on each side. Close holes in profile sets with plastic caps #3 (25). Usando por lo menos 3 personas, adjunte los dos juegos de perfiles de techo largos (5+6) a los perfiles de esquina (1), conectando los cuatro perfiles de esquina (1).
-
Page 13: Step 4 Securing The Gazebo To The Ground
STEP 4 Securing the Gazebo to the Ground Asegurando el gazebo al suelo Fasten the gazebo frame to the ground, using four spikes (28) for each support plate. Lower support frames (2) to cover support plates (3). Sujete la estructura del gazebo al suelo, usando cuatro estacas (28) para cada placa de soporte. -
Page 14: Step 5 Installing The Lower Roof Gable Profiles
STEP 5 Installing the Lower Roof Gable Profiles Instalando los perfiles inferiores del techo a dos aguas ATTENTION: DO NOT ATTEMPT TO ASSEMBLE THIS ALONE ! ATENCION: NO INTENTE INSTALAR ESTO SOLO ! Components / Componentes Roof Gable Profile (10) Roof Gable Profile (9) Roof Top Cover (15) Perfil de techo a dos aguas (10) - Page 15 Using screws (19), connect all eight roof top connectors (34) to VIEW FROM BELOW roof top cover (15) as shown. VISTA INFERIOR Usando tornillos (19), conecte todos los conectores de superior de techo (34) a la cubierta superior de techo (15) como se muestra. Using screws (22) and nuts (24), connect roof gable profiles (9) to roof connectors (4) on top of corner profiles (1).
- Page 16 Install roof gable profiles (10). Using screws (20) connect profiles (10) to inner roof connectors (7) on profile sets (5,6)and the other end to remaining connectors (34) on roof top cover (15). Instale los perfiles de techo a dos aguas (10). Usando tornillos (20) conecte los perfiles (10) a los conectores del techo interior (7) en los juegos de perfil de techo (5,6) y el otro extremo a la viga conectora superior del techo (34) en la cubierta superior de techo (15).
-
Page 17: Step 6 Installing The Lower Horizontal Roof Profiles
STEP 6 Installing the Horizontal Roof Profiles Instalando los perfiles inferiores horizontales del techo Components / Componentes Attach roof gable profiles (16,17) to T-connectors A (32) and B (33), placing ends into cut-outs on gutter profiles 9 and 10 as shown. Roof Profile (16) Roof Profile (17) Adjunte los perfiles de techo a dos aguas (16,17) a los... -
Page 18: Upper Roof Profiles
STEP 7 Installing the Roof Panels and Upper Roof Profiles Instalando los paneles del techo y los perfiles del techo superior IMPORTANT: Remove protective plastic from both sides of roof panels. Place with black surface toward the sun facing out when installing. IMPORTANTE: Retire el plástico protector de ambos lados de los paneles del techo. - Page 19 Components / Componentes Screw (22) Tornillo (22) x 56 Roof Profile (16A) Roof Profile (17A) Roof Gable Profile (9A) Roof Gable Profile (10A) Perfil de Techo (16A) Perfil de Techo (17A) Perfil de Techo (9A) Perfil de Techo (10A) 998mm 998mm 2107mm 1537mm...
- Page 20 Fit roof panel (14) on top of roof profiles (9,10 and 17) towards top of gazebo as shown. Fije el panel de techo (14) sobre los perfiles de techo (9,10 y 17) como se muestra. Fit roof panel (12) on top of roof pro- files(9,10 and 16) as shown and fasten with one screw (23) from below to outer roof connector (8).
- Page 21 Slide roof profile (9A) into rails on top of roof profile (9) from lower end towards top of gazebo as shown. Empujar el perfil del techo a dos aguas (9A) sobre el perfil de techo a dos aguas (9) hacia la parte superior de gazebo como se muestra.
- Page 22 Continue in a clock-wise direction as shown, until the last two panels: Place the upper roof panel. Place the lower roof panel, secure with one screw (23) from below. Place the roof gable profile, fasten with four screws (22) from below. Continúe en dirección de las agujas del reloj se muestra, hasta los últimos dos paneles: Coloque el panel de techo superior.
-
Page 23: Step 8 Installing The Plastic Caps
Slightly lifting the roof gable profiles (9A and 10A), place the lower roof panel (12) and secure with one screw (23) from below. Fasten the roof gable profiles (9A and 10A) at their lower end with screws (22) from below. Place the horizontal roof profile (17A) carefully from above as shown, fasten with three screws (22) from below. - Page 24 Gazebo GZ3D Aluminium Composite Roof Panels Paneles de Techo de Aluminio Compuesto Assembly Instructions Instrucciones de ensamblaje WARRANTY: Warranty covers damage due to manufacturing defects only. Warranty does not cover weather inflicted damage (Force Majeure) and/or damages caused by not following assembly instructions and adhering to warnings in manual.
Need help?
Do you have a question about the GZ3D and is the answer not in the manual?
Questions and answers