Table of Contents
Advertisement
Quick Links
REPAIR
REPAIR
Crash damage is not covered under the warranty!
If damage occurs, use small amount of furnished 5-min Epoxy to repair broken foam. Clear packing tape will hold the
parts together; leave it on patch for added strength. Re-balance the plane after you repaired.
REPARATION
Les dommages liés à un crash ne sont pas couverts par la garantie !
Si un dommage se produit, utilisez un peu de colle époxy 5 minutes pour réparer la partie en polystyrène. Prenez une
bande adhésive transparente pour maintenir ensemble les pièces réparées ; laissez-la sur les pièces collées pour
accroître la solidité. Rééquilibrez l'avion après la réparation si nécessaire.
REPARATUR
Schäden durch Abstürze gehören nicht zur Garantie.
Styropor und Depron können mit 5-Minuten-Epoxy wieder zusammen geklebt warden.
RIPARAZIONI
La garanzia non copre i danni causati da cadute.
In caso di caduta utilizzare piccole quantità della colla epossidica 5-min in dotazione per riparare le parti rotte. Utilizzare
nastro trasparente per mantenere unite le parti, lasciandolo in posizione per una miglior tenuta. Dopo la riparazione,
bilanciare nuovamente l'aereo.
CONCLUSION
CONCLUSION
To defeat the laws of gravity and take to the wing is both challenging and thrilling. We hope you enjoy the R/C flight and
make it your hobby for a lifetime. Please let Thunder Tiger be your chosen brand, no matter what direction you progress.
CONCLUSION
Défier les lois de la gravité en volant est à la fois excitant et passionnant. Nous espérons que vous prendrez plaisir à
entrer dans le monde fascinant de l'aéromodélisme et que ce loisir deviendra une passion. Merci d'avoir choisi
Thunder Tiger.
CONCLUSION
To defeat the laws of gravity and take to the wing is both challenging and thrilling. We hope you enjoy the R/C flight and
make it your hobby for a lifetime. Please let Thunder Tiger be your chosen brand, no matter what direction you progress.
CONCLUSIONI
Superare le leggi di gravità e prendere il volo è una sfida da brividi. Ci auguriamo che il volo R/C vi regali ore di
divertimento e che diventi il vostro hobby preferito. Preferite sempre Thunder Tiger, qualunque siano i vostri obiettivi.
44
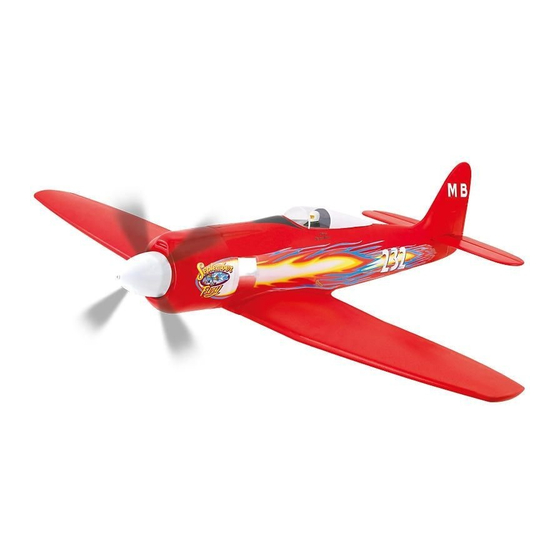
Unlimited Pylon Racer
Assembly Manual
No.4331
Specifications:
Wing Span: 34"(864mm)
Length: 30 1/2"(774mm)
Wing Area: 224.75 sq. in (14.5dm )
Weight: 17 oz. (480g)
C a r a c t é r i s t i q u e s :
E n v e r g u r e : 8 6 4 m m
L o n g u e u r : 7 7 4 m m
2
Surface alaire : 14.5dm
Poids : 480g (17 oz.)
Technische Daten:
Spannweite: 864mm
Länge: 774mm
2
Tragflächeninhalt: 14.5dm
Gewicht: 480g
2
Caratteristiche:
Apertura alare: 34"(864 mm)
Lunghezza: 30 1/2"(774 mm)
Superficie alare: 224,75 pollici
2
quadrati (14,5dm )
Peso: 17 oz. (480g)
JE6759
1
2
Advertisement
Table of Contents

Related Manuals for THUNDER TIGER Sept. Fury Unlimited Pylon Racer


Summary of Contents for THUNDER TIGER Sept. Fury Unlimited Pylon Racer
- Page 1 To defeat the laws of gravity and take to the wing is both challenging and thrilling. We hope you enjoy the R/C flight and make it your hobby for a lifetime. Please let Thunder Tiger be your chosen brand, no matter what direction you progress.
-
Page 2: Warranty
Inspect all parts for Parts Drawing Disegno Del Pieces Detachees Particolari completeness and damage. Contact Thunder Tiger authorized agent if you find any problem or need Other Items Autres elements Benötigtes Attrezzatura tech support. - Page 3 Super Combo. Non modificare in nessun modo il modello, per non alterarne le caratteristiche di volo. nazionale di Aeromodelli 2002). Thunder Tiger è orgogliosa di presentare a tutti i modellisti R/C del mondo, Qualsiasi modifica fa decadere la garanzia.
-
Page 4: Other Items Required
Batteria AcePower Lipo 1050mAh 3S1P 11,1V (Art. 2804) con 2 microservi. Thunder Tiger fornisce due modelli radio a 3 canali tra cui scegliere, uno a stick La batteria AcePower Lipo è una batteria ad elevata capacità di scarica in grado di sostenere singolo e uno a stick doppio. -
Page 5: Parts Drawing
PARTS DRAWING PARTS DRAWING Parts shown below are same in STD and OBL version. PARTS DRAWING Check all the parts against the Parts Drawing. If anything is missing please contact AS6444 Fuselage your dealer. AS6444 Fuselage AS6446 Horizontal Tail AS6445 Wing AS6447 Cowling AS6448 Canopy AS6449 Wheel Door... - Page 6 PARTS DRAWING FUSELAGE AS6412 Tail Gear AS6451 Pushrod Set Tail Gear Tail Gear Mount Bx 2pcs Mount A x 1pcs Elevator Pushrod x 1pcs Aileron Torque Rod x (L/1pcs, R/1pcs) Collar x 1pcs Tail Gear x 1pcs Aileron Pushrod x 1pcs Clevis A x 1pcs Clevis B x 1pcs Torque Rod Retainer x 1pcs...
- Page 7 FUSELAGE FUSELAGE Epoxy the left and right fuselage halves together. Insert pushrod through the pushrod support then Note the furnished epoxy is 5-min. epoxy and working thread the small clevis. Epoxy the firewall assembly, time is only 3 minutes, you will have to quickly apply pushrod support in place of right fuse lage.
- Page 8 FUSELAGE FUSELAGE Epoxy the wing mount assembly in fuselage. Epoxy the battery tray in fuselage . Locate the wing mount, nut retainer and M3 nut. Glue the retainer on wing mount then press M3 nut in place. Make sure the M3 nut is centered. Collez a l'époxy dans le fuselage l'assemblage du Collez a l'époxy le support de batterie dans le fuselage.
- Page 9 FUSELAGE FUSELAGE Locate canopy and trim to fit on fuselage. Apply cockpit Epoxy wing dowel plate I on the front fuselage and Locate the cowling mounts then epoxy the mounts in place. Locate the dowels, wing dowel plate I and II. wing dowel plate II on the front center wing, then glue and instrument panel decal in place as well as white decal on canopy.
- Page 10 FUSELAGE TAIL Epoxy the wing bolt brace on the bottom wing. Cut a slot at the hinge line for installation of elevator Trial fit the main wing on fuselage then temporally Trial fit the joiner in place next apply epoxy and glue it secure with M4 washer and wing bolt.
- Page 11 WING WING Wing Upside Draw a hinge line between two ends of aileron. Carefully cut two ends of aileron. Note: Do not cut the Bend and tape hinge line as indicated. hinge line. Marquez une ligne entre les deux extrémités de l'aileron. Pliez l'aileron puis scotchez-le au niveau de la rainure Découpez avec précaution les deux extrémités de de charnière située sur le dessus de l'aile.
-
Page 12: Landing Gear
WING LANDING GEAR Glue free retainer Landing Gear Epoxy the landing gear assembly on the bottom wing Epoxy the toque rod and torque rod retainer in place. Carefully flapping aileron and make sure it move freely Same procedure on the other one. but will not come off. - Page 13 TAIL GEAR LANDING GEAR Tail Gear Install the tail gear with epoxy in the aft section of the Trim the wheel door along the molded line then fix on <Foe Retracted Gear> fuselage. the wire with furnished decal 26.Install light wheel and Locate tail gear mounts, tail gear, collar, set screw and The foe retracted gear is a good choice for less drag.
- Page 14 MOTOR MOTOR STD Power Unit Press the bearings all the way in then insert the drive shaft. To get good gear mesh, use a piece of thin paper and Secure the power unit with the furnished four2.6x8mm Snap on the E clip and make sure the E clip is well set between the pinion and spur gear.
- Page 15 PROPELLER MOTOR Trim cowling along with molded line then Locate spinner adaptor, drive nut, prop washer and a clear Install the 4 blades on the blade holder as shown. secure the cowling with three 2 x 8mm wood round plate, then install 4-blade propeller as shown. screws at the molded point.
- Page 16 RADIO RADIO Trim spinner along with the molded line, drill a 3/32" (2.5mm) Secure the servo on the aileron servo tray, then epoxy Locate aileron pushrods and clevises, thread clevises on Secure the servo on the elevator servo tray, then epoxy the servo tray assembly in the fuselage.
- Page 17 RADIO RADIO Thread the pushrod to the servo horn and secure the servo Secure Battery on the battery tray with Velcro. Connect all Install the Speed Controller in the fuselage with Velcro. Install the switch of the electric speed controller. servo wires to receiver and secure the receiver with Velcro horn on the servo when servo is in neutral position.
-
Page 18: Control Throws
5/16",8mm 1/4",6mm from the leading edge at the wing root. before you go to fly. All Thunder Tiger staffs hope you Elevator-Low Rate Aileron-Low Rate enjoy flying your new Sept. Fury. -
Page 19: Operation Check
OPERATION CHECK FLYING FLYING If you are a beginner, you should have a flight instructor to teach you how to fly the Sept. Fury. Like a real airplane, you must have an understanding of how to fly the model before launch, or you will probably not be successful. Check at your hobby shop or contact www.modelair-craft.org for flying clubs in your area. - Page 20 FLUG Wenn Sie ein Anfänger sind, so sollten sie die ersten Versuche immer mit einem erfahrenen Piloten machen. Sorgen Il est recommandé d'avoir recours à un professeur de vol pour apprendre à piloter le Sept. Fury. Comme un véritable Sie auch für ausreichend Versicherungsschutz. Die normale Haftpflichtversicherung deckt einen Schaden nicht ab. avion, vous devez comprendre comment faire voler le modèle avant de le faire décoller.
- Page 21 FLYING PILOTAGGIO Incorrect Incorrecte Falsch PILOTAGGIO Sbagliato Wind Direction Il principiante deve essere affiancato da un istruttore di volo che gli insegni come pilotare il Sept. Fury. Come un vero Direction du vent aereo, è necessario sapere come pilotare un aeromodello prima del lancio, per non incorrere in probabili insuccessi. Per trovare un Aero Club nella vostra zona chiedete al vostro negozio di modellismo o recatevi al sito www.modelair- Windrichtung craft.org.
-
Page 22: Troubleshoot
RADIO MOVEMENT TROUBLE SHOOT Always turn transmitter on first then the receiver and turn receiver off first then the transmitter. IN CASE OF TROUBLE Hang the airplane and throttle up the stick. The motor unit should come on. Make sure the propeller is trying to 1.If motor does not run when Throttle Stick is up pull the airplane forward.
Need help?
Do you have a question about the Sept. Fury Unlimited Pylon Racer and is the answer not in the manual?
Questions and answers