
Subscribe to Our Youtube Channel
Related Manuals for IFM Electronic Efector 300 SI1007


Summary of Contents for IFM Electronic Efector 300 SI1007
- Page 1 Bedienungsanleitung Operating instructions Notice utilisateurs Strömungswächter Flow monitor Contrôleur de débit SI1007...
-
Page 2: Table Of Contents
Inhalt Bedien- und Anzeigeelemente ....Seite 3 Menü-Übersicht ......Seite 4 Bestimmungsgemäße Verwendung . -
Page 3: Bedien- Und Anzeigeelemente
Bedien- und Anzeigeelemente Einstelltasten MODE / LEARN / ENTER FLOW / TEMP °C Betriebsanzeige Betriebsanzeige Strömung (Run-Modus Strömung) Aktuelle Strömung im Anzeigebereich (grüner LED-Balken) Überströmung (LED 9 blinkt) Unterströmung (LED 0 blinkt) Schaltpunkt-Anzeige: LED orange: Strömung ≥ SP; LED rot: Strömung < SP) Betriebsanzeige Temperatur (Run-Modus Temperatur) Aktuelle Temperatur im Bereich 0-80°C (roter LED-Balken) -
Page 4: Menü-Übersicht
Run-Modus Strömung Run-Modus Temperatur >2s >2s Schaltpunkt Strömung Schaltpunkt Temperatur Abgleich Maximalströmung >5...<10s >5s >5s Abgleich Minimalströmung >10...<15s Ausgangsfunktion S2 Überwachung Überströmung Rücksetzen Werkseinstellung >15...<20s LED = grün LED = orange LED = rot... -
Page 5: Bestimmungsgemäße Verwendung
Bestimmungsgemäße Verwendung Der Strömungswächter • erfaßt Strömungsgeschwindigkeit und Temperatur in flüssigen und gasförmigen Medien, • zeigt wahlweise die aktuelle Strömung (grüner LED-Balken) oder die aktuelle Temperatur (roter LED-Balken), • schaltet die Ausgänge entsprechend der Programmierung: S1 (Pin 4): Strömungsüberwachung Ausgangsfunktion Ausgang geschaltet, wenn Strömung ≥... -
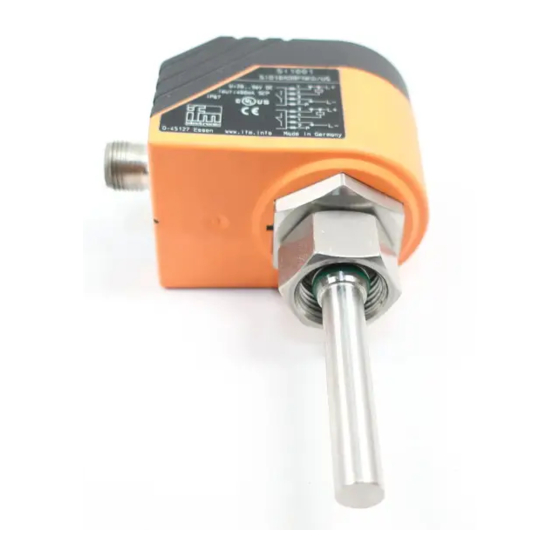
Page 6: Montage
Montage Das Gerät ist adaptierbar an unterschiedliche Prozeßanschlüsse. (Adapter sind gesondert als Zubehör zu bestellen). ACHTUNG: Flowadapter zur Erfassung kleiner Durchflußmengen dür- fen nicht verwendet werden. • Montieren Sie das Gerät bei waagerecht verlaufenden Rohren möglichst seitlich (Abb 1). Bei Montage von unten sollte die Rohrleitung frei von Ablagerungen sein. - Page 7 Gewinde M18 x 1,5 1. Fetten Sie die Überwurfmutter (3) und alle Gewinde mit Schmier- paste ein, um mehrmaliges Lösen und Festziehen zu gewährleisten. Achtung: Es darf kein Fett auf die Sensorspitze (A) gelangen. 2. Schrauben Sie den passenden Adapter (2) auf den Prozeßanschluß (1). 3.
- Page 8 Elektrischer Anschluß Das Gerät darf nur von einer Elektrofachkraft installiert werden. Befolgen Sie die nationalen und internationalen Vorschriften zur Errichtung elektrotechnischer Anlagen. Spannungsversorgung nach EN50178, SELV, PELV. Um die "limited Voltage" Anforderungen gemäß UL 508 zu erfüllen, muß das Gerät aus einer galvanisch getrennten Quelle versorgt und durch eine Überstromeinrichtung abgesichert werden.
-
Page 9: Programmieren
Programmieren I I Wechsel Run-Modus Strömung ↔ ↔ Run-Modus Temperatur • Mindestens 2 s lang Taste Mode/Enter drücken. I I Überwachungsbereich Strömung einstellen • Ggf. in Run-Modus Strömung wechseln. • Medium mit gewünschter Maximalströmung in der Anlage fließen lassen. • >5...<10 s lang Taste Learn/Set drücken (= Abgleich auf Maximal- strömung / oberes Ende des Überwachungsbereichs). - Page 10 I I Einstellen der Schaltfunktion für S2 • Ggf. in Run-Modus Temperatur wechseln. • 2 x kurz Taste Mode/Enter drücken. • 5 s lang Taste Learn/Set drücken, loslassen, wenn LED blinkt. • Taste Learn/Set drücken, um die LED für die gewünschte Ausgangsfunktion zu verschieben.
-
Page 11: Inbetriebnahme / Betrieb / Wartung
Bei verriegeltem Gerät können die aktuellen Einstellungen für die Schaltpunkte, für die Überwachung Überströmung und für die Schaltfunktion (Logikfunktion) S2 angezeigt werden. Anwahl durch Menüaufruf wie bei der Programmierung. Inbetriebnahme / Betrieb / Wartung Prüfen nach Montage, elektrischem Anschluß Programmierung, ob das Gerät sicher funktioniert. •... -
Page 12: Einstelldiagramme / Technik-Information
Einstelldiagramme / Technik-Information I I Überwachungsbereich Strömung einstellen Der Überwachungsbereich wird festgelegt durch • Abgleich gewünschte Maximalströmung (HI-Teach) = oberes Ende des Fensters. Dieser Abgleich genügt für die Sensor- meisten wasserbasierten signal Applikationen. • Abgleich gewünschte Minimalströmung / Strömungs- stillstand (LO-Teach) = unteres Ende des Fensters;... - Page 13 • Abgleich auf Minimalströmung / Strömungsstillstand (LO- Teach; optional) Das Gerät erfaßt die vorhandene Strömung und setzt diesen Wert als unteren Anzeigewert für das LED-Display. Im Betriebszustand blinkt die erste grüne LED (LED 0), wenn die Strömung unter diesen Wert fällt (bzw.
- Page 14 I I Schaltpunkt Strömung einstellen (SP Flow Der Schaltpunkt ist werksseitig voreingestellt (LED 7). Die Einstellung beeinflußt die Reaktionszeit des Geräts: • hoher Schaltpunkt = schnelle Reaktion bei Strömungsabfall, • niedriger Schaltpunkt = schnelle Reaktion bei Strömungsanstieg. Wechseln Sie ggf. in den Run-Modus Strömung. Drücken Sie die Taste Mode/Enter einmal.
- Page 15 I I Überwachnung von Überstömung Mit dieser Funktion können Sie die Position des Anzeigefensters im Überwachungsbereich festlegen: Verschieben Sie die LED für den obe- ren Anzeigewert auf die Position 8, 7, 6 oder 5. Bei maximaler Betriebsströmung leuchten alle LEDs von 0 bis zu dieser LED. Die LEDs oberhalb dieses Bereichs signalisieren Überströmung.
- Page 16 I I Schaltpunkt Temperatur einstellen (SP Temp Wechseln Sie ggf. in den Run-Modus Temperatur. Drücken Sie die Taste Mode/Enter einmal. Der aktuelle Schaltpunkt wird angezeigt: leuchtende LED: Schritte in 10°C, blinkende LED: Schritte in 1°C. Drücken Sie die Taste Learn/Set und halten Sie sie gedrückt.
- Page 17 I I Einstellen der Schaltfunktion für S2 Wechseln Sie ggf. in den Run-Modus Temperatur. Drücken Sie die Taste Mode/Enter zweimal. Die aktuelle Einstellung wird angezeigt (grüne LED). Drücken Sie die Taste Learn/Set 5 s lang (bis die LED blinkt). Drücken Sie die Taste Learn/Set so oft, bis die gewünschte LED aufleuchtet.
- Page 18 I I Werkseinstellung wieder herstellen Wechseln Sie ggf. in den Run-Modus Strömung. Drücken Sie die Taste Learn/Set und halten Sie sie gedrückt. Die grünen LEDs rechts und links >15...<20 s blinken, nach 5 s füllt sich der LED-Balken (grün) von links nach rechts, nach weiteren 5 s füllt sich der LED-Balken (grün) von rechts nach links,...
- Page 19 Hysteresefunktion Strömung Strömung Maximalströmung Schaltpunkt (SP) Hysterese Minimalströmung Steigt die Strömungsgeschwindigkeit, schaltet der Ausgang bei Erreichen des Schaltpunkts (SP Flow Sinkt die Strömungsgeschwindigkeit wieder, schaltet der Ausgang zurück, wenn der Wert “SP minus Hysterese” erreicht ist. Flow Die Hysterese wird wesentlich beeinflußt von der Wahl des Arbeitsbereichs auf der Empfindlichkeitskurve des Sensors: •...
- Page 20 Contents Controls and visual indication ....page 21 Menu structure ......page 22 Function and features .
-
Page 21: Controls And Visual Indication
Controls and visual indication setting buttons MODE / LEARN / ENTER FLOW / TEMP °C function display Function display flow (Run mode flow) current flow within the display range (LED bar green) excess flow (LED 9 flashes) underflow (LED 0 flashes) Indication of the switch point: LED orange: flow ≥... -
Page 22: Menu Structure
Run mode flow Run mode temperature >2s >2s Switch point flow Switch point temperature Adjustment to maximum flow >5...<10s >5s >5s Adjustment to minimum flow >10...<15s Monitoring excess flow Output function S2 Factory reset >15...<20s LED = green LED = orange LED = red... -
Page 23: Function And Features
Function and features The flow monitor • detects flow velocity and temperature in liquid and gaseous media, • displays the current flow (LED bar green) or the current temperature (LED bar red), function is selectable, • switches the outputs according to the programming: S1 (pin 4): flow monitoring Output function Output... -
Page 24: Installation
Installation The unit is adaptable for various process fittings (adapters to be ordered separately as accessories). NOTE: Do not use the unit with flow adapters for low flow rate. • In the case of horizontal pipes mount the unit from the side, if pos- sible (fig. - Page 25 thread M18 x 1,5 1. Lubricate the nut (3) and all threads with grease to ensure the nut can be loosened and tightened several times. Note: No grease must be applied to the sensor tip (A). 2. Screw the suitable adapter (2) onto the process fitting (1). 3.
-
Page 26: Electrical Connection
Electrical connection The unit must be connected by a suitably qualified electrician. The national and international regulations for the installation of electrical equipment must be observed. Voltage supply to EN50178, SELV, PELV. The device shall be supplied from an isolating source and protected by an overcurrent device such that the limited voltage circuit requirements in accordance with UL 508 are met.Disconnect power before connecting the unit as follows... -
Page 27: Programming
Programming I I Select run mode flow ↔ ↔ run mode temperature • Press the Mode/Enter button for at least 2 s. I I Setting of the detection range ) • Ensure you are in run mode flow. • Allow the medium to flow through the system at the required maxi- mum flow rate. - Page 28 I I Setting the output function for S2 • Ensure you are in run mode temperature. • Press the Mode/Enter button twice. • Press the Learn/Set button for 5 s, release when LED flashes. • Press the Learn/Set button several times to shift the LED for the requested output function.
-
Page 29: Installation And Set-Up / Operation / Maintenance
Units are delivered from the factory in the unlocked state. If the unit is locked, it is possible to indicate the current setting for the switch points, for monitoring excess flow and for output function S2. Use the programming menu for indicating. Installation and set-up / Operation / Maintenance After mounting, wiring and setting check whether the unit operates correctly. -
Page 30: Programming Diagrams / Technical Information
Programming diagrams / Technical information I I Setting of the detection range The detection range (window) is determined by: • Adjustment to the required maximum flow (HI-Teach) = upper limit of the window. This setting is sufficient for the sensor majority of waterbased appli- signal cations. - Page 31 • Adjustment to minimum flow / flow standstill (LO-Teach; optional) The unit detects the current flow and sets this value as the minimum display value for the LED display. In normal operation the first green LED (LED 0) flashes when the flow falls below this value (or when it comes to a standstill).
- Page 32 I I Setting of the switch point flow (SP Flow The switch point is preset at the factory (LED 7). The setting influ- ences the reaction time of the unit. • High switch point = fast reaction in the case of flow decrease. •...
- Page 33 I I Monitoring excess flow With this function the position of the display window within the detection range can be defined: Shift the LED for the maximum dis- play value to position 8, 7, 6 or 5. In the case of maximum flow all LEDs from 0 up to this LED are lit.
- Page 34 I I Setting of the switch point temperature (SP Temp Ensure you are in run mode temperature. Press the Mode/Enter button briefly. The current switch point is indicated: LED lit: steps in 10°C, LED flashes: steps in 1°C. Press the Learn/Set button and keep it pressed.
- Page 35 I I Setting the output function for S2 Ensure you are in run mode temperature. Press the Mode/Enter button twice. The current setting is indi- cated (green LED). Press the Learn/Set button for 5 s (until LED flashes). Press the Learn/Set button several times until the requested LED lights.
- Page 36 I I Return to factory setting Ensure you are in run mode flow. Press the Learn/Set button and keep it pressed. The green LEDs on the right and >15...<20 s on the left flash, after 5s the LED bar (green) fills from left to right, after a further 5 s the LED bar (green) fills from right to left,...
- Page 37 Hysteresis function flow flow maximum flow switch point (SP) hysteresis minimum flow When the flow rises, the output switches when the switch point ) has been reached. Flow When the flow falls again, the output switches back when the value "SP minus hysteresis"...
- Page 38 Contenu Eléments de service et d’indication ... . . page 39 Structure du menu ......page 40 Fonctionnement et caractéristiques .
-
Page 39: Eléments De Service Et D'indication
Eléments de service et d’indication boutons-poussoir de réglage MODE / LEARN / ENTER FLOW / TEMP °C indication de fonction Indication de fonction débit (Mode Run débit) débit actuel du fluide dans la plage de détection (rampe LED verte) débit excessif (LED 9 clignote) chute du débit (LED 0 clignote) Seuil de commutation (SP): LED orange: débit ≥... -
Page 40: Structure Du Menu
Mode Run débit Mode Run température >2s >2s Seuil de commutation débit Seuil de commutation temp. Réglage sur débit maximum >5...<10s >5s >5s Réglage sur débit minimum >10...<15s Fonction du sortie S2 Surveiller un débit excessif Réglages de base >15...<20s LED = verte LED = orange LED = rouge... -
Page 41: Fonctionnement Et Caractéristiques
Fonctionnement et caractéristiques Le contrôleur de débit • détecte la vitesse de circulation et la température du fluide (milieux liquides et gazeux), • affiche le débit actuel (rampe LED verte) ou la température actuelle (rampe LED rouge), • commute les sorties en fonction de la programmation S1 (broche 4): contrôle du débit Sortie Etat de commutation... -
Page 42: Montage
Montage L'appareil est adaptable à différents types de raccords process (adap- tateurs à commander séparément comme accessoires). Attention: Ne pas monter l’appareil dans une raccord pour failbe débit. • Dans le cas des tubes horizontaux monter l'appareil latéralement, si possible (fig. 1). Lorsque l'appareil est monté... - Page 43 filetage M18 x 1,5 1. Graisser l'écrou (3) et les filetages afin d'assurer que l'écrou peut être desserré et serré plusieurs fois. Remarque: Aucune graisse ne doit être appliquée au bout de la sonde (A). 2. Visser l'adaptateur approprié (2) sur le raccord process (1). 3.
-
Page 44: Raccordement Électrique
Raccordement électrique L'appareil doit être monté par un électricien. Les règlements nationaux et internationaux relatifs à l'installa- tion de matériel électrique doivent être respectés. Alimentation selon EN50178, TBTS, TBTP. Afin de répondre aux exigences de la norme "UL 508" pour la catégorie "limited voltage", l´appareil doit être impérativement alimenté... -
Page 45: Programmation
Programmation I I Passage dans le mode Run débit ↔ ↔ mode Run température • Appuyer sur le bouton Mode/Enter pendant au moins 2 s. I I Réglage de la plage de détection débit ) • S'assurer d'être dans le mode Run débit. •... - Page 46 I I Réglage de la fonction de commutation pour S2 • S'assurer d'être dans le mode Run température. • Appuyer deux fois sur le bouton Mode/Enter. • Appuyer sur le bouton Learn/Set pendant 5 s, le relâcher lorsque la LED 0 clignote. •...
-
Page 47: Mise En Service / Fonctionnement / Maintenance
Lorsque l'appareil est verrouillé, les réglages actuels pour les seuils de commutation, pour le contrôle débit excessif et pour la fonction de commutation (fonction logique) S2 peuvent être indiqués. Pour ce faire, ouvrir le menu et procéder comme pour la programmation. Mise en service / Fonctionnement / Maintenance Après le montage, le câblage et le réglage vérifier le bon fonctionne- ment de l'appareil. -
Page 48: Diagrammes De Réglage / Informations Techniques
Diagrammes de réglage / Informations techniques I I Réglage de la plage de détection débit La plage de détection est déter- minée par: • Réglage sur débit maximum souhaité (HI-Teach) . Ce réglage suffit pour la plu- signal part des applications à base de la d'eau. - Page 49 • Réglage sur débit minimum ou débit nul (LO-Teach; optionnel) L'appareil détecte le débit existant et l'utilise comme valeur minimale pour l'affichage à LED. En fonctionnement la première LED verte (LED 0) clignote lorsque le débit du fluide tombe en-dessous de cette valeur (ou lorsque le débit est nul).
- Page 50 I I Réglage du seuil de commutation “débit” (SP Flow Le seuil de commutation est préréglé en usine (LED 7). Le réglage influence le temps de réponse de l'appareil: Plus haut est le seuil de commutation = réaction rapide en cas de chute du débit, plus bas est le seuil de commutation = réaction rapide en cas d'augmentation du débit.
- Page 51 I I Surveiller un débit excessif Grâce à cette fonction, une fenêtre d'affichage dans la plage de détection peut être définie: Déplacer la LED indiquant la valeur maxi- male à la position 8, 7, 6 ou 5. En débit maximum toutes les LED de cette échelle sont allumées.
- Page 52 I I Réglage du seuil de commutation “température” (SP Temp S'assurer d'être dans le mode Run température. Appuyer brièvement sur le bouton Mode/Enter. Le seuil de commu- tation actuel est affiché: LED allumée: pas en 10°C, LED clignotante: pas en 1°C. Appuyer sur le bouton Learn/Set et le maintenir.
- Page 53 I I Réglage de la fonction de commutation pour S2 S'assurer d'être dans le mode Run température. Appuyer deux fois sur le bouton Mode/Enter. Le réglage actuel est affiché (LED verte). Appuyer sur le bouton Learn/Set pendent 5 s (jusqu'à ce que la LED clignote).
- Page 54 I I Récupérer les réglages de base effectués en usine S'assurer d'être dans le mode Run débit. Appuyer sur le bouton Learn/Set et le maintenir appuyé. Les LED vertes à droite et à gauche >15...<20 s clignotent; après 5 s la rampe de LED s'allume de gauche à...
- Page 55 Fonction hystérésis (débit) débit débit maximum seuil de hystérésis commutation (SP) débit minimum Si le débit augmente, la sortie commute lorsque le seuil de commuta- tion (SP ) est atteint. Flow Si le débit diminue de nouveau, la sortie ne commute que lorsque la valeur “SP minus hystérésis”...
-
Page 56: Technische Daten
Technische Daten Betriebsspannung [V] ......20 ... 36 DC Strombelastbarkeit [mA] ... 2 x 250; Kurzschlußschutz, getaktet; verpolungssicher / überlastfest Spannungsabfall [V] . -
Page 57: Technical Data
Technical data Operating voltage [V] ......20 ... 36 DC Current rating [mA] ....2 x 250; short-circuit protection; reverse polarity protection / overload protection Voltage drop [V] . -
Page 58: Données Techniques
Données techniques Tension d'alimentation [V]......20 ... 36 DC Courant de sortie [mA] ....2 x 250; protégé: courts-circuits protégé: inv. - Page 59 Logikfunktion Nr. Strömung Temperatur Ausgang S2 Logic function no. flow Temperature Output S2 Fonction logique débit Température Sortie S2 ≥ SP ≥ SP Flow Temp = ja/yes/oui; = nein/no/non; = ja oder nein/yes or no/oui ou non...
Need help?
Do you have a question about the Efector 300 SI1007 and is the answer not in the manual?
Questions and answers