
Related Manuals for Kodak S2000f Series


Summary of Contents for Kodak S2000f Series
- Page 1 KODAK S2085f Scanner KODAK S3060 Scanner KODAK S3060f Scanner KODAK S3100 Scanner KODAK S3100f Scanner KODAK S3120 Scanner User's Guide A-61916...
- Page 2 3rd Party Licenses This software is based in part on the work of the Independent JPEG Group Copyright (C)2009-2013 D. R. Commander. All Rights Reserved. Redistribution and use in source and binary forms, with or without modification, are permitted provided that the following conditions are met: Redistributions of source code must retain the above copyright notice, this list of conditions and the following disclaimer.
-
Page 3: Table Of Contents
Contents Contents ............................i Safety .............................v User Precautions ........................v Warning labels ........................vi Acoustic emission ......................... vi 1 Overview .............................1 Illustrations in this guide ......................1 Supporting documentation ......................1 Accessories ..........................2 What’s in the box ........................2 Scanner components .........................3 Front view ..........................3 Inside view ..........................6 Rear view ..........................7 Optional Printer Accessory: Printer access view ..............8... - Page 4 Misfeed Detection Control ....................39 Scanning paused ........................40 Document Handling ......................41 Elevator and paper path controls ..................42 4 Document Printing ........................43 Using the Kodak Printer Accessory ..................43 Printer specifications ........................44 Installing/replacing the ink cartridge ..................45 Changing print positions ......................47 Problem solving ........................48 5 Maintenance ..........................49...
- Page 5 Appendix A Regulatory Information ..................67 Environmental information ....................67 European Union ........................67 EMC statements ........................70 Appendix B Warranty - US and Canada only ................71 A-61916 August 2019...
- Page 6 A-61916 August 2019...
-
Page 7: Safety
Remove the power cord from the wall outlet before moving or relocating the scanner. • Follow the Kodak Alaris recommended cleaning procedures. Do not use air, liquid or gas spray cleaners. These cleaners displace dust, dirt and debris to other locations within the scanner, which may cause the scanner to malfunction. -
Page 8: Warning Labels
Warning labels CAUTION: Moving parts, avoid contact. Acoustic emission Maschinenlärminformationsverordnung – 3, GSGV Der arbeitsplatzbezogene Emissionswert beträgt <70 dB(A). [Machine Noise Information Ordinance — 3, GSGV The operator-position noise emission value is <70 dB(A).] A-61916 August 2019... -
Page 9: Overview
The Kodak S2000f/S3000 Series Scanners are desktop duplex color scanners. These models are available: • Kodak S2085f Scanner scans up to 85 pages per minute, black and white A4 documents at 300 dpi in portrait orientation. The S2085f Scanner also includes a built-in flatbed which allows you to scan exception documents up to A4 (21 x 29.7 cm) or 8 ½... -
Page 10: Accessories
TWAIN Datasource or ISIS Driver. (CAT No.1324391 - Printer Accssry i2900/S2000f/i3000/S3000) Kodak A3 Flatbed Accessory — the Kodak A3 Flatbed adds scanning capability for exception-size documents up to A3 (29.7 x 42 cm) or 11 x 17- inch (27.94 x 43.2 cm) to your Kodak S2085f/S3060/S3060f/S3100/S3100f/... -
Page 11: Scanner Components
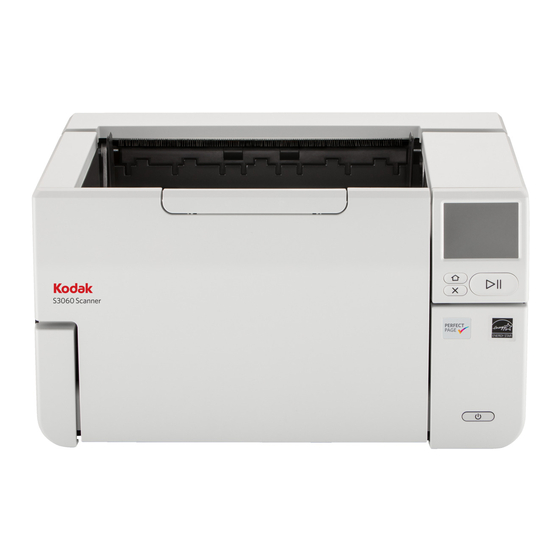
Front view The following illustration is of the Kodak S3060f Scanner. The Kodak S2085f, S3060f and S3100f are flatbed models. If you have any other Kodak S2000f/ S3000 Series Scanner, you do not have a flatbed. All components are on all scanner models unless otherwise noted. - Page 12 Scanner display screen — touch screen with color graphic display of scanner information and controls. The screen provides access for Kodak Alaris scanning applications that allow you to initiate scanning at the scanner.
- Page 13 Output tray extension — can be opened to accommodate documents up to 17 inches / 43.2 cm. Document stop - raise the document stop for improved document stacking. Input tray (elevator) side guides - slide these guides in and out to accommodate the size of the documents that you are scanning.
-
Page 14: Inside View
When you pull the scanner cover release latch forward, the following internal components are visible. Ultrasonic Sensors — used to detect multifeeds and document damage. The Kodak Alaris Intelligent Document Protection feature helps protect your documents from being damaged. Refer to the Scanning Setup Guides for more information about this feature. -
Page 15: Rear View
Ethernet port — connects the scanner to the network. Power port — connects the adapter power cord to the scanner. Back panel — removable to allow you to attach the Kodak Printer Accessory. Rear document exit — allows you to exit exception documents from the rear of the scanner. -
Page 16: Optional Printer Accessory: Printer Access View
Optional Printer The illustration below shows the operating components of the printer. For Accessory: Printer access installation instructions, see the instructions that were packed with your Kodak Printer Accessory. view Printer cable — this cable connects directly to the scanner to allow communication to the printer. -
Page 17: Installation/First Scan
5. Verify the contents of the scanner box. (Refer to the left panel of the Installation Guide.) NOTE: When positioning the scanner, be sure to provide adequate clearance at the back of the scanner if you will be using the rear document exit or the Kodak Printer Accessory. A-61916 August 2019... -
Page 18: Setting Up Your Scanner
Setting up your scanner Follow these steps from the Installation Guide. 1. Attach the correct AC plug adapter to the power supply. Attach the power supply to the scanner, and then to a power outlet. 2. Turn the scanner on by pressing the power button on the front of the scanner. -
Page 19: Configure Network Settings
NOTE: The Settings menu can also be used to change individual network and power settings. • To navigate through the scanner’s display set-up screens, make your selection(s) and then press the right arrow to go to the next screen/ step. •... -
Page 20: Install Ferrite Core
Install ferrite core If you are using an Ethernet cable, install the provided ferrite core. Without a properly attached ferrite core, the scanner may cause interference to nearby wireless devices. 1. Open the ferrite core that came with the scanner. 2. -
Page 21: Install Driver Software
-If your computer does not automatically start the installer, browse to the disc and run set_up.exe. 3. Follow the steps of the “Kodak S2000f/S3000 Scanners” driver software installation. Be sure to follow the ‘Typical’ installation in order for your computer to be properly connected to your scanner and to verify the scanner is working. -
Page 22: Verify Scanner's Firmware
Verify scanner’s Follow these steps to see if your scanner’s firmware needs updating. firmware 1. Determine your scanner’s firmware version by doing the following on the scanner: - Make sure your scanner is turned on and in the Ready screen. - Press the button to display the settings screen. -
Page 23: Update Scanner's Firmware
Update scanner’s Use one of the following methods to update your scanner’s firmware: firmware • Computer with driver software installed – Use this option when the computer already has the driver software installed and it is connected to/can access the scanner. •... -
Page 24: Available Alaris Scanning Software
6. Open a web browser on the computer and do the following within the web browser: -Enter the scanner’s network IP Address to get to the scanner’s internal web page. -Click the ‘Support’ tab. -Click the “UPDATE SCANNER FIRMWARE” button; it is in the lower left corner. - Page 25 “Adjusting the input tray for document length” on page 19.) 4. Select your scanning application. The scanner comes with Smart Touch functionality and Kodak Capture Pro LE. For more information, see “Available Alaris Scanning Software” on page 16. Getting your documents ready to scan •...
-
Page 26: Power Saver Mode And Turning The Scanner Off
Initial scan with an Alaris scanning application Alaris scanning applications are available for download with your scanner purchase and will allow you to quickly and easily perform common scanning tasks, such as: • create a searchable PDF of a printed report •... -
Page 27: Scanner Adjustments
3 Scanner Adjustments Adjusting the input You can adjust the input tray to accommodate your scanning needs. tray • Adjusting the side guides — the side guides can be moved in or out to accommodate document size. When adjusting the side guides, place your hands on the bottom of the side guides, over the slots in the tray to slide the guides in and out. -
Page 28: Adjusting The Output Tray
- Document lengths more than 17 inches / 43.2 cm — if you are scanning documents longer than 17 inches / 43.2 cm, the scanner driver must be set to accommodate these long documents. Be sure to verify that the Maximum Length option on the Device-General tab (TWAIN Datasource) or the Longest Document option on the Scanner tab (ISIS Driver) is set to longer than the longest document being scanned. - Page 29 • Adjusting the side guides - adjust the side guides on the output tray to match the position of the side guides on the input tray. • Adjusting the document stop - adjust the output tray document stop to slightly longer than the longest document being fed. If you are scanning documents longer than the output tray will accommodate, fold the document stop flat on the output tray.
- Page 30 • Adjusting the output tray for document length - Open the output tray extension to accommodate longer documents. - With the output tray extended, lift the output tray to engage the height adjustment tab. This position will enable a more uniform stack of documents.
-
Page 31: Attaching The Exit Deflectors
Attaching the exit The scanner comes with custom exit deflectors and mounts. The deflectors help align the documents as they are deposited in the output tray. Multiple deflectors sizes of exit deflectors are included. Depending on the document set you are scanning, attach one of the size deflectors that meet your needs. -
Page 32: Flatbed Scanning (S2085F, S3060F, S3100F Scanners Only)
Flatbed scanning The flatbed can be used to scan exception documents, file folders, books, magazines, passports and more. (S2085f, S3060f, S3100f Scanners only 1. Open the flatbed cover (see “Grasp here to open flatbed” on page 3). 2. Place the document face down on the glass platen. 3. - Page 33 NOTES: • When scanning from the flatbed, be sure there are no documents in the input tray of the scanner. • When scanning a document/book from the flatbed, be sure the flatbed cover is closed. The cover will automatically adjust to the thickness of the document/book.
-
Page 34: Using The Rear Document Exit
Using the rear Documents that require special handling (i.e., fragile documents, shipping envelopes, etc.) can be output using the rear document exit. This exit provides document exit the straight-through paper path option that allows an exception document to pass through the transport, thus reducing the possibility of a document jam. To use the rear document exit, lift the rear document exit lever up. -
Page 35: Using The Scanner Touch Screen
Using the Scanner Touch Screen Status area The scanner touch screen displays the current state of the scanner. 1 - Document count 2 - Paper Present indicator, (if no paper is detected, this icon displayed.) 3 - Scanner is connected to a computer via USB. 4 - Scanner is connected to the Wired Network. - Page 36 A check mark means the option is selected: When more options are available than the screen can display, a scroll bar is provided: When the worn tire icon appears at the top of the scanner touch screen, it is time to clean the scanner or replace consumables (rollers, tires, etc.), see “Maintenance”...
-
Page 37: Settings Screen
Settings screen The settings screen is the starting point for configuring the scanner. To access the Settings screen, touch the Menu button (see “The menu button on page 27), and select Settings. From here the user can collect scanner information, perform calibrations, track maintenance items, and view scanner events that have occurred during the current power on cycle. -
Page 38: Network
Each item in the meter menu displays the number of scans since the last cleaning or replacement, and the maximum recommended number of scans before the next cleaning or replacement. In the example above there have been 124 scans since the last Feed Module replacement; a maximum of 1,000,000 scans are recommended before the next replacement. -
Page 39: Diagnostics
If you are using Wired Networks, you can choose between Automatic and Manual network address configuration. In the Automatic setting, the network will assign an IP address to scanner. To connect your scanner to a static IP address: 1. Select Manual. 2. - Page 40 Technical Support. Alterations - This option is for Service Use only. Only use this option when directed to do so by Kodak Alaris Service personnel. A-61916 August 2019...
-
Page 41: Easy Setup
Easy Setup Kodak Alaris provides an easy-to-use alternative to configuring the scanner’s network settings. The scanner operator can scan an EasySetup document, and the network settings will be configured automatically. Obtain an EasySetup document. 1. From the Settings screen, select EasySetup. -
Page 42: Power
Power The power saver (number of minutes the scanner is idle before entering power saver mode) and power off (number of minutes the scanner is idle before the power is turned off) settings are adjustable. Select Power to adjust the settings. -
Page 43: Elevator
Elevator Use the Elevator feature to enable/disable the Automatic input elevator. When set to Automatic, the elevator will raise to the highest position as soon as documents are placed in an empty elevator. Feed adjustment Use this feature to adjust the length of time the feed rollers are engaged. If short, light-weight, thin, or delicate documents are causing paper jams;... -
Page 44: Speed
Speed Use the Speed feature to adjust the speed of the scanner and the resolution of scanned images. 1. Select Speed from the Settings menu. 2. Select Greater than 300 dpi. 3. Choose a setting: - Highest Quality - runs the scanner at a slower speed but produces the highest quality image. -
Page 45: Admin Access
Admin Access Use this option to restrict access to the scanner. If Admin Access is enabled, the scanner operator will be required to enter a password to access some settings. The password can be changed from this screen at any time. 1. -
Page 46: Ready States
If the scanner’s Sharing Mode is set to Single PC, this screen will not appear. Ready with profiles Once activities are registered with the scanner by a Kodak Alaris scanning application, scanning activities can be initiated at the scanner. If the scanner’s Sharing Mode is configured as Single PC, this will be the first screen that appears. -
Page 47: Scanning In Progress
Scanning in progress When scanning is in progress, the scanner display will count the number of documents scanned thus far. The scanned display will report when the scanning activity is completed. The display will include the total number of documents scanned. Misfeed Detection Control A misfeed is more than one page passing through the imaging area together. -
Page 48: Scanning Paused
Scanning paused You can pause scanning at any time by pressing the button. The scanner display will reflect that the scanning activity is paused. Resume scanning by touching the button. A-61916 August 2019... -
Page 49: Document Handling
Document Handling The setting for Document Handling determines how the scanner transports pages through the scanner. It affects how pages are fed into the scanner, how fast they move through the scanner, and how they are placed in the output tray. An enhanced handling option can improve output stacking. -
Page 50: Elevator And Paper Path Controls
Elevator and paper path If these controls are not visible because the “Ready with profiles” screen is controls displayed, they can be accessed from the menu. Touch the menu button • Lower Elevator - touch this option to lower the elevator (input tray) to the 300 sheet position. -
Page 51: Document Printing
4 Document Printing Using the Kodak This chapter provides information for using the Kodak Printer Accessory for the S2000f/S3000 Series Scanners. In order to use the printing option you Printer Accessory must have purchased and installed the Kodak Printer Accessory. -
Page 52: Printer Specifications
Printer specifications More information about the following specifications can be found in the TWAIN Datasource or ISIS Driver Scanning Setup Guide. Characteristic Description Maximum lines Maximum characters 40 (including spaces) Print locations (horizontal) 11 manually set NOTE: You must remove the Print Location screw for 11 positions;... -
Page 53: Installing/Replacing The Ink Cartridge
Installing/replacing CAUTION: Do not adjust or service the printer during scanning. the ink cartridge You must install the ink cartridge before using the printer. Refer to “Supplies and consumables” on page 60 for ordering information. After initial installation, replace the ink cartridge when: •... - Page 54 4. Insert the ink cartridge into the printer carrier as shown. 5. Press the green release tab and rotate the printer carrier to the “printing” position. 6. Slide the printer carrier into the desired print position. See “Changing print positions” on page 47. 7.
-
Page 55: Changing Print Positions
Changing print You will need to remove the printing location screw if you want to use 11 print positions. If you leave the screw in place, only 9 print positions will be positions available. The horizontal print position must be changed manually. 1. -
Page 56: Problem Solving
Problem solving Use the list below as a guide to check possible solutions to problems you may encounter when using the printer. Problem Possible Solution • Be sure the ink cartridge is not empty. Print quality is poor or inconsistent •... -
Page 57: Maintenance
Years of production scanning experience proves that properly cleaning and maintaining your scanner will result in scanning more paper in less time with less issues. A properly maintained Kodak S2085f/ S3060/S3060f/S3100/S3100f/S3120 Scanner will provide years of trouble-free operation. -
Page 58: Opening The Scanner Cover
Opening the scanner 1. Power down the scanner. cover 2. Remove any documents from the input tray, output tray and transport. 3. Pull the scanner cover release latch forward. The scanner cover will open partially. Grasp the center of the top cover to fully open the cover for access to the internal components. -
Page 59: Cleaning Procedures
Do not use canned/compressed air. Use of compressed air may cause dust to be forced into the scanner’s imaging system and lodge in an area that causes image quality issues and cannot be cleaned without Kodak Alaris Service personnel. •... -
Page 60: Cleaning The Rollers
Cleaning the rollers Cleaning the rollers includes all of the rollers in the transport area, the separation roller tires and the feed module tires. 1. Turn off the scanner and open the scanner cover. 2. Manually rotate and wipe the rollers with a roller cleaning pad. 3. -
Page 61: Cleaning The Feed Module Tires
8. Reinstall the separation roller by aligning the slots on the separation roller with the holders. 9. Reinstall the pre-separation pad. Be sure it snaps into place. Cleaning the feed module 10. Clean the feed module tires by manually rotating and wiping the feed tires module tires with a roller cleaning pad. -
Page 62: Cleaning The Cis Imager
17. When finished with all cleaning procedures, turn on the scanner. Cleaning the flatbed glass The flatbed’s glass platen can collect fingerprints and dust. Use Staticide Wipes for Kodak Scanners or Brillianize Detailer Wipes to clean the glass (S2085f/S3060f/S3100f Scanners only) platen. -
Page 63: Running A Transport Cleaning Sheet
Running a transport The transport should be cleaned with a Transport Cleaning Sheet fed several cleaning sheet times. 1. Remove the wrapping from the Transport Cleaning Sheet. 2. Adjust the side guides to the widest position. 3. Place the transport cleaning sheet in the center of the input tray in landscape orientation with the adhesive side up. -
Page 64: Replacement Procedures
Replacement For guidelines on how often to replace the feed module, feed tires, urging tires, separation roller module, separation roller tires, and pre-separation pads; refer procedures to the support page for your scanner, and click on “Supplies.” www.AlarisWorld.com/go/IMsupport Replacing the feed module 1. - Page 65 7. Install each new tire by gently pulling it over the core. The tires do not need to be installed in any specific orientation. NOTE: When changing tires, be sure to put the larger tires on the longer shaft and the smaller tires on the shorter shaft. IMPORTANT:Do not overstretch the tire;...
-
Page 66: Replacing The Separation Roller
Replacing the separation 1. Open the scanner cover. roller 2. Remove the pre-separation pad by lifting the pad up and out of position; then remove the separation roller. 3. Insert the new separation roller. Be sure to line up the slots on the separation roller with the holders. -
Page 67: Replacing The Pre-Separation Pad
Replacing the pre- Change the pre-separation pad when the frequency of multi-fed documents separation pad increases. 1. Open the scanner cover. 2. Remove the pre-separation pad by lifting the pad up and out of position. 3. Install the new pre-separation pad. Be sure it snaps into place. 4. -
Page 68: Replacing The Flatbed Background
Replacing the flatbed Replace the flatbed background when it is damaged or very dirty. If you are background experiencing cropping issues, inspect the background and replace it if necessary. (S2085f/S3060f/S3100f Scanners only) NOTE: Handle the flatbed background with care during replacement. 1. -
Page 69: Troubleshooting
6 Troubleshooting Scanner error indicators A blinking power button indicates a scanner error or alert condition, which will be displayed on the scanner screen. A yellow alert needs your attention, e.g. if the scanner cover is open. A red alert is a critical error. If you can not correct the problem by following the guidance on the scanner screen, you may need to power-cycle the scanner. -
Page 70: Self Help For Problems
Self help for Use the chart below as a guide for possible solutions to problems you may encounter when using the Kodak S2085f/S3060/S3060f/S3100/S3100f/S3120 problems Scanner. Problem Possible Solution Documents are jamming or multiple Make sure that: documents are feeding • all documents meet specifications for size, weight, and type, etc. as outlined in Appendix A, Specifications. - Page 71 • Disable any anti-virus or security suite software. If the problem resolves, consult the anti-virus or security suite software documentation for how to use exceptions or exclusions and add the Kodak folders. • Some image processing functions will reduce scanner speed. • Resolution (dpi) setting may be set too high.
- Page 72 Problem Possible Solution Documents are multifeeding Make sure that: • the leading edges of all batched documents are centered in the feeder so that each document will come in contact with the feed rollers. • the feed module and separation roller are clean and not worn. •...
- Page 73 Problem Possible Solution Scanner is not indicating multifeeds or Perform a Multifeed Calibration. From the scanner display ready screen, indicates repeated false multifeeds press the button to display the Settings menu. • Press the Diagnostics option. • Press the Multifeed Calibration option: •...
-
Page 74: Upgrading Software
Upgrading software Kodak Alaris frequently updates drivers and firmware to correct issues and add new features. If you are experiencing repeated error messages, for example, you should upgrade to the latest driver before contacting Service. Go to: ,, access S2000f/S3000 Drivers www.AlarisWorld.com/go/IMsupport... -
Page 75: Appendix A Regulatory Information
This symbol indicates that when the last user wishes to discard this product, it must be sent to appropriate facilities for recovery and recycling. Please contact your local Kodak Alaris representative or refer to www.kodakalaris.com/go/recycle for additional information on the collection and recovery programs available for this product. - Page 76 Appendix A Regulatory Information Product Disclosure Table - Kodak S2085f/S3060/S3060f/S3100/S3100f/S3120 Scanners 有毒有害物质或元素名称及含量标识表 Table of hazardous substances’ name and concentration 有毒有害物质或元素 hazardous substances’ name 部件名称 铅 汞 镉 六价铬 多溴联苯 多溴二苯醚 Component name (Pb) (Hg) (Cd) (Cr6+) (PBB) (PBDE) 适配器 (AC Adapter) 电路板...
- Page 77 Taiwan: 設備名稱:掃描器 型號(型式): Kodak S2085f Scanner / Kodak S3060 Scanner / Equipment name Type designation (Type) Kodak S3060f Scanner / Kodak S3100 Scanner / Kodak S3100f Scanner / Kodak S3120 Scanner 限用物質及其化學符號 單元 Restricted substances and their chemical symbols Unit 鉛...
-
Page 78: Emc Statements
Appendix A Regulatory Information 備考1.〝超出0.1 wt %〞及〝超出0.01 wt %〞係指限用物質之百分比含量超出百分比含量基準值。 Note 1: “Exceeding 0.1 wt %” and “exceeding 0.01 wt %” indicate that the percentage content of the restricted substance exceeds the reference percentage value of presence condition. 備考2.〝○〞係指該項限用物質之百分比含量未超出百分比含量基準值。 Note 2: “○” indicates that the percentage content of the restricted substance does not exceed the percentage of reference value of presence. 備考3.〝... -
Page 79: Appendix B Warranty - Us And Canada Only
Kodak Alaris or through Kodak Alaris’ authorized distribution channels: Kodak Alaris Inc. warrants that an Alaris Scanner, from the time of sale through the Limited Warranty period applicable to the Product, will be free of defects in materials or workmanship and will conform to the performance specifications applicable for the particular Alaris Scanner. - Page 80 Warranty Service descriptions Kodak Alaris offers a range of service programs to support its Limited Warranty and to assist with the use and care of the Alaris Scanner (“Service Methods”). An Alaris Scanner represents an important investment. Alaris Scanners provide the productivity needed to stay competitive.
- Page 81 Warranty, then place the entire malfunctioning unit in the shipping case, apply the enclosed labels and call the carrier for pickup within 5 business days after receiving the AUR. Kodak Alaris will pay the return transportation charges. If parts are missing from the returned unit, Customer may be charged for the parts at prevailing per call rates.
- Page 82 For U.S. contact Technical Support by telephone: Telephone technical support is available Monday-Friday between the hours of 5 a.m. to 5 p.m. excluding Kodak Alaris holidays. Phone: (800) 822-1414 For technical documentation and FAQs available 24 hours a day: Website: www.AlarisWorld.com/go/IM...
- Page 84 All trademarks and trade names used are the property of their respective holders. The Kodak trademark and trade dress are used under license from Eastman Kodak Company. © 2019 Kodak Alaris Inc. TM/MC/MR: Alaris...
Need help?
Do you have a question about the S2000f Series and is the answer not in the manual?
Questions and answers