Table of Contents
Advertisement
Quick Links
DMBE TYXAL+
www.deltadore.com
Notice d'installation
FR
Installation guide
EN
Installationsanleitung
DE
Guida di installazione
IT
Manual de instalación
ES
Instrukcja instalacji
PL
NL
Installatiehandleiding
2xLS 14500 - 3.6 V / 5.2 Ah - Lithium
Autonomie 10 ans - Autonomy 10 years
Consumption stand-by : 14 μA
Consumption : 26 mA max
868,30 MHz / 868,95 MHz (EN 300 220)
100 m
Ý
300m
-10°C / +70°C
-20°C / +60°C
IP
IP 55
75%
56 x 235 x 128mm
520 gr.
R&TTE 1999/5/CE
Important
product information (¸)
Contenu / Contents / Inhalt /
Contenuto / Contenido /
/ Inhoud
Instructions
Important
Product
Informations
Advertisement
Table of Contents

Subscribe to Our Youtube Channel
Related Manuals for DELTA DORE DMBE TYXAL+


Summary of Contents for DELTA DORE DMBE TYXAL+
- Page 1 DMBE TYXAL+ www.deltadore.com Notice d’installation Installation guide Installationsanleitung Guida di installazione Manual de instalación Instrukcja instalacji Installatiehandleiding Contenu / Contents / Inhalt / 2xLS 14500 - 3.6 V / 5.2 Ah - Lithium Autonomie 10 ans - Autonomy 10 years Contenuto / Contenido / / Inhoud Consumption stand-by : 14 μA...
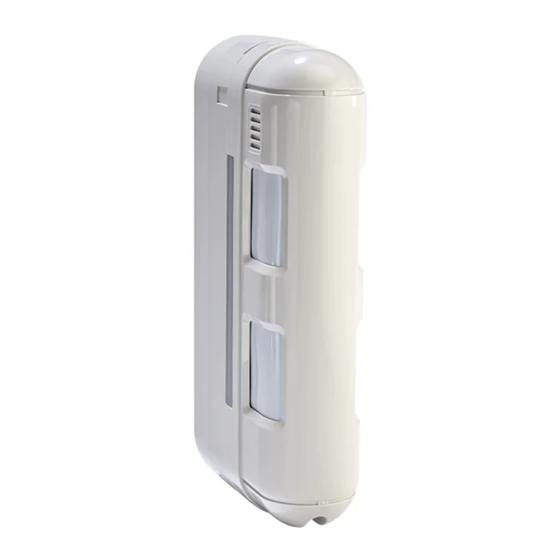
- Page 2 1. Presentation 2. Location DMBE TYXAL+ is a passive infrared motion detector, de- signed to detect the infrared radiation emitted by human bodies. N°3 This motion detector aims to protect the outside of a Install the motion detector vertically, with building by detecting intrusions prior to penetration into both high and low detection zones parallel the premises.
- Page 3 3. Mounting 4. Activation Ë Ê Ê Ë Connector Do not touch the mirrors. Remove the fixing screw from Remove the fixing screws Open the base's card slot. Plug the battery cable into the card the top cover and withdraw from the rear mount.
- Page 4 5. Beam inclination settings 6. Detector range settings Principle: Principle: If an obstacle cuts through the beams along the wall, these The high beam will always remain parallel to the ground. 0° beams can be inclined horizontally towards the front, up to 3 The lower beam can be directed as shown below.
- Page 5 6. Detector range settings 7. Function settings Ì Select the desired position (A, B, C or D). Detection sensitivity settings The lower beam can be set to control the range according to the table below. The sensitivity can be set to 3 different positions: •...
- Page 6 8. Detection test 10. Battery replacement The LED flashes continuously, the battery is dead. Before opening the unit, the alarm control unit must be Check the device functions properly by conducting a detection test. in Maintenance mode (refer to system installation guide). Ê...
Need help?
Do you have a question about the DMBE TYXAL+ and is the answer not in the manual?
Questions and answers