Table of Contents
Advertisement
Available languages
Available languages
Quick Links
Advertisement
Chapters
Table of Contents

Subscribe to Our Youtube Channel
Related Manuals for Megasat HD 810


Summary of Contents for Megasat HD 810
- Page 1 Brillantes Fernsehen Brillantes Fernsehen HD 810 Benutzerhandbuch Deutsch...
-
Page 2: Table Of Contents
Entfernen Sie nicht das Gehäuse, um das Risiko eines Stromschlags zu vermeiden. Kon- taktieren Sie qualifiziertes und lizenziertes Service-Personal, um das Gerät zu reparieren, oder kontaktieren Sie Ihren Händler. Megasat Werke GmbH | Industriestraße 4a | D-97618 Niederlauer | www.megasat.tv | info@megasat.tv DEUTSCH DEUTSCH... -
Page 3: Grundfunktionen
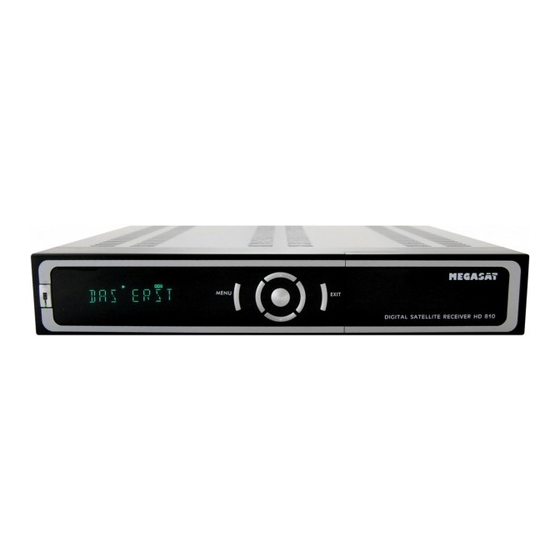
Grundfunktionen Grundfunktionen Allgemeine Merkmale Vorderseite • MPEG2 SD, MPEG2 HD, H.264/AVC SD, H.264/AVC HD • 480i/p, 576i/p, 720p, 1080i/p • Automatische Umschaltung PAL/NTSC • 5000 TV- und Radiokanäle programmierbar • Digitaler Audioausgang SPDIF Coaxial • 32 verschiedene Favoritengruppen • Mehrsprachiges Menü •... -
Page 4: Fernbedienung
Grundfunktionen Installieren und Anschließen Das folgende Diagramm zeigt Ihnen, wie Sie den Receiver, TV und LNB miteinander Fernbedienung verbinden. Lesen Sie bitte zuerst die Anleitung, wenn Sie nicht sicher sind wie Sie die Komponenten miteinander verbinden sollen..........Ein- / Ausschalten .......... -
Page 5: Installation Und Betrieb
Installation und Betrieb Installation und Betrieb Hauptmenü Übersicht Hauptmenü Programme bearbeiten ....TV-Programmliste Vergewissern Sie sich, ob der Receiver richtig installiert und an die anderen Geräte an- ............Radio-Programmliste geschlossen wurde. Wenn das Gerät das erste Mal benutzt wird oder keine Kanalliste ............Kanäle eines Satelliten löschen vorhanden ist, wird beim Einschalten auf dem Bildschirm das Hauptmenü... -
Page 6: Programmliste
Installation und Betrieb Installation und Betrieb Programmliste 4. Drücken Sie die ROTE Taste um ein Programm zu sperren. Wählen Sie ein Drücken Sie die OK-Taste und es wird das Programm aus, das gesperrt werden soll Fenster „PIN eingeben“ angezeigt. Mit den und drücken Sie die OK-Taste (Falls eine Tasten PR+, PR- bewegen Sie den Cursor Passwortabfrage erscheint, bestätigen... - Page 7 Installation und Betrieb Installation und Betrieb Sortieren Löschen Drücken Sie die ROTE Taste um das Fenster Drücken Sie die BLAUE Taste, wenn Sie mit den verschiedenen Möglichkeiten der ein Programm löschen wollen. Wählen Kanal-Sortierung anzuzeigen. Sie das gewünschte Programm aus und markieren Sie es mit der OK/List- Name (A-Z): aufsteigende Reihenfolge Taste.
-
Page 8: Installation
Installation und Betrieb Installation und Betrieb Kanäle eines Satelliten löschen Satellitenliste 1. Durch Drücken der Tasten PR+, PR- kön- Gehen Sie mit dem Cursor auf die „Kanäle eines Satelliten löschen“ und drücken Sie die nen Sie in der Liste auf-/abwärts blättern. OK/List-Taste. -
Page 9: Antenneneinstellung
Installation und Betrieb Installation und Betrieb 3. Motoreinstellung: Drücken Sie die OK/List-Taste und stellen Sie im angezeigten Antenneneinstellung Fenster die Motorsteuerung ein. Bei feststehender Antenne Satellit: Wählen Sie mit den Tasten +/- den gewünschten Satelliten aus oder Wählen Sie im Untermenü „Antennenan- drücken Sie die OK-Taste um eine Über- schluss“... -
Page 10: Unicable System
Installation und Betrieb Installation und Betrieb Unicable System Satellitensuche Einzelsatellitensuche Unter dem Menüpunkt LNB Frequenz, können Sie die Einstellungen für Einkabelsysteme (Unicable) vornehmen. 1. Satellit : wählen Sie mit den Tasten +/- Mit den Tasten können Sie verschiedene Einstellungen für das LNB wählen. Der Receiver ist für unterschiedliche UniCable Systeme programmierbar. -
Page 11: Systemeinstellungen
Installation und Betrieb Installation und Betrieb TP-Liste Transponderliste Systemeinstellungen 1. Wählen Sie mit den Tasten +/- den ge- 1. Drücken Sie die OK-Taste um in die Systemeinstellungen zu gelangen. wünschten Satelliten aus. 2. Bewegen Sie den Cursor mit den Tasten „PR+/PR-“ auf-/abwärts um das entsprechen- 2. -
Page 12: Timereinstellung
Installation und Betrieb Installation und Betrieb Länder-Zeiteinstellungen Kindersicherung 1. Region: Wählen Sie mit den +/- Tasten Ihren Standort aus. Bevor Sie das Menü Kindersicherung öffnen, 2. GMT-Nutzung: müssen sie den PIN eingeben. Der voreinge- wenn sie „Nach Region“ auswählen, wird Zeit und Datum automatisch eingestellt. stellte PIN ist „0000“. -
Page 13: Werkzeuge
Installation und Betrieb Installation und Betrieb Erweiterte Einstellungen Werkseinstellung Drücken Sie die OK/List-Taste, um in die 1. LNB-Spannung: Option Werkseinstellung zu gelangen. Be- Wählen Sie AUS/EIN. stätigen Sie mit „Ja“, werden alle Einstellun- 2. Kanalspieltyp: gen in den Auslieferungszustand versetzt. Wählen Sie freie, verschlüsselte (kryptographisch) oder komplett aus. -
Page 14: Mediaplayer
Installation und Betrieb Installation und Betrieb Mediaplayer Musikanwendungsbeispiel Das Mediaplayer-Menü ist nicht aktiv, wenn kein USB-Gerät eingesteckt ist. Wählen Sie mit den Tasten / PR+ und / PR- ein Musikstück aus und drücken Sie die grüne Funktionstaste, um dieses der Wiedergabeliste (Favoritenliste) hinzuzufügen. Das Öffnen Sie den Mediaplayer, indem Sie im Menü... - Page 15 Installation und Betrieb Installation und Betrieb Bei Nein gelangen Sie zurück zur Wiedergabeliste, bei Ja wird die Wiedergabeliste kom- Wenn Sie Off wählen, bleibt das erste Bild, das Sie auswählen, auf dem Bildschirm stehen. plett gelöscht und Sie gelangen wieder zum Ausgangsfenster. Drücken Sie die L/R-Taste (blau), um in den Änderungsmodus zu gelangen.
-
Page 16: Fehlerbehebung
Installation und Betrieb Fehlerbehebung Network Local Setting Bei Problemen mit dem Receiver, überprüfen Sie folgende Situationen, um die Fehler- quelle zu ermitteln. Diverse Einstellungen für die Einbindung des Receivers in ein Heimnetzwerk. Problem mögliche Ursachen Was müssen Sie tun? WiFi Manager LED Leuchte auf der Vorderseite Netzkabel ist nicht angeschlos- Überprüfen Sie, ob das Netzka-... - Page 17 Information Hinweis: Notizen Gewicht und Abmessungen sind nicht die absolut exakten Werte. Technische Details können jederzeit geändert werden (nach Hersteller) ohne vorherige Ankündigung. Konformitätserklärung Hiermit wird die Übereinstimmung mit folgenden Richtlinien/Normen bestätigt: Richtlinie zur elektromagnetischen Verträglichkeit 2004/108/EG EN 55013: 2001 + A1: 2003 + A2: 2006 EN 55020: 2007 EN 61000-3-2:2006 + A1:2009 + A2:2009 EN 61000-3-3:2008...
- Page 18 Brillantes Fernsehen Brillantes Fernsehen HD 810 User manual English Stand: v1.0 April 2013...
- Page 19 Do not remove the cover, to reduce the risk of electric shock. Contact qualified and li- censed service personnel to repair the receiver, or contact your dealer. Megasat Werke GmbH | Industriestraße 4a | D-97618 Niederlauer | www.megasat.tv | info@megasat.tv ENGLISH...
-
Page 20: Basic Operation
Basic Operation Basic Operation Genaral Features Front Panel • MPEG2 SD, MPEG2 HD, H.264/AVC SD, H.264/AVC HD • 480i/p, 576i/p, 720p, 1080i/p • Automatic PAL/NTSC conversion • 5000 channels TV and Radio programmable • Digital Audio output SPDIF Coaxial • 32 different favorite groups selection •... -
Page 21: Installation And Connection
Basic Operation Installation an connection The following diagram shows you how to connect the HD receiver, TV, LNB and other Remote control equipment, please read this first if you are not sure about the connection, and it will guide you to the correct connection.......... -
Page 22: Installation And Operation
Installation and Operation Installation and Operation Main Menu Overview Main Menu Edit Channel ........TV Channel List Make sure, the set-top box is properly installed and connected to the other devices. If the ............Radio Channel List device is used for the first time or no channel list exists, when you turn on the screen, the ............Delete channels by satellite main menu will appear automatically. - Page 23 Installation and Operation Installation and Operation 4. Press the RED button to lock a program. Edir Channel Select a program you want to lock and press the OK key (If a password is reques- Press the OK button and the window „Enter ted appears, confirm it with „0000“).
- Page 24 Installation and Operation Installation and Operation Sort Delete Press the RED button to open the window Press the BLUE button if you want to with the different ways of sorting channel. delete a channel. Select the channel you want and mark it by pressing the Name (A-Z): increasing order (the „$“...
-
Page 25: Installation
Installation and Operation Installation and Operation Delete channels of a satellite Satellite List 1. By pressing the PR +, PR-you can scroll Go to the „Delete channels of a satellite“ with the cursor and press the OK / List button. through the list up/down. -
Page 26: Antenna Setup
Installation and Operation Installation and Operation Antenna Setup Satellite: Select with the +/- buttons the desired satellite and press the OK button to display a list. Then select from the list of With a fixed antenna the satellite and press the OK button. Transponder: Follow the instructions in From the submenu „antenna connection, “... -
Page 27: Unicable System
Unicable (9750-10600) is pre-programmed for all identical systems by Kathrein, Technisat the OK button. 2. Nur für FTA: select by pressing the but- and Megasat IF Channel/Center Freq.: 1=1284; 2=1400; 3=1516; 4=1632; tons +/- YES or NO. 3. Channel search: select with the +/- but- 5=1748;... -
Page 28: System Setup
Installation and Operation Installation and Operation TP-List (Transponderlist) System Setup 1. Use the +/- keys to select the desired 1. Press the OK button to enter the system settings. satellite. 2. Move the cursor with the „PR + / PR-“ up/down to select the submenu. 2. -
Page 29: Local Time Setting
Installation and Operation Installation and Operation Local Time Setting Parental Lock 1. Area: Use the + / - keys to select your location. Before you open the Parental Control menu, 2. GMT Usage: you must enter the PIN. The default PIN is if you choose „by Location“, the date and time is set automatically. -
Page 30: Tools
Installation and Operation Installation and Operation Other Factory Setting Press the OK / List button to get back to 1. LNB-voltage: factory settings. Confirm with „Yes“, all Select OFF / ON. settings are reset to the factory condition. 2. Channel type: Do you want to cancel the operation, select Select Free, scrambled (cryptographically) or completely. -
Page 31: Mediaplayer
Installation and Operation Installation and Operation Mediaplayer Music Example When no USB device is inserted, the menu will be inaktive. Select with the buttons /PR+ and /PR a song and press the green function key to add this to the playlist (my list). The particular piece of music is marked with a heart symbol. Open the Media Player, choose the Tools menu point of Media Player and click on OK. - Page 32 Installation and Operation Installation and Operation If No, go back to the playlist. If YES the playlist will completely deleted and you return to If you select Off, the first image that you choose will be stand on the screen. the main window.
-
Page 33: Troubleshooting
Installation and Operation Troubleshooting Network Local Setting Check for problems with the set-top box, the following situations to detect the source of error. Various settings to integration the set-top box in a home network. Problem Possible causes What to do WiFi Manager LED on the front panel fail to Main supply cable is not con-... -
Page 34: Informations
Informations Note: Notes Weight and dimensions are not absolutely exact values . Technical details can be changed at any time (according to manufacturer) without prior notice. Declaration of Conformity This complies with the following directives / standards is confirmed: Electromagnetic Compatibility Directive 2004/108/EG EN 55013: 2001 + A1: 2003 + A2: 2006 EN 55020: 2007 EN 61000-3-2:2006 + A1:2009 + A2:2009... - Page 35 Status: v1.0 April 2013...
Need help?
Do you have a question about the HD 810 and is the answer not in the manual?
Questions and answers