Table of Contents
Advertisement
Available languages
Available languages
Quick Links
IB514011EN
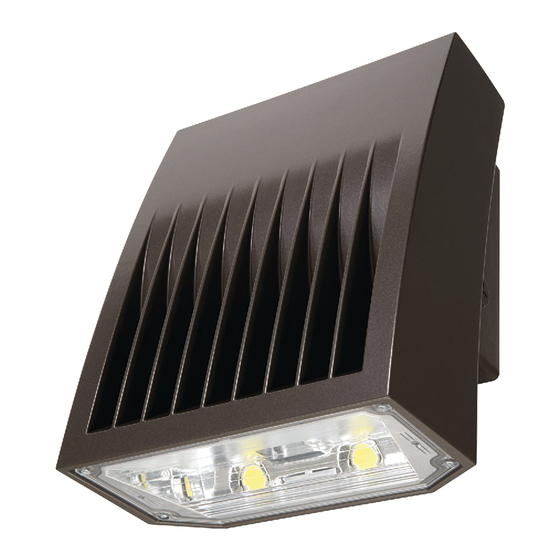
Installation Instructions – Crosstour MAXX Replacement Driver
Options
Instructions D'installation – Options de Remplacement de Pilote de
Luminaire Crosstour MAXX
Instrucciones de Instalación – Opciones para Controlador de
Reemplazo Crosstour MAXX
WARNING
Make certain power is OFF before starting installation
or attempting any maintenance.
WARNING
Make certain power is OFF before starting installation
or attempting any maintenance. Risk of fire/electric
shock. If not qualified, consult an electrician.
WARNING
Risk of Electric Shock—Disconnect power at fuse or
circuit breaker before installing or servicing.
WARNING
Risk of Burn—Disconnect power and allow fixture to
cool before servicing.
WARNING
Risk of Personal Injury— DO NOT mount luminaire
within 6" of a combustible surface. DO NOT handle
luminaire by the lens.
IMPORTANT: Read before installing fixture. Retain for future reference.
SAFETY: This fixture must be wired in accordance with the National Electrical Code and applicable local codes and
ordinances. Proper grounding is required to insure personal safety. Carefully observe grounding procedure under
installation section.
WARNING
Risk of Personal Injury— Fixture may become
damaged and/or unstable if not installed properly.
Tighten all fixture components to their recommended
torque values. Do not lift pole into place by securing
lifting device to lighting fixture or mounting arm.
These instructions do not claim to cover all
N
ote:
details or variations in the equipment, procedure,
or process described, nor to provide directions
for meeting every possible contingency during
installation, operation or maintenance. When
additional information is desired to satisfy a
problem not covered sufficiently for user's purpose,
please contact your nearest representative.
N
ote:
Specifications and dimensions subject to change
without notice.
Brand Logo
reversed out of
black
INS #
INS #
Advertisement
Table of Contents

Related Manuals for Eaton Lumark Crosstour MAXX


Summary of Contents for Eaton Lumark Crosstour MAXX
- Page 1 Brand Logo reversed out of black IB514011EN INS # INS # Installation Instructions – Crosstour MAXX Replacement Driver Options Instructions D’installation – Options de Remplacement de Pilote de Luminaire Crosstour MAXX Instrucciones de Instalación – Opciones para Controlador de Reemplazo Crosstour MAXX WARNING WARNING Make certain power is OFF before starting installation...
-
Page 2: Installation
Additional lens cleaning should be performed with non-abrasive acrylic cleanser. Remove any dirt, leaves, or other foreign debris from the housing and fins. Clean water may be used to flush the fins. Connect all Ground Wires First EATON IB514011EN Installation instructions... - Page 3 Gray (Dim -) Figure 3. Dimming Driver and Photocontrol (PC1-DIM, PC2-DIM Option) Driver Load (Black) Factory Wired Driver to LED Supply Neutral (White) Photocontrol Neutral (White) Supply Line (Black) Violet (Dim +) Gray (Dim -) Figure 4. EATON IB514011EN Installation instructions...
- Page 4 Supply Line (120 or 277V) Figure 5. Dimming Occupancy Sensor (MS/DIM-L20 Option) Driver Load (Black) Factory Wired Driver to LED Neutral (White) Supply Neutral (White) Connect to Ground Dimming Motion Green Sensor Supply Line (120 or 277V) Figure 6. EATON IB514011EN Installation instructions...
- Page 5 Motion Sensor Line (Black) Connect Supply Line here for 347V Applications Load (Red) Neutal (White) 347V (Black) Supply Neutral (Black) XFMR 480V (Yellow) Connect Supply Line here for 480V Applications Figure 7. Connect all Ground Wires First EATON IB514011EN Installation instructions...
- Page 6 Neutral (White) Supply Neutral (White) Figure 8. With Photocontrol (PC1, PC2 Option) Driver Load (Black) Factory Wired Driver to LED Neutral (White) Supply Neutral (White) Load (Red) Neutral (White) Supply Line (Black) Line (Black) Photocontrol Figure 9. EATON IB514011EN Installation instructions...
- Page 7 Supply Neutral (White) Load (Red) Neutral (White) Line (Black) Connect Supply Line Photocontrol here for 347V Application Neutral Load (Red) (White) 347V (Black) XFMR Supply Line (Black) 480V (Yellow) Connect Supply Line here for 480V Application Figure 11. EATON IB514011EN Installation instructions...
-
Page 8: Outils Requis
Débranchez le fil noir et blanc sur le pilote et le fil de mise à la terre sur le couvercle avant. (3) Connecteurs à emboîtement Retirez le couvercle avant du luminaire et posez-le face contre terre sur une surface souple. Figure 1. EATON IB514011EN Instructions d’installation... -
Page 9: Entretien
être utilisée pour rincer les ailettes. Pilote de variation d'intensité (Option DIM) Module Fil d'alimentation (Noir) Charge (Noir) Module câblé en usine vers la DEL Neutre (Blanc) Fil Neutre (Blanc) Violet (Intensité +) Gris (Intensité -) Figure 3. EATON IB514011EN Instructions d’installation... - Page 10 Figure 4. Capteur de présence (Option MS-L20) Module Charge (Noir) Module câblé en usine vers la DEL Neutre (Blanc) Fil Neutre (Blanc) Charge (Rouge) Détecteur de mouvements Ligne (Noir) Fil d’alimentation (120 ou 277V) Figure 5. EATON IB514011EN Instructions d’installation...
- Page 11 Neutre (Blanc) mouvements Ligne (Noir) Branchez le fil d'alimentation ici pour utilisation à 347V Charge (Rouge) Neutre (Blanc) 347V (Noir) Fil neutre (Noir) XFMR 480V (Jaune) Branchez le fil d'alimentation ici pour utilisation à 480V Figure 7. EATON IB514011EN Instructions d’installation...
- Page 12 Fil Neutre (Blanc) Figure 8. Avec commande photovoltaïque (Option PC1, PC2) Module Charge (Noir) Module câblé en usine vers la DEL Neutre (Blanc) Fil Neutre (Blanc) Charge (Rouge) Neutre (Blanc) Fil d'alimentation (Noir) Ligne (Noir) Photocontrôle Figure 9. EATON IB514011EN Instructions d’installation...
- Page 13 Neutre (Blanc) Ligne (Noir) Branchez le fil d'alimentation Photocontrôle ici pour utilisation à 347V Neutre Charge (Rouge) (Blanc) 347V (Noir) XFMR Fil d'alimentation (Noir) 480V (Jaune) Branchez le fil d'alimentation ici pour utilisation à 480V Figure 11. EATON IB514011EN Instructions d’installation...
-
Page 14: Instalación
Desconecte el cable negro y blanco de la controladora y (3) Conectores el cable con conexión a tierra de la cubierta frontal. a presión Extraiga la cubierta frontal de la luminaria y colóquela mirando hacia abajo sobre una superficie suave. Figura 1. EATON IB514011EN Instrucciones de instalación... -
Page 15: Mantenimiento
Elimine la suciedad, las hojas y otros desechos extraños de la carcasa y las aletas. Se puede utilizar agua limpia para limpiar las aletas. EATON IB514011EN Instrucciones de instalación... - Page 16 Controlador de Atenuación y fotocontrol (opción PC1-DIM, PC2-DIM) Unidad Carga (Negro) Unidad cableada de fábrica al LED Neutro de suministro (Blanco) Fotocontrol Neutro (Blanco) Línea de suministro (Negro) Violeta (Atenuación +) Gris (Atenuación -) Figura 4. EATON IB514011EN Instrucciones de instalación...
- Page 17 Sensor de Ocupación de Atenuación (opción MS/DIM-L20) Unidad Carga (Negro) Unidad cableada de fábrica al LED Neutro (Blanco) Neutro de suministro (Blanco) Conectar a tierra Sensor de movimiento con atenuación Verde Línea de suministro (120 o 277V) Figura 6. EATON IB514011EN Instrucciones de instalación...
- Page 18 347 V Carga (Rojo) Neutro (Blanco) 347V (Negro) Neutro de suministro (Negro) XFMR 480V (Amarillo) Conecte la línea de suministro aquí para aplicaciones de 480V Figura 7. Conecte primero todos los cables a tierra EATON IB514011EN Instrucciones de instalación...
- Page 19 Figura 8. Con Fotocontrol (opción PC1, PC2) Unidad Carga (Negro) Unidad cableada de fábrica al LED Neutro (Blanco) Neutro de suministro (Blanco) Carga (Rojo) Neutro (Blanco) Línea de suministro (Negro) Línea (Negro) Fotocontrol Figura 9. EATON IB514011EN Instrucciones de instalación...
- Page 20 Conecte la línea de suministro Fotocontrol aquí para aplicación de 347V Neutro Carga (Rojo) (Blanco) 347V (Negro) XFMR Línea de suministro (Negro) 480V (Amarillo) Conecte la línea de suministro aquí para aplicación de 480V Figura 11. EATON IB514011EN Instrucciones de instalación...
- Page 21 Warranties and Limitation of Liability Please refer to www.eaton.com/LightingWarrantyTerms for our terms and conditions. Garanties et limitation de responsabilité Veuillez consulter le site www.eaton.com/LightingWarrantyTerms pour obtenir les conditions générales. Garantías y Limitación de Responsabilidad Visite www.eaton.com/LightingWarrantyTerms para conocer nuestros términos y condiciones.
Need help?
Do you have a question about the Lumark Crosstour MAXX and is the answer not in the manual?
Questions and answers