Advertisement
Quick Links
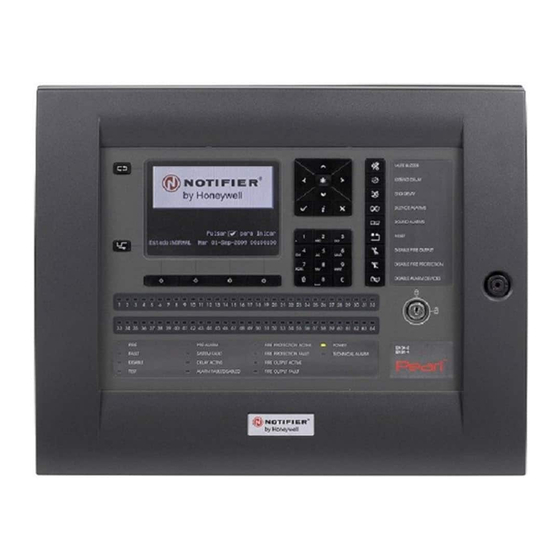
Pearl Panel - Basic Installation Guide
Checking For Damage
1
Carefully remove the Pearl fire control panel from its packaging. Do not discard this packaging
until an inspection of the product has been completed (refer to step 4 below).
2
Inspect the product for any damage that may have occurred in transit.
3
If no damage is evident, proceed with installation.
4
If product appears to have been damaged, do not proceed with installation. Return to supplier,
re-using same packaging wherever possible. Include written details of damage.
Remove the door before installing the enclosure on the wall bracket.
Ensure adequate clearance is provided (> 200mm) to the left of the panel to allow unrestricted
access to the internal equipment with the door open.
Wall Mounting
The Pearl fire control panel has been designed to simplify the installation process and reduce the risk
of product contamination prior to starting system commissioning. To this end, the panel electronics
need not be installed until required for the commissioning process. With reference to the instructions
overleaf (which also contains a wall-mounting template for drilling the required holes), screws (B -
see overleaf) are provided for securing the enclosure to the wall plate. Screws for the wall-mounting
plate are not provided.
CAUTIONS & WARNINGS
Electro-sensitive Devices (ESD)
Take suitable ESD precautions when removing or installing printed circuit boards
(PCBs). Failure to comply will shorten life of the equipment and may invalidate any
warranty.
This is CE Marked to show that is conforms to the requirements of the following
European Community Directives:
- The EMC Directive 2004/108/EEC, by the application of the following EMC standards:
EN61000-6-3: Electronic compatibility (EMC) generic emission standard for Residential,
Commercial and light industrial environments.
EN50130-4: EMC Product family standard: Immunity requirements for components
of fire, intruder and social alarm systems.
- The Low Voltage Directive 2006/95/EE, by the application of the safety standard:
EN60950-1: Safety of information technology equipment.
- The Construction Products Directive 89/106/EEC, by the application of the following
standards:
EN54-2: Fire detection and fire alarm systems - control and indicating equipment.
EN54-4: Fire detection and fire alarm systems - power supply equipment.
WARNING: The PSU enclosure contains high voltage
circuitry. To avoid electric shock, do not remove the PSU
enclosure or allow the entry of conductive materials/fluids.
CAUTION: BATTERIES!
Risk of explosion if the battery is replaced by an incorrect type.
Take care when batteries are fitted.
It is normal for lead-acid type batteries to discharge hydrogen while being charged. The
panel enclosure is adequately ventilated to dissipate this hydrogen.
DO NOT seal the panel enclosure or mount the panel in a sealed enclosure or cavity.
WEEE Directive
This product contains electrical and electronic equipment that must be disposed of
suitably at the end of its service life. Contact your Local Authority to determine the
procedures for the disposal of waste electrical and electronic equipment.
Dispose of batteries in accordance with local regulations.
Cables & Wiring
This basic installation guide describes where to bring cabling and wiring in to the panel.
This information can be found in the Installation & Commissioning Manual in Section 5.3.1 Base PCB Wiring Connections. When bringing cables
through the wall-mounting plate, use the recommended cable entry apertures as illustrated below. This is a top view of the mounting plate. The
back row of apertures are shown as A1 to A8 and the front row are shown as B1 to B9. The recommended cable entry aperture for the primary
supply cable is indicated.
Loop 2 (IN)
Loop 2 (OUT)
Loop 1 (IN)
Loop 1 (OUT)
Repeater (RS485)
Sounder Circuit 2
Sounder Circuit 1
Digital Input Circuit 1
Digital Input Circuit 2
AUX Output
External Power Connection
The Pearl fire alarm control panel receives power from a 230V, 50Hz primary supply.
Open and lock out the main circuit breaker before connecting any wiring. DO NOT connect power until
panel is ready to perform commissioning tests.
The external primary supply cable must be brought in and terminated at the Mains Termination Block
(MTB) provided. Connect the Neutral (blue) wire to termination point 'N' and connect the Phase or Live
(brown) wire to termination point marked 'L'. Terminate the primary earth wire to the stud located to the
lower-right of the MTB using the ring terminal, plain and spring washers and M4 nut provided. The
cable used for the primary supply must conform with the electrical wiring specifications of the country
and local requirements. MAKE SURE the supplied MTB safety cover (A) is fitted over the wiring
termination screw heads after the mains supply wiring termination has been made.
Primary supply cable gland and cord anchorage bushing used to route the primary supply cable through
the 20mm cable aperture MUST have a minimum flame retardant rating of UL94V0. Recommended
alternatives are given in the Installation & Commissioning Manual.
Battery Installation
The enclosure requires the installation of 12Ah batteries. Two are required. The standby batteries should be located in the enclosure as shown in the diagrams
overleaf.
Allow a sufficient air gap between them (10mm recommended) to allow for heat dissipation.
Inspection & Testing
Inspection and Testing should conform to any national, regional or local standards applicable for the specific installation.
Before connecting any field wiring to the panel the following tests must first be carried out:
-
Check the continuity of all cable runs (including screens).
-
Check the isolation between all cores and between cores and screen / earth. Minimum isolation of 2Mohms is required.
-
Check that the screen of all signal cables is not grounded to earth elsewhere in the building and that it is installed in accordance with recommendations –
refer to relevant wiring installation sections in the Installation & Commissioning Manual.
-
Check that signal cables are not run in cable trays, or similar, alongside power cables for this and other equipment.
Having successfully carried out the above tests and once any faults found have been rectified the panel is ready for connection of external cables and
wiring. The recommended cable entry points for connection to the Base PCB are shown above. Connect the screen drain wires to the nearest earth stud
in the enclosure.
Primary Supply
M3 Earth stud (x6)
Screen wires
Fault Relay output circuit
Fire Relay output circuit
-
+
+
Network cable (OUT)
Network cable (IN)
A
N
L
FUSE: 1.6A (T) 250V HRC
N
L
FUSE: 1.6A (T) 250V HRC
N
L
-
997-659-000-2
Advertisement

Subscribe to Our Youtube Channel
Related Manuals for Honeywell NOTIFIER Pearl


Summary of Contents for Honeywell NOTIFIER Pearl
- Page 1 Pearl Panel - Basic Installation Guide Cables & Wiring Checking For Damage This basic installation guide describes where to bring cabling and wiring in to the panel. Carefully remove the Pearl fire control panel from its packaging. Do not discard this packaging This information can be found in the Installation &...
- Page 2 4-5mm x 40mm (min) 4-5mm x 50mm (min) 360mm 230V 48-62Hz 1.6A 23 0V 48 -62 1.6 A 23 0V 48 -62 1.6 A...
Need help?
Do you have a question about the NOTIFIER Pearl and is the answer not in the manual?
Questions and answers