
Related Manuals for Lionelo FIN PLUS


Summary of Contents for Lionelo FIN PLUS
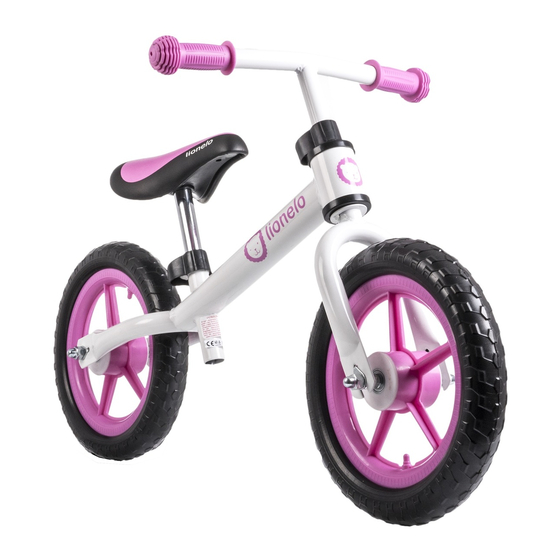
- Page 1 Instrukcja obsługi User manual FIN PLUS rowerek biegowy balance bike WWW.LIONELO.COM...
- Page 3 WWW.LIONELO.COM...
- Page 4 Wstęp Drogi Kliencie! Dziękujemy za obdarzenie nas zaufaniem i wybranie marki Lionelo. Nasze produkty wykonywane są z największą starannością, by zapewnić Twojemu dziecku komfort korzystania, równo- cześnie dbając o jego bezpieczeństwo. Dzięki wykorzysta- niu wysokiej jakości materiałów i nowoczesnych rozwiązań...
-
Page 5: Instrukcja Obsługi
Instrukcja obsługi Uwaga: Montaż musi być przeprowadzony przez osobę dorosłą. Niezastosowanie się do tych ostrzeżeń i instrukcji montażu może spowodować poważne obrażenia lub śmierć. Środki ostrożności: • Zabawka przeznaczona do użytku na powierzchni płaskiej i bez przeszkód. Nigdy nie należy używać w pobliżu scho- dów, skośnych podjazdów, pojazdów silnikowych, wzgórz, powierzchni mokrej, piaskowej i żwirowej, alejek, dróg publicznych, basenów lub obszarów, w których może istnieć... - Page 6 • Niezmontowany rower i dostarczone opakowanie zawie- ra niewielkie części i plastikowe torby, które są niebez- pieczne dla małych dzieci - trzymaj je w miejscu niedo- stępnym dla dzieci. Wszelkie plastikowe worki i inne materiały z opakowań należy zutylizować. • Odpowiedni dla dzieci w wieku: 2 - 6 lat.
- Page 7 Schemat montażu: kierownica siodełko linia bezpieczeństwa linia bezpieczeństwa rama przednie widełki koło tylne koło przednie podkładka osłona klucz podkładki zacisk zacisku plastikowe...
- Page 8 Instalacja widełek: Nałóż podkładkę A na trzpień widełek. Nałożyć podkładki plastikowe B, na prowadnice widełek w ramie. Nałożyć ramę na trzpień widełek. Następnie nałożyć podkładkę i zacisk. Postępuj jak na poniższym rysunku. Instalacja i regulacja kierownicy: Nałóż na trzpień kierownicy osłonę zacisku. Włóż kierownicę w uchwyt ramy.
- Page 9 Instalacja koła: Włóż koło wewnątrz widełek. Nałóż podkładki na śrubę i dokręć nakrętki, upewnij się, że koła są prawidłowo zainstalowane. Instalacja i regulacja siodełka: Włóż siodełko do rury pod siodłowej ramy. WAŻNE! UPEWNIJ SIĘ, że znak MINIMAL na rurce siodeł- ka JEST PONIŻEJ górnej części rury pod siodłowej ramy.
-
Page 10: Dear Customer
Introduction Dear Customer! Thank you for the bestowal of trust in us and choosing the brand Lionelo. Our child restraint systems are made with the utmost care to ensure comfortable journeys and, above all, maximum safety of your child. Implementation of high quality mate- rials and modern technologies allows us to provide users with a product that is perfectly suited for everyday use. - Page 11 User manual Note: The assembly of the product must be performed by an adult. Failure to comply with this provision and the assembly instruc- tions could result in serious injury or even death. Precautions: • Use the toy on a flat surface in the area free from any obstacles.
- Page 12 • Both the not assembled bike and shipping box contain small parts and plastic bags that are dangerous for small children - keep them out of their reach. All plastic bags and other packing materials must be disposed of. • Suitable for children aged: 2 - 6.
-
Page 13: Assembly Diagram
Assembly diagram: Handlebar Saddle Safety line Safety line Frame Front fork Rear wheel Front wheel Shim Clamp Wrench Plastic Clamp cover shims... - Page 14 Fork installation: Place the A shim on the fork’s stem. Put the plastic shims (B) onto the fork socket of a frame. Place the frame on the fork’s stem. Then, apply the shim and the clamp. Follow the steps shown in the picture below. Handlebar installation / adjustment : Place the clamp cover onto the handlebar’...
- Page 15 Wheel installation: Insert the wheel inside the fork. Place the shims on the screw and tighten them. Make sure both wheels are properly installed. Saddle installation / adjustment: Place the clamp cover onto the handlebar’s stem. Insert the saddle into the saddle-tube of the frame. IMPORTANT! MAKE SURE the safety line mark on the saddle tube is BELOW the upper part of the saddle-tube of the frame.
-
Page 16: Sehr Geehrte Kunden
Einleitung Sehr geehrte Kunden! Wir bedanken uns für Ihr Vertrauen und Auswahl der Marke Lionelo. Unsere Produkte werden mit äußerster Sorgfalt hergestellt, um Ihrem Kind einen Nutzungskomfort bei gleichzeitiger Sorge um seine Sicherheit zu gewähren. Dank den hochwer- tigen Materialien und innovativen technologischen Lösungen geben wir zu Ihren Händen ein Produkt über, das perfekt für... - Page 17 Bedienungsanleitung Die Montage muss von einer erwachsenen Achtung: Person ausgeführt werden. Nichtbeachtung dieser Warnungen und der Montageanlei- tung kann sehr schwere Verletzungen oder einen Tod verur- sachen. Sicherheitshinweise: 1. Das Spielzeug wird für Verwendung auf einer ebenen Fläche und ohne Hindernisse bestimmt. Es soll niemals in der Nähe von Treppen, schrägen Fahrzeugen, Kraftfahrzeugen, Hügeln, Naß-, Sand- und Kies- flächen, Alleen, Verkehrsstraßen, Schwimmbecken oder Gebieten, auf denen eine Wahrscheinlichkeit des Verkehrs und anderer Bedrohun-...
- Page 18 BENUTZEN Sie dieses Fahrzeug nicht, wenn es ein Teil fehlt, ein Teil defekt oder gebrochen ist. Ersetzen Sie die Teile mit den Ersatzteilen NICHT. 6. Das nicht aufgebaute Laufrad und die gelieferte Verpackung bein- halten kleine Plastikteile und Plastiktüten, die gefährlich für Kleinkind- er sein können.
- Page 19 Montageschema: Lenker Sitz Sicherheitslinie Sicherheitslinie Rahmen Vordere Gabel Hinterrad Vorderrad Unterlegscheibe Plastik- Klemme Klemmenge- Schlüssel Unterlegscheiben häuse...
- Page 20 Montage der Gabel: Die Unterlegscheibe A auf Bolzen der Gelenke aufsetzen. Die Plastik-Unterlegscheiben B auf Führungsschiede der Gelen- ke in Rahmen aufsetzen. Der Rahmen auf Bolzen der Gelen- ke aufsetzen. Dann Unterlegscheibe und Klemme aufsetzen. Nach vorliegender Abbildung fortsetzen. Montage und Einstellung des Lenkers: Auf Bolzen des Lenkers ein Klemmengehäuse aufsetzen.
- Page 21 Montage des Rades: Das Rad in Gabel einstecken. Die Unterlegscheiben auf Schraube aufsetzen und die Mutter festschrauben. Prüfen, ob die Räder richtig montiert wurden. Montage und Einstellung des Sitzes: Der Sitz in Rohre des Sitzrahmens einstecken. WICHTIG! VERGEWISSERN SIE SICH, dass ein MINIMAL -Zeichen auf Röhrchen des Sitzes SICH UNTEN oberem Teil der Rohr vom Sitzrahmen BEFINDET.
- Page 22 WWW.LIONELO.COM...
- Page 23 BrandLine Group Sp. z o. o. ul.Dziadoszańska 10 61-248 Poznań www.lionelo.com WARRANTY CARD KARTA GWARANCYJNA Model: ………………………….. SN: …………………………..May be sold in: BE CZ DK DE EE IE EL ES FR HR IT LV LT HU MT NL AT PL PT RO SI SK FI SE UK...
-
Page 24: Warunki Gwarancji
Warunki gwarancji: 1. Marka Lionelo z siedzibą w Poznaniu (61-248) przy ul. Dziadoszańskiej 10 gwarantuje sprawne działanie produktu zgodnie z warunkami tech- niczno-eksploatacyjnymi opisanymi w instrukcji obsługi. 2. Gwarancja jest udzielana na okres 60 miesięcy, licząc od daty sprzedaży. W przypadku zakupu produktu przez firmę (faktura VAT) gwarancja udziela- na jest na okres 12 miesięcy. - Page 25 reklamowanego urządzenia opisu uszkodzenia, wszystkich akcesoriów, które klient otrzymał podczas kupna urządzenia oraz dowodu zakupu zawi- erającego datę sprzedaży. 13. Gwarancją nie są objęte: naturalne zużycie związane z eksploatacją, uszkodzenia powstałe w wyniku niewłaściwego i niezgodnego z instrukc- ją obsługi użytkowania, uszkodzenia lub rozdarcia wynikłe z winy nabywcy, płowienie tkanin spowodowane długotrwałym działaniem promieni słonec- znych, pranie w nieodpowiedniej temperaturze, uszkodzenia mechaniczne, elektryczne, termiczne, ingerencje cieczy lub celowe uszkodzenia i wywołane...
-
Page 26: Warranty Conditions
Warranty conditions: 1. The Lionelo brand with its registered office at Dziadoszańska 10, 61-248 Poznań, Poland guarantees that the equipment is operational in accordance with the technical-operating conditions described in the manual. 2. The warranty is granted for a 60 months period from the date of sale. If the Buyer is a company (VAT invoice), the warranty is granted for a 12-month period. - Page 27 of the instructions described in the manual, tears or cracks caused by the Customer, fading of fabric resulting from prolonged exposure to sunlight or washing the product or its parts in the wrong temperature, mechanical, elec- trical, thermal and intentional damages and defects caused by them, as well as damage caused by unauthorised modifications or repairs.
- Page 28 Garantiebedingungen: 1. Die Marke Lionelo mit Sitz in Poznań (61-248), ul. Dziadoszańska 10 garantiert reibungsloses Funktionieren der Ware gemäß den technisch-betrieblichen Bedi- ngungen, die in der Betriebsanleitung beschrieben werden. 2. Die Garantie wird für 60 Monate ab dem Kaufdatum gewährt. Beim Einkauf der Ware durch eine Firma (Rechnung mit ausgewiesener MwSt.) wird die Garantie...
- Page 29 13. Die Garantie erstreckt sich nicht auf: natürliche, mit dem Gebrauch der Ware verbundene Abnutzung, Beschädigungen, die infolge einer missbräuchlichen oder unsachgemäßen Verwendung entstanden, Beschädigungen oder die durch Verschulden des Kunden verursachten Zerreißungen, Verblassen der Gewebe, die infolge der längeren Sonneneinstrahlung entstand, falsche Waschtempera- tur, mechanische, elektronische, thermische Beschädigungen, Wirkung der Flüs- sigkeiten, absichtliche Beschädigungen und Defekte, die sie verursachten und die willkürlichen Änderungen.
- Page 30 Lionelo Service – Support List of Authorized Service Centers: Lista autoryzowanych centrów serwisowych: lionelo.com/en/service Dziękujemy za zakup urządzenia naszej marki!
- Page 32 WWW.LIONELO.COM...
Need help?
Do you have a question about the FIN PLUS and is the answer not in the manual?
Questions and answers