Table of Contents
Advertisement
Available languages
Available languages
Quick Links
Item #1001411385
Model #HB-7902-02
USE AND CARE GUIDE
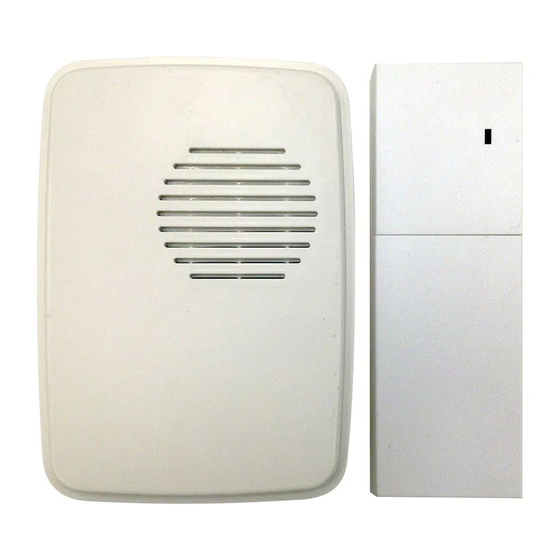
WIRELESS DOORBELL EXTENDER KIT
Questions, problems, missing parts?
Before returning to the store, call Hampton Bay Customer Service
8 a.m. - 5 p.m., CST, Monday - Friday
1-844-760-3644
HAMPTONBAY.COM
Illustrations may vary from actual unit.
THANK YOU
We appreciate the trust and confidence you have placed in Hampton Bay through the purchase of this wireless
doorbell extender kit. We strive to continually create quality products designed to enhance your home. Visit us online
to see our full line of products available for your home improvement needs. Thank you for choosing Hampton Bay!
Advertisement
Chapters
Table of Contents

Subscribe to Our Youtube Channel
Related Manuals for HAMPTON BAY HB-7902-02


Summary of Contents for HAMPTON BAY HB-7902-02
- Page 1 We appreciate the trust and confidence you have placed in Hampton Bay through the purchase of this wireless doorbell extender kit. We strive to continually create quality products designed to enhance your home. Visit us online to see our full line of products available for your home improvement needs. Thank you for choosing Hampton Bay!
-
Page 2: Table Of Contents
Table of Contents Table of Contents ........2 Tools Required ........3 Safety Information ........2 Hardware Included .........3 Warranty ............2 Package Contents ........4 3-Year Limited Warranty ......2 Installation ..........4 Pre-Installation ..........3 Operation ...........6 Planning Installation ......3 Care and Cleaning ........7 Specifications ........3 Troubleshooting .........8 Safety Information PRECAUTIONS... -
Page 3: Pre-Installation
Pre-Installation PLANNING INSTALLATION Before installing the wireless doorbell extender kit, ensure that all parts are present. Compare parts with the Hardware Included and Package Contents sections. If any part is missing or damaged, do not attempt to assemble, install, or operate this wireless doorbell extender kit. Estimated installation time: 30 minutes SPECIFICATIONS Doorbell... -
Page 4: Package Contents
Pre-Installation (continued) PACKAGE CONTENTS Part Description Quantity Doorbell Doorbell extender Installation Installing the doorbell Plug in the doorbell (A) at the desired location. Installing the batteries into the doorbell extender Open the doorbell extender (B) by pressing on the cover with your thumb and sliding the cover off. - Page 5 Installation (continued) Testing the doorbell extender NOTE: Do not permanently mount the doorbell extender and doorbell range until the doorbell and doorbell extender are working properly. Test the range by temporarily positioning the doorbell extender (B) next to the existing doorbell.
-
Page 6: Operation
Installation (continued) Mounting the doorbell extender Use either the screws (BB) or double-sided tape (DD) to mount the doorbell extender (B). To mount with screws (AA), temporarily remove the batteries and place the doorbell extender (B) against the mounting surface and mark the two screw holes. -
Page 7: Care And Cleaning
Operation (continued) Selecting the doorbell extender NOTE: All doorbells are designed to play only two tune different tunes no matter how many push buttons are used. The doorbell (A) has different selectable tunes. If the doorbell extender (B) is set to the “REAR” tune it will only play the Ding (one note) tune. -
Page 8: Troubleshooting
Troubleshooting Problem Possible Cause Solution The doorbell does The batteries are not Make sure the batteries are installed according to the not sound. installed correctly. diagram inside the doorbell extender. The batteries are dead. Check the charge of the doorbell extender batteries and replace if necessary. - Page 9 Troubleshooting (continued) Problem Possible Cause Solution The batteries The doorbell or doorbell Metal reduces transmission range. Use 1/4 in. to 1/2 seem okay, but extender is mounted in. (6 to 13 mm) wood shims to move the doorbell or the doorbell does on metal or near metal doorbell extender away from the metal surface.
- Page 10 Questions, problems, missing parts? Before returning to the store, call Hampton Bay Customer Service 8 a.m. - 5 p.m., CST, Monday - Friday 1-844-760-3644 HAMPTONBAY.COM Retain this manual for future use. 208196-02A...
- Page 11 Las ilustraciones pueden ser diferentes de la unidad comprada. GRACIAS Agradecemos la confianza que han depositado en Hampton Bay al comprar este juego prolongador del timbre inalámbrico. Procuramos crear continuamente productos de calidad diseñados para mejorar su hogar. Visítenos en internet para ver nuestra línea completa de productos disponibles que necesita para el mejoramiento de su hogar.
-
Page 12: Contenido
Contenido Contenido ..........12 Herramientas Requeridas ....13 Información de seguridad ......12 Ferretería Incluida ........13 Garantía ...........12 Contenido del Paquete ......14 3 años de garantía limitada ....12 Instalación ..........14 Antes de la instalación ......13 Operación ..........16 Planificación de la Instalación .....13 Cuidado y limpieza ........17 Especificaciones ........13 Análisis de averías ........18 Información de seguridad... -
Page 13: Antes De La Instalación
Antes de la instalación PLANIFICACIÓN DE LA INSTALACIÓN Antes de instalar el juego prolongador del timbre inalámbrico, asegúrese de tener todas las piezas. Compare las piezas con las indicadas en las secciones Ferretería incluida y Contenidos del paquete. Si alguna pieza falta o está dañada, no trate de ensamblar, instalar u operar este juego prolongador del timbre inalámbrico. -
Page 14: Contenido Del Paquete
Antes de la instalación (continuación) CONTENIDO DEL PAQUETE Pieza Descripción Cantidad Timbre Prolongador del timbre Instalación Instalación del timbre Enchufe el timbre (A) en la ubicación deseada. Instalación de las pilas en el prolongador del timbre Abra el prolongador (B) del timbre presionando en la tapa con el pulgar y deslizando la tapa para retirarla. - Page 15 Instalación (continuación) Prueba del alcance del NOTA: No instale de forma permanente el prolongador prolongador del timbre y del del timbre hasta que el timbre y el prolongador del timbre funcionen correctamente. timbre Pruebe el alcance colocando temporalmente el prolongador (B) del timbre cerca del timbre existente.
-
Page 16: Operación
Instalación (continuación) Montaje del prolongador del timbre Use sea los tornillos (BB) o la cinta engomada por los dos lados (DD) para montar el prolongador (B) del timbre. Para montar con los tornillos (AA), retire temporalmente las pilas, coloque el prolongador (B) del timbre contra la superficie de montaje y marque los dos orificios para los tornillos. -
Page 17: Cuidado Y Limpieza
Operación (continuación) Selección del tono del NOTA: Todos los timbres están diseñados para reproducir prolongador del timbre solo dos tonos diferentes no importa cuantos pulsadores se utilicen. El timbre (A) tiene diferentes tonos seleccionables. Si el prolongador (B) del timbre es configurado como tono “REAR”... -
Page 18: Análisis De Averías
Análisis de averías Problema Causa Probable Solución El timbre no Las baterías no están Asegúrese que las pilas estén instaladas de acuerdo al suena. bien instaladas. diagrama de la parte interior del prolongador del timbre. Las baterías se aca- Check the charge of the doorbell extender batteries and baron. - Page 19 Análisis de averías (continuación) Problema Causa Probable Solución Las pilas parecen El timbre o el prolon- El metal reduce el alcance de transmisión. Utilice cuñas estar bien, pero gador del timbre está de madera de 1/4 pulg. a 1/2 pulg. (de 6 a 13 mm) para el timbre no montado sobre metal mover el timbre o el pulsadort lejos de la superficie de...
- Page 20 ¿Tiene preguntas, problemas o piezas faltantes? Antes de la devolución al almacén llame al Servicio al Cliente de Hampton Bay de 8 a.m.-5 p.m., Hora del Central, de lunes a viernes. 1-844-760-3644 HAMPTONBAY.COM Guarde este manual para uso futuro. 208196-02A...
Need help?
Do you have a question about the HB-7902-02 and is the answer not in the manual?
Questions and answers